
")
Ever wonder how to make an Origami Basic Cube that holds its shape and looks super clean?
I’ve been there. I folded, crumpled, and tossed so many pieces before it finally clicked.
This guide? It’s your step-by-step cheat sheet. No fluff—just clear, easy Origami Basic Cube instructions from someone who’s been in your shoes.
What Are We Making? The Origami Basic Cube
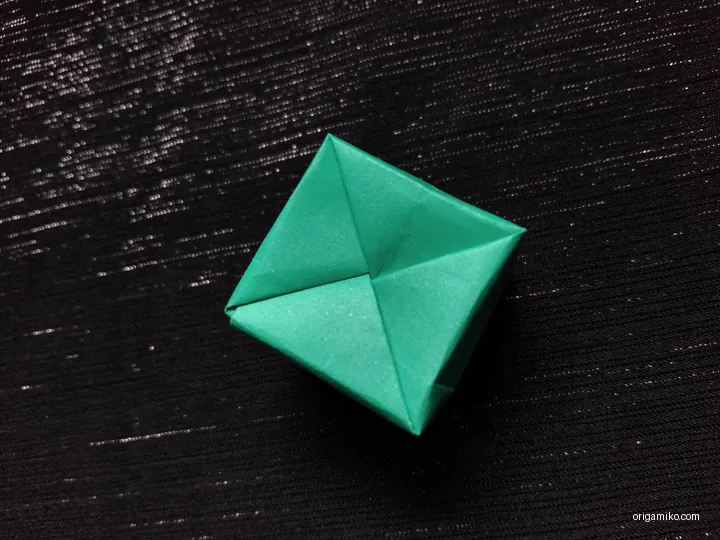
Let me break it down: we’re making a Simple Basic Cube that starts with just one piece of paper and folds into a surprisingly sturdy 3D cube.
The cool part? You don’t need any glue, scissors, or fancy origami paper. Just patience and some finger-folding action. I still remember the first time mine actually looked like a real cube—I legit showed it off at dinner.
This project is one of the easiest intro-level designs that feels like magic once you tuck that last flap in. Whether you’re 12 or 42, it’s a great way to get into paper folding without feeling overwhelmed.
Definition List: Key Origami Terms
Origami
The traditional Japanese art of paper folding.
Crease
The sharp fold you make when pressing the paper down.
Tuck
Inserting one part of the paper under another to secure the shape.
Symmetry
Folding both sides evenly to keep the design balanced.
Materials Needed
Before we fold anything, here’s what you’ll need. No surprises later.
| Item | Description | Notes |
|---|---|---|
| Paper | 15 cm × 9 cm rectangular paper | Any paper works. Origami or plain. |
| Flat surface | A smooth, clean area to fold | Avoid bumpy tables. |
| Fingertips | Your best folding tools | Precision helps. |
| Good lighting | You’ll want to see your folds clearly | Especially for steps 3 and 4. |
Simple Basic Cube Step by Step
Let’s go fold-by-fold. I’ll walk you through each part. It’s easier than it sounds.
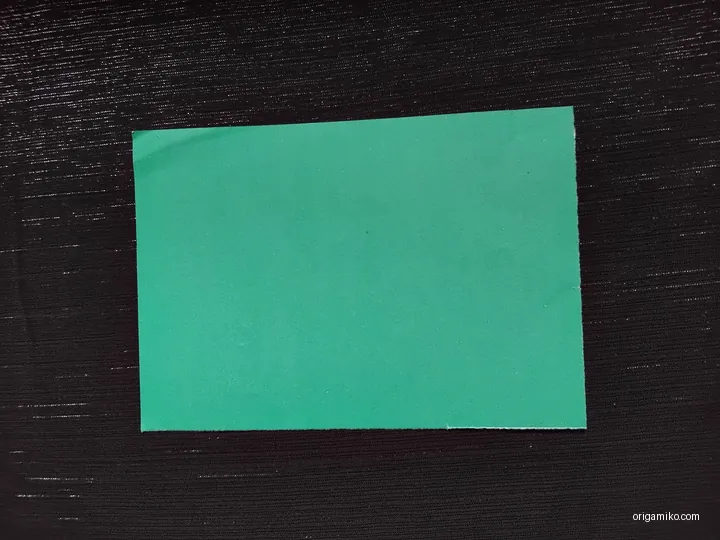
- Step 1: Take a paper.
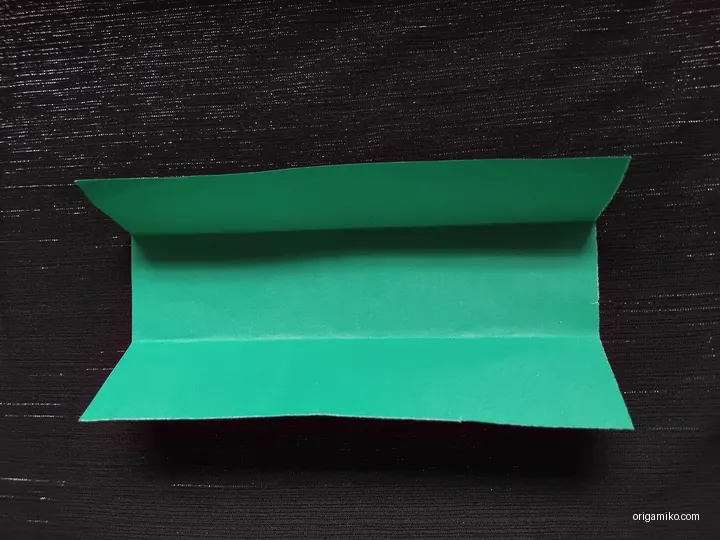
Start with a rectangular paper that measures 15 × 9 cm. Don’t worry if it’s not origami paper—printer paper works too. - Step 2: Fold it in three parts and fold both lower corners slightly.
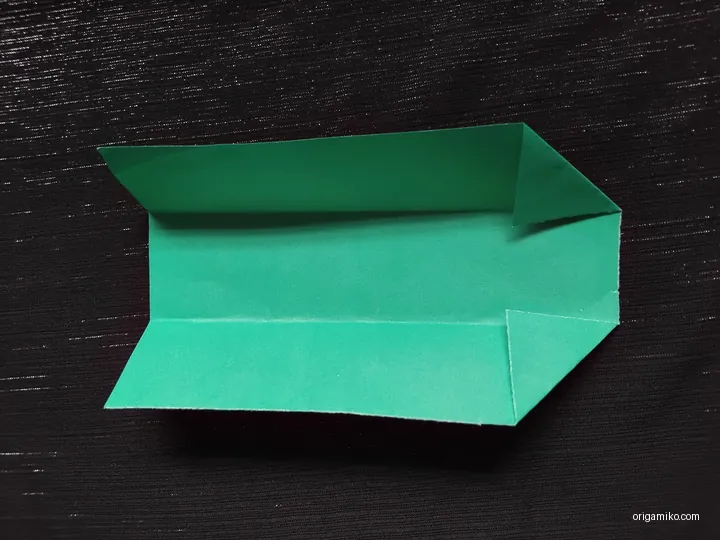
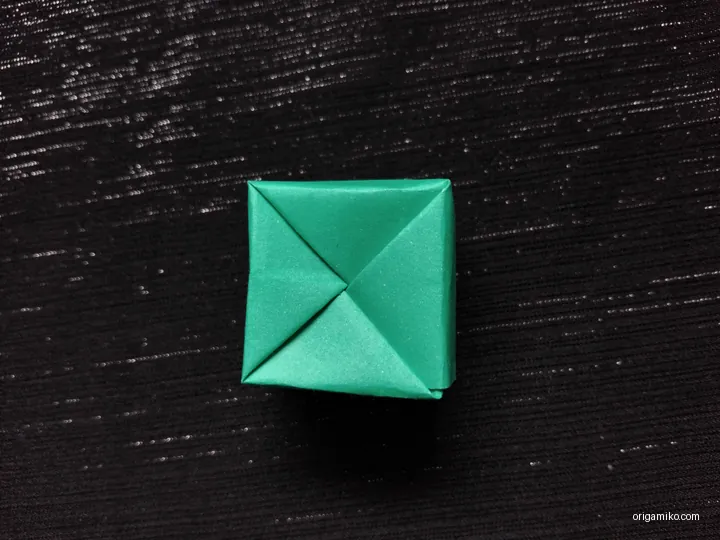
Think of folding it like a letter into thirds. Then, fold the bottom left and right corners just a bit—this helps lock the cube later. - Step 3: Now make five folds like the picture.
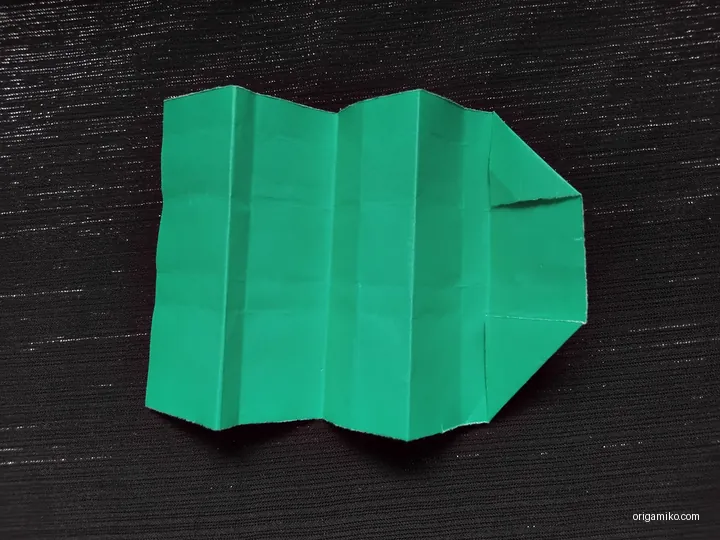
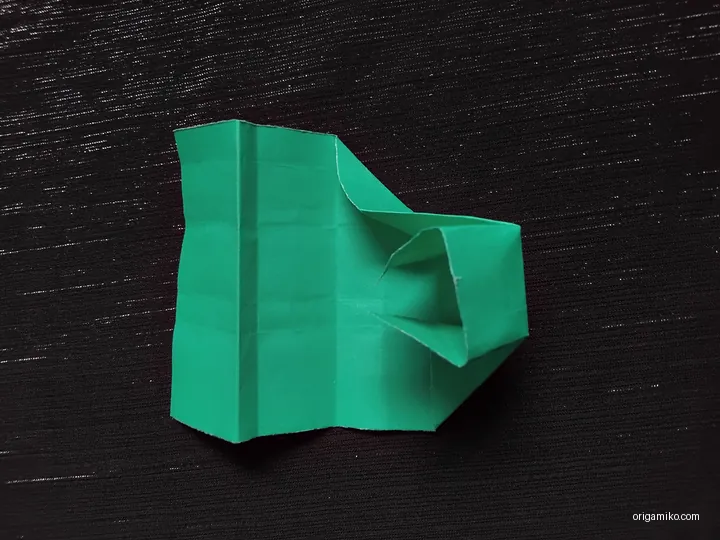
Imagine an accordion fold. You’ll be folding along existing creases to give the paper structure. Try to make them as sharp and clean as you can. - Step 4: Make fold like the picture and repeat it four times.
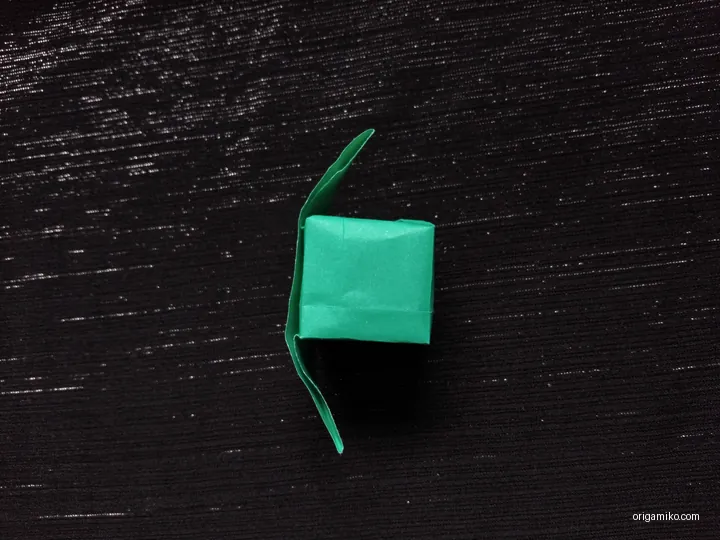
Now you’re forming the sides. Repeat the previous folding technique on all sides—four total. Take your time here. - Step 5: Insert both corners inside the cube.
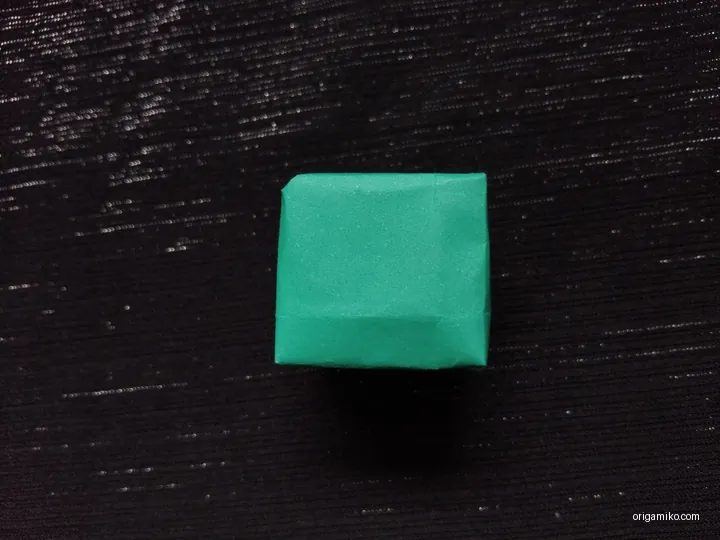
This is where it starts to look like a cube! Gently tuck those slightly folded corners into the nearest open flaps. No tape needed—it holds itself! - Step 6: Now the Origami Basic Cube is ready.
Done! Sit back and admire that perfect little cube. It might even bounce a little if you drop it.
Tips for Success
Want a cleaner, crisper cube? Here’s what I’ve learned from folding a bunch of them.
- Use thin paper for sharper folds.
- Make sure your folds line up perfectly.
- Don’t rush Step 4—it’s the backbone of the cube.
- Run your fingernail or a ruler along the creases for extra precision.
Common Mistakes and How to Avoid Them
Folding errors can sneak in. Here’s what to watch for:
- Paper rips when folding.
You’re probably using thick or brittle paper. Switch to lightweight stock. - Cube won’t hold shape.
You may have skipped a step or didn’t crease tightly. Redo Step 5 carefully. - Misaligned sides.
Double-check your thirds in Step 2. If the base folds aren’t even, the cube goes wonky.
Similar Variations You Can Try
Once you’ve nailed this, try these fun twists:
- Mini Cubes – Use smaller paper, like 9 × 5 cm.
- Color Cubes – Try colored paper or decorate your own before folding.
- Modular Cubes – Use multiple units that join together for bigger builds.
The possibilities? Endless. And fun.
FAQs
Q: Can I use square paper instead of 15 × 9 cm?
A: For this design, you need a rectangular shape. Square paper will mess up the proportions.
Q: Does the paper color matter?
A: Nope. But colors or patterns make it more fun.
Q: Is this cube good for kids?
A: Absolutely. Just guide them through Steps 3 and 4. It’s a great intro to origami.
Outro
So that’s how to make an easy Origami Basic Cube—step by step, no guesswork, no stress. Whether you’re doing it for fun, teaching a class, or just want a relaxing hobby, this cube is a great start.
Try it out. Fold a few. Before you know it, you’ll be making stacks of these like I did. And if you’re wondering where to go next, maybe check out more paper folding projects—there’s a whole world of origami waiting.
Now you know how to make Origami Basic Cube—go fold one right now and let me know how it turned out!