

Ever wondered how paper transforms into magical creatures? Today I’ll show you how to create your very own origami chameleon.
This simple origami chameleon step by step guide will enchant both beginners and seasoned folders. Get ready for an amazing paper-folding adventure that’s surprisingly rewarding.
What Makes the Origami Chameleon Special?
The origami chameleon holds a special place in my heart. I remember the first time I folded one – I was amazed at how such a simple design could capture the essence of this fascinating reptile.
What I love most about this project is its accessibility. You don’t need years of experience or fancy tools. Just a square piece of paper and about 10 minutes of your time.
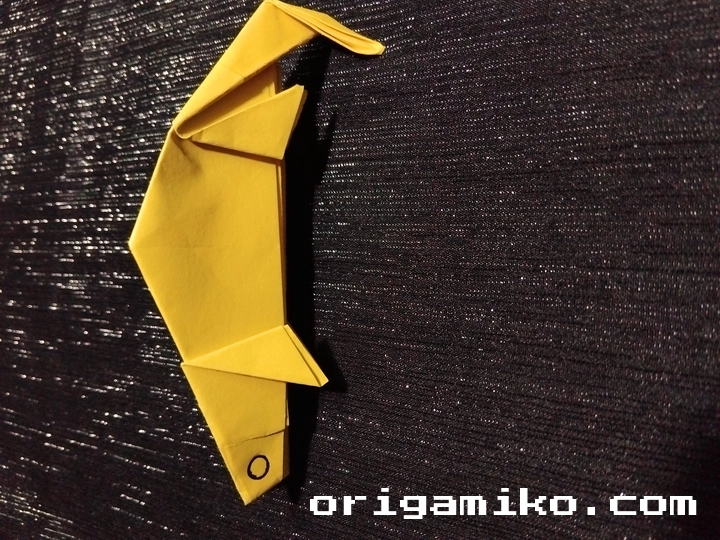
The beauty lies in its simplicity. While real chameleons change colors and move their eyes independently, our paper version captures their distinctive triangular head and compact body. It’s like holding a tiny piece of nature in your hands.
This particular design works wonderfully as a desk decoration, gift, or teaching tool for kids learning about animals and paper crafts.
Materials Needed
Let me break down exactly what you’ll need for this project:
| Material | Specification | Purpose | Alternative Options |
|---|---|---|---|
| Paper | 15cm x 15cm square | Main folding material | Any square paper 6-8 inches |
| Paper Type | Origami paper (kami) | Best folding properties | Wrapping paper, magazine pages |
| Paper Weight | 60-80 GSM | Optimal thickness | Standard printer paper works |
| Color | Green preferred | Realistic appearance | Any color you prefer |
| Tools | Clean, flat surface | Workspace | Table, hardcover book |
| Optional | Bone folder | Crisp creases | Ruler edge, fingernail |
Paper Quality Matters : Traditional origami paper works best because it holds creases well and doesn’t tear easily during folding.
Size Flexibility : While 15cm works perfectly, any square between 6-8 inches will create a lovely chameleon.
Color Choices : Green feels most natural, but I’ve made beautiful chameleons in blue, purple, and even patterned papers.
How to Make Origami Chameleon: Step-by-Step Instructions
Now comes the fun part! These origami chameleon instructions will guide you through each fold. Take your time – there’s no rush in paper folding.
Step 1: Prepare Your Paper
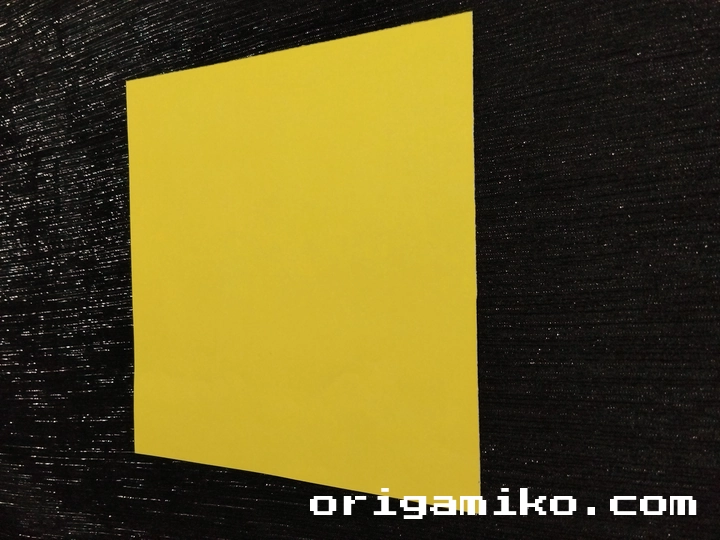
Take your 15cm x 15cm paper and place it on your work surface. Make sure it’s completely flat and oriented as a diamond shape in front of you.
I always start by smoothing out any wrinkles. Clean folds make all the difference in the final result.
Step 2: Create the Foundation Creases
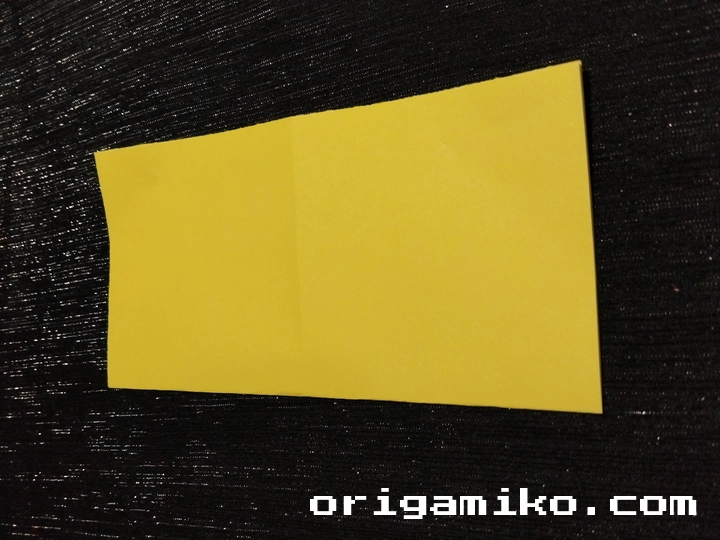
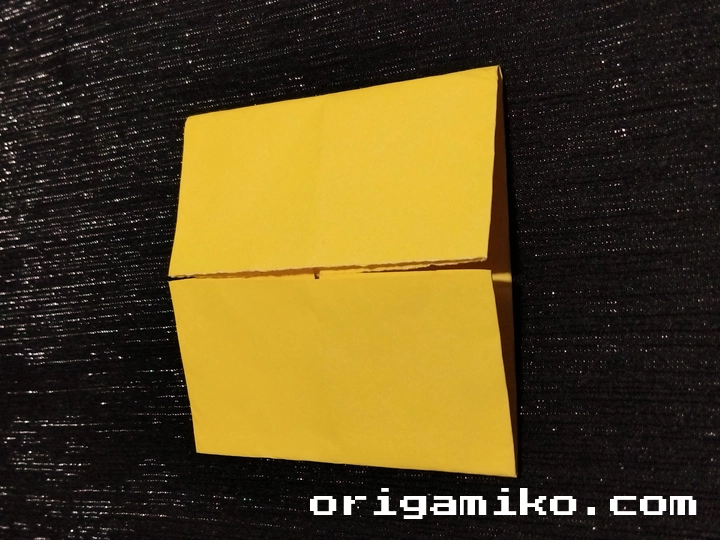
Fold your paper horizontally, then unfold. Next, fold it vertically and unfold again. Finally, fold it diagonally from the middle to create an X-shaped crease pattern.
These foundation creases are like a roadmap for your chameleon. They’ll guide every subsequent fold.
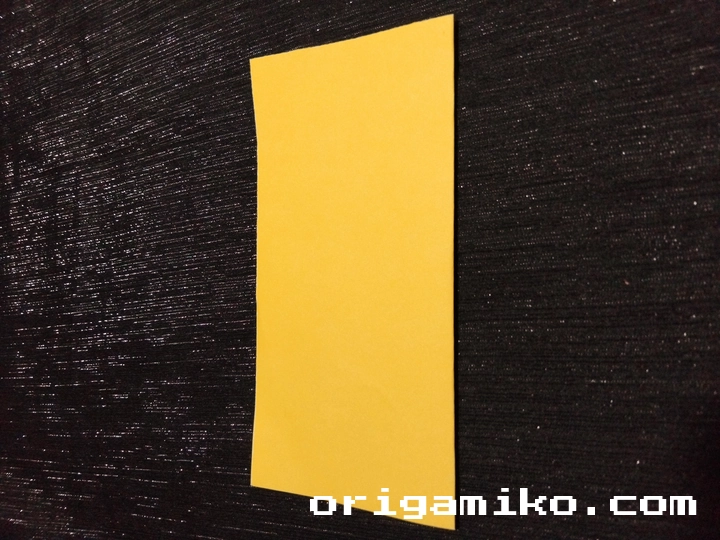
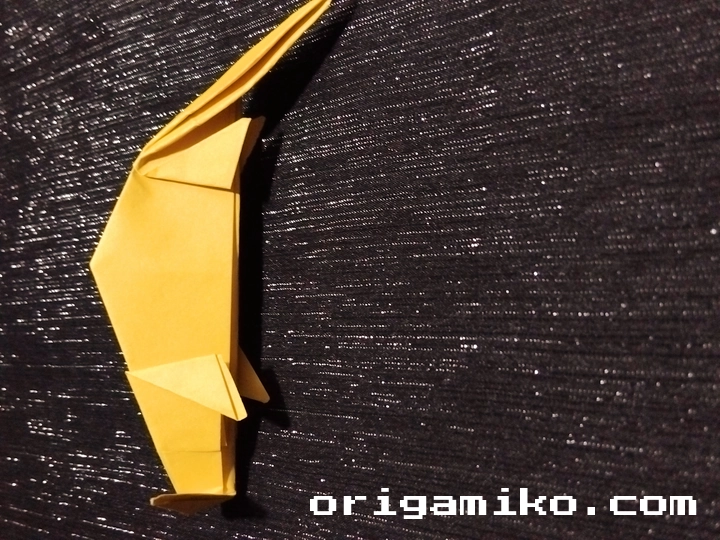
Step 3: Form the Initial Shape
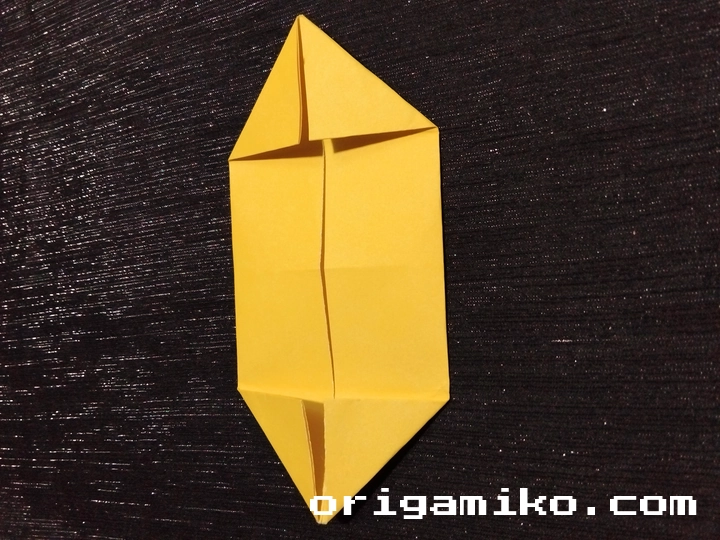
Fold both top corners down toward the center, just like you see in traditional origami bases. This creates the beginning of your chameleon’s body structure.
The key here is symmetry. Both sides should mirror each other perfectly.
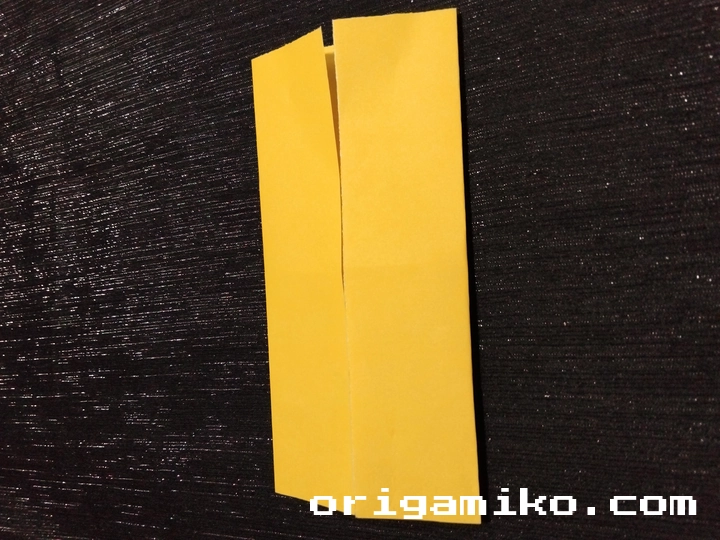
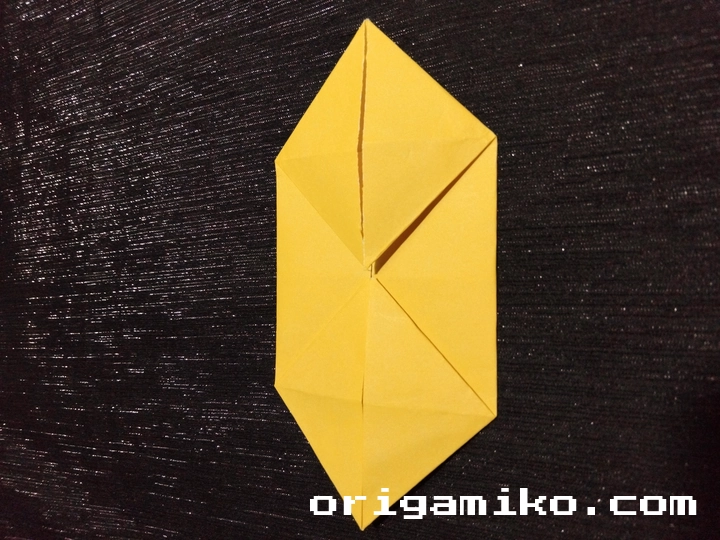
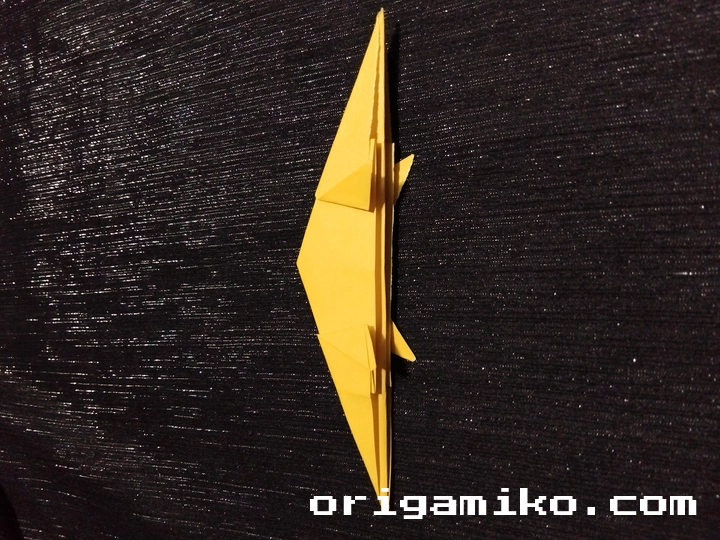
Step 4: Create the Side Details
Now comes a crucial step. Half-fold both side corners inward. This creates the chameleon’s distinctive body shape and sets up the proportions.
Don’t worry if it doesn’t look like a chameleon yet. Trust the process – it’s all coming together.
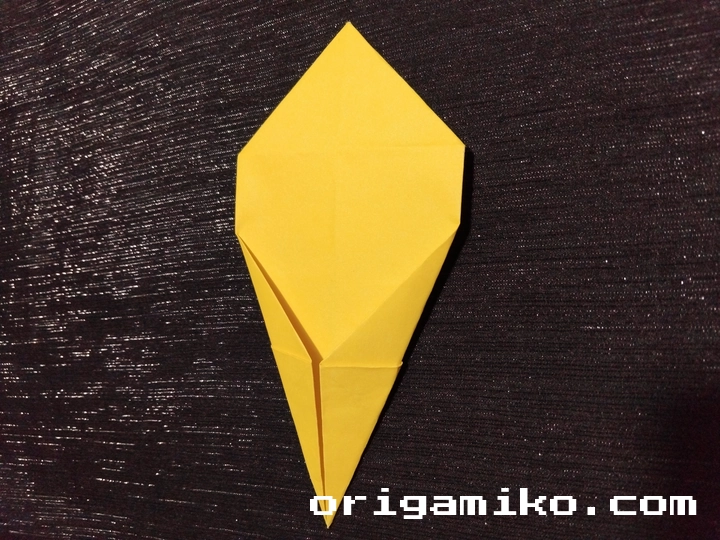
Step 5: Add the Finishing Touches
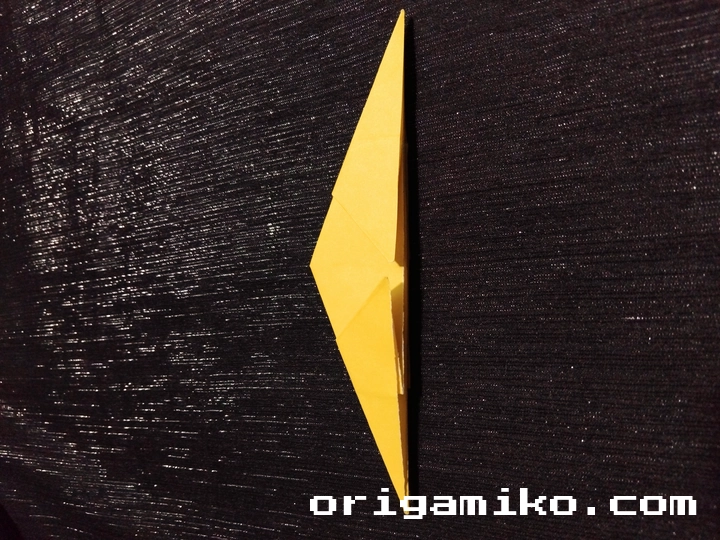
Make small folds from both sides, following the natural lines created by your previous folds. These final adjustments bring your chameleon to life.
This is where the magic happens. Those small folds create the head definition and body contours that make it recognizably chameleon-like.
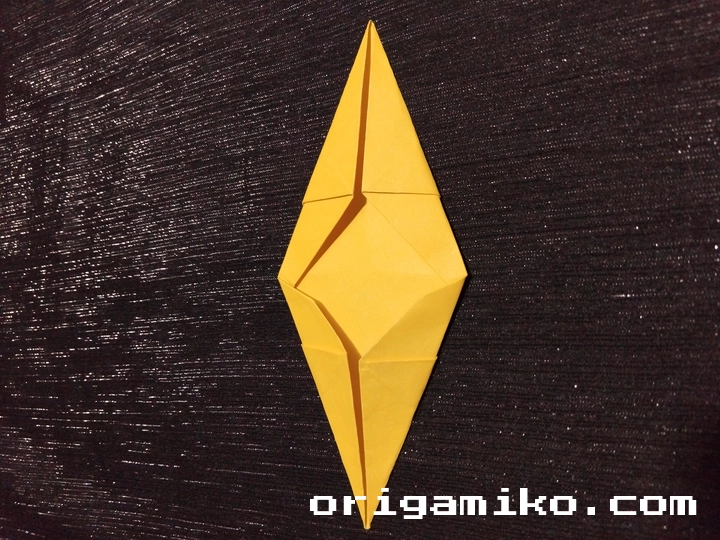
Step 6: Your Origami Chameleon is Complete!
Congratulations! You’ve just created your very own paper chameleon. Take a moment to admire your work and maybe make a few more in different colors.
Tips for Success
After folding hundreds of these little creatures, I’ve learned some tricks that make the process smoother:
• Start with larger paper if you’re a beginner. It’s easier to see what you’re doing and make precise folds.
• Work on a hard surface like a table or desk. Soft surfaces make it harder to create sharp creases.
• Take breaks if you feel frustrated. Sometimes stepping away for a few minutes helps you see the folds more clearly.
• Practice the valley and mountain folds before starting. Understanding these basic techniques makes everything easier.
• Use your fingernails to make sharp creases. The crisper your folds, the better your final chameleon will look.
• Don’t force the paper. If something doesn’t seem right, unfold and try again. Paper folding should feel natural, not forced.
Common Mistakes and How to Avoid Them
I’ve made every mistake in the book, so let me save you some frustration:
Uneven Folds The most common issue I see is asymmetrical folding. Always check that both sides match before moving to the next step. If one side looks different, unfold and try again.
Rushing Through Steps Paper folding is meditative. When you rush, you miss the subtle alignments that make the difference between an okay chameleon and a great one.
Wrong Paper Size Using paper that’s too small makes the folds cramped and difficult. Stick with the 15cm recommendation until you’re comfortable with the pattern.
Ignoring Crease Direction Valley folds and mountain folds matter. Pay attention to which way each crease should face – it affects the final shape significantly.
Skipping the Foundation Creases Those initial horizontal, vertical, and diagonal folds aren’t optional. They create the framework that makes everything else possible.
Similar Variations You Can Make
Once you’ve mastered this easy origami chameleon, you might want to try these related projects:
Origami Lizard Very similar folding pattern but with a longer tail section. Great for practicing the same basic techniques.
Origami Gecko Uses comparable body proportions but adds small details for the distinctive gecko feet.
Origami Dragon More complex but builds on the same triangular head concept you’ve learned here.
Origami Frog Different animal but uses similar corner-folding techniques that translate well.
Modular Chameleon Family Try making multiple chameleons in different sizes and colors to create a whole family display.
Troubleshooting Your Chameleon
Sometimes things don’t go according to plan. Here’s how I handle common issues:
If your chameleon won’t stand properly, check the base folds. Usually, a small adjustment to the bottom creases fixes stability issues.
When the proportions look off, it’s often because one of the early steps wasn’t quite symmetric. Don’t be afraid to unfold and restart – it’s all part of the learning process.
If the paper keeps unfolding, you might need sharper creases. Go back and reinforce each fold with your fingernail or a bone folder.
The Art and History Behind Origami Chameleons
Origami, the Japanese art of paper folding, has been bringing joy to people for centuries. While traditional origami focused on cranes, frogs, and flowers, modern folders have expanded to include all sorts of creatures.
The chameleon design represents the evolution of origami from purely traditional forms to creative interpretations of the natural world. It combines simple techniques with clever folding sequences to capture the essence of these remarkable reptiles.
What I find fascinating is how this simple paper chameleon captures the creature’s most distinctive features – the triangular head, compact body, and overall proportions – using just a few strategic folds.
Creative Display Ideas
Your finished chameleon deserves a special spot! Here are some ways I like to showcase these paper creatures:
Create a desktop habitat with multiple chameleons in different colors. Add some paper leaves or branches for a complete scene.
Use them as unique gift toppers instead of bows. They’re especially perfect for nature-themed presents or children’s gifts.
Make a mobile by hanging several chameleons at different heights. The slight air currents make them appear to move naturally.
Turn them into greeting card decorations by attaching them to the front of handmade cards.
Teaching Others This Design
I love sharing this project with kids and other origami enthusiasts. Here’s what works best when teaching others:
Start by demonstrating each step slowly while they follow along. Don’t move to the next step until everyone has completed the current one.
Encourage questions and be patient with mistakes. Everyone learns at their own pace, and that’s perfectly fine.
Have extra paper ready. People often want to try different colors or make multiples once they see how satisfying the process is.
Frequently Asked Questions
Q: Can I use regular printer paper for this project? A: Absolutely! While origami paper works best, printer paper will work fine. It might be slightly harder to fold, but the result will still be lovely.
Q: How long does it take to make one chameleon? A: Once you know the steps, about 5-10 minutes. Your first one might take 15-20 minutes as you learn the pattern.
Q: Is this suitable for children? A: Yes! Kids around 8 years old and up usually handle this well with some guidance. Younger children might need help with the precision folds.
Q: What if my chameleon doesn’t look exactly like the pictures? A: That’s totally normal! Each person’s folding style creates slight variations. As long as you’re happy with it, that’s what matters.
Q: Can I make it smaller or larger? A: Definitely! Just keep the paper square. Smaller versions (6cm) make cute miniatures, while larger ones (20cm) show more detail.
Q: How do I make the creases sharper? A: Use your fingernail, a bone folder, or even the edge of a ruler to press down firmly on each fold. Sharp creases make a big difference.
Advanced Techniques for Your Next Chameleon
Once you’re comfortable with the basic design, try these enhancements:
Wet Folding Slightly dampen your paper before folding. This allows for more curved, organic shapes that dry in place. Be careful not to use too much water.
Color Changes Use duo-colored paper (different colors on each side) to create natural-looking color variations in your chameleon.
Texture Addition Try using textured papers like handmade paper or even fabric for unique surface effects.
The Meditative Aspect of Paper Folding
One thing I didn’t expect when I started making origami chameleons was how relaxing the process would become. There’s something deeply satisfying about the repetitive motions and the focus required for precise folding.
Many people find origami meditative. The concentration required pushes other worries aside, creating a peaceful mental space. It’s like yoga for your fingers and mind.
I often fold chameleons when I need to unwind after a stressful day. The familiar sequence of folds becomes almost automatic, allowing my mind to settle into a calm rhythm.
Conclusion
Creating an easy origami chameleon has been one of my favorite paper-folding adventures. From that first simple fold to seeing the finished creature take shape, every step brings its own small joy.
I hope this simple origami chameleon step by step guide has given you everything needed to create your own paper reptile. Remember, practice makes perfect, and even imperfect chameleons have their own charm and character.