
")
Ever found yourself fumbling to store little notes, business cards, or tiny messages?
What if I told you there’s a simple solution using just one square sheet of paper?
Today, we’re diving into a magical, hands-on journey—one fold at a time.
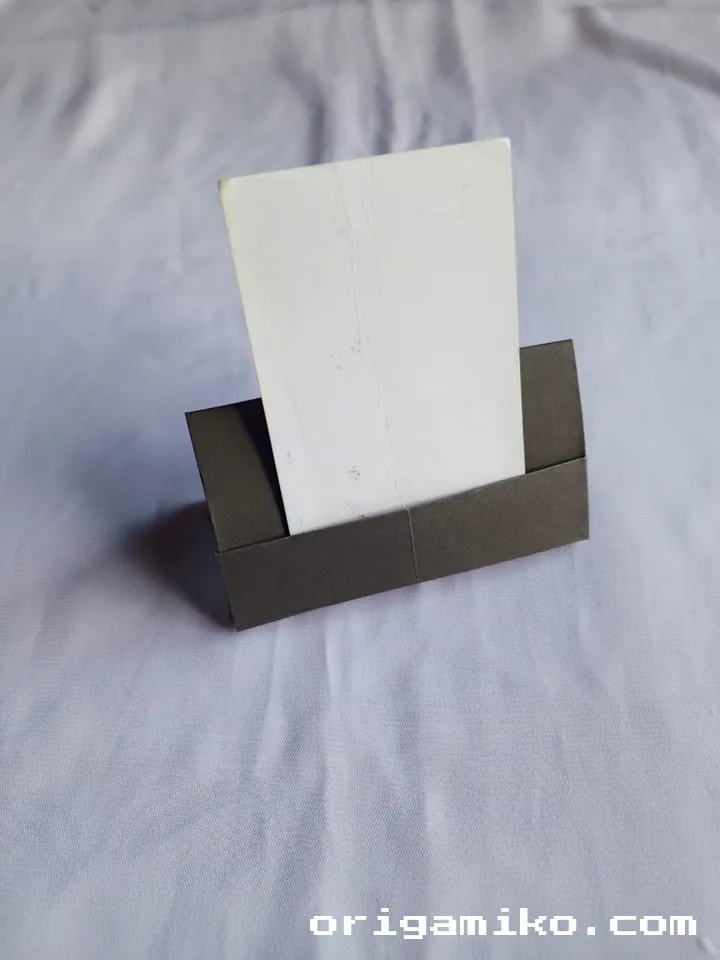
What We’re Making: The Origami Card Holder
Okay, friends—this is no ordinary DIY. We’re crafting a Simple Origami Card Holder that’s both stylish and functional. It’s compact, neat, and surprisingly sturdy. Best of all? You only need a 12″ × 12″ square paper and your two hands.
Now, if you’re thinking, “I’ve never folded a thing in my life,” don’t sweat it. I’ll guide you with clear origami card holder instructions, using easy terms, friendly tips, and a few personal stories. And if you’ve folded before—awesome! You’ll still find this enjoyable and calming. Like meditation, but with paper.
Let’s break this down, step-by-step.
Materials Needed
You only need one thing, but let’s get picky and precise about it. Here’s a table with details to help you choose the best material for your card holder.
| Item | Details |
|---|---|
| Paper Size | 12 inches × 12 inches (standard square) |
| Paper Type | Origami paper, scrapbook paper, or any medium-weight square paper |
| Best Paper Weight | 70gsm to 100gsm (not too thick, not too thin) |
| Ideal Colors | Pastels, bold solids, or patterned paper (your call!) |
| Optional Tools | Bone folder (for sharp creases), flat surface (like a table) |
| What to Avoid | Wrinkled, overly thick, or glossy paper (they make folding harder) |
Key Terms You’ll See (But Don’t Stress!)
Let’s decode some simple origami words before diving in:
Housefold
: A fold where two edges meet the center line—looks like folding both flaps inward like doors.
Unfold
: Open the paper back up to flatten it after a fold (used to make guidelines).
Middle Fold
: A fold that goes directly across the center of the square—like folding it in half.
Consecutive Folds
: Two folds made back-to-back in sequence, usually to shape or collapse something.
Simple Card Holder Step by Step
Alright, roll up your sleeves (if you have any), and follow me. I’ll break this down like we’re folding together at the same table.
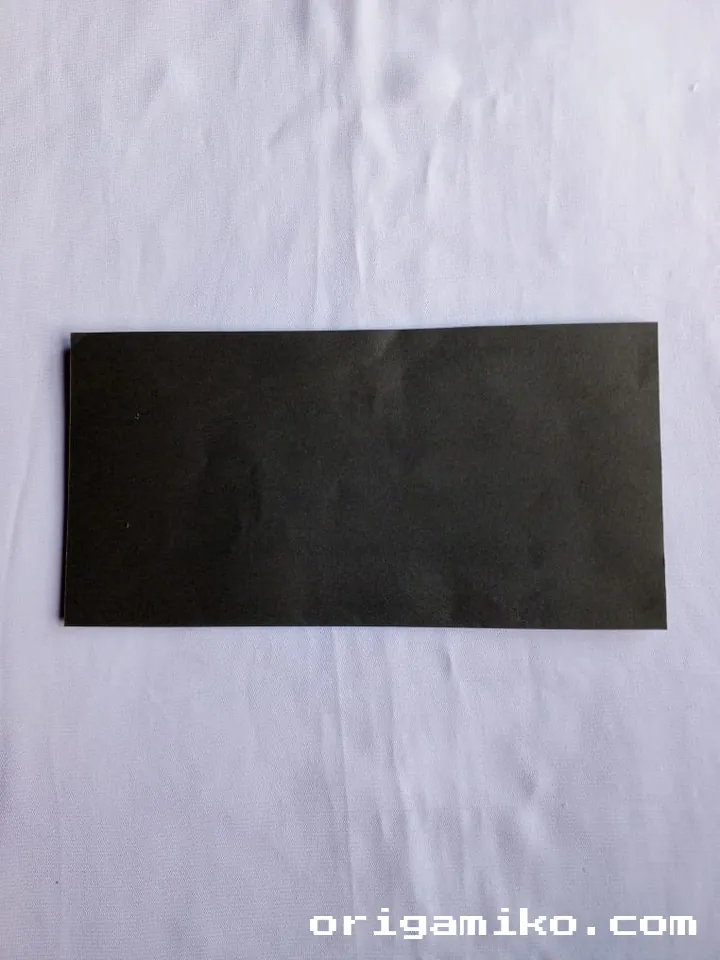
Step 1: Grab a Square Sheet (12″ × 12″)
Pick your favorite paper. Solid color, floral print—whatever speaks to you. Just make sure it’s perfectly square. This is where it all begins.
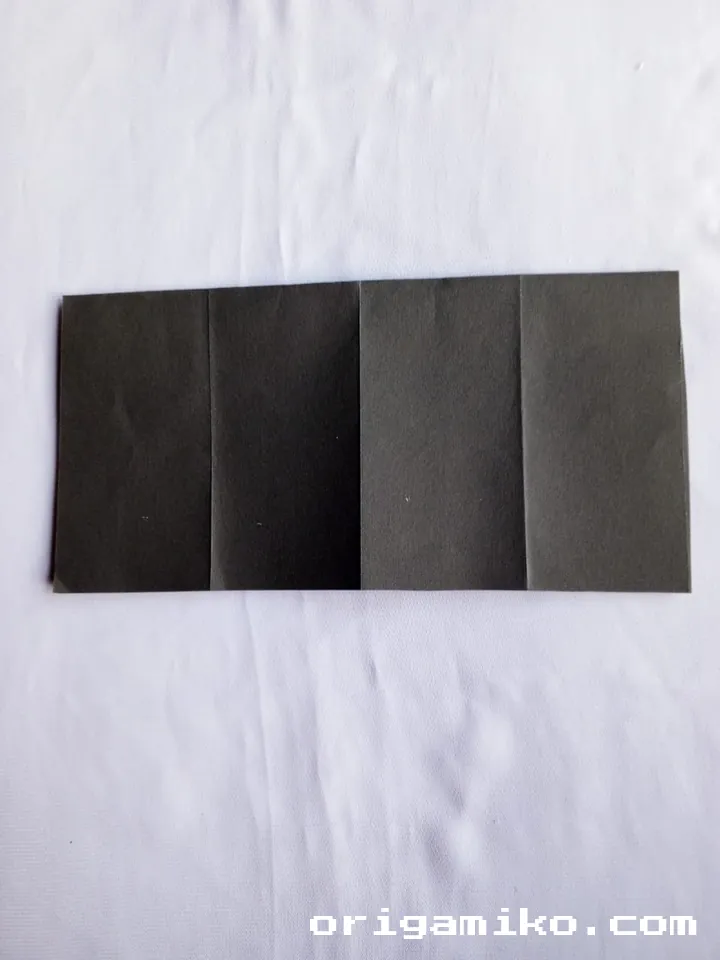
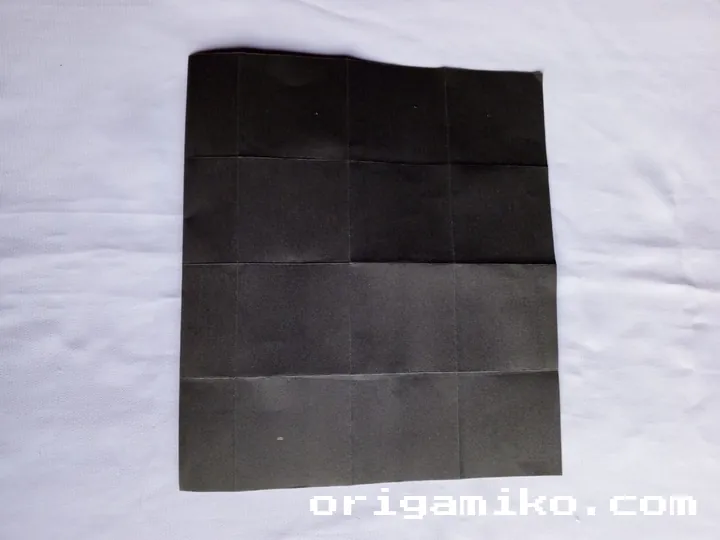
Step 2: Fold It Horizontally – Then Housefold and Unfold
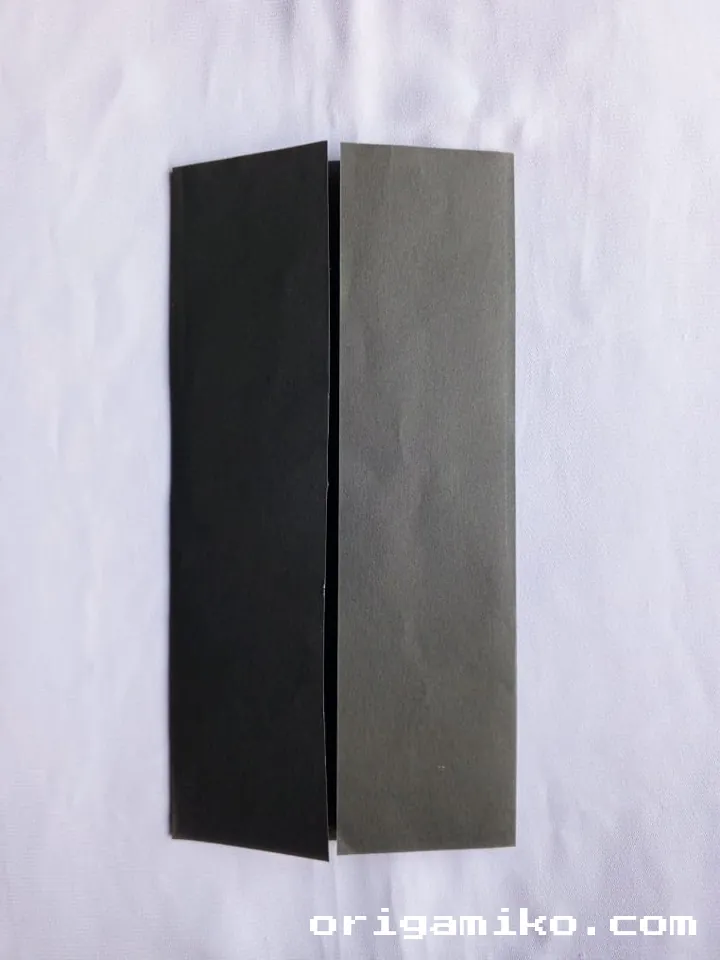
- First, fold the paper in half horizontally.
- Crease it well.
- Now, unfold it.
- Then fold both edges inward to meet the center crease (housefold).
- Unfold again. You should now see three vertical lines on your paper.
This step helps create “rails” to guide the rest of our folds.
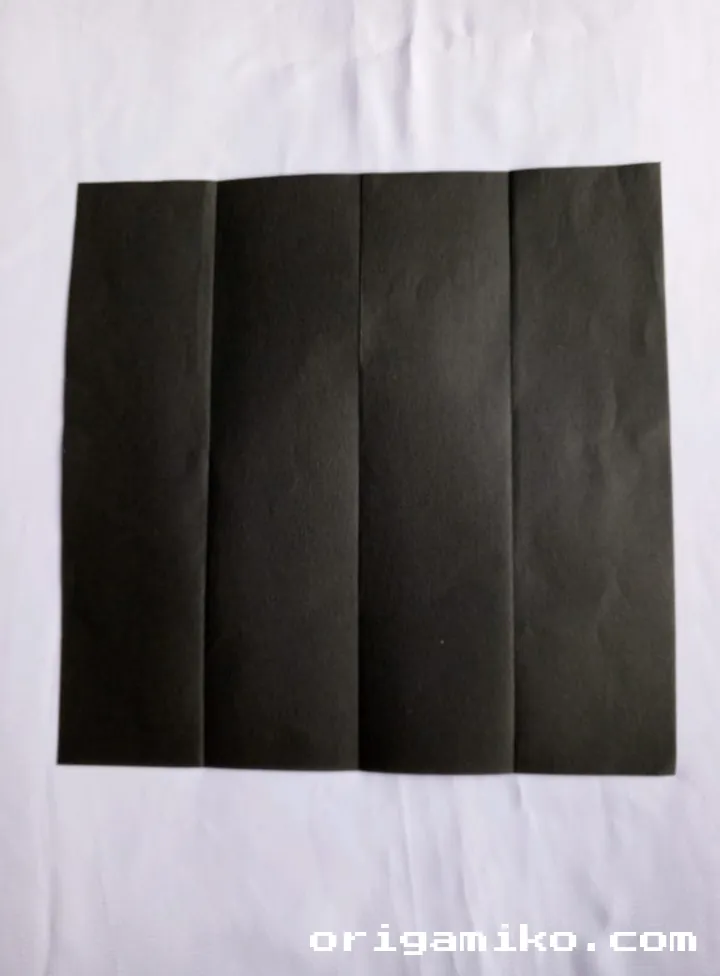
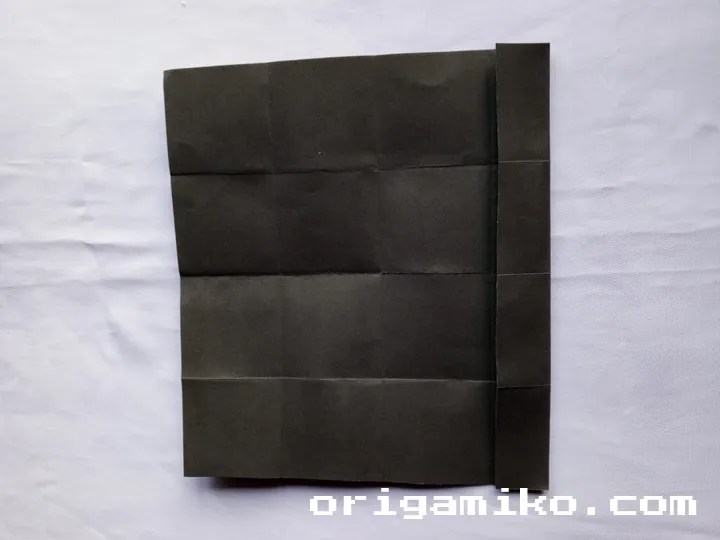
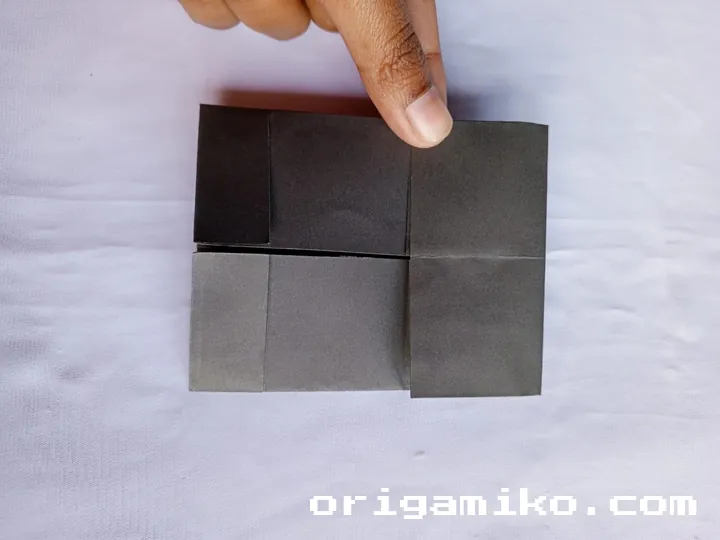
Step 3: Fold Vertically Through the Middle – Housefold Again and Unfold
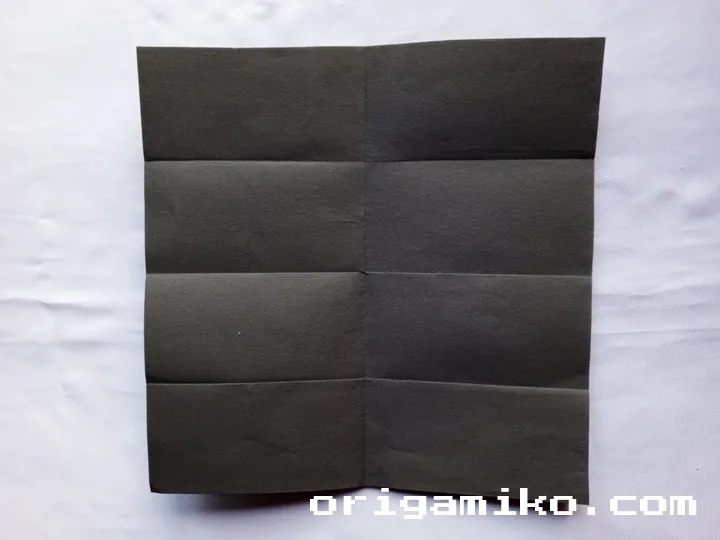
- Rotate your paper and fold it in half vertically (top to bottom).
- Crease and unfold.
- Then, just like before, fold both sides toward the center line.
- Crease sharply and unfold.
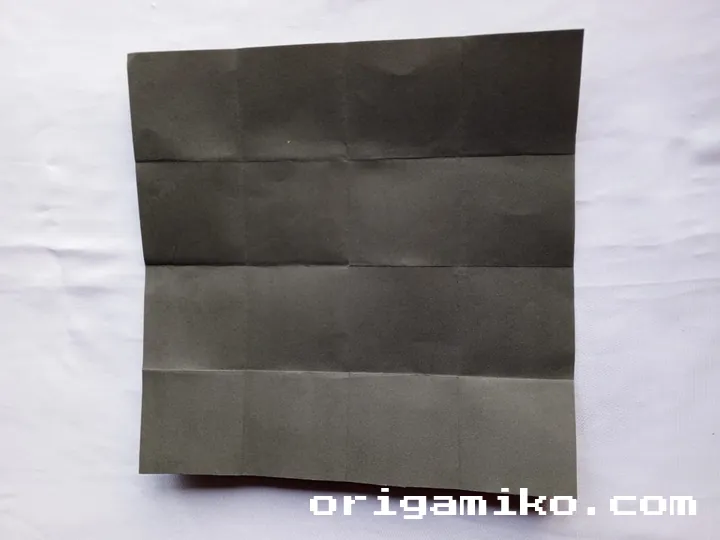
At this point, your paper has a tidy grid—kind of like tic-tac-toe lines.
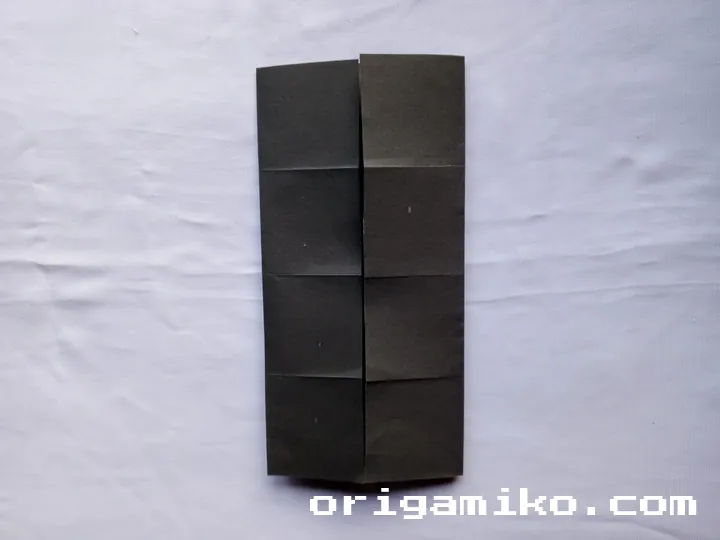
Step 4: Fold the Bottom Once – Then Two More Folds from the Back
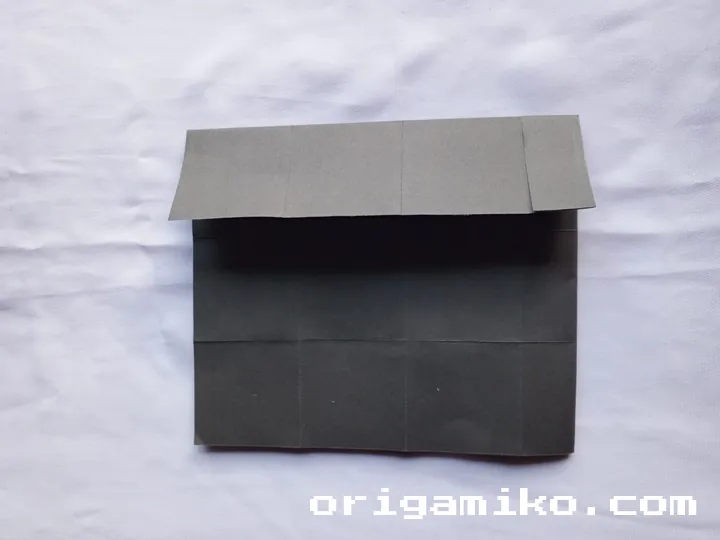
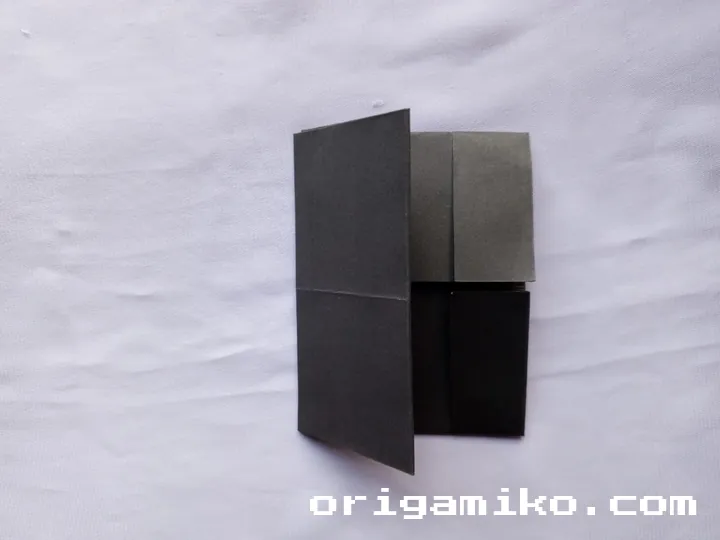
- Flip the paper to the reverse side.
- Fold the bottom edge up about 2 inches and crease.
- Now, fold the same bottom section upward once more (this gives it height).
- Unfold both folds.
This may feel like folding up a pant leg—one cuff, then another. These two folds add structure to your card holder’s base.
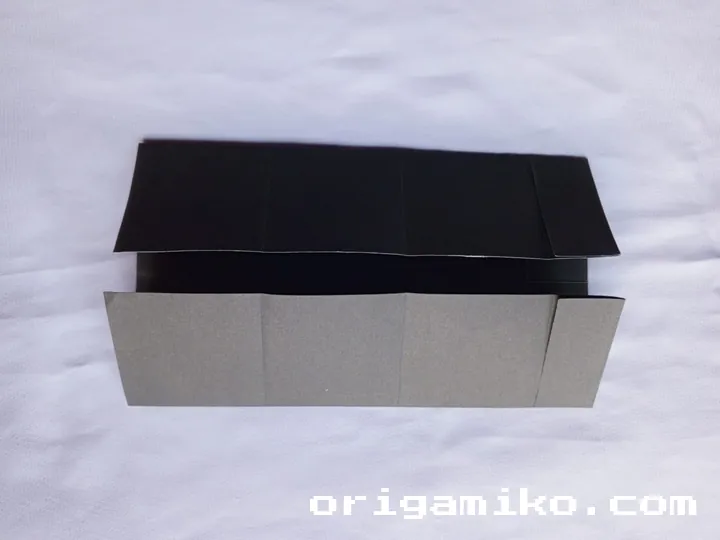
Step 5: Collapse and Bring It Together
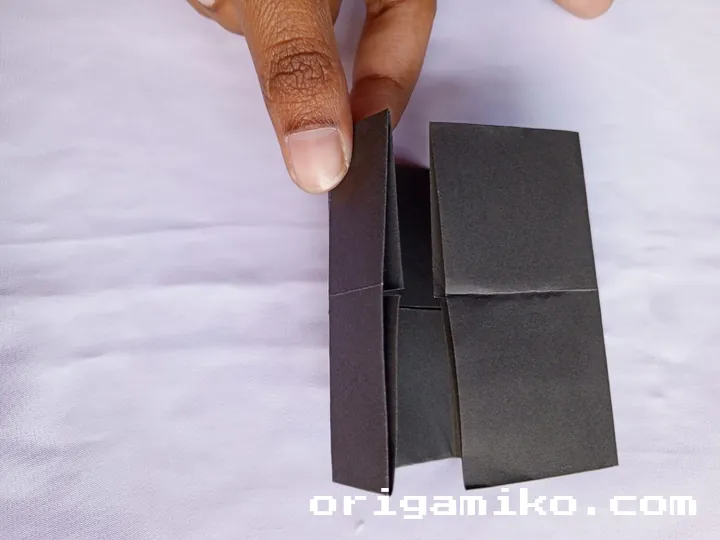
- Time for the fun part: shaping!
- Fold the top of the paper downward to align with the base.
- Gently press the folds together.
- You’ll see a natural pocket form—like magic.
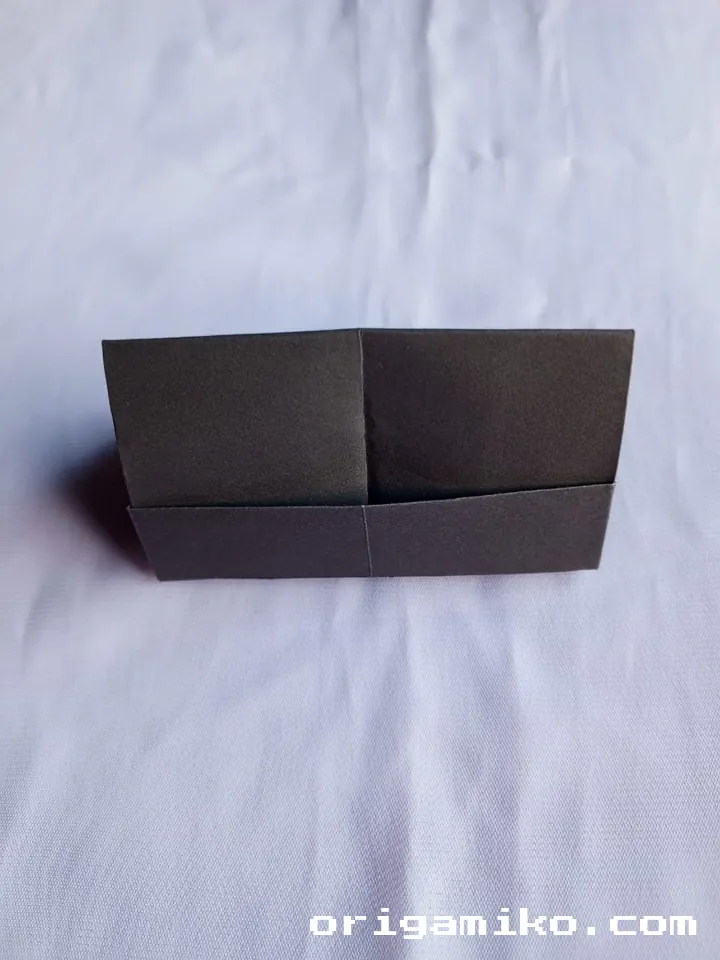
And boom! The Origami Card Holder is complete. No glue, no scissors. Just smart folds.
Tips for Success
Let me share a few things I’ve learned (sometimes the hard way):
- Use a flat surface for clean creases.
- Don’t rush. Let the folds guide you.
- Crease firmly with your nails or a bone folder.
- If you’re using patterned paper, start with the pattern side down.
- Practice once with scrap paper before using fancy ones.
This isn’t a race—it’s more like a calm stroll.
Common Mistakes (And How to Avoid Them)
Let’s save you from frustration. Here are a few things to watch out for:
- Paper not square? Your folds won’t line up. Always trim your paper perfectly.
- Creases too weak? Your card holder will pop open.
- Too thick paper? It’ll buckle instead of folding nicely.
- Forgetting to unfold? You’ll get confused later.
If something feels off, just unfold and start again. Trust me, I’ve done that a hundred times.
Similar Variations You Can Try
Want to switch things up? Try these ideas:
- Mini Origami Card Holder: Use 6″ × 6″ paper for a tiny version (great for notes).
- Double Pocket Holder: Repeat the steps but fold inward at both ends.
- Accordion-Style Holder: Add one extra fold in step 4 to give it expandable sides.
- Origami Wallet: Add flaps to the sides for card slots.
- Decorated Version: Add washi tape, stickers, or draw on the paper before folding.
Once you get the hang of it, the sky’s the limit.
FAQs
Q: What is the best paper for an easy origami card holder?
A: Medium-weight origami paper works best—around 80gsm. Avoid overly thick cardstock.
Q: Can I make a bigger holder?
A: Totally! Just scale up the paper. A 15″ × 15″ sheet gives you more room.
Q: Is this suitable for kids?
A: Yes! With some guidance, kids as young as 7 can enjoy making it.
Q: How sturdy is it?
A: Surprisingly strong—especially if you crease well and use quality paper.
Final Thoughts
I hope you had fun learning how to make a card holder using nothing but a square sheet and a bit of focus. It’s such a satisfying little project, and you end up with something useful—and pretty cute.
Whether you’re new to origami or a seasoned paper-folder, this simple project blends creativity and function. Try out different papers, gift them to friends, or keep one on your desk. The journey of folding is always worth it.
And hey—don’t forget, this easy origami card holder started with just one fold.
Let me know how your version turned out, and feel free to explore more origami fun like a triangle box, 4-pointed star, or origami envelope right here.
Want more guides like this? Just ask—I’m always folding something new