

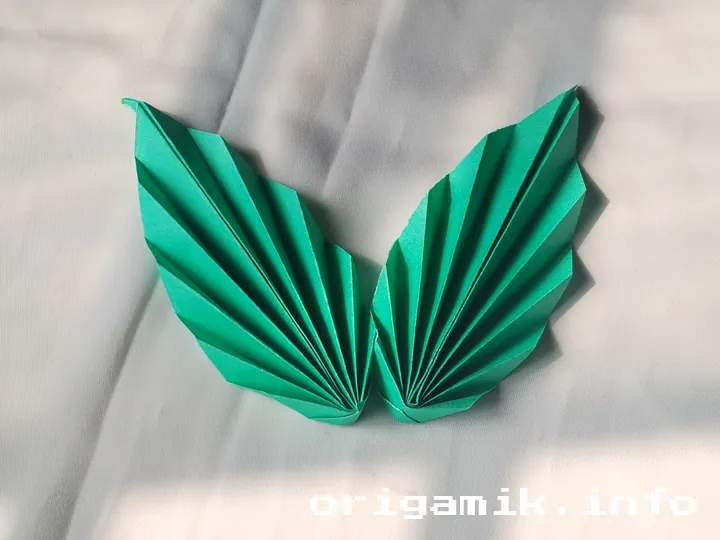
Ever wondered how to make a simple green leaf step by step using just a piece of paper? Origami is an amazing craft that transforms ordinary paper into art. Today, I’ll guide you through creating an easy Origami green leaf that looks elegant and lifelike!
This step-by-step journey will be fun and rewarding. Whether you’re a beginner or a seasoned origami artist, this tutorial will help you create a beautiful green leaf. Let’s get started!
What Is an Origami Green Leaf?
Origami, the ancient Japanese art of paper folding, allows us to create intricate designs from a single sheet of paper. One of the simplest and most visually appealing designs is the Origami green leaf. This leaf is perfect for decorations, greeting cards, or even as part of a bigger origami project. The best part? It’s easy to make and requires only a few folds!
Definition List:
- Origami: The Japanese art of paper folding to create shapes and figures without cutting or gluing.
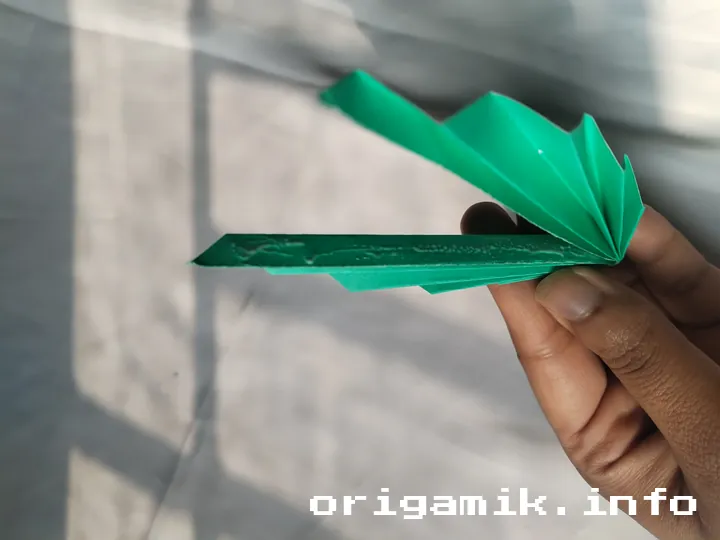
- Zigzag Fold: A series of accordion-like folds that give texture and depth to paper.
- Middle Fold: A central crease that provides symmetry and shape to the leaf.
Materials Needed
Before we begin, make sure you have everything ready. Below is a data-rich table to help you gather your materials:
| Material | Description | Alternative Options |
|---|---|---|
| Square Paper (9″×9″) | A green-colored square sheet of paper | Any color of choice |
| Scissors | For making necessary cuts | Craft knife |
| Glue | To secure the fold in place | Tape or adhesive |
Now that you have everything, let’s begin folding!
Step-by-Step Origami Green Leaf Instructions
Follow these simple steps carefully to create a stunning paper leaf:
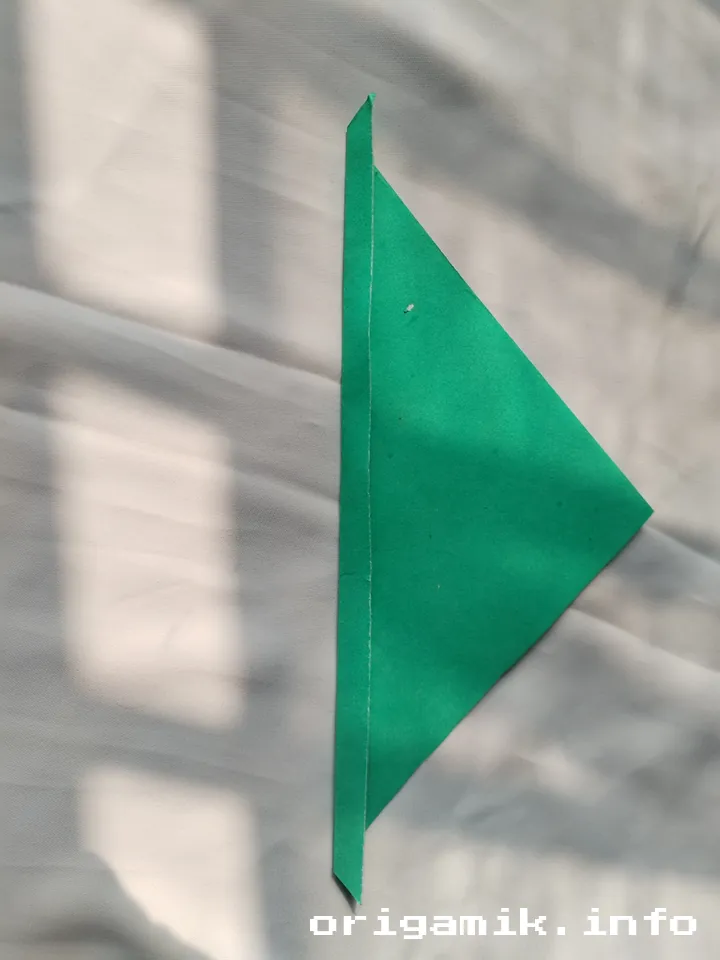
Take a Square-Shaped Paper
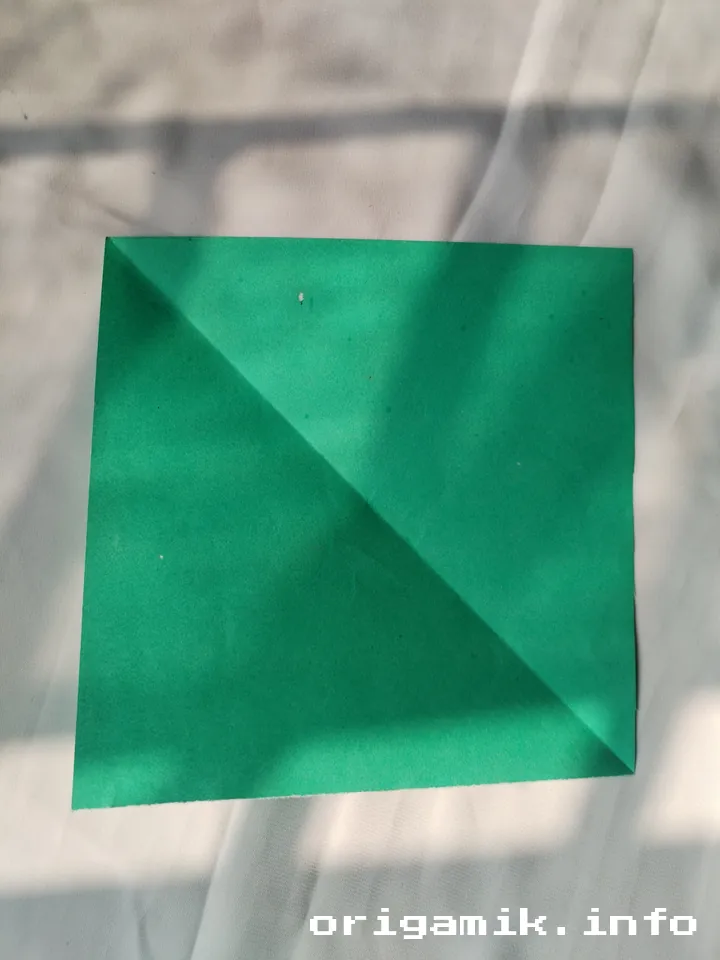
Start with a 9″ × 9″ sheet of paper. If your paper isn’t square, trim it before proceeding.
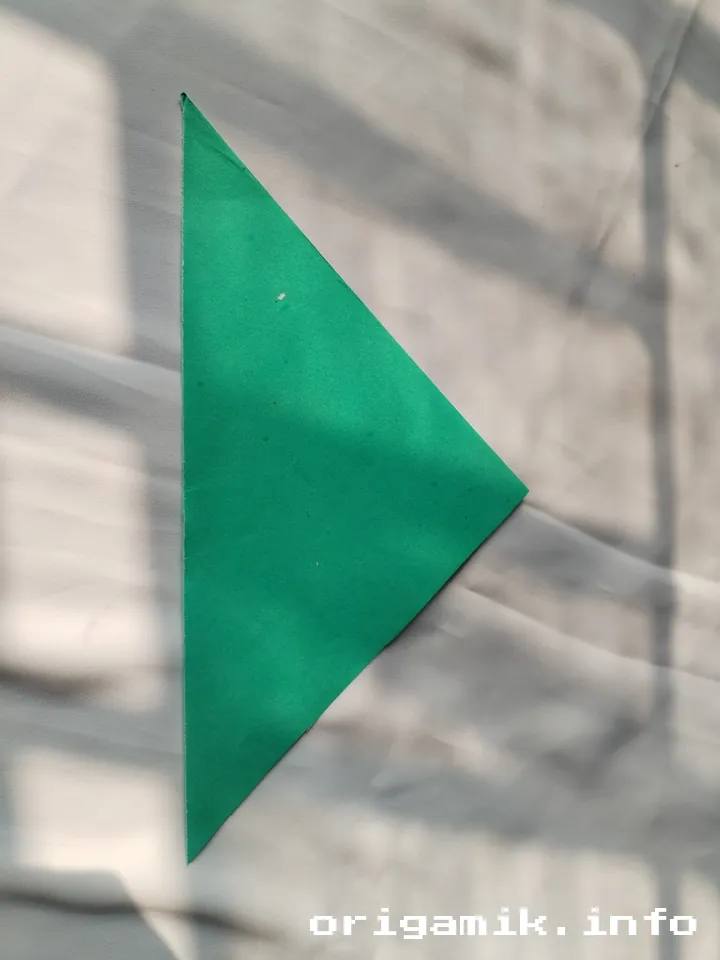
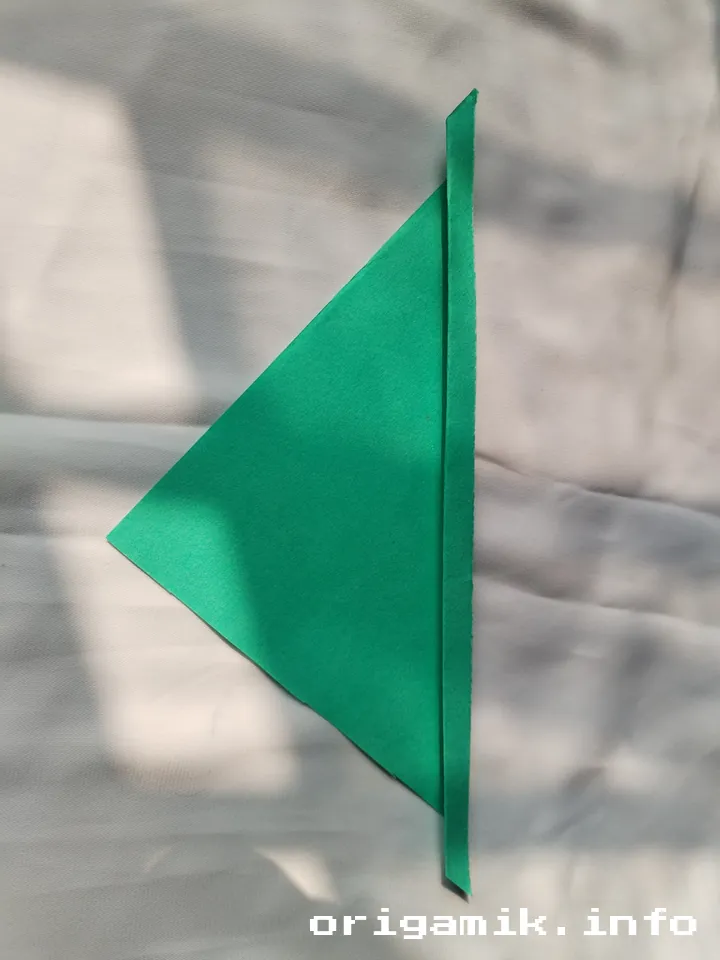
Fold the Corner and Cut It
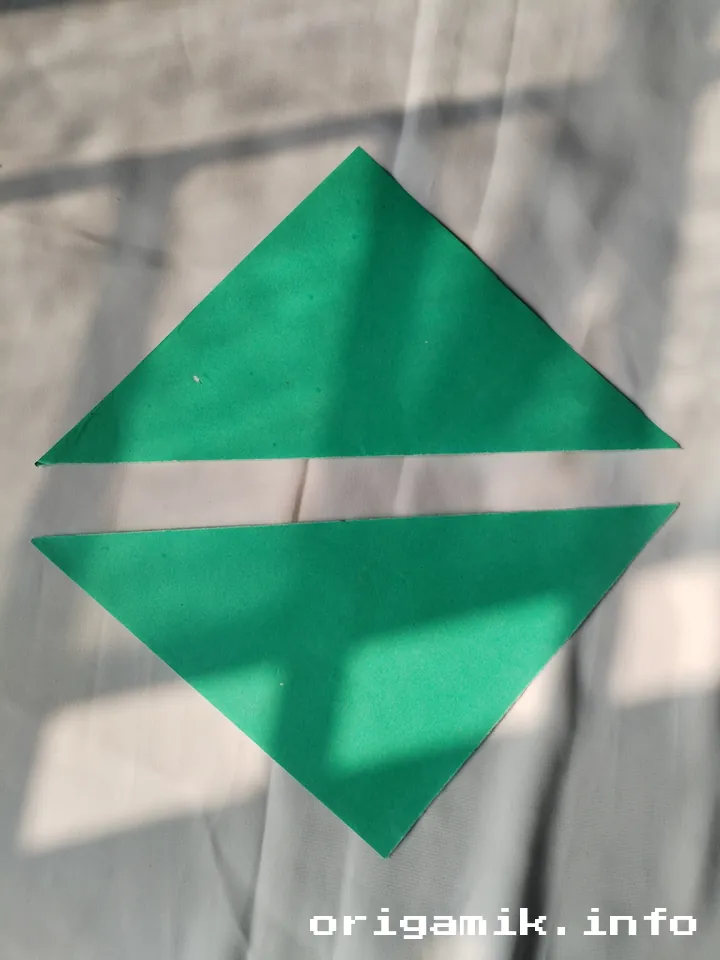
Fold one corner to the opposite edge, creating a triangle. Then, cut along the fold to shape the leaf.
Fold Zigzag

Start at one end and make small accordion-style folds, like a fan. This adds texture and realism.
Make a Middle Fold and Glue It

Fold the leaf in half along the center. Apply a little glue to hold it in place.
Your Origami Green Leaf is Ready!
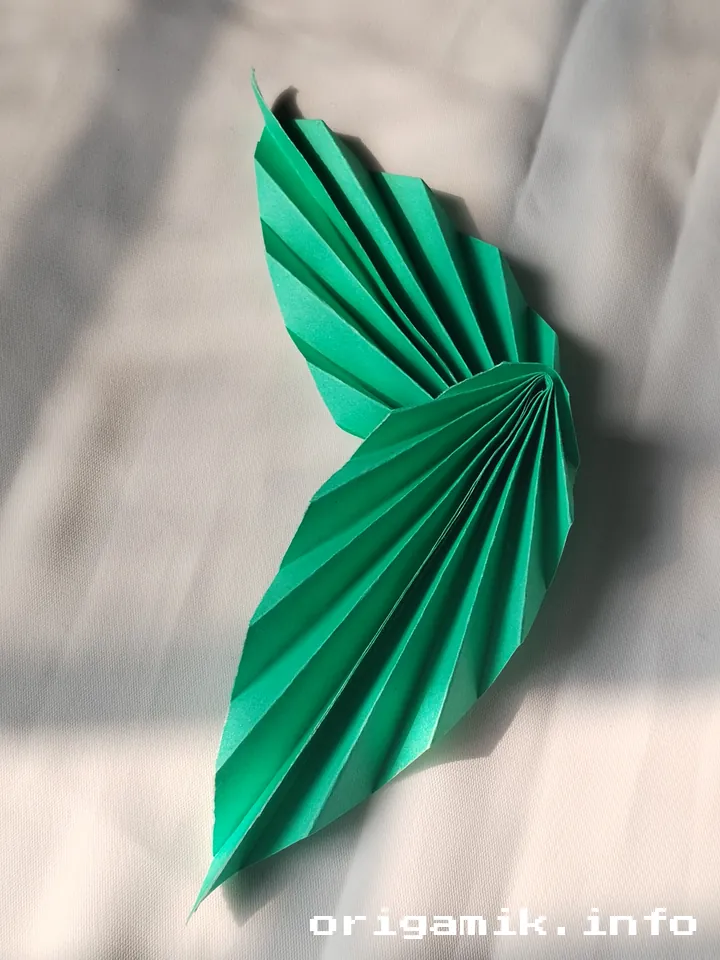
Let it dry and enjoy your handcrafted paper leaf!
Tips for Success
Creating the perfect origami leaf requires practice and patience. Here are some useful tips:
- Use thin paper: Thick paper is harder to fold neatly.
- Make sharp creases: Run a ruler over folds for crisp edges.
- Be gentle: Avoid tearing the paper while folding.
- Experiment with colors: Try different shades of green or even patterned paper!
Common Mistakes and How to Avoid Them
Even experienced folders make mistakes. Here are common errors and their fixes:
| Mistake | Solution |
| Uneven folds | Align edges properly before folding. |
| Paper tearing | Use gentle pressure while folding. |
| Glue not holding | Use a stronger adhesive or let it dry longer. |
Similar Variations You Can Try
Want to expand your origami skills? Try these variations:
- Origami Maple Leaf – More intricate folds for a detailed look.
- Origami Lotus Leaf – Ideal for floral origami arrangements.
- 3D Origami Leaf – Adds dimension for a realistic effect.
Each variation brings a unique charm to your paper crafts!
FAQs
1. Can I use regular printer paper?
Yes! However, origami paper is thinner and easier to fold.
2. How long does it take to make an origami green leaf?
Just 5-10 minutes with practice.
3. What can I use my origami leaf for?
Decorations, greeting cards, scrapbooks, or even classroom projects!
Conclusion
Making an easy Origami green leaf is a delightful and creative experience. By following this simple green leaf step-by-step guide, you now have a beautiful paper leaf ready for any craft project.
Now that you know how to make a green leaf from paper, why not try other origami designs? Keep practicing, and enjoy the art of folding!