
")
Ever tried folding paper and felt stuck halfway through?
Want to learn an easy Origami Fan that actually looks good when you’re done?
Stick with me—I’ll guide you through each fold with real talk, not fancy fluff.
The Origami Fan: Simple but Magical
I still remember the first time I made an Origami Fan.
I was just messing around with printer paper, and boom—it turned into something that felt straight out of a craft book.
This isn’t just a folded piece of paper. It’s a little work of art.
What makes the Origami Fan so great?
It’s super quick. Totally beginner-friendly.
And honestly… a bit addictive. Once you fold one, you’ll want to try ten more.
Whether you’re making a cute classroom display, decorating a card, or just looking for a peaceful paper-folding moment, this fan does the trick.
Key Terms You Should Know
Let’s keep things simple:
Origami
The Japanese art of folding paper into decorative shapes and figures.
Fan Fold
A back-and-forth fold that looks like an accordion—used in fans, paper decorations, and even some gift wraps.
Crease
The sharp line you create when you fold paper.
Insert
Tucking one flap or point of paper into another section—like sliding it into a pocket.
Materials Needed
Here’s everything you need. It’s basic stuff—nothing fancy.
| Item | Description | Where to Find It |
|---|---|---|
| A4 Paper | Standard size 30cm x 21cm | Office supply store or home |
| Flat Surface | Table or desk for folding | Anywhere in your home/classroom |
| Patience | Trust me, it helps | Deep breaths—you’re good |
Tip: Go for a slightly thicker paper if you want a sturdier fan. But not too thick—it needs to fold easily.
How to Make Origami Fan – Step by Step
Alright, let’s do this. I’m keeping it super clear.
Step 1: Take a Paper

Grab one A4-sized sheet (30cm x 21cm). Place it landscape on your table.
Step 2: Half Fold It—and Repeat
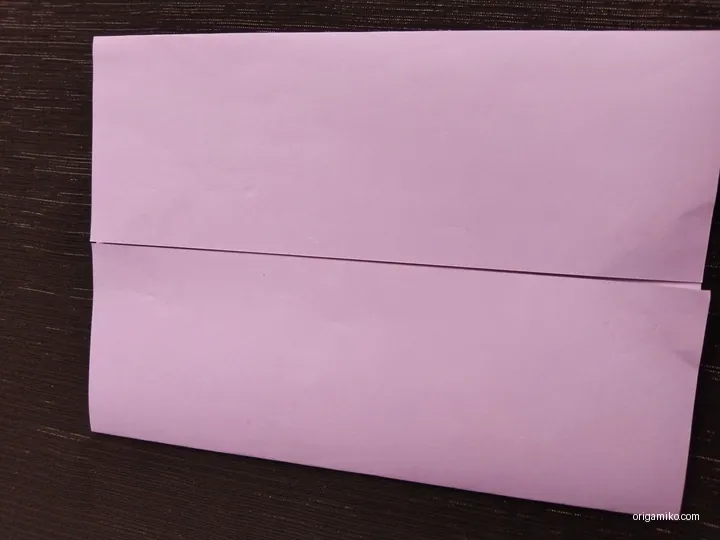
Fold the paper in half from top to bottom.
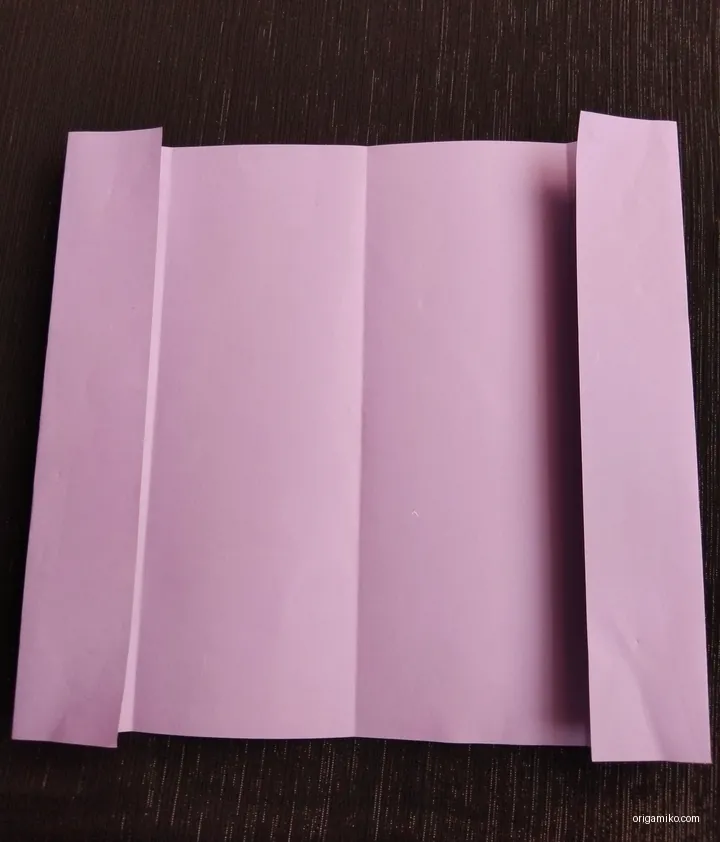
Now unfold, then fold it again—but this time fold one side to the crease you just made.
Repeat that folding pattern like an accordion. Just keep alternating. Think: zig-zag, zig-zag.
Step 3: Press and Shape the Folds
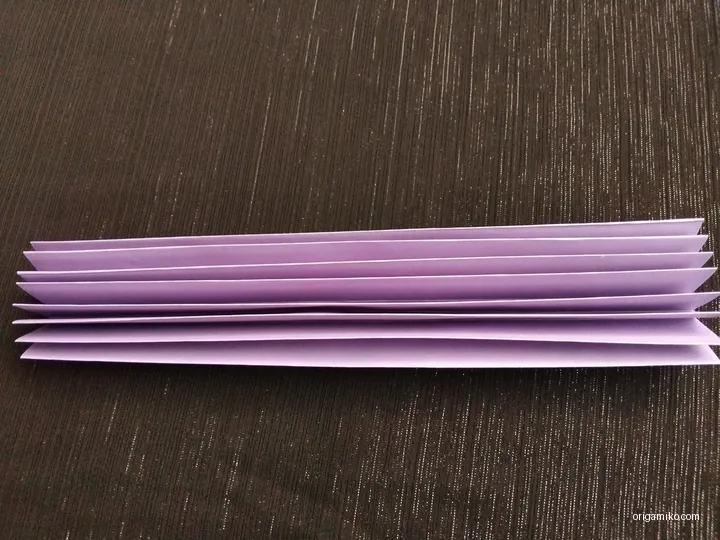
Now fold it in the direction that helps it hold shape like a fan.
Think of those paper fans you made as a kid—they open and close like a mini accordion.
Step 4: Fold from the Middle and Tuck Corners
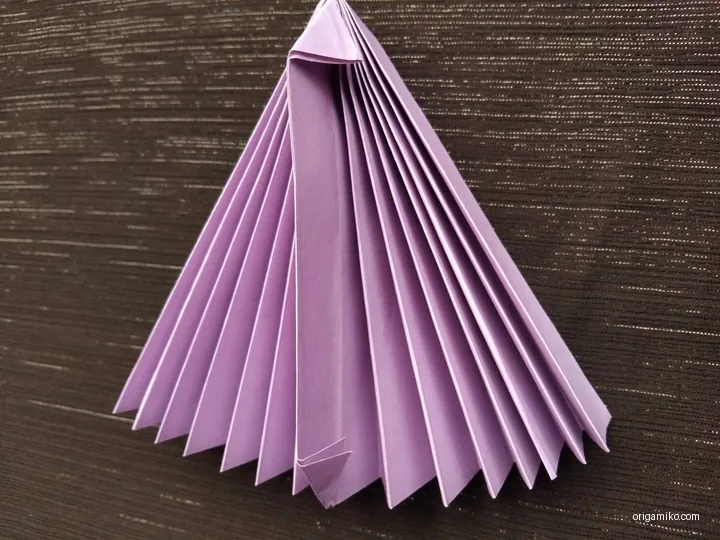
Fold the whole fan in half at the center so the folded edges are on the outside.
Now fold the outer corners inward, and slide those corner tips into the inner layers of paper.
You’re tucking them in—like making a paper hug.
Step 5: Fan Out and Admire
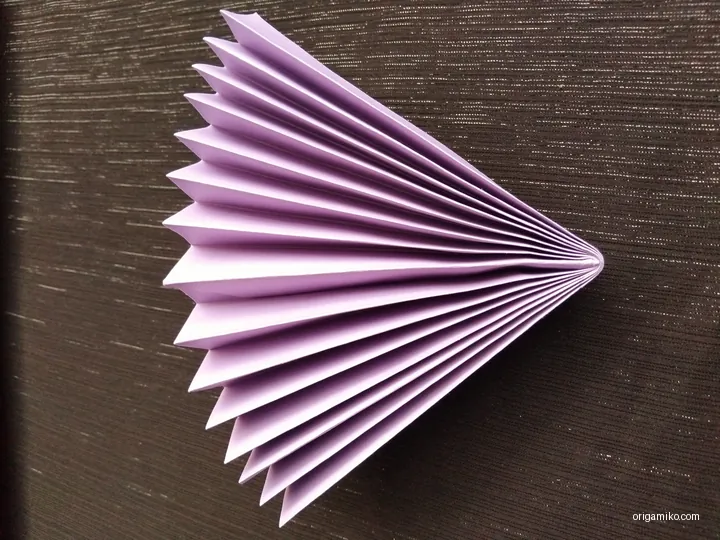
That’s it! Your easy Origami Fan is ready.
Hold it at the bottom and gently fan it out like a peacock tail. Boom—instant decor.
Tips for Success
Want to get it right the first time? Here’s what helped me:
- Crease every fold tightly—don’t be shy.
- Keep your folds even. That’s what makes it look clean.
- Work on a hard surface. Soft folds? Messy fan.
- Test different papers. Glossy ones reflect light beautifully.
Common Mistakes and How to Avoid Them
We all mess up. Here’s how to dodge the usual ones:
- Uneven folds? Use a ruler edge or credit card to flatten creases.
- Too thick paper? Makes it hard to tuck in corners. Try thinner paper first.
- Paper tearing? You’re folding too hard or using weak paper.
Similar Variations You’ll Love
Once you’ve nailed this one, try these too:
- Mini Origami Fans – Use smaller paper for place cards or decorations.
- Double-Layer Fans – Use two colors for a pop effect.
- Origami Circle Fans – Make two fans, glue the backs together to form a circle.
- Hanging Paper Fans – Add string and hang them for party vibes.
The possibilities? Endless.
FAQs
Q: Can I use square paper instead of A4?
A: You can, but the fan shape may look more compact. Stick with 30x21cm for best results.
Q: What’s the easiest paper to fold for beginners?
A: Lightweight printer paper or origami paper. Avoid cardstock.
Q: Can kids try this?
A: Absolutely! This is one of the easiest paper crafts for kids—great for classrooms or rainy-day fun.
Q: Is this a traditional Japanese design?
A: It’s inspired by traditional Japanese folding, but simplified for casual crafting.
Final Thoughts
So that’s it—how to make Origami Fan, the easy way. We kept it simple, clear, and fun.
Whether you’re making one fan or twenty, remember: it’s not about perfection—it’s about the joy of folding.
Got your own take on this simple fan step by step?
I’d love to hear how it turned out or what twist you added. Send in your feedback—let’s keep folding together.
And hey—don’t forget this: the easy Origami Fan you just made?
That’s art. Your art.