

Ever wonder how to make an Origami hibiscus flower that looks stunning but doesn’t make your brain hurt?
I get it. Folding paper can feel intimidating—especially when you want it to actually look like a flower.
But don’t worry. I’ll walk you through this simple hibiscus flower step by step, no stress, no fancy tools.
What Are We Making? A Paper Bloom That Pops!
So, we’re diving into the magical world of origami to create a simple, beautiful hibiscus flower—all from a single square sheet of paper. It’s bright. It’s bold. And yeah, it’s surprisingly easy.
The best part? Whether you’re a beginner who just Googled how to make Origami hibiscus flower or someone who’s folded cranes since childhood, this is the kind of craft that hits the sweet spot between satisfying and achievable.
Materials Needed
Let’s keep this simple. Just one key material and a few optional helpers. Here’s a quick breakdown:
| Item | Details | Why You Need It |
|---|---|---|
| Origami Paper | 10×10 inches (square) | Essential for correct folding and symmetry |
| Bone Folder (optional) | Any tool to press folds | Helps create sharp, clean creases |
| Tweezers (optional) | For tucking small corners | Useful for delicate adjustments |
| Pencil (optional) | For sketching center pistil if needed | Adds detail to the final design |
| Glue (optional) | Small dab for the pistil | Keeps central part secure, not traditional though |
Tip: Use colorful or double-sided paper to make your hibiscus really pop!
Key Terms to Know
Let’s clear up some origami lingo before we jump in.
- Crease: A fold that helps shape your paper and gives it structure.
- Pentagon fold: A method of shaping the paper into a five-sided base.
- Petal peel: Gently curving paper outward to form realistic petals.
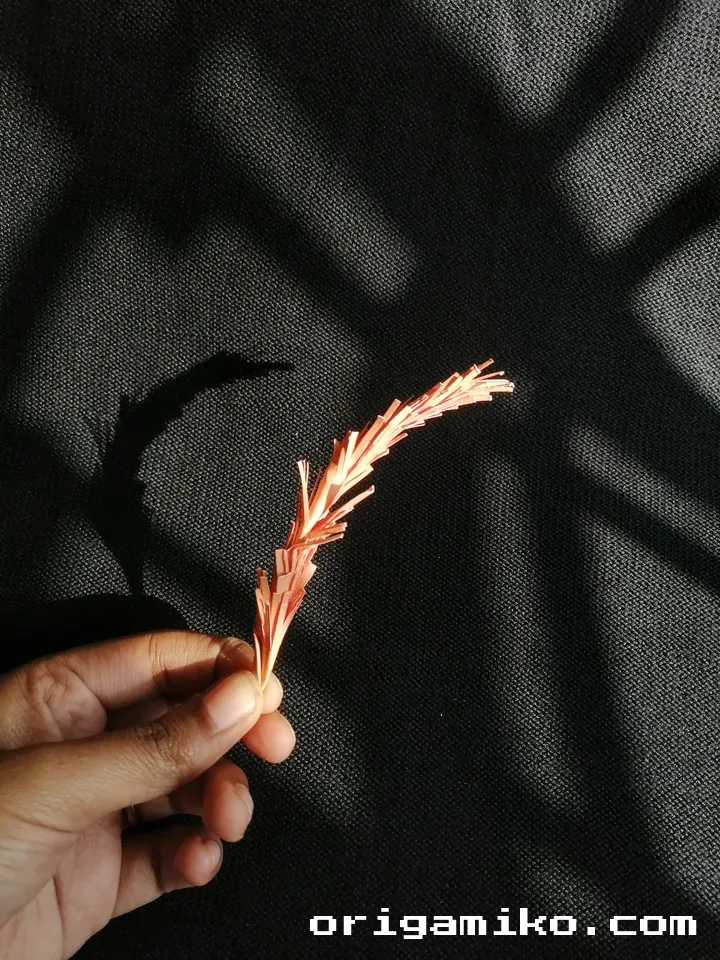
- Pistil: The center part of the flower, optional but adds a touch of realism.
Simple Hibiscus Flower Step by Step
Now for the fun part. Grab your 10×10 paper, and let’s get folding.
- Take a Paper
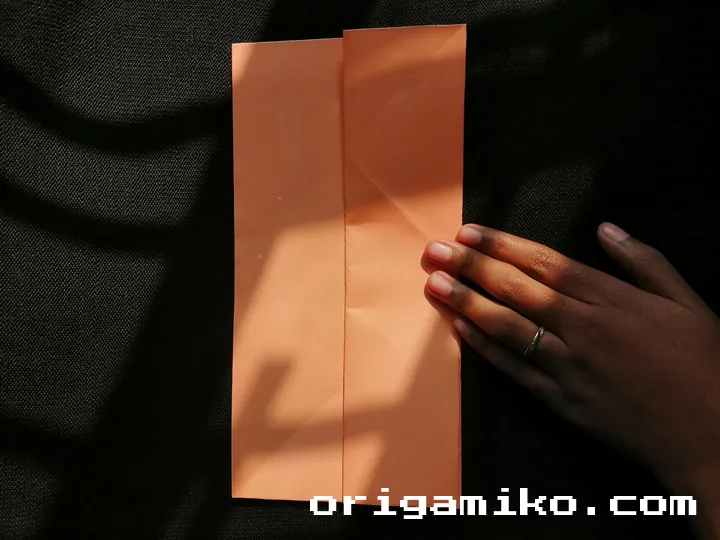
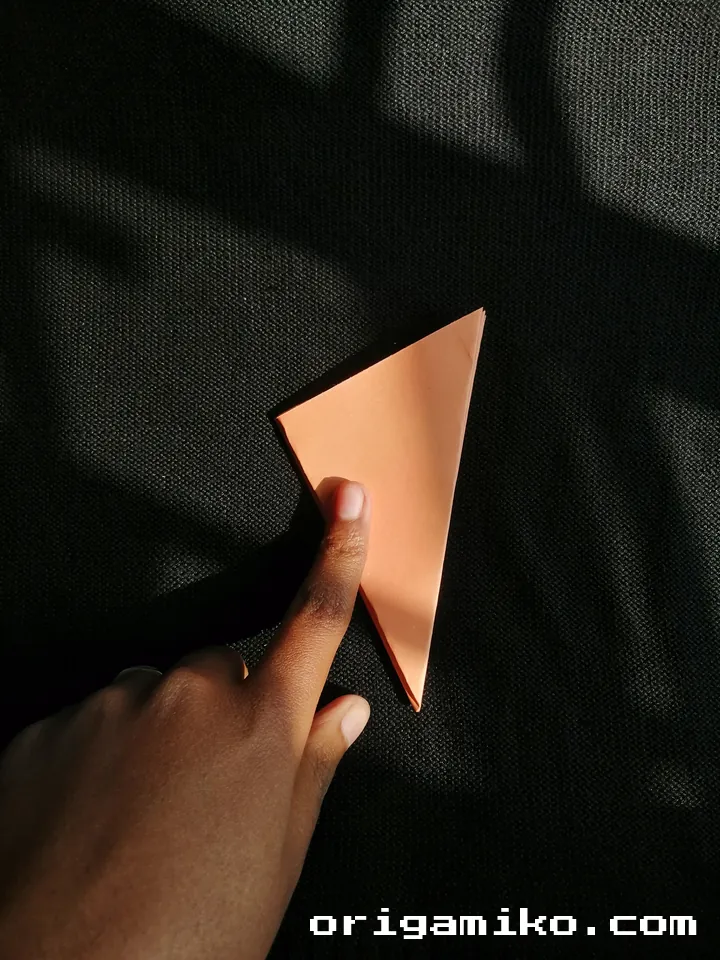
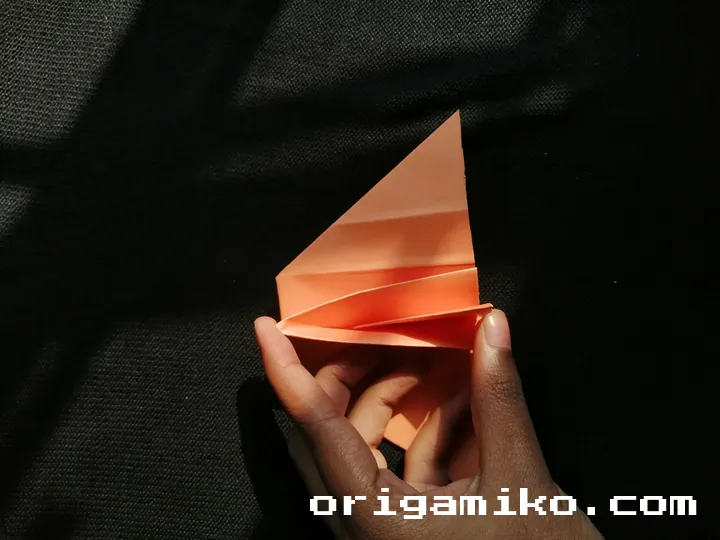
Start with your square piece of origami paper. I like using bright red or pink—it really screams “hibiscus.” - Fold to Form a Pentagon Shape
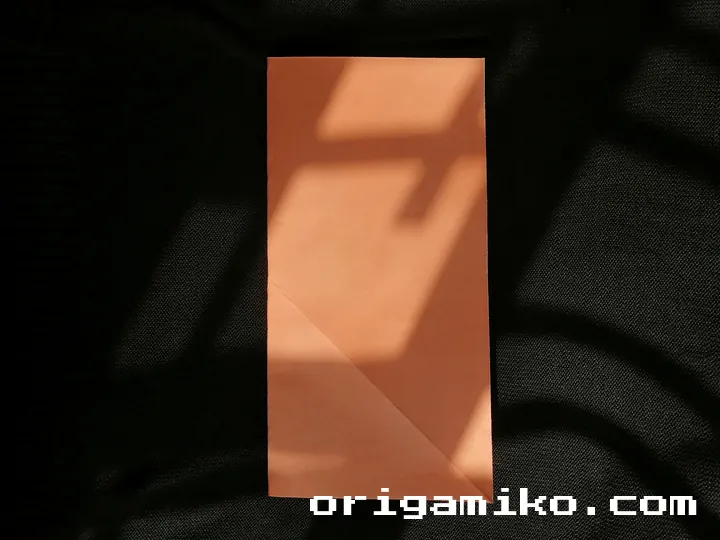
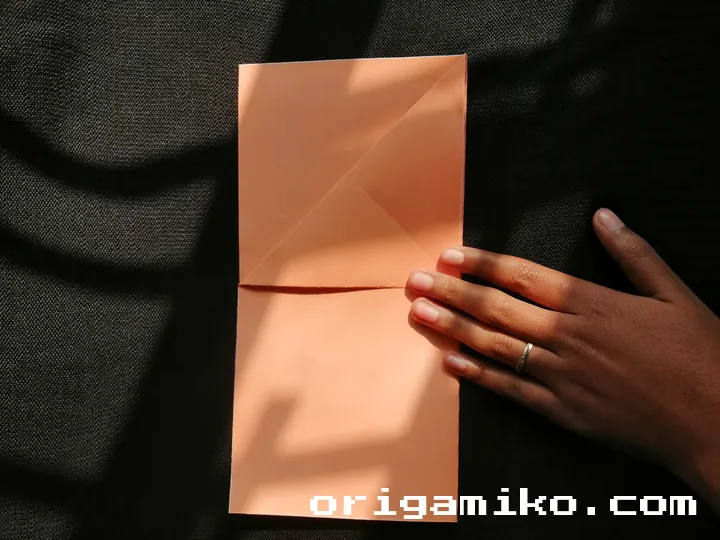
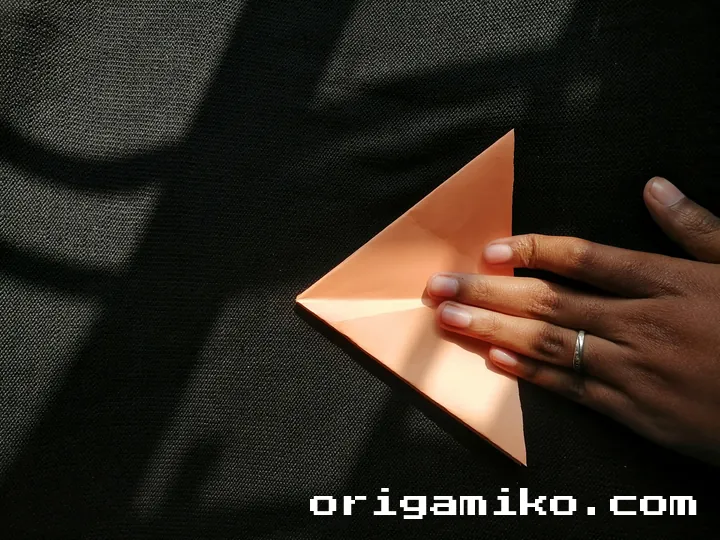
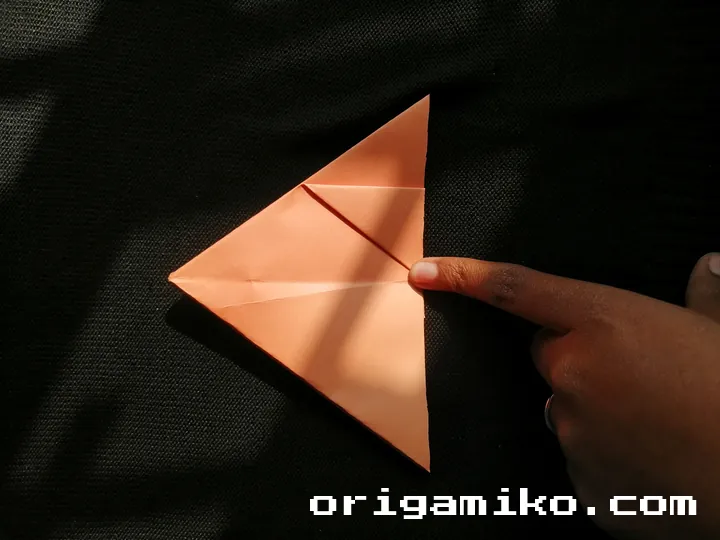
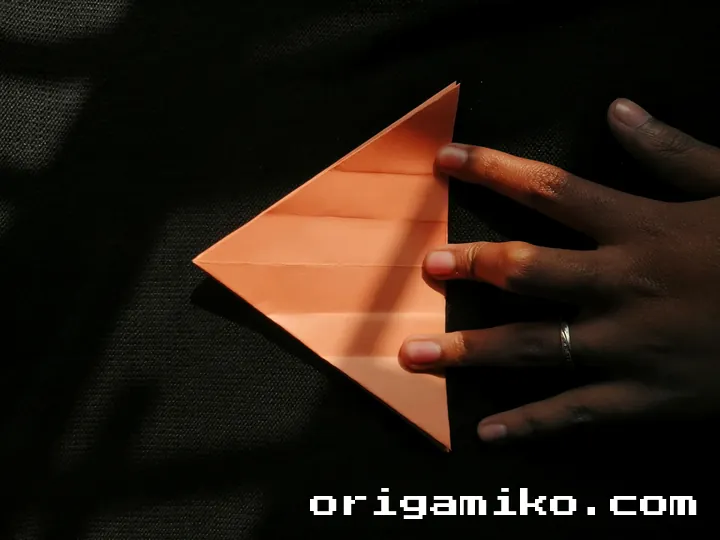
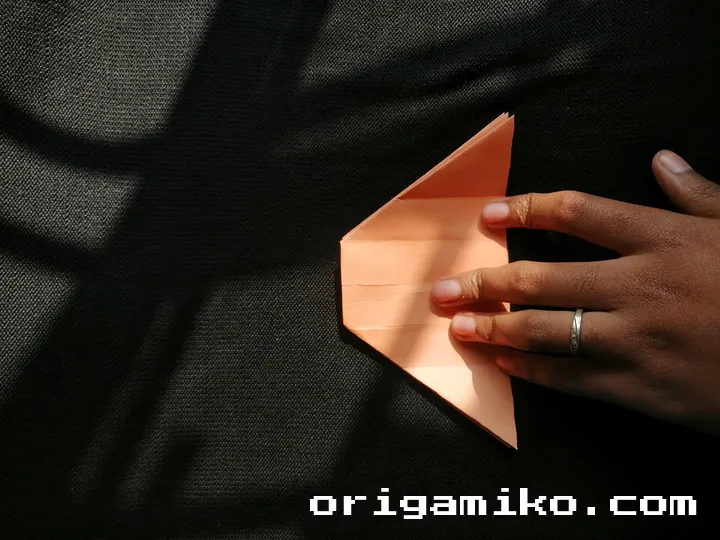
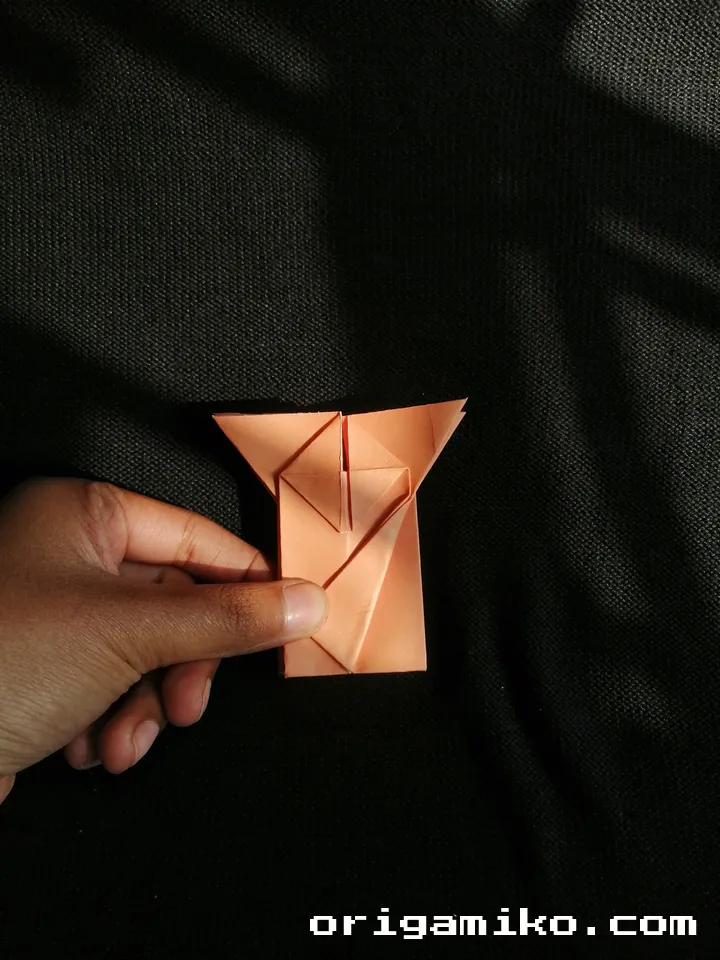
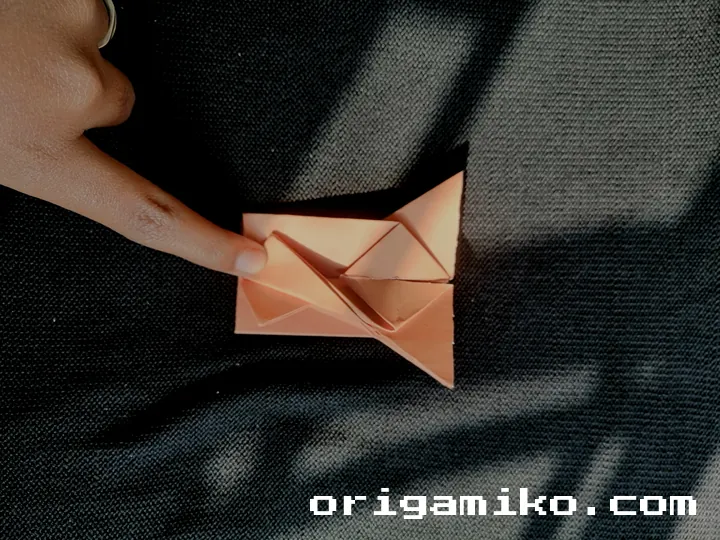
This part might take a little patience. Fold diagonally, then into thirds, and adjust until you get a perfect five-sided shape. Yes, it’s possible. I promise. - Create the Crease Pattern
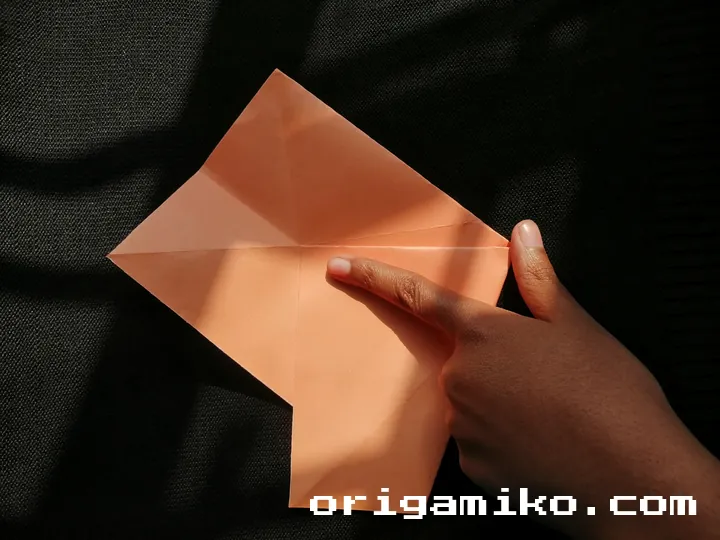
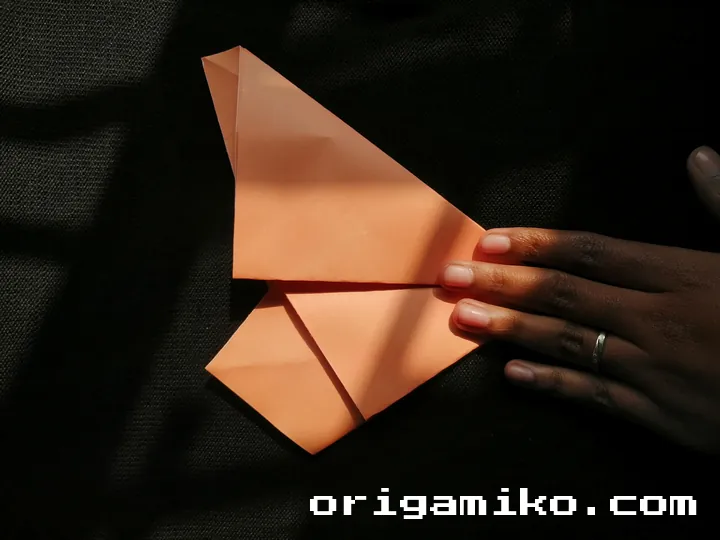
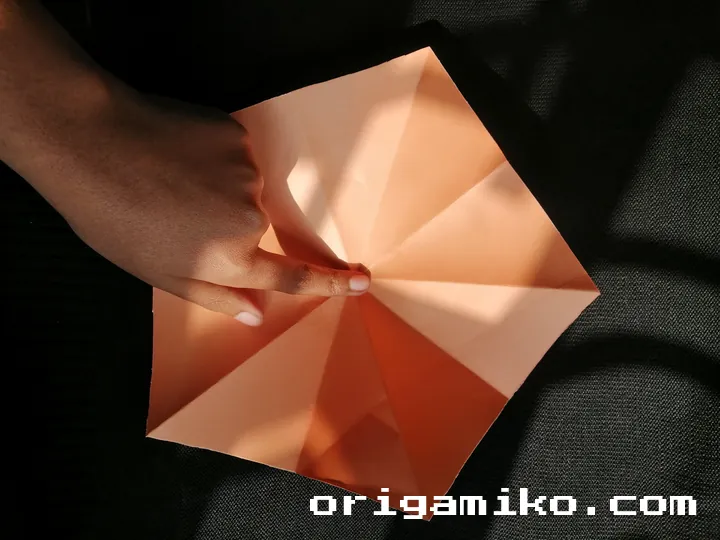
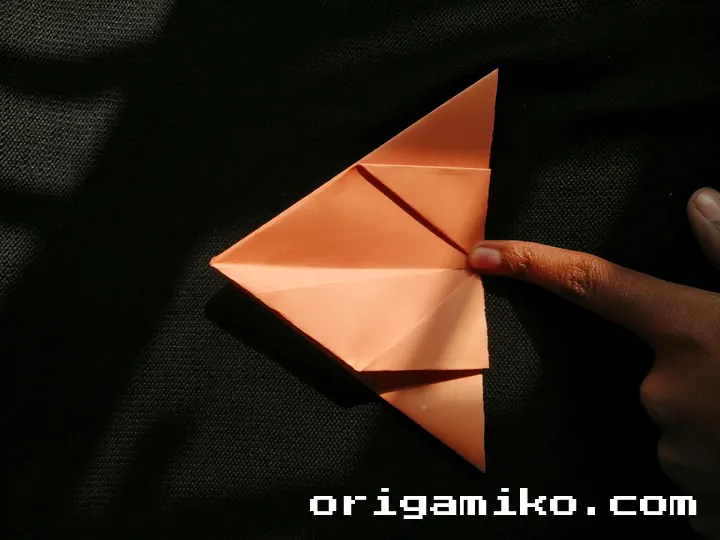
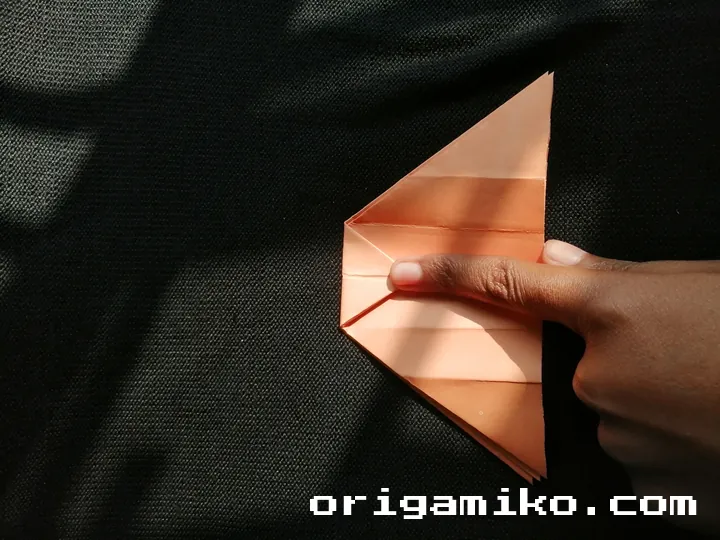
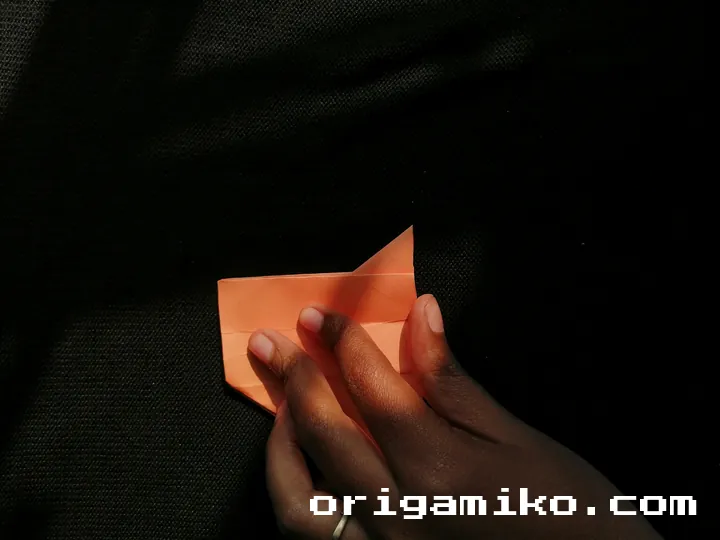
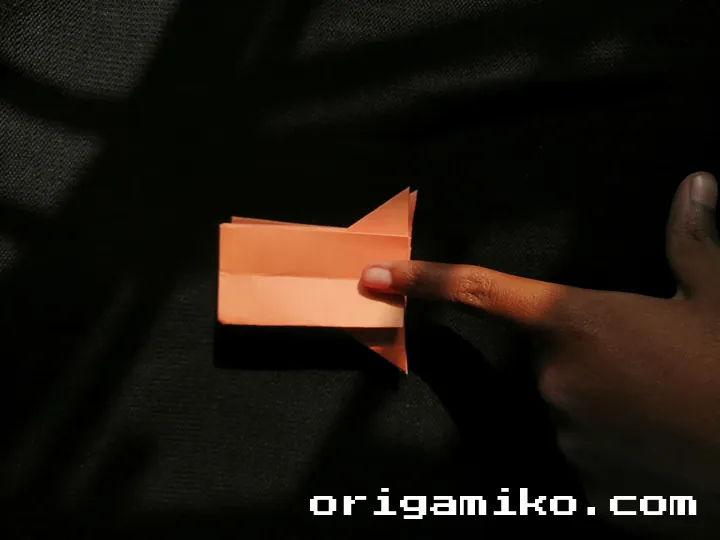
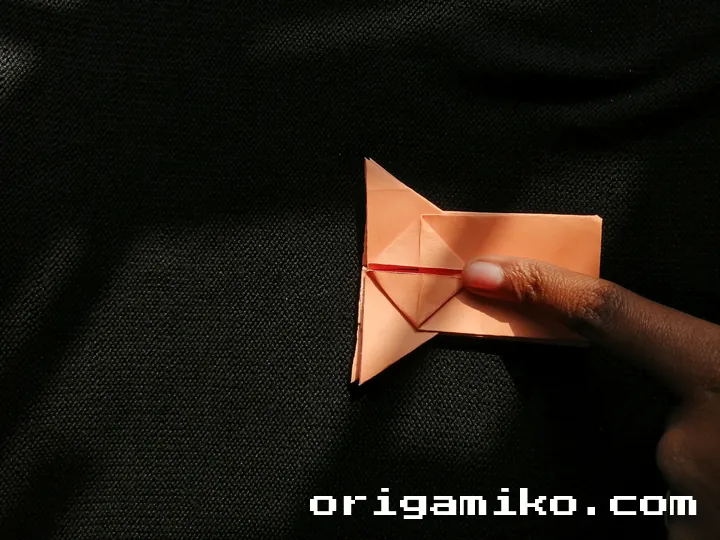
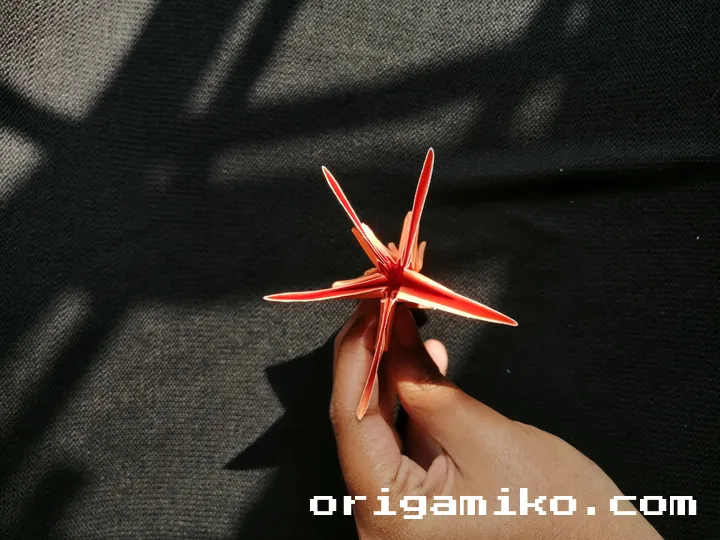
Fold each edge into the center to make a star-like crease. These guide lines will help petals form correctly. Think of it like a roadmap for your flower. - Unfold and Re-Crease into a Small Decagon
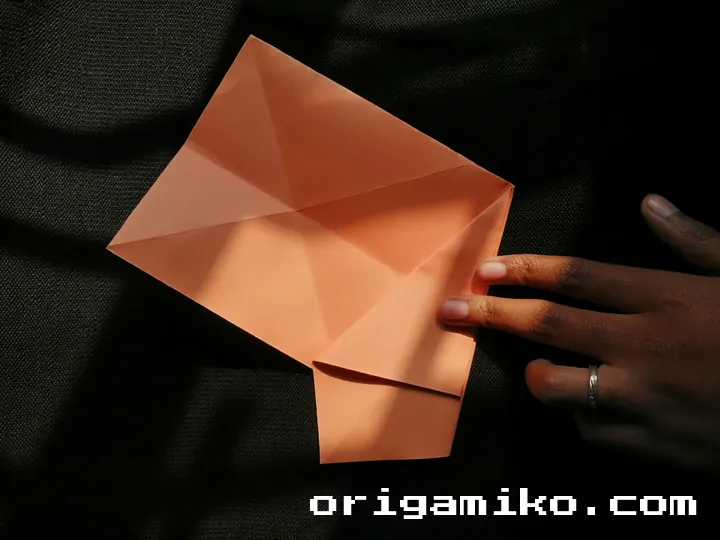
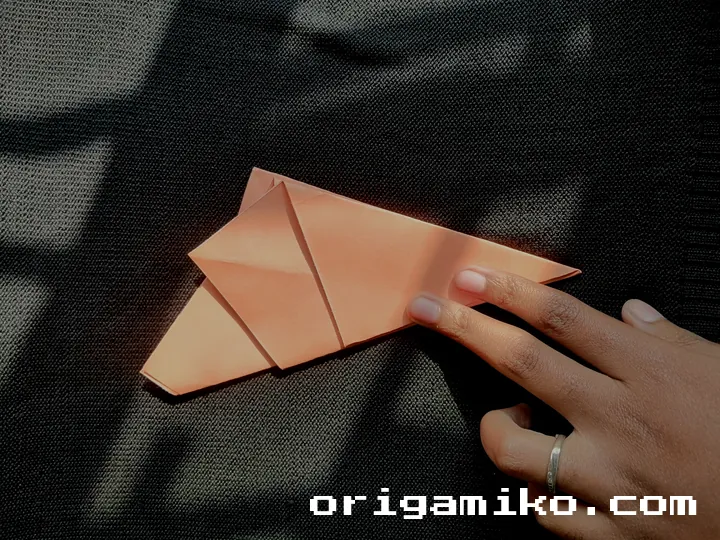
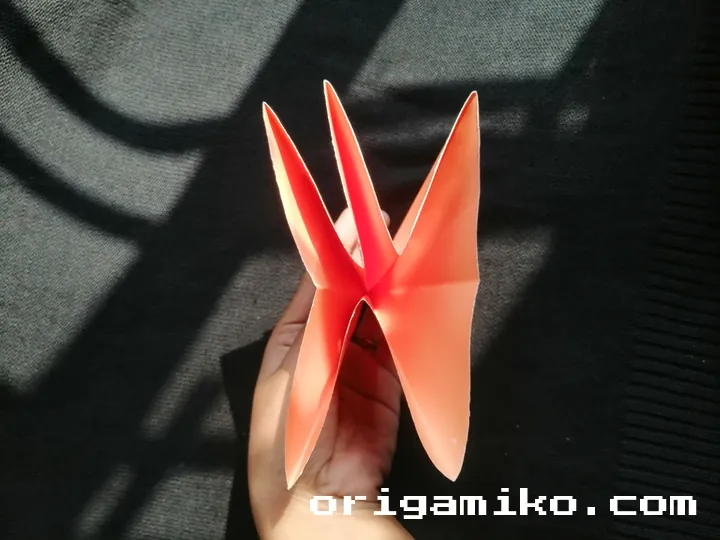
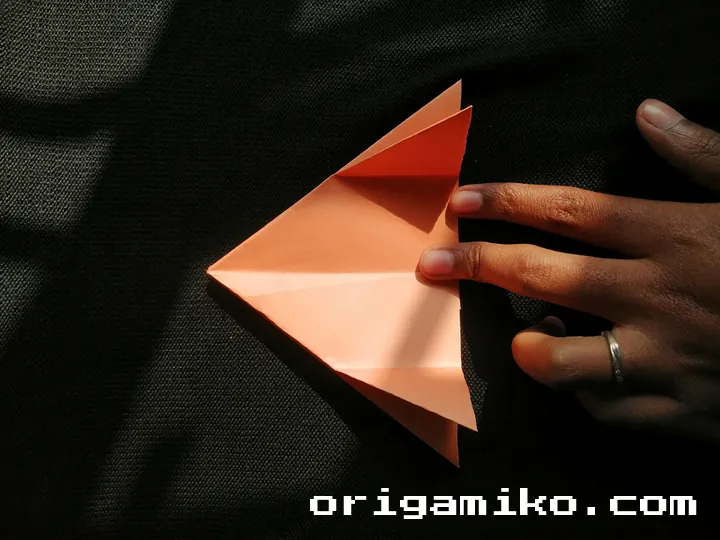
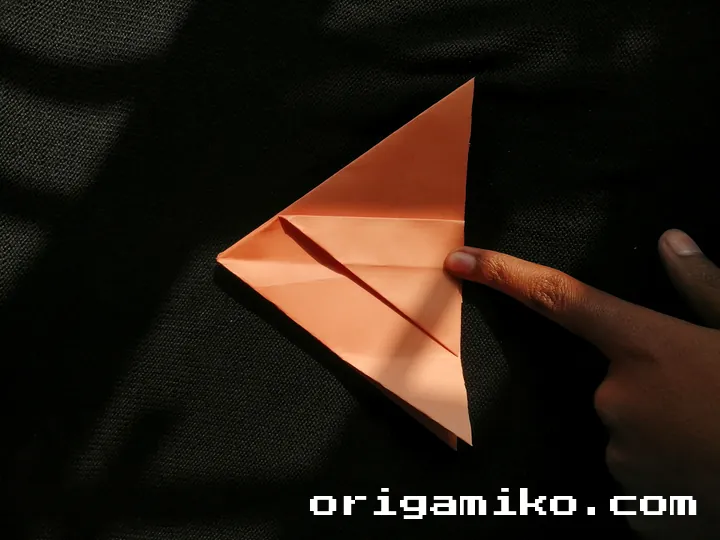
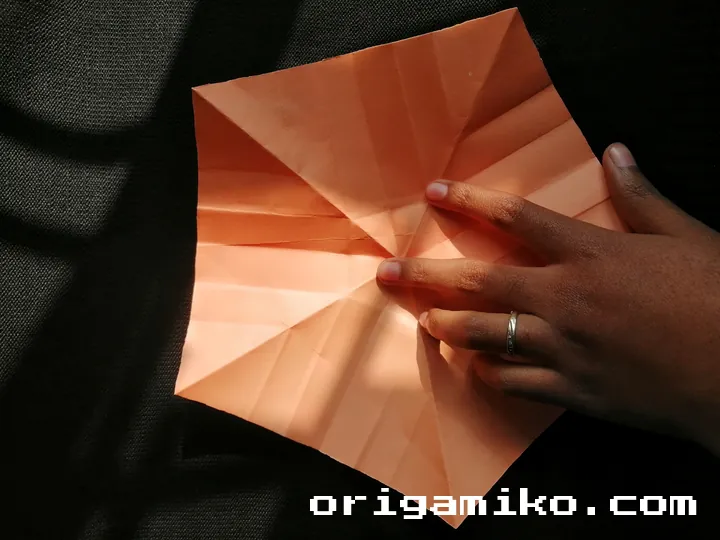
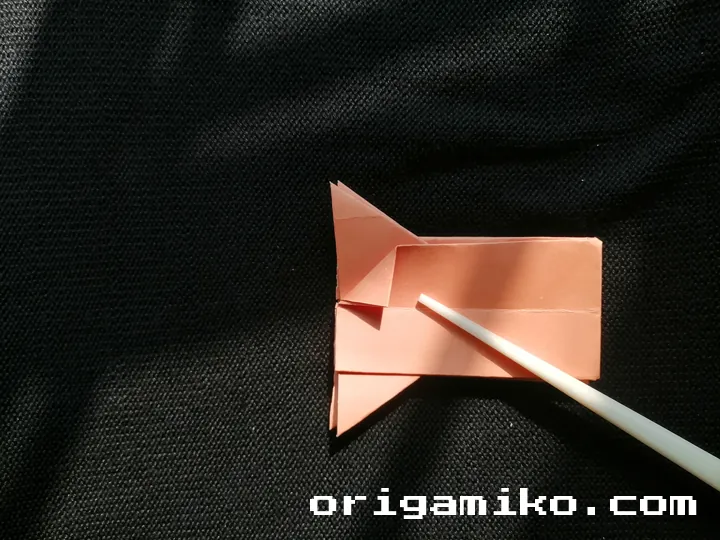
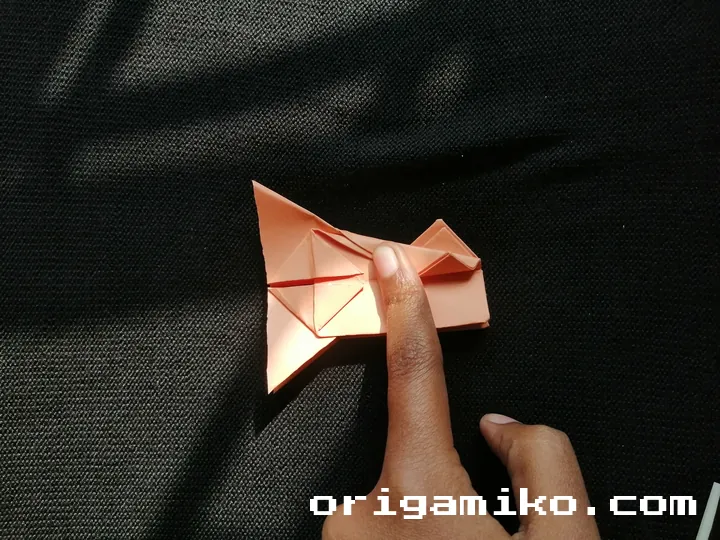
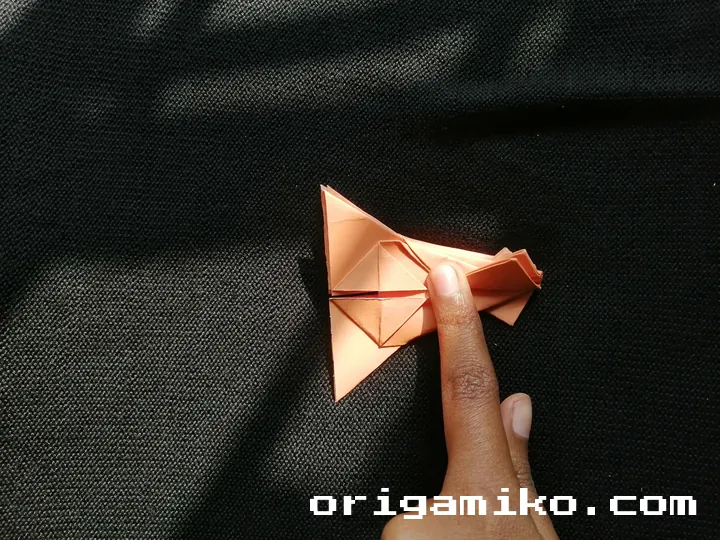
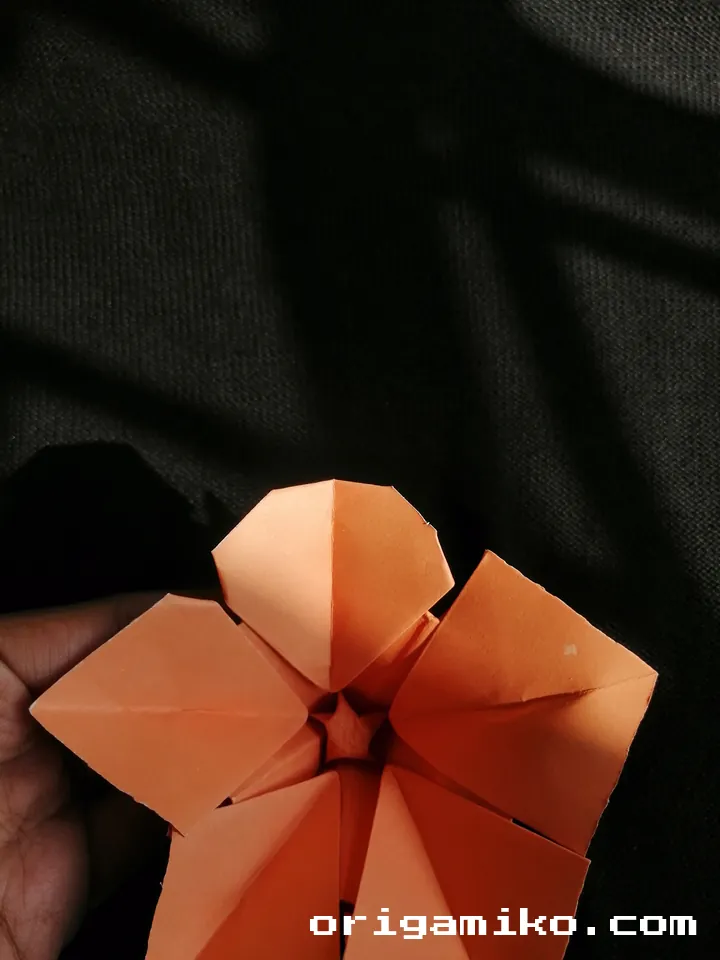
Gently open the paper, then refold along a tighter crease path to form a decagon. It’s basically a smaller, rounded shape now. This step preps the petals. - Peel Each Petal Down
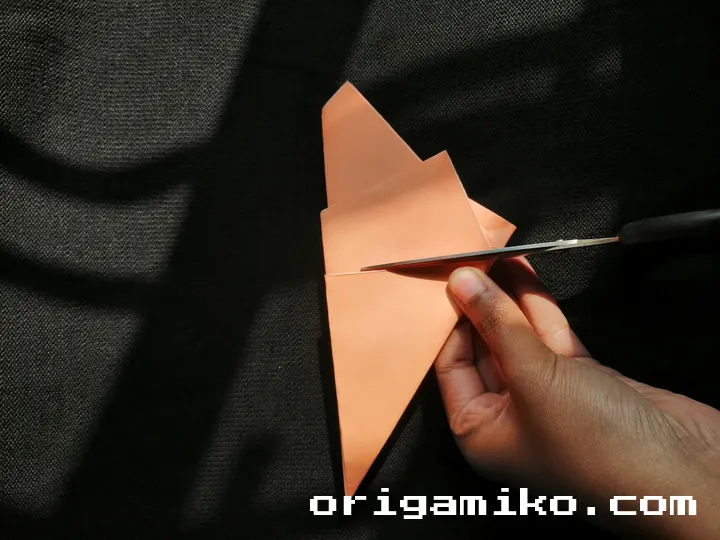
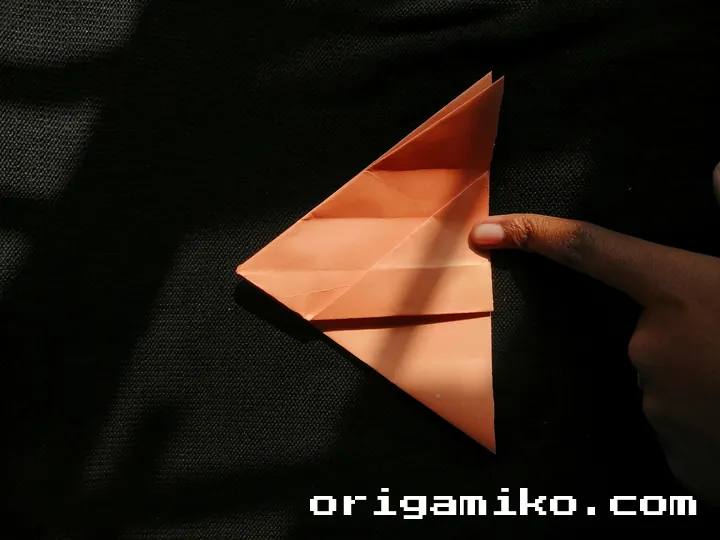
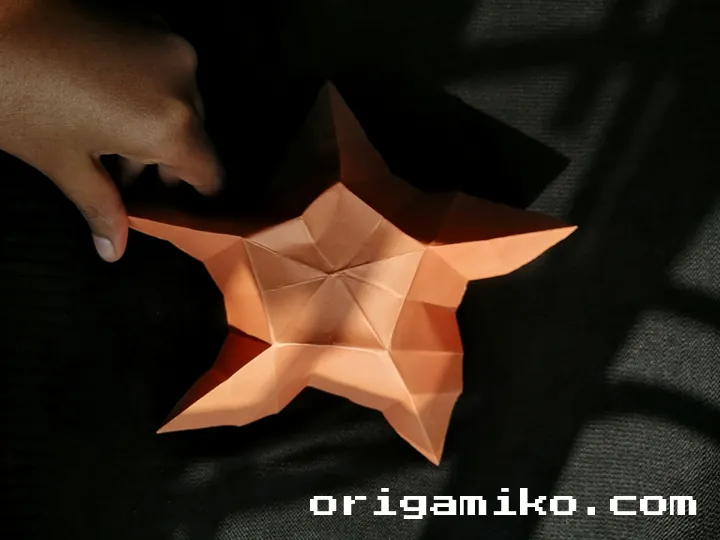
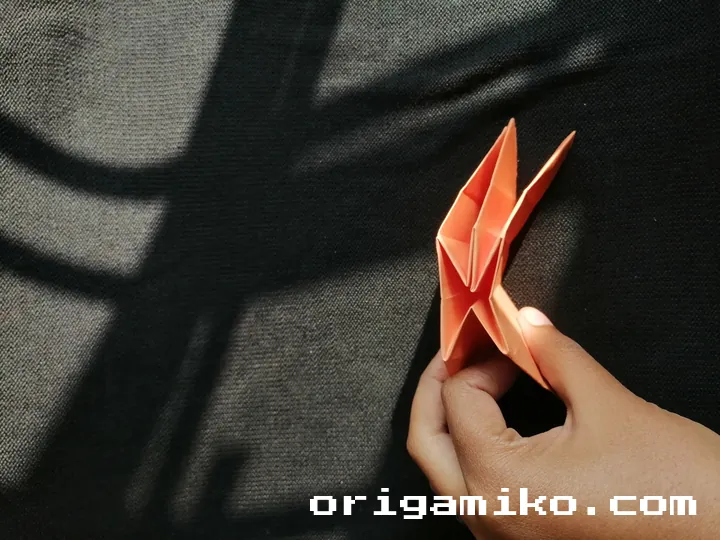
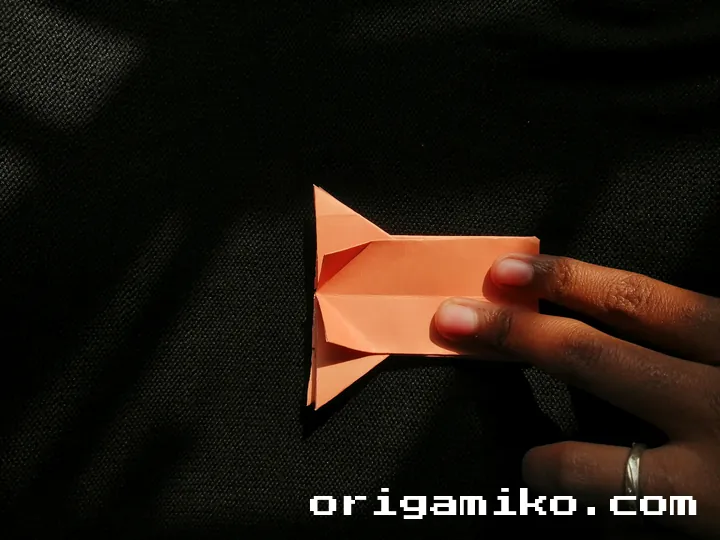
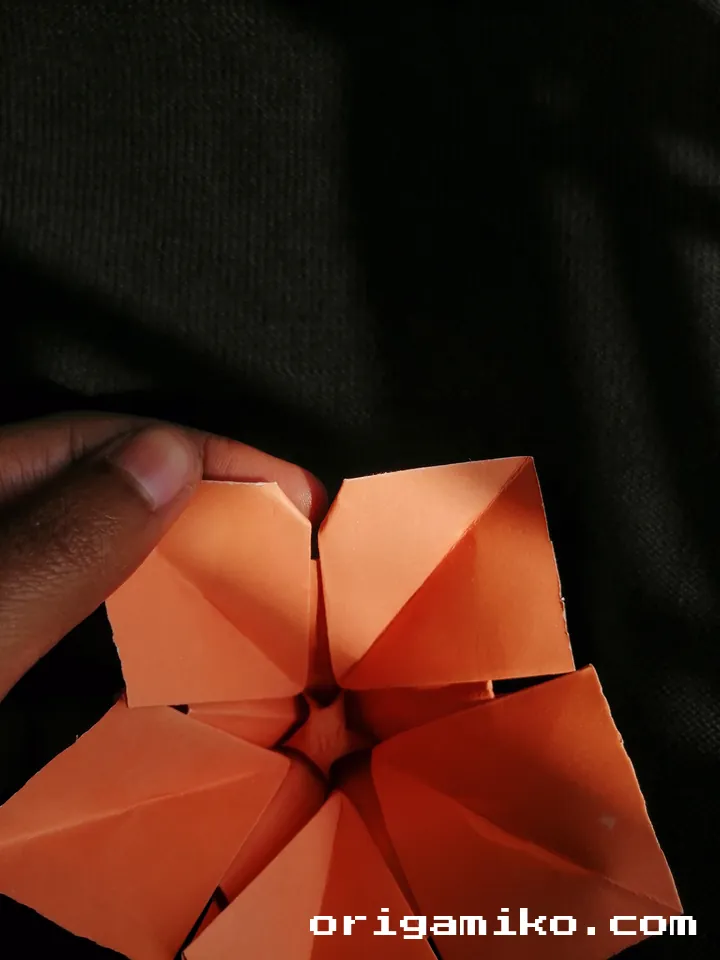
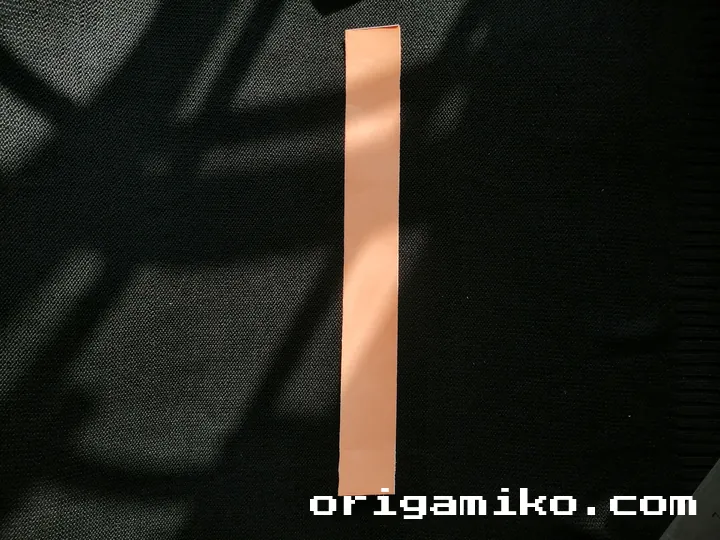
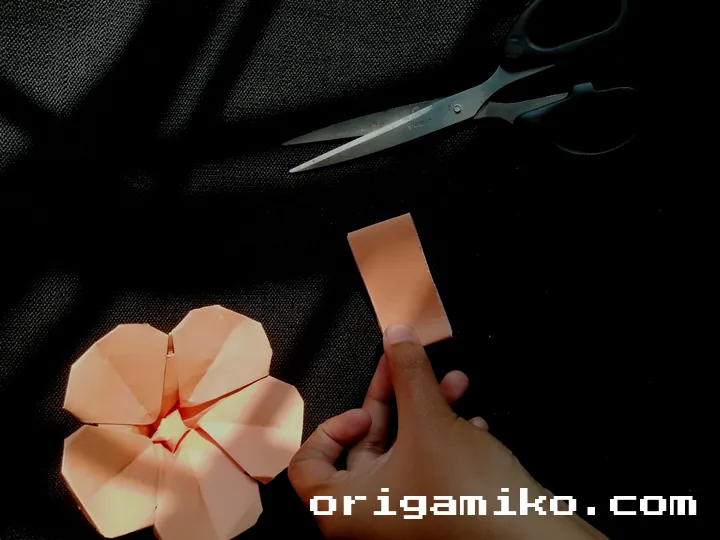
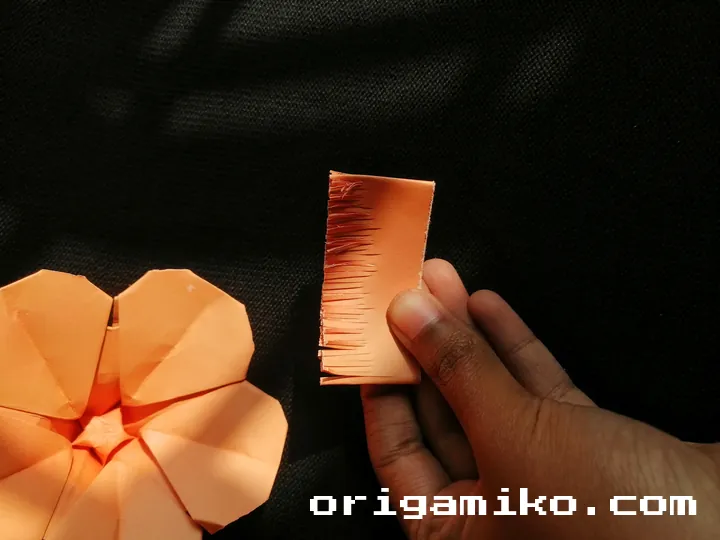
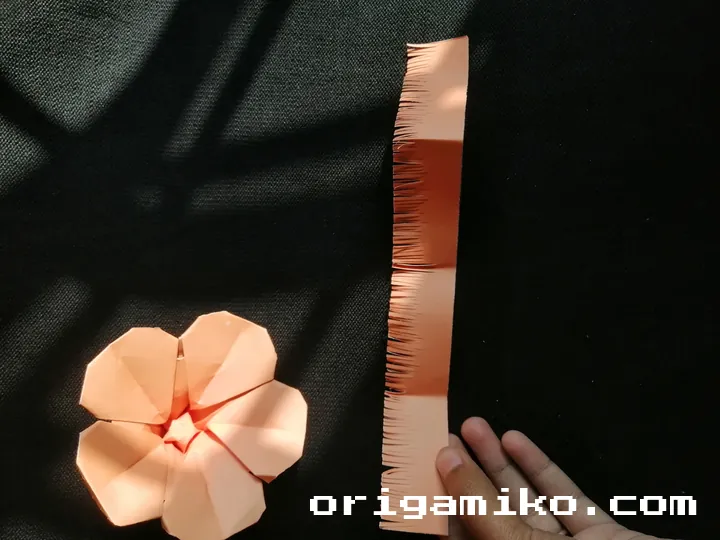
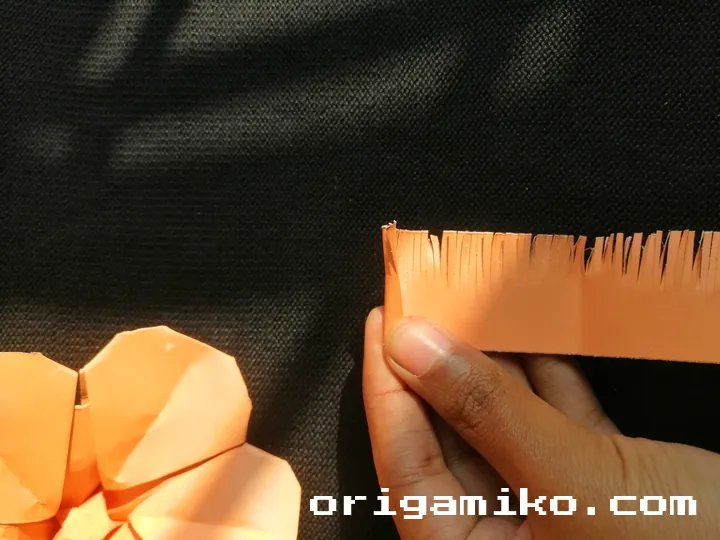
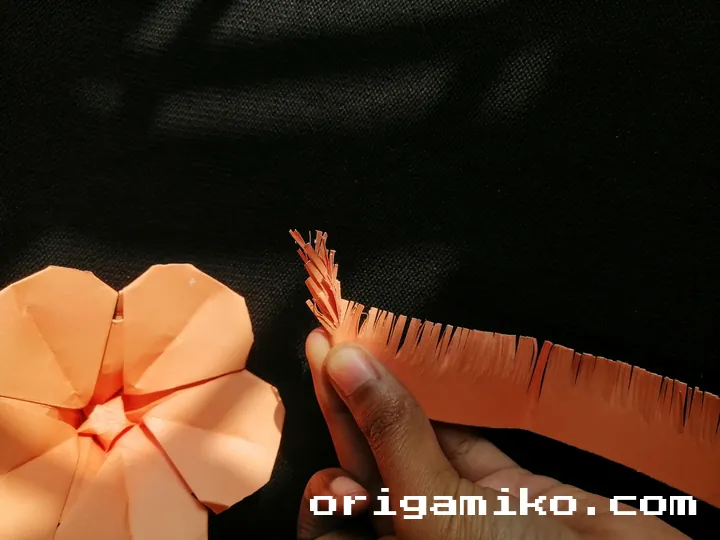
This is the magical moment. One by one, peel down each section to shape the petals. Then fold the corner of each petal inward. Voila! It’s starting to look like a flower. - Make a Flower Pistil
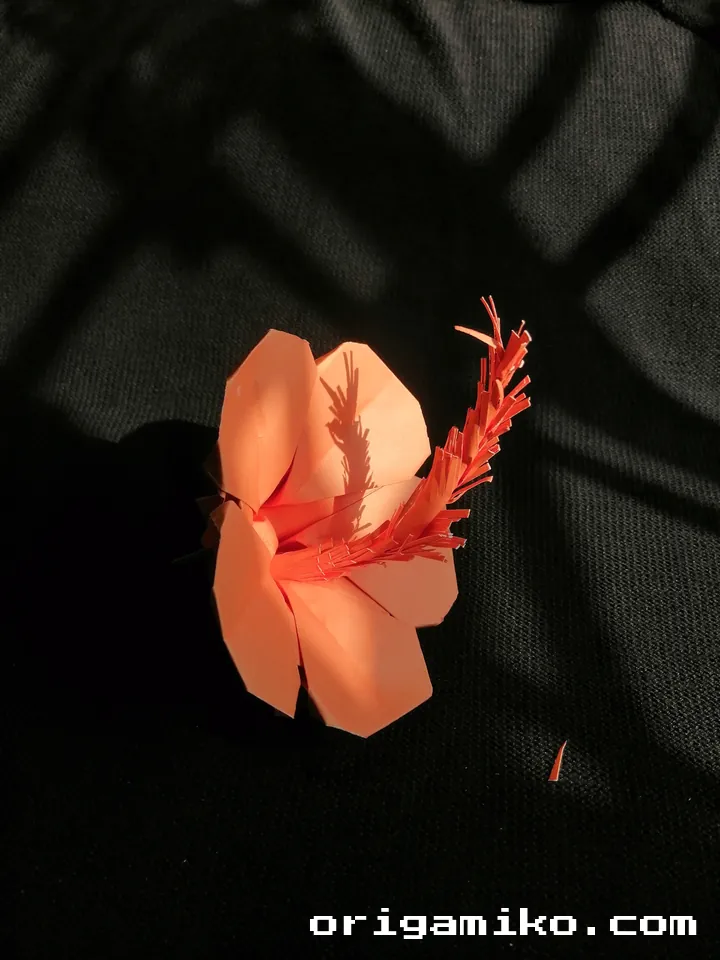
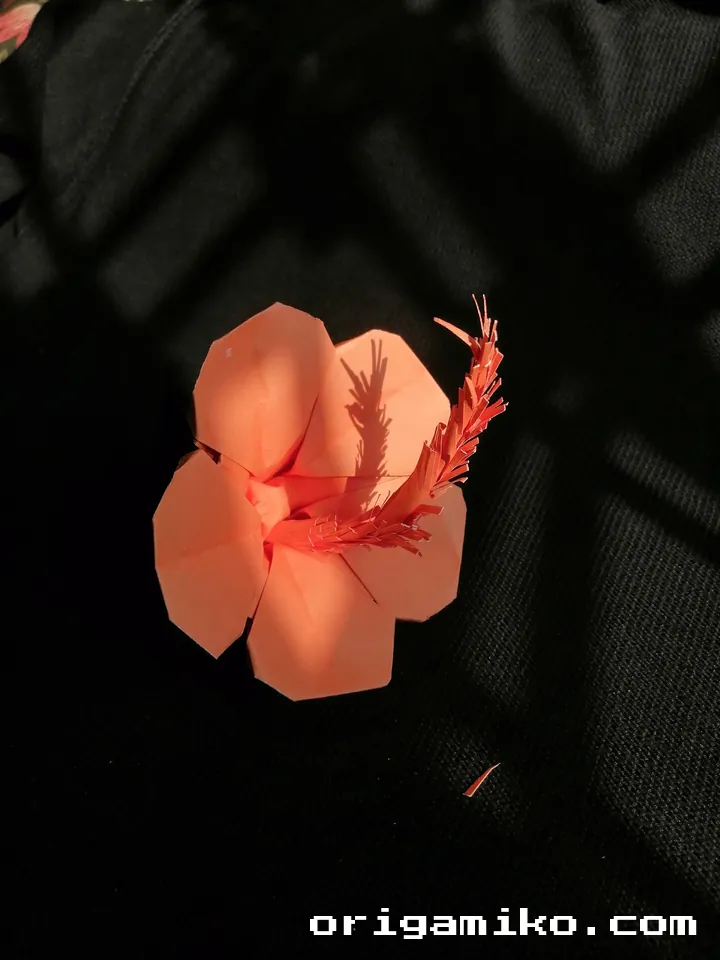
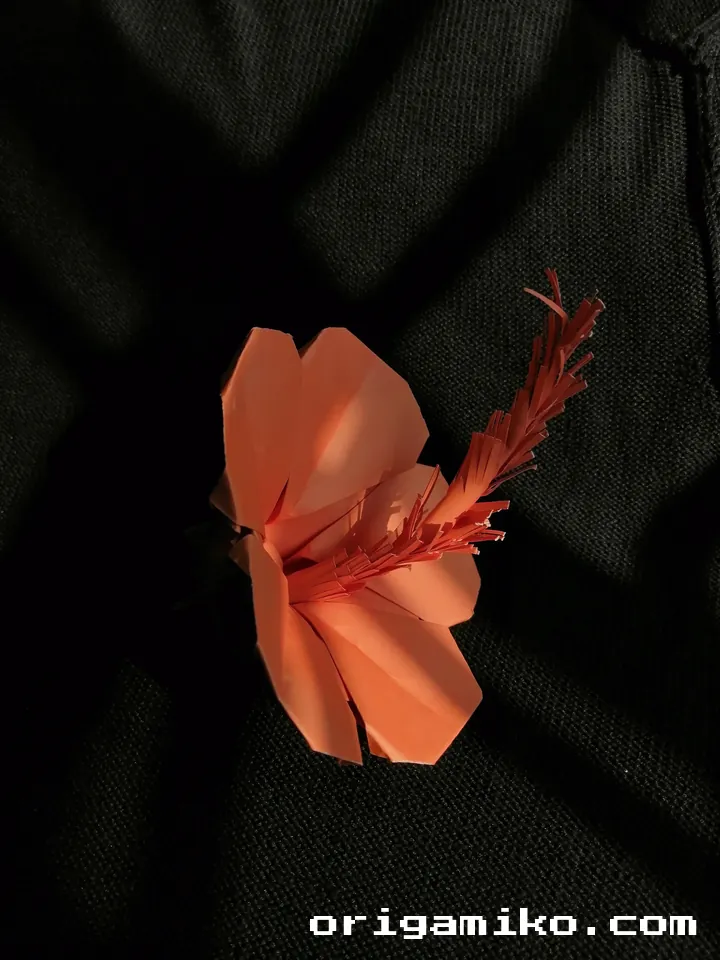
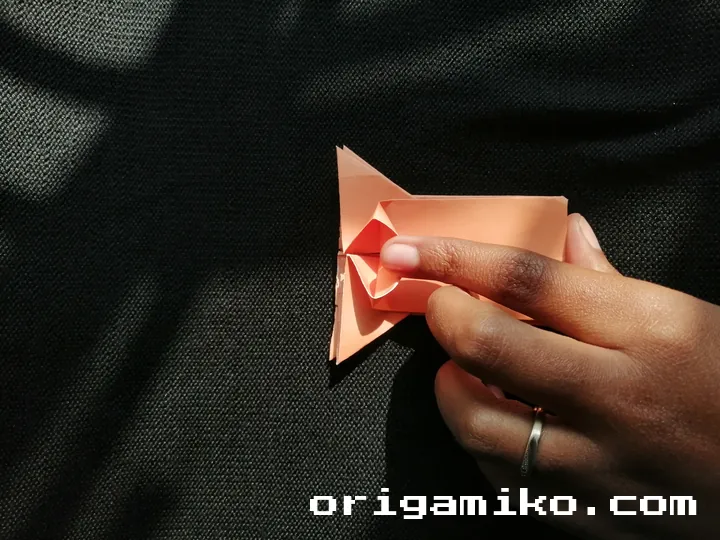
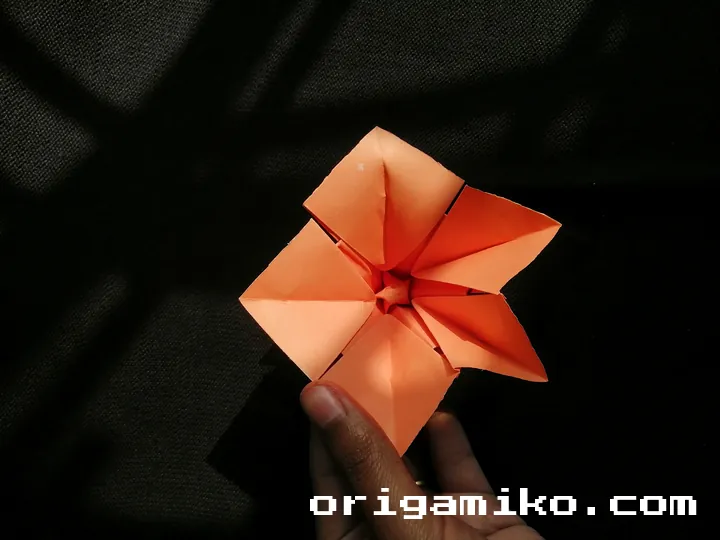
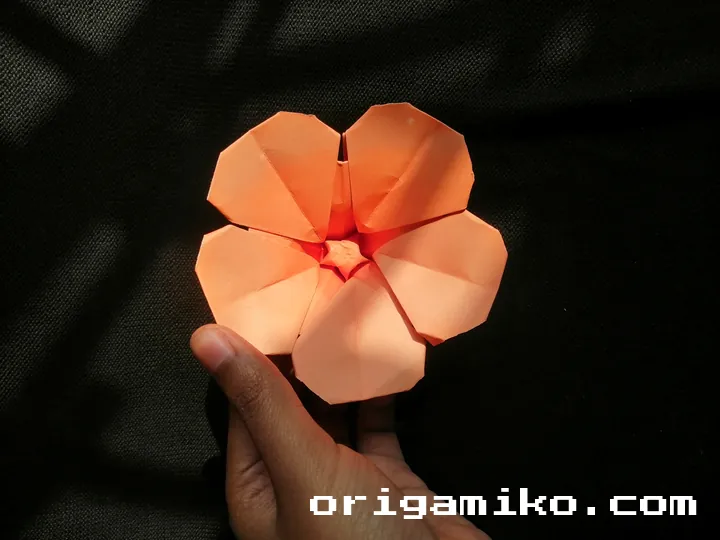
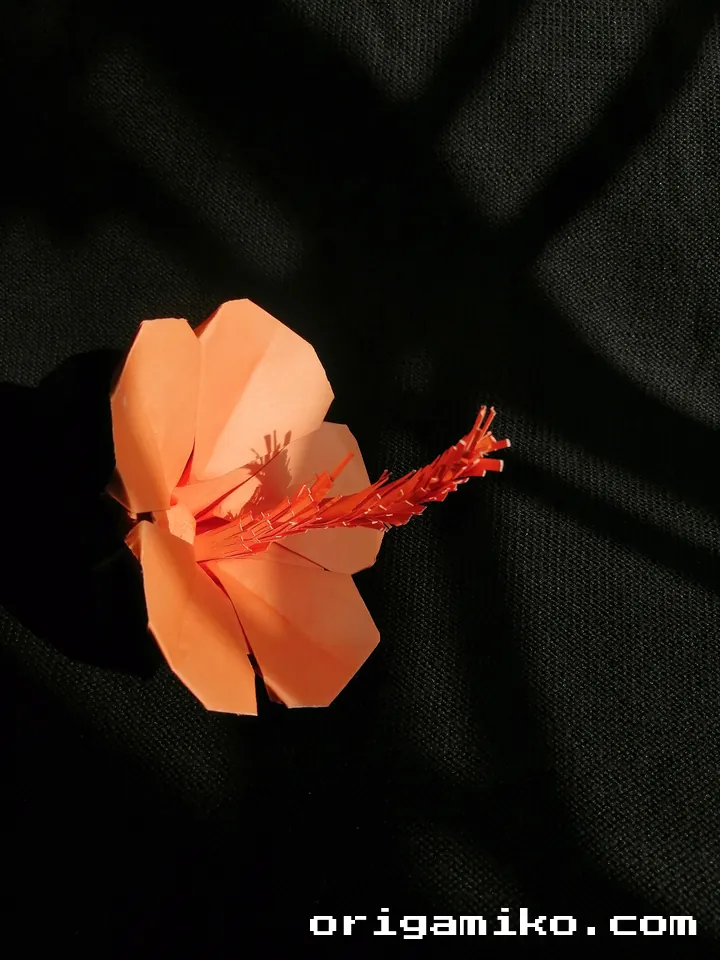
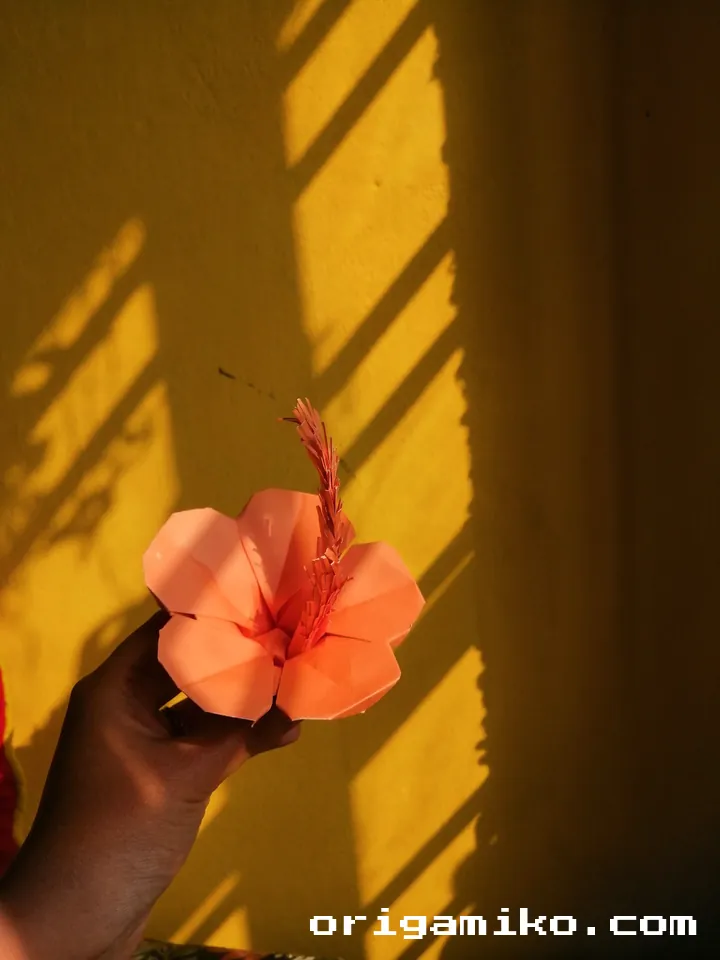
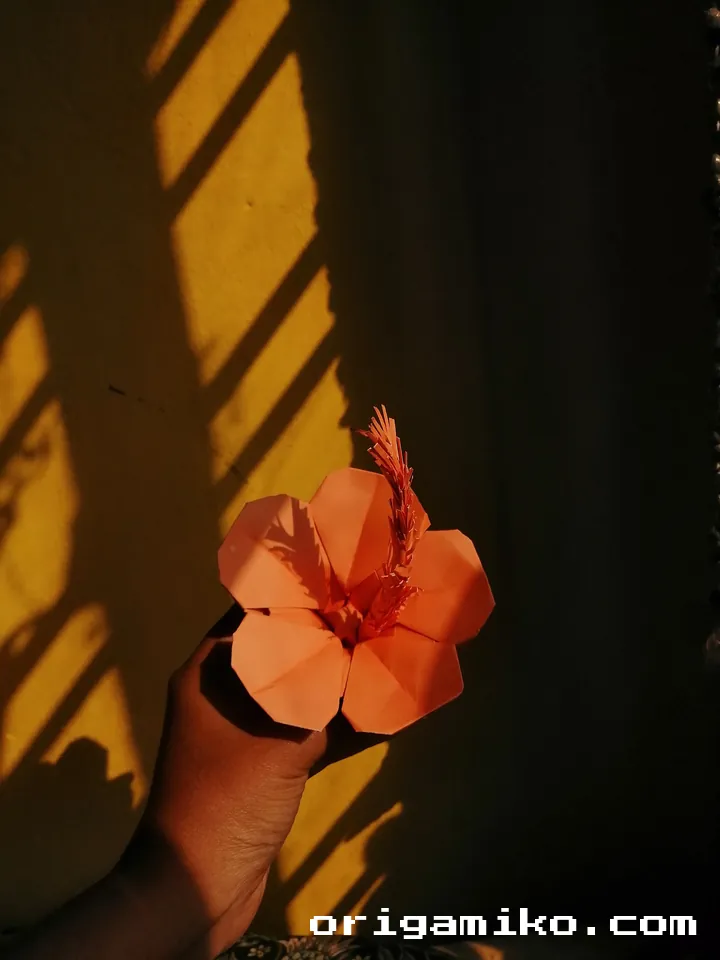
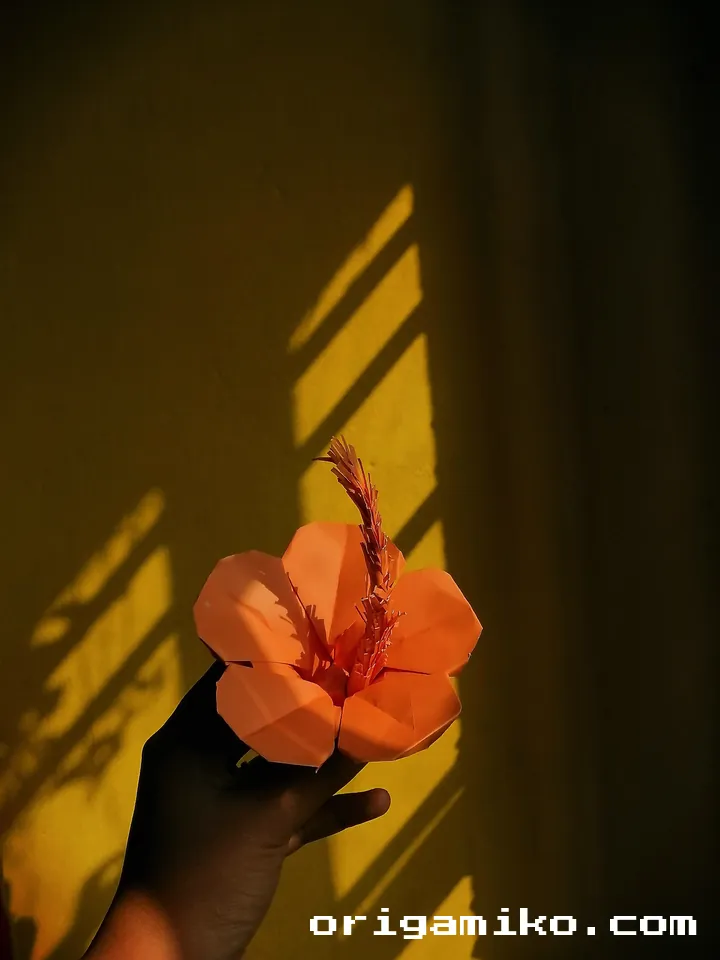
Roll a tiny strip of paper (or use a pencil to draw a spiral in the center). This gives the hibiscus its realistic center. Optional but worth it. - Your Origami Hibiscus Flower Is Ready
Step back and admire it. It’s bright, natural, and handcrafted—all from a single piece of paper. Nice work!

Tips for Success
Want your hibiscus to turn out clean and crisp? These tips help:
- Press folds firmly. A weak crease leads to floppy petals.
- Work on a flat surface. No wrinkly bedsheets here—go for a desk or table.
- Take your time with the pentagon. Getting this right makes the rest a breeze.
- Use tweezers for tiny folds. Seriously helps if your fingers feel too big.
Common Mistakes (And How to Avoid Them)
We’ve all been there. Here’s what can go wrong—and how to fix it:
- Petals tear during peeling.
Fix: Use thicker paper or go slower. - Paper won’t hold shape.
Fix: Try a bone folder to press harder. - Crease lines don’t align.
Fix: Refold carefully. Watch your angles when folding the pentagon. - Flower looks uneven.
Fix: Double-check symmetry early in the process.
Similar Variations You Might Love
Once you master this easy Origami hibiscus flower, why stop? Try these next:
- Origami Rose – Romantic and classic
- Origami Lotus – Layered and spiritual
- Origami Lily – Slim and elegant
- Origami Sakura – The cherry blossom favorite
Each one adds a new fold or twist—literally—and gives you more creative freedom.
FAQs
How long does it take to make one flower?
About 10–20 minutes for beginners. Once you’re used to the folds, you’ll fly through it.
Can I use regular printer paper?
You can, but origami paper works better. It’s thinner and folds without cracking.
What if my pentagon looks uneven?
Refold or trim slightly to balance it. Precision in the early steps helps a lot.
Is glue necessary for the pistil?
Not at all. You can twist or fold it into place, but glue helps hold it if you’re gifting it.
Final Thoughts
There’s something truly magical about turning a flat square into a blooming flower. With just a few folds, some patience, and a bit of creativity, you now know how to make Origami hibiscus flower creations that wow.
So grab your paper, clear your space, and let your creativity unfold. That easy Origami hibiscus flower isn’t just a project—it’s a little celebration of beauty in your hands.
Got questions? Want to share your version? Let me know—I’d love to hear how your hibiscus turned out!