


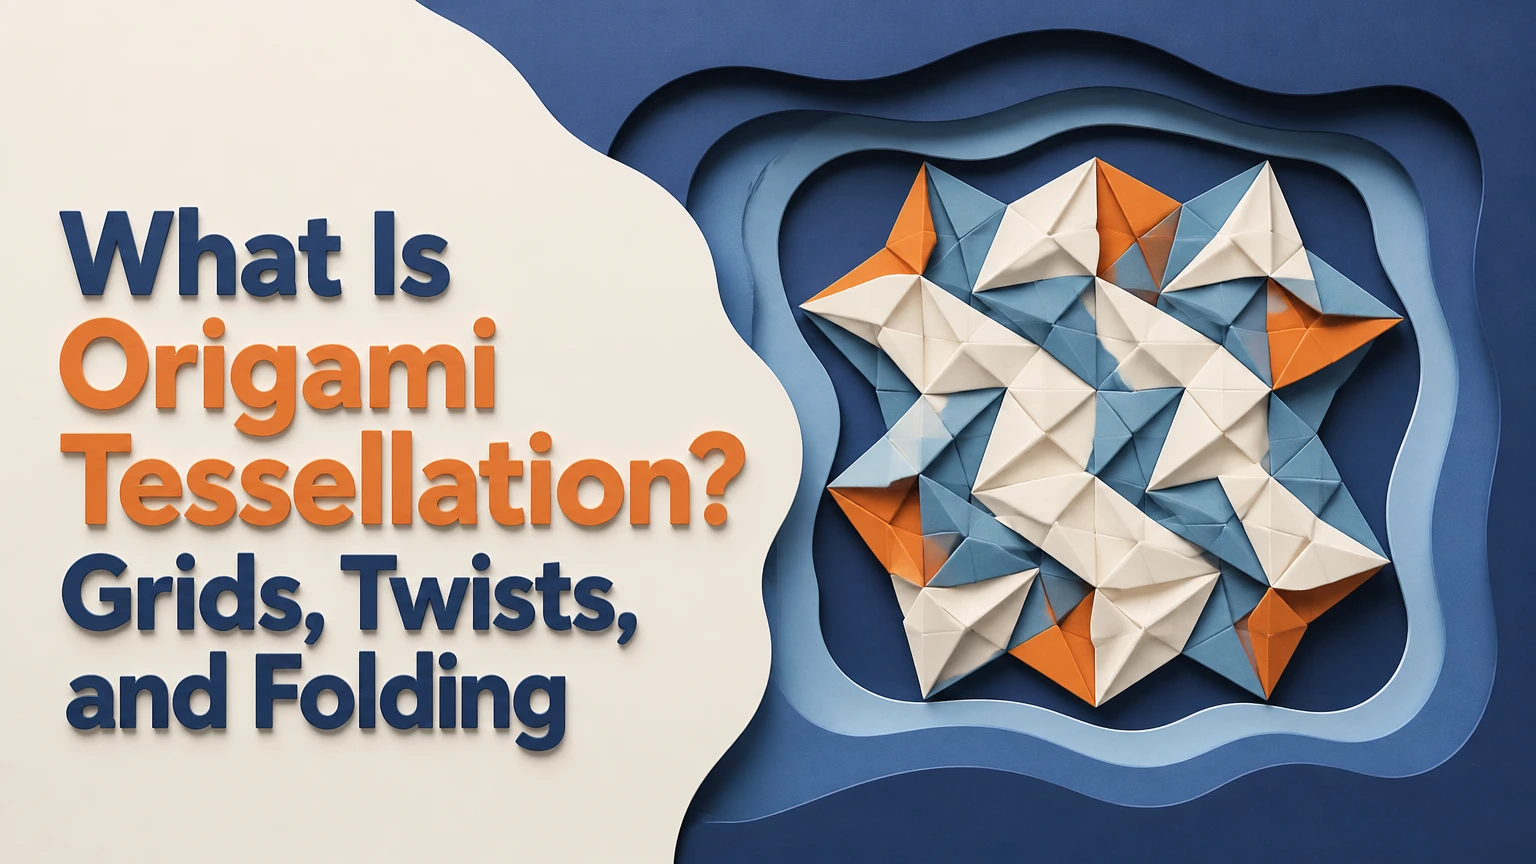
An origami tessellation is a geometric paper-folding design that repeats a motif across one sheet, usually without cutting or gluing. Instead of forming an animal or object, the folder builds a continuous field of pleats, twists, and polygonal cells that can remain flat, become corrugated, or open into translucent windows.
Key Facts at a Glance
- Origami tessellations repeat a geometric unit across a sheet rather than creating one isolated figurative model.
- A tessellation depends on a planned crease pattern, usually based on square, triangular, or hexagonal geometry.
- Mountain folds, valley folds, pleats, and twists determine whether the pattern collapses flat or forms relief.
- A square sheet does not need to be cut into a hexagon for a hexagonal tessellation; many designs use a triangular grid on a square sheet.
- Typical beginner projects use a 4 x 4 or 8 x 8 repeat structure and take 30-90 minutes.
- Thin, long-fiber paper usually handles dense tessellations better than ordinary copy paper.
What Is Origami Tessellation?
Origami tessellation is the practice of folding a repeating, connected pattern into a single sheet of paper. The visible units may resemble triangles, squares, hexagons, stars, flowers, scales, or woven fabric, but the design remains a continuous folded surface rather than a collection of separate pieces.
A mathematical tessellation covers a plane with repeated shapes and leaves no gaps or overlaps. An origami tessellation applies that idea to paper, where the plane is first marked with creases and then transformed into a folded surface. The result can be completely flat, raised like a relief, or elastic enough to expand and contract.
Traditional origami often uses a crease pattern to produce a recognizable subject, such as a crane or box. Origami tessellation uses repetition as the main subject. A single twist may be interesting, but the repeated relationship between neighboring twists creates the characteristic texture.
The term does not require one universal grid, one paper size, or one final shape. Designers may use square, triangular, hexagonal, radial, or irregular layouts, provided the folds connect into a coherent repeating structure. Most classical tessellations also avoid cutting, although a cut version belongs more accurately to kirigami or hybrid paper sculpture.
How Does Origami Tessellation Work?
Origami tessellation works by assigning mountain and valley folds to a periodic crease pattern, then allowing intersections to rotate and collapse into repeated three-dimensional units. The pattern succeeds only when the local folds can coexist without impossible overlaps, excessive stretching, or paper failure.
The grid creates the repeat
A grid provides measured spacing and consistent angles. A square grid commonly uses 90-degree intersections, while a triangular grid uses 60-degree and 120-degree angles. Designers repeat a unit across the sheet, but the repeat may be staggered, mirrored, or rotated instead of copied in a simple row.
The grid is a planning system, not necessarily a visible feature in the finished work. Dense patterns can contain hundreds of small cells, and a small spacing error near the center can shift the alignment at the edges.
Pleats create movement
A pleat is a pair of nearby parallel folds, one mountain and one valley. Repeated pleats produce an accordion-like strip that can compress in one direction and expand in another. Pleats also guide how paper travels around a twist.
A crease pattern records direction, but it does not automatically guarantee a clean collapse. The paper still has thickness, friction, and memory. Those physical factors explain why a mathematically valid diagram may feel difficult in real paper.
Twists resolve intersections
A twist is a small polygonal region that rotates as surrounding creases move. In a common hexagonal twist, several creases converge around a central polygon, allowing the neighboring pleats to change direction without simply lying on top of one another.
The central polygon may close tightly, remain partially open, or spread into a window. Twist geometry controls the final texture, light transmission, and flexibility. It is the basic local mechanism behind many origami tessellations.
Collapse converts the map into a surface
During collapse, the folder activates several pre-creased areas and guides them into their intended mountain and valley relationships. A small tessellation may collapse one twist at a time; a larger design may require simultaneous manipulation across a wide area.
The useful mental model is not “fold every line independently.” It is “coordinate neighboring faces so the entire sheet can move.” This difference explains why forcing one stubborn intersection often damages adjacent units.
What Are the Main Types of Origami Tessellation?
The main types are classified by grid geometry, twist structure, and final form. Grid type predicts the angles and repeat pattern, while twist type predicts whether the surface looks closed, open, flat, or corrugated.
Grid types
| Grid family | Common angles | Typical repeat | Visual result |
|---|---|---|---|
| Square | 90 degrees | Squares, bricks, checker units | Orthogonal, pixel-like texture |
| Triangular | 60 and 120 degrees | Triangles, diamonds, stars | Faceted, crystalline surface |
| Hexagonal | Six-sided cells with triangular support lines | Honeycomb and flower units | Organic, radial, cellular texture |
| Radial | Varies by design | Rotated spokes and rosettes | Circular relief and star patterns |
A hexagonal tessellation often relies on a triangular crease network because six equilateral triangles meet around a point. Calling every 60-degree design a “hexagon grid” can hide that distinction. The visible cell may be hexagonal even when the construction lines are triangular.
Flat twists
Flat tessellations compress close to two dimensions. They work well for framed panels, greeting cards, studies of symmetry, and backlit displays because the surface has a predictable silhouette and limited depth.
Flat does not mean easy. Dense flat work demands accurate creases, controlled paper thickness, and careful edge alignment. A design can be geometrically correct yet fail to lie flat because the paper has accumulated bulk at intersections.
Open-back twists
An open-back twist leaves a central opening or exposes the reverse side of the paper. Light can pass through the openings, creating contrast between opaque folds and translucent windows.
Open-back patterns are useful for screens, lanterns, and window panels, but they have less structural resistance at the center of each unit. A thin paper may stretch around the opening if the folder presses too aggressively.
Corrugations
Corrugated tessellations form repeated ridges rather than a fully flattened panel. Corrugations can flex like an accordion, making them suitable for sculptural surfaces, kinetic studies, and some lampshade concepts.
The relief usually needs a support method when used as an object. Paper clips, edge locks, framing, or a backing structure may hold the intended depth. Heat from a lamp can also deform paper, so an origami shade requires low-temperature LED lighting and safe clearance.
| Final form | Typical depth | Flexibility | Best application | Main limitation |
|---|---|---|---|---|
| Flat twist panel | 0-5 mm | Low to moderate | Framing and study panels | Edge alignment is unforgiving |
| Open-back panel | 2-10 mm | Moderate | Backlighting and screens | Open centers weaken the sheet |
| Corrugated relief | 10-50 mm | High | Sculpture and kinetic surfaces | Edges often need support |
| Folded tube or canopy | 30-150 mm | Moderate | Prototypes and installations | Shape retention needs a frame |
Which Paper and Tools Should You Use?
Thin, strong paper with long fibers is usually the best choice for dense origami tessellations. Paper around 40-80 gsm is practical for many studies, while heavier stock can help a large, simple relief retain shape but becomes difficult at tightly packed intersections.
Paper weight alone does not predict performance. A 60 gsm glassine sheet, a 60 gsm handmade washi, and a 60 gsm short-fiber office sheet can crease and stretch very differently. Grain direction, coating, moisture response, and fiber length matter.
| Material | Typical weight | Main property | Best use | Limitation |
|---|---|---|---|---|
| Copy paper | 75-90 gsm | Cheap and available | Large-grid practice | Bulk and fiber cracking |
| Glassine | 40-60 gsm | Smooth and translucent | Open-back and backlit work | Can split at sharp folds |
| Tant | 70-80 gsm | Crisp, colored surface | Beginner twists | Limited size for large layouts |
| Elephant Hide | 100-120 gsm | Strong and durable | Large, low-density reliefs | Too thick for many dense grids |
| Mulberry washi | 40-90 gsm | Long, tough fibers | Complex custom work | Quality varies by supplier |
Useful tools include a hard cutting mat, ruler, pencil, soft graphite, and bone folder. A blunt tool is safer than a sharp blade for marking because a cut changes the paper topology and can turn a folding project into kirigami.
How should you prepare the sheet?
Start with a clean square whose edges differ by no more than about 0.5 mm for a small, dense study. Use a hard, flat surface and make reference folds from edge to edge rather than estimating the center by eye.
For a triangular layout, mark equal divisions along the edges and connect them at 60-degree angles. A printed crease pattern can improve repeat accuracy, but printing introduces its own scale error, so verify one known distance with a ruler before folding.
How Do You Fold a Beginner Origami Tessellation?
A beginner should start with a low-density square-twist or simple hydrangea-style pattern, using a 4 x 4 or 8 x 8 repeat rather than a highly detailed 64 x 64 layout. Expect 30-90 minutes for the first attempt, including grid preparation and collapse.
Before You Start
| Requirement | Typical beginner specification |
|---|---|
| Paper | One 20 x 20 cm square, 60-80 gsm |
| Tools | Ruler, pencil, bone folder, hard surface |
| Grid | 4 x 4 or 8 x 8 repeat |
| Time | 30-90 minutes |
| Cost | Approximately $1-$5 for practice materials |
| Difficulty | Beginner to lower intermediate |
Step 1: Make an accurate square
Trim or select a square sheet and inspect its corners. Fold the sheet diagonally once, then compare the edges; a visible mismatch indicates that the sheet is not square enough for precise repetition.
You will know it worked when both diagonals meet cleanly at the same center point. A common mistake is beginning with a rectangular sheet and trying to compensate through later folds.
Step 2: Establish the base grid
Divide each edge into equal intervals, then transfer the divisions across the sheet with light creases. Fold from the center outward, checking that each new line meets the corresponding edge point.
You will know it worked when the smallest grid cells have consistent dimensions. Do not press hard during this stage if the paper surface marks easily.
Step 3: Add the twist creases
Mark the diagonal or angled lines that define one repeat unit. Complete one unit first and compare its angles against the neighboring units before repeating the marking across the sheet.
You will know it worked when every intended twist has the same orientation. A frequent error is reversing one diagonal, which creates a local mirror image that blocks the later collapse.
Step 4: Pre-crease mountain and valley directions
Run the bone folder along each line with moderate pressure, then reverse the fold where necessary so the paper remembers both directions. Avoid crushing intersections before the paper has a clear movement path.
You will know it worked when the sheet moves along the planned lines with little resistance. Over-creasing can weaken thin paper and produce white stress marks.
Step 5: Collapse from the center outward
Pinch the first twist gently from the underside and allow the surrounding pleats to rotate into position. Work toward adjacent units only after the first unit lies correctly.
You will know it worked when neighboring twists share edges without buckling. The common mistake is pushing the center straight down; twisting and guiding the paper is safer than applying vertical force.
Step 6: Shape and flatten the result
Adjust the depth of each unit, align the perimeter, and place the finished sheet under a clean book for several hours. Wet shaping can help suitable papers, but moisture may expand or stain ordinary wood-pulp paper.
You will know it worked when the panel keeps its pattern after light handling. Do not use adhesive to hide misalignment because glue prevents later correction and changes the single-sheet character.
How Long, Difficult, and Expensive Is It?
A simple origami tessellation usually takes 30-90 minutes for a first attempt, while a dense master pattern can require 10-30 hours. Cost is often low, but large sheets, specialty paper, printed diagrams, and failed practice attempts increase the total.
The figures below are typical planning ranges, not fixed industry standards. Grid size describes the number of divisions used in one direction, but a 16 x 16 grid does not guarantee the same labor as another 16 x 16 design because twist density and collapse complexity vary.
| Project level | Typical grid | Folding time | Practice cost | Skill demand |
|---|---|---|---|---|
| First twist study | 4 x 4 | 30-60 minutes | $1-$3 | Beginner |
| Small repeating panel | 8 x 8 | 1-3 hours | $2-$8 | Beginner to intermediate |
| Detailed geometric panel | 16 x 16 | 3-8 hours | $5-$20 | Intermediate |
| Dense artwork | 32 x 32 | 8-20 hours | $10-$40 | Advanced |
| Master-level pattern | 64 x 64 or higher | 10-30+ hours | $20-$100+ | Expert |
High grid density creates more than visual detail. It multiplies the number of intersections that can drift, tear, or accumulate thickness. The practitioner rule is simple: increase paper size before increasing grid density when the finished pattern feels crowded.
Origami Tessellation Compared With Related Paper Forms
Origami tessellation is different from kirigami, ordinary mathematical tiling, modular origami, and relief embossing because the repeated structure comes from folding one connected sheet. The alternatives may use cuts, separate units, flat graphics, or industrial forming methods.
| Method | Sheet structure | Cutting or glue | Typical output | Main advantage |
|---|---|---|---|---|
| Origami tessellation | One connected sheet | Normally neither | Repeating folded surface | Continuous geometric relief |
| Kirigami | One or more sheets | Cutting permitted | Openwork sculpture | Windows and silhouettes |
| Modular origami | Multiple folded units | Interlocking or glue sometimes used | 3D assembled form | Large objects from simple units |
| Mathematical tiling | Plane or digital diagram | Not applicable | Flat geometric pattern | Exact visual analysis |
| Embossing | Sheet pressed with a mold | Usually neither | Repeated raised texture | Fast repeat production |
Is tessellation the same as a tiling?
A tessellation and a tiling share the idea of repeated shapes covering a surface, but an origami tessellation also has foldability constraints. The shape arrangement must work as a physical crease pattern, so paper thickness, mountain and valley assignments, and local layer order affect the result.
Mathematical tiling can ignore thickness because it describes idealized regions. Origami cannot. A mathematically elegant pattern may require impossible layer ordering or produce collision when folded.
Can origami tessellations replace lampshade materials?
Origami tessellations can form decorative lamp shades, but folded paper is not automatically safe for heat, electrical stress, or long-term humidity. Use a low-heat LED, keep paper away from the bulb and socket, and add a nonflammable frame where the design needs support.
Paper tessellations are especially effective as diffusers because glassine and other translucent papers scatter light through thin folded regions. They are less suitable for wet rooms, outdoor exposure, or fixtures that use incandescent or halogen bulbs.
What Commonly Goes Wrong?
Most failures come from accumulated measurement error, incorrect crease direction, excessive force, or paper that cannot tolerate the intended grid density. Repair is easiest before the entire pattern collapses, so inspect every completed repeat before moving across the sheet.
| Failure | Likely cause | Visible symptom | Recovery |
|---|---|---|---|
| Edge mismatch | Unequal divisions | Lines miss at the perimeter | Recheck the base grid |
| Torn twist | Vertical pressure at center | Split fibers or white stress marks | Open the unit and reduce force |
| Buckled panel | Wrong mountain or valley assignment | Waves between adjacent twists | Reverse the offending crease |
| Warped sheet | Moisture or uneven handling | Curled edges and stretched cells | Dry flat under light weight |
| Locked collapse | Missing diagonal crease | One unit refuses to rotate | Pre-crease the movement path |
| Thick intersections | Paper too heavy | Raised lumps and poor flattening | Use thinner paper or larger cells |
How do you fix an inaccurate grid?
Stop folding the pattern and compare several cells across the center, corners, and edges. If the error appears in the base divisions, restarting is usually faster than forcing the final rows into alignment.
For a valuable sheet, use a soft pencil to record the measured discrepancy and redesign the repeat around the actual spacing. Do not stretch paper to make a grid fit; stretching changes neighboring angles and creates later distortion.
How do you prevent tearing at twists?
Pre-crease the twist from both sides, support the surrounding paper, and rotate the center gradually rather than forcing it downward. Thin glassine may need fewer repeated passes with the bone folder because repeated abrasion weakens the same fiber line.
A torn intersection rarely returns to full strength. Clear repair tape can stabilize a practice model, but the repair adds thickness and changes how the neighboring units collapse.
How do you reduce bubbling and warping?
Keep hands dry, work on a stable surface, and avoid wet shaping until the pattern is already accurate. Ordinary copy paper often absorbs hand moisture and stretches unevenly, especially during long sessions.
If the tessellation is complete, place it between clean sheets under moderate weight for several hours. Excessive weight can flatten intended corrugation, so use a spacer or frame when the relief depth matters.
Which Projects Fit Each Skill Level?
Beginners benefit from one repeatable twist and a forgiving paper, intermediate folders can manage multi-unit collapses, and advanced designers can explore dense crease patterns or custom corrugations. Project difficulty depends more on alignment and collapse behavior than on the final appearance.
| Skill level | Recommended paper | Suitable project | Primary lesson | Avoid initially |
|---|---|---|---|---|
| Beginner | 60-80 gsm Tant or copy paper | Single square twist | Mountain, valley, and twist action | 32 x 32 grids |
| Early intermediate | 40-60 gsm glassine | Five-triangle style panel | Repeated alignment and collapse | Very small cells |
| Intermediate | 60-90 gsm strong washi | Hydrangea-style tessellation | Multi-directional pleats | Weak short-fiber paper |
| Advanced | 40-80 gsm treated washi | Custom corrugation | Design and layer management | Unverified diagrams |
| Expert | Large handmade or MC-treated paper | Dense sculptural pattern | Paper engineering at scale | Small sheet with high density |
The Fujimoto Hydrangea is widely used as a learning reference because it demonstrates repeated units and changing surface relief. Eric Gjerde’s tessellations introduce more involved geometric relationships, while Ron Resch’s work connects folded repetition with architectural and sculptural thinking.
OrigamiUSA’s educational material emphasizes that beginners should understand the basic twist before attempting elaborate tessellations. That advice has a practical reason: when a complex collapse fails, the folder needs to identify whether the fault lies in the grid, the crease assignment, the paper, or the sequence.
What Can Origami Tessellation Be Used For?
Origami tessellations can be used for framed art, translucent screens, lampshade prototypes, architectural studies, packaging concepts, kinetic surfaces, and mathematical demonstrations. The best application depends on whether the finished sheet needs flatness, flexibility, light transmission, or structural depth.
A flat panel fits a frame and demonstrates symmetry clearly. An open-back pattern modifies light. A corrugation can flex and absorb movement, but it usually needs edge control if it must hold a specific shape.
Origami engineering research has connected folding patterns with deployable structures, including compact packaging and space-related mechanisms. A paper model does not automatically scale into a functional product, because full-scale designs must account for material thickness, repeated loading, hinges, manufacturing tolerances, and environmental exposure.
That limitation matters. Origami tessellation is excellent for exploring geometry and motion, but a paper prototype is not evidence that a metal, polymer, or composite structure will perform identically.
What Is the Most Reliable Learning Sequence?
The most reliable sequence is one twist, one row, one panel, then one original variation. This progression develops crease accuracy and spatial judgment without making every mistake impossible to diagnose.
- Fold a single square twist on inexpensive paper.
- Repeat the twist four times while maintaining orientation.
- Fold an 8 x 8 pattern from a verified diagram.
- Compare square and triangular grid behavior.
- Try an open-back or corrugated variation.
- Design a small original pattern on graph paper.
- Move to specialty paper only after the collapse works reliably.
An expert rule of thumb is to test a motif at three scales before committing to a large sheet. A unit that works at 10 cm may become too thick at 5 cm, while a unit that looks weak at 20 cm may need deeper shaping or a support frame.
Frequently Asked Questions
Does origami tessellation require a square sheet?
No. Origami tessellations can use squares, rectangles, circles, regular polygons, or irregular sheets, depending on the crease pattern. A square is the easiest starting format because edge divisions and symmetry are simple to verify, but the final boundary does not determine the internal grid.
Are origami tessellations always flat?
No. Flat tessellations are one category. Corrugated, pleated, open-back, and sculptural tessellations deliberately retain depth, and some can expand or contract when the folder moves the sheet along its crease network.
Can you use printer paper for origami tessellation?
Yes, printer paper works for large, simple practice patterns, especially around 75-90 gsm. It becomes less suitable as cells get smaller because its thickness creates bulky intersections and its short fibers can crack after repeated folding.
What is the difference between an origami twist and a tessellation?
An origami twist is one local rotating unit formed around a polygonal center. An origami tessellation is the larger repeating arrangement that connects many twists, pleats, and faces across the sheet.
Do you need software to design a tessellation?
No. Pencil, ruler, graph paper, and geometric construction are sufficient for simple patterns. Software can help test symmetry or generate crease layouts, but a digital pattern still needs physical validation because paper thickness and friction are absent from a purely geometric diagram.
Can you make origami tessellation without pre-creasing?
Rarely, and not reliably for repeating designs. Pre-creasing establishes the mountain and valley pathways that coordinate the collapse; skipping it usually causes uneven units, locked twists, and force concentrated at the wrong intersections.
The Bottom Line
Origami tessellation is repeated geometric folding across one connected sheet, built from grids, pleats, twists, and coordinated collapses. The most dependable starting point is a 4 x 4 or 8 x 8 pattern on 60-80 gsm paper, followed by a gradual move toward triangular grids, open twists, and corrugated reliefs.
The phrase what is origami tessellation describes both a mathematical idea and a physical paper practice. Its defining feature is not merely repeated shapes, but a foldable, connected surface in which local geometry controls the behavior of the entire sheet.
