
")
Have you ever imagined crafting a graceful olive branch from just a small sheet of paper?
With a few simple folds, you can create something truly enchanting and meaningful.
Follow along as we dive into a magical, step-by-step journey that’s both easy and incredibly rewarding.
Why Create an Origami Olive Branch?
The olive branch has long been a symbol of peace, friendship, and hope. In ancient times, it was offered during negotiations and celebrated in art, literature, and history. Folding one from paper connects you to this timeless tradition — and it’s wonderfully calming too.
Whether you’re new to origami or a seasoned paper artist, crafting an olive branch offers something special. It’s delicate, beautiful, and surprisingly simple once you know the right steps. Plus, it makes a thoughtful gift, a beautiful decoration, or a peaceful addition to your journal or greeting cards.
What You’ll Need
Before we jump in, gather a few simple supplies:
- A square sheet of paper (recommended size: 6 inches × 6 inches)
- A clean, flat surface for folding
- Patience and a sense of wonder!
You can use green paper for a natural look or experiment with colors to create something uniquely yours.
Step-by-Step Instructions for Folding the Origami Olive Branch
Take your time with each fold. Origami is just as much about the journey as it is about the final creation!
Step 1: Start with a Square Piece of Paper
Begin with a perfectly square sheet of paper, preferably 6″ × 6″ in size.
Place it flat in front of you, with the colored side (if any) facing down.
Make sure your hands are clean to avoid smudging the paper.
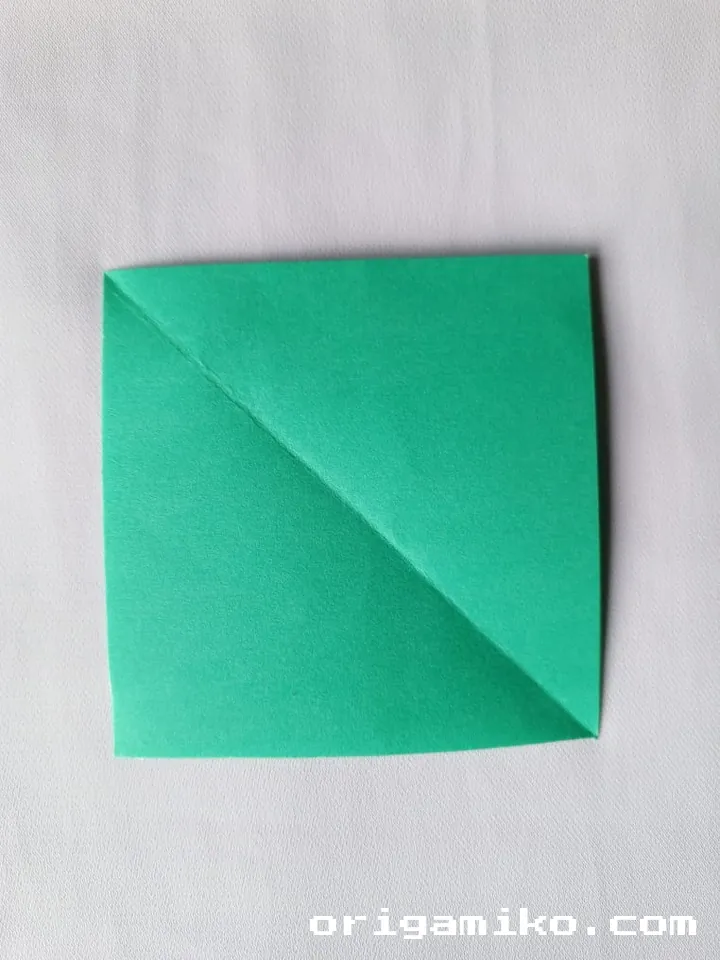
Step 2: Fold and Unfold the Corners
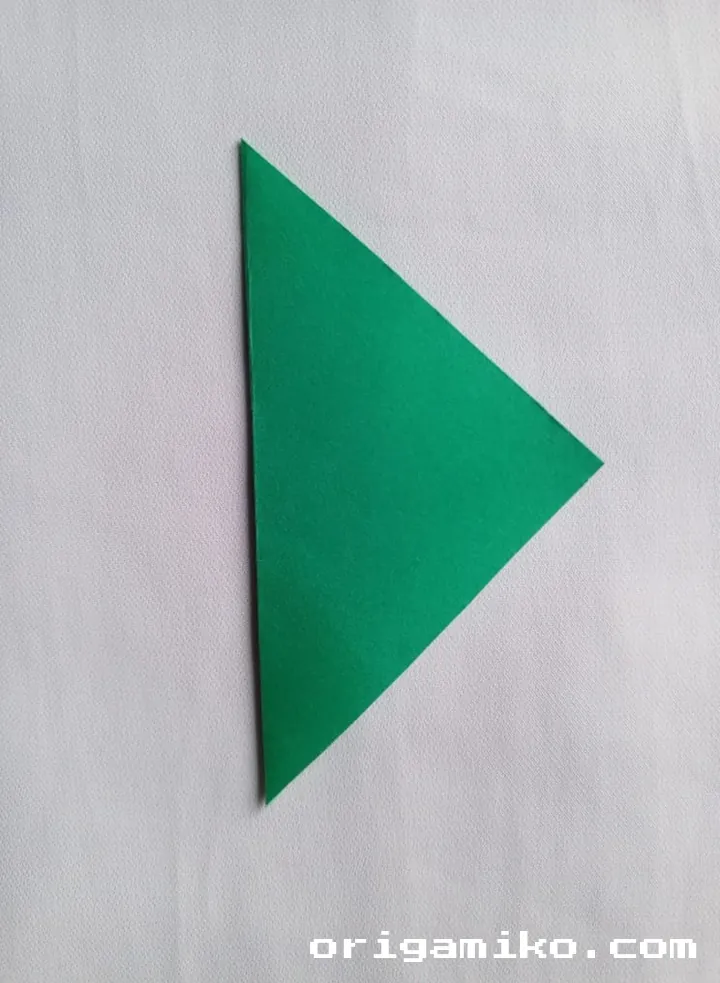
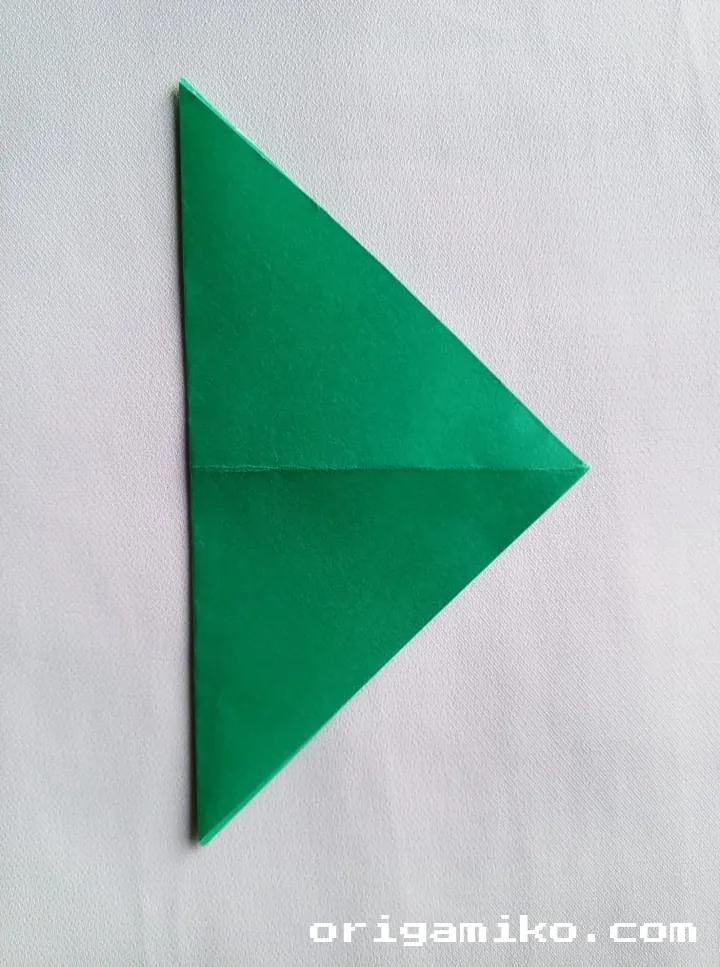
First, fold the top right corner down to meet the bottom left corner, creating a diagonal crease.
Unfold it carefully, smoothing it back to a flat square.
Now, repeat the same for the top left corner to the bottom right corner, and unfold again.
These folds create an “X” crease across the paper, which will guide you through the next steps.
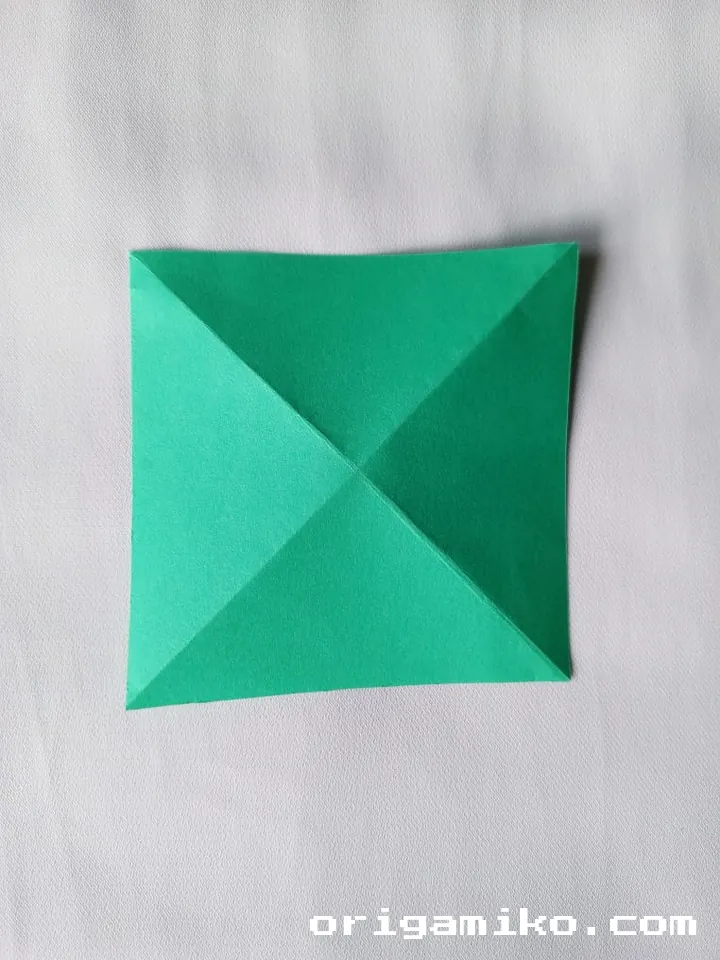
Step 3: Fold Vertically and Horizontally, Then Unfold
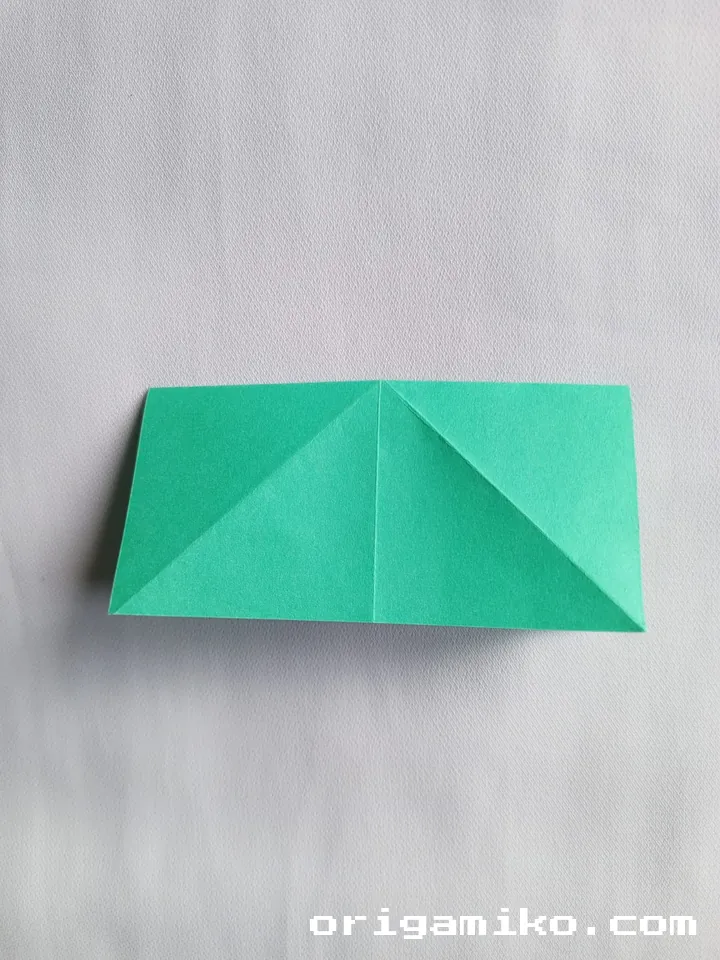
Take the top edge of the paper and fold it down to meet the bottom edge.
Crease it well, then unfold.
Now fold the left edge over to meet the right edge, crease sharply, and unfold again.
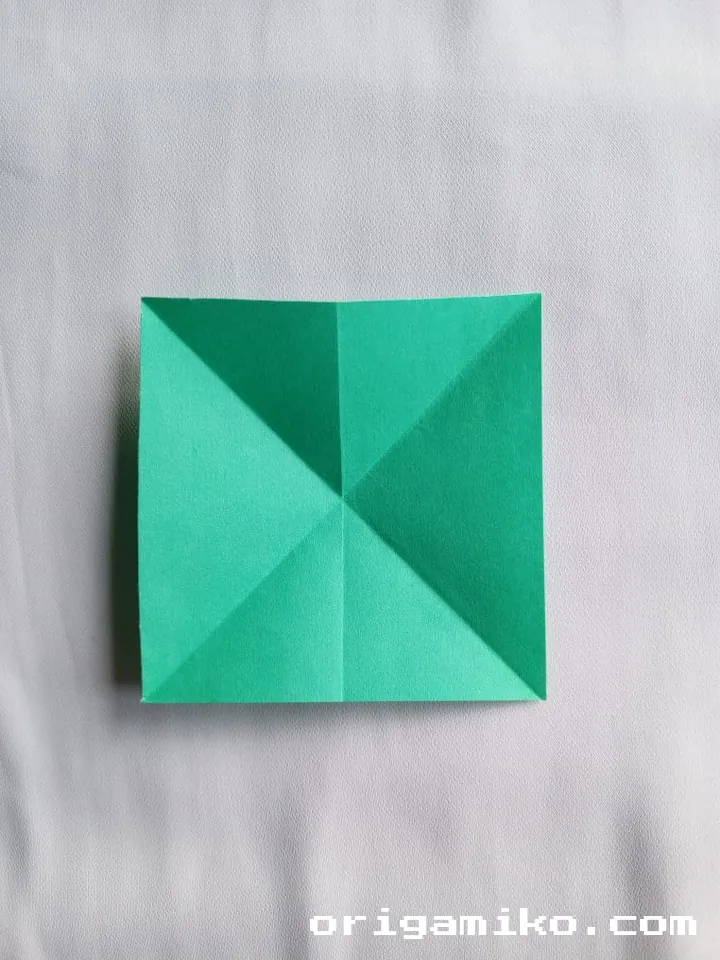
You should now have an eight-sectioned paper, divided by creases running horizontally, vertically, and diagonally.
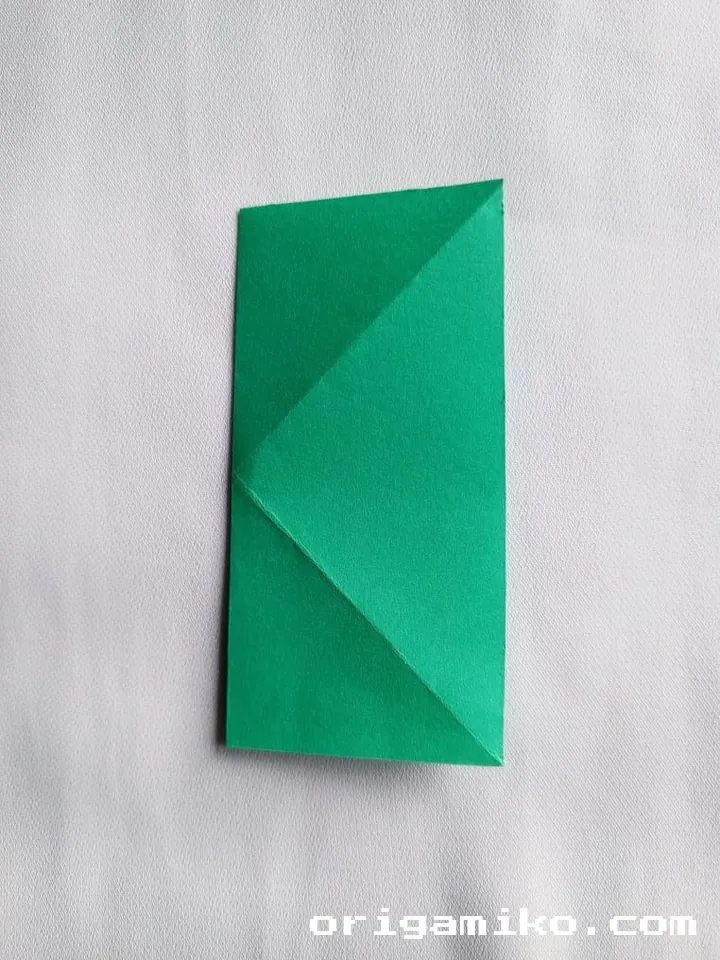
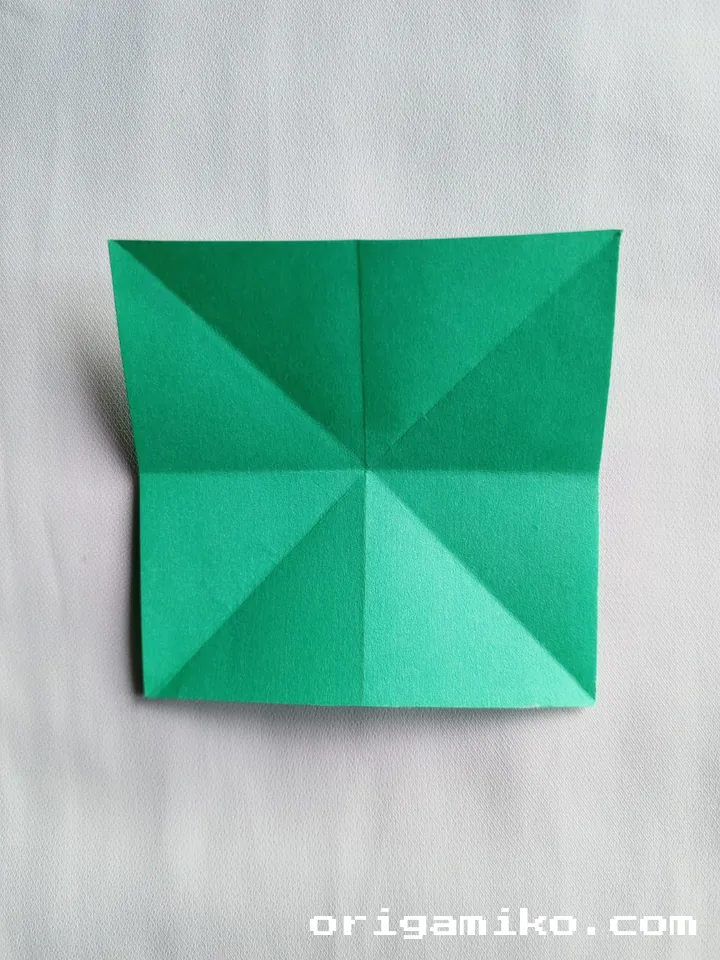
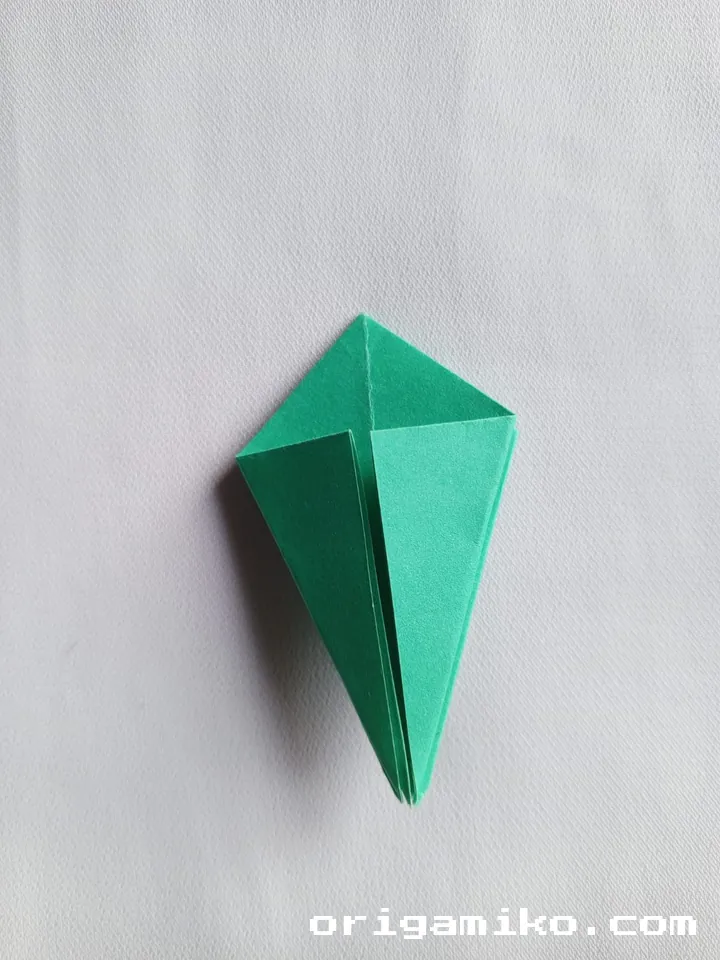
Step 4: Fold the Sides In and Unfold

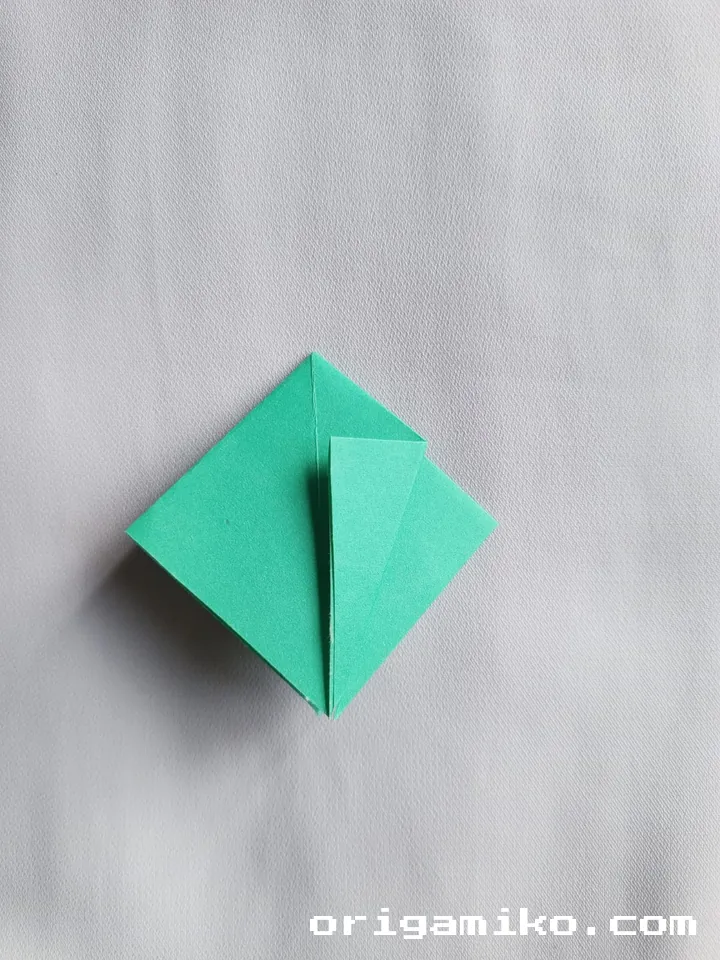


Now, fold the right side of the paper inward so the edge meets the center crease — then unfold.
Next, fold the left side inward to the center crease — and unfold that too.
Each fold helps set up the internal structure of the olive branch.
Be sure to crease firmly, but gently, so the paper doesn’t tear.
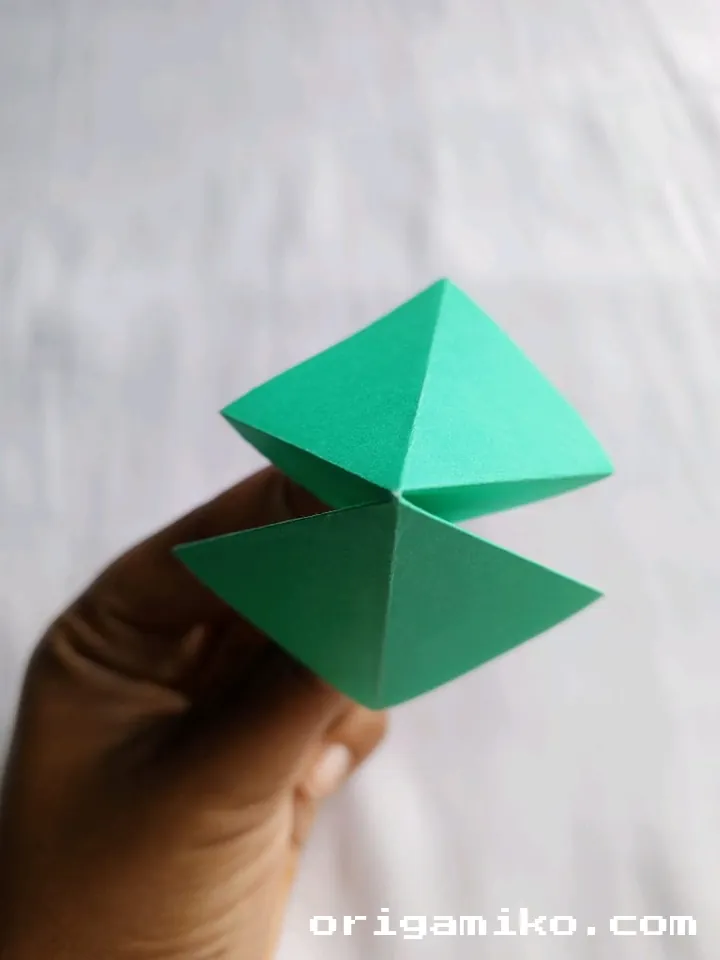
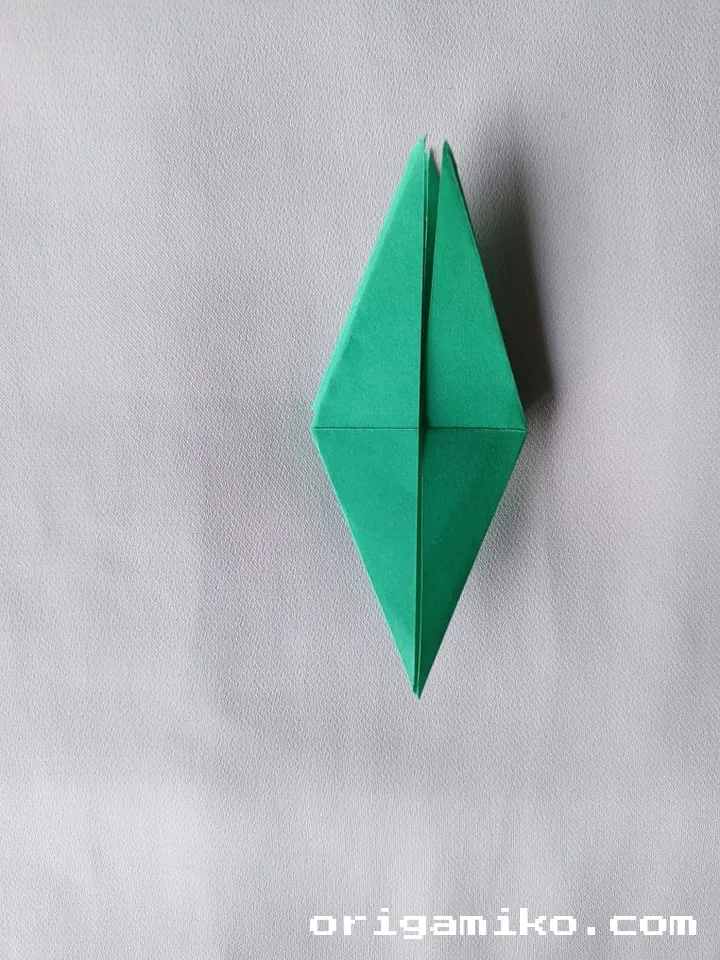
Step 5: Create Inside Reverse Folds

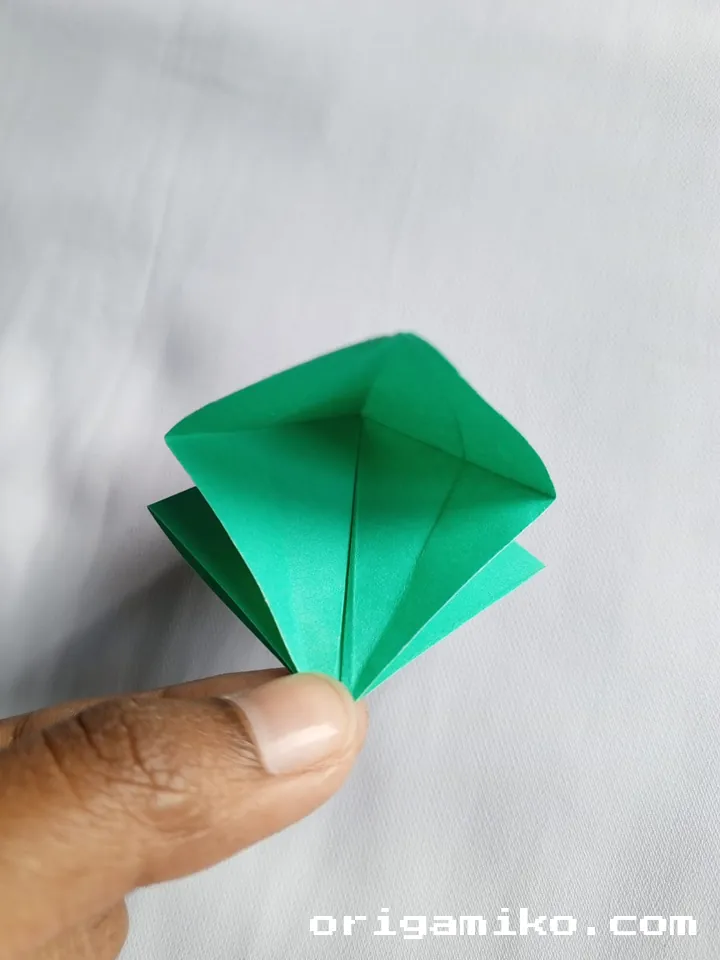
Here’s where the magic begins!
Following the existing creases, fold the right and left sides inward again — but this time, tuck the folds inside along the pre-made creases.
This inside reverse folding helps shape the slenderness needed for the olive branch.
If you’re unsure, think of it as folding the paper “into itself” along the lines you already created.
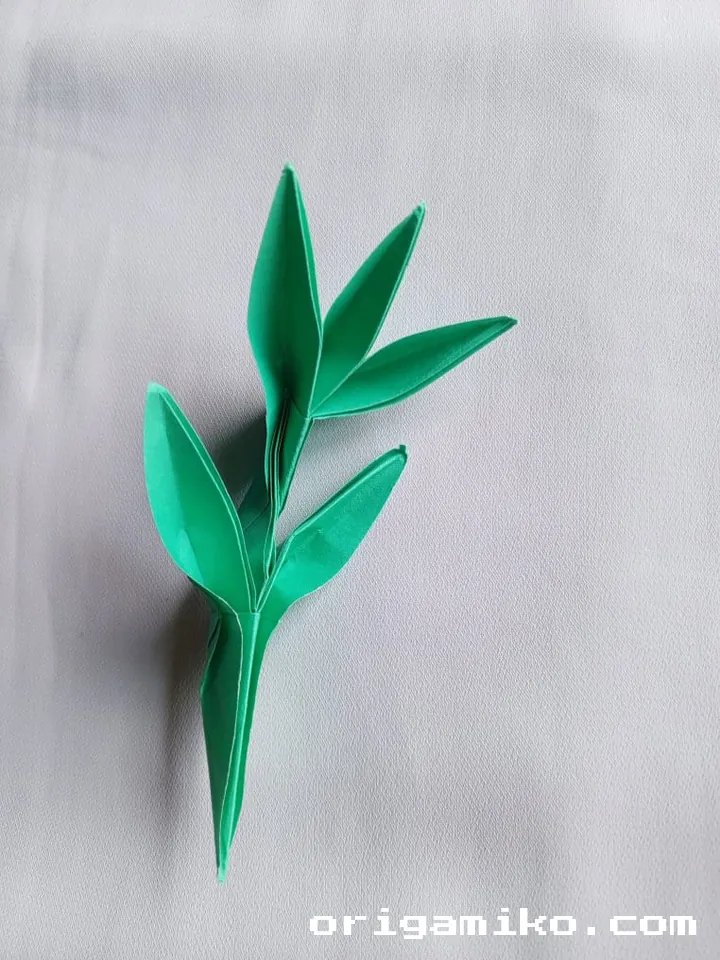
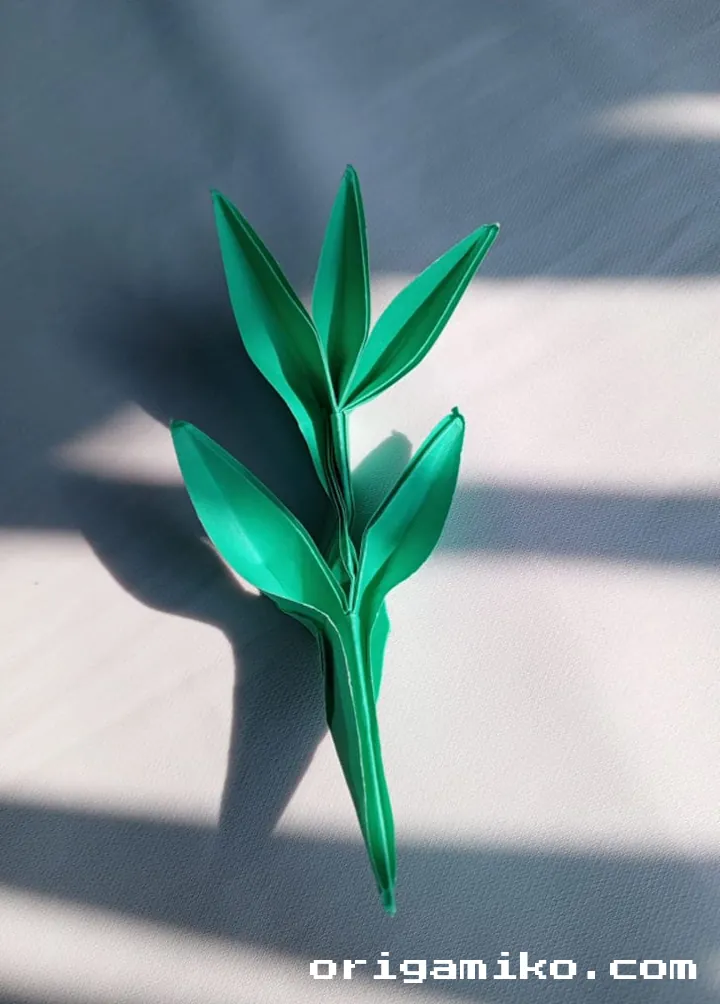
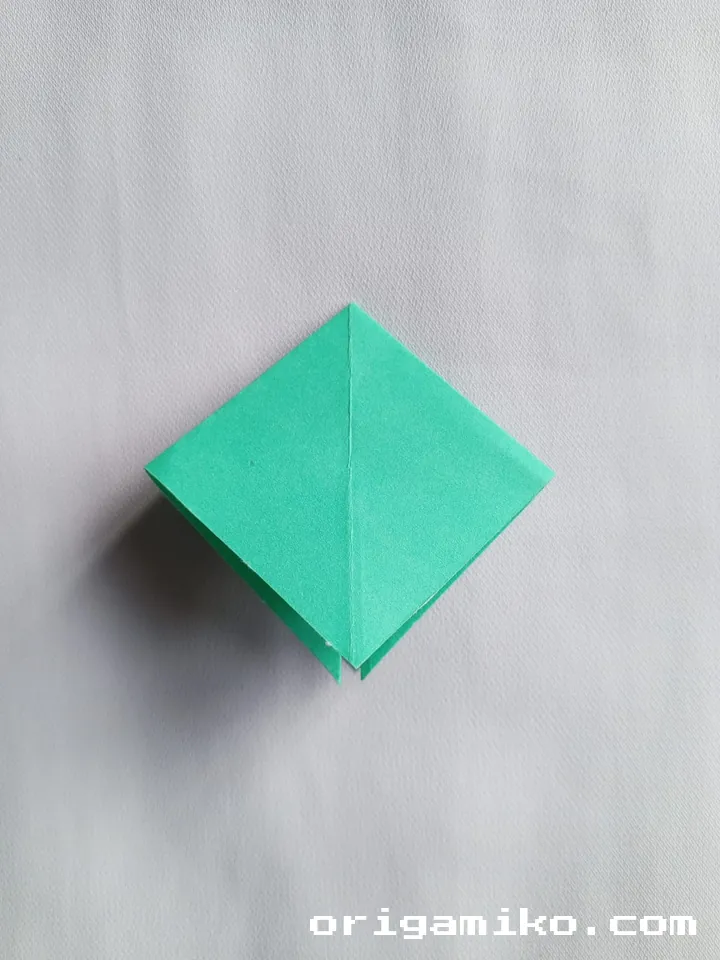
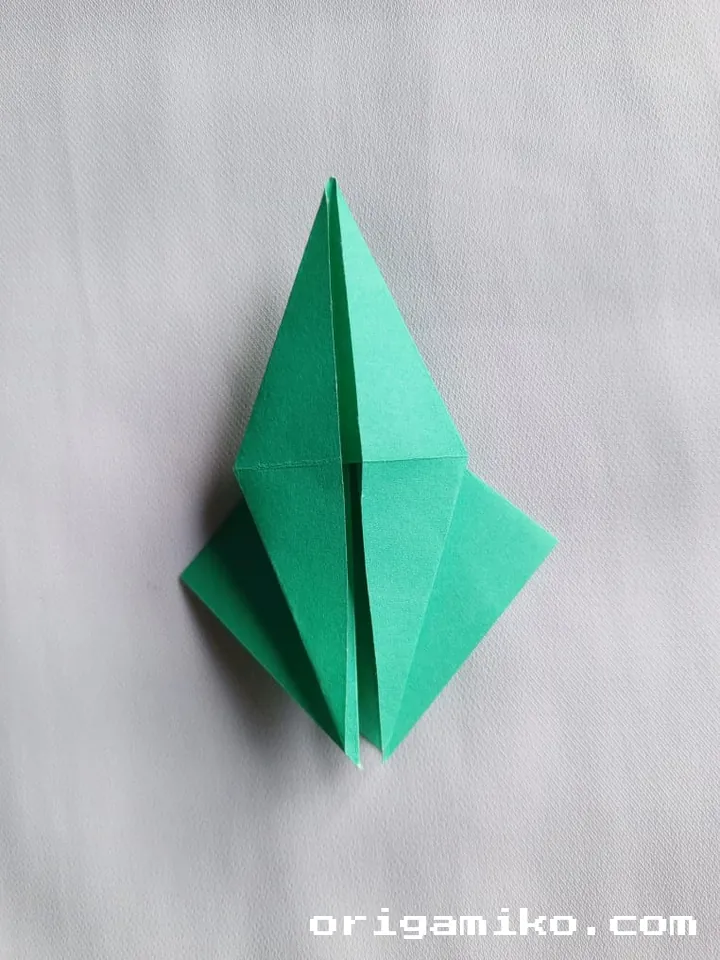
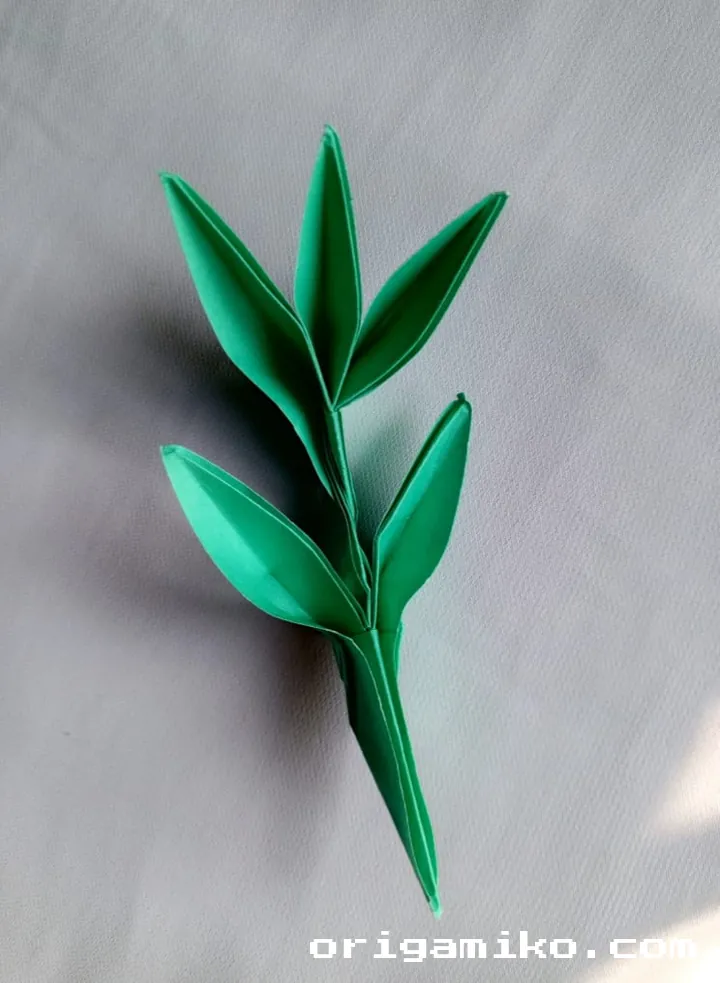
Step 6: Form the Base of the Olive Branch
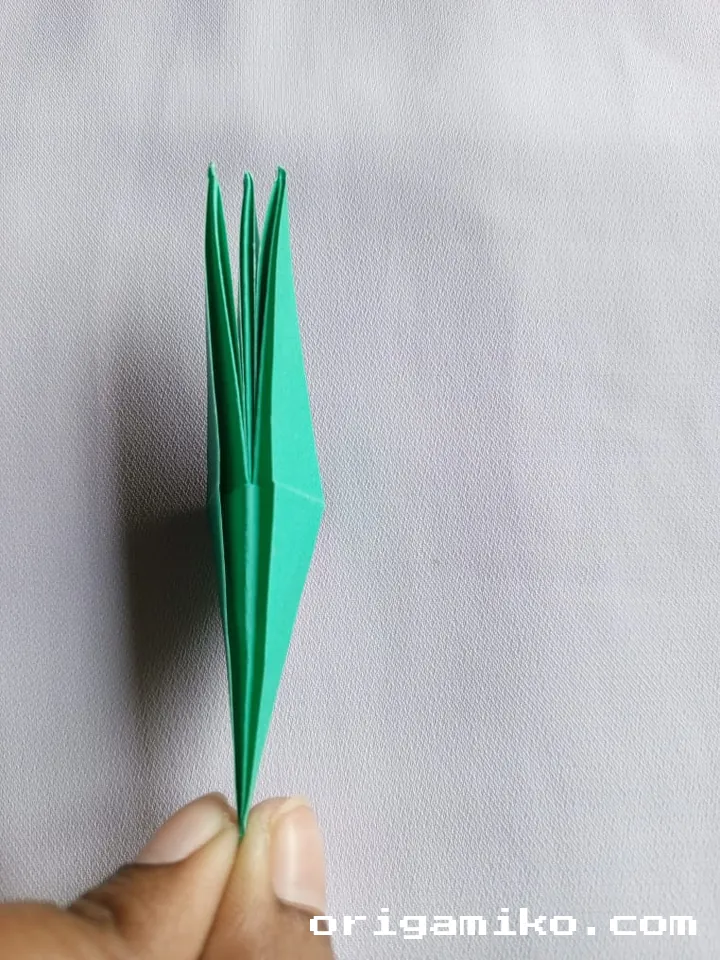

Now that the inner folds are complete, flatten the model gently.
You’ll see the form starting to resemble a thin branch shape.
Smooth out any uneven sections carefully, keeping the folds sharp and tidy.
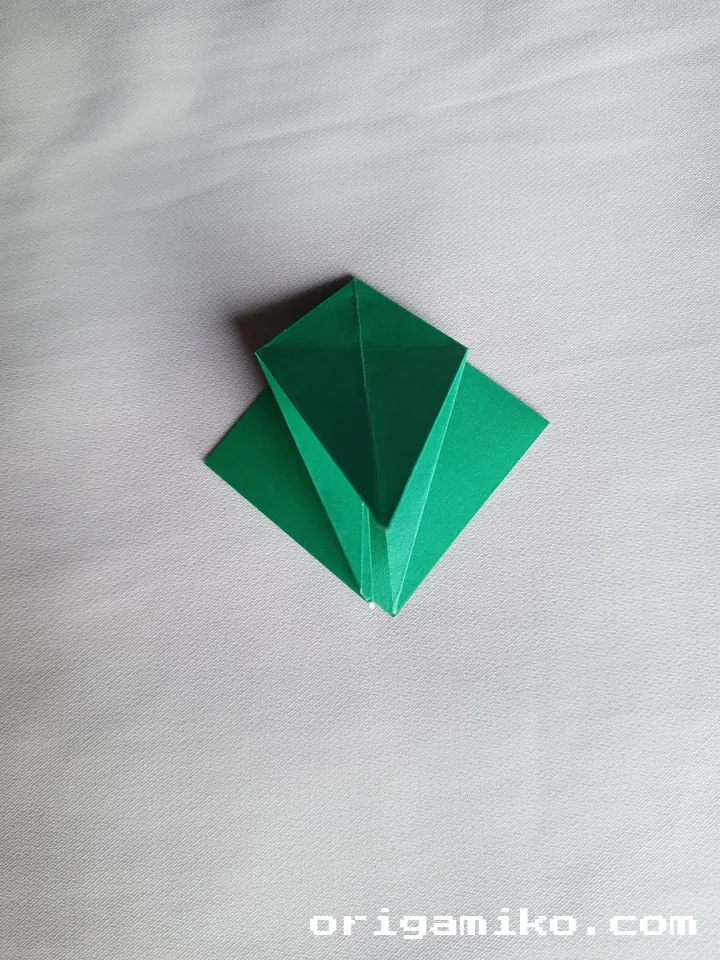
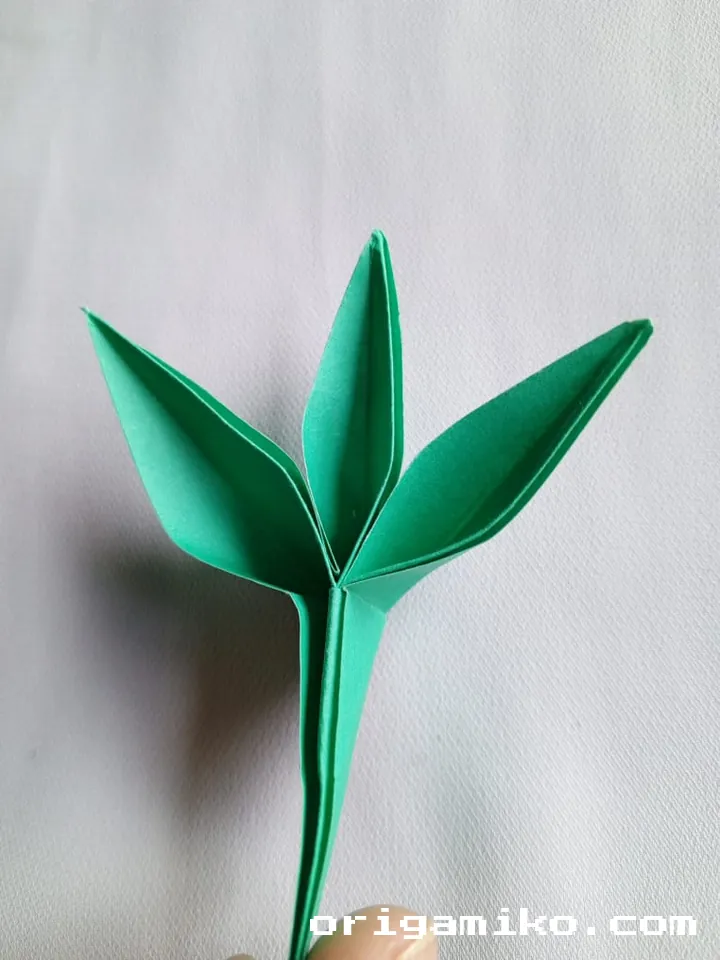
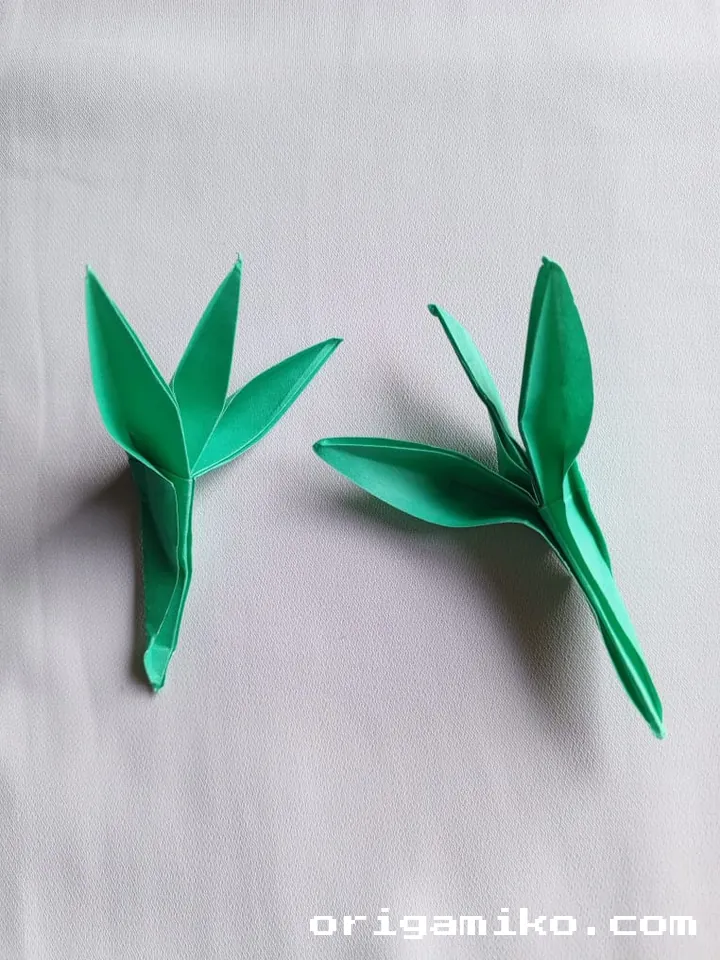
Step 7: Shape the Olive Branch Details
Finally, it’s time to refine your branch.
Pinch the sides gently to give the “stem” a more rounded, natural appearance.
You can also slightly curve the branch by softening some of the folds with your fingertips, making it look even more organic.
Feel free to add small “leaf” shapes by folding tiny portions outward from the branch if you like a more decorative look.
Tips for a Beautiful Origami Olive Branch
- Use thinner paper for easier, crisper folds — origami paper is perfect.
- Practice with scrap paper first if you’re new to origami, so you can get comfortable with the inside reverse folds.
- Be patient — some steps might seem tricky at first, but each fold brings you closer to a stunning result.
- Customize your branch by using papers with different textures, colors, or even subtle patterns.
Creative Ideas for Using Your Origami Olive Branch
Now that you’ve folded your beautiful olive branch, here are a few ideas for showing it off:
- Add it to handmade greeting cards for a personal, peaceful touch.
- Use it as a decorative element for weddings, celebrations, or special dinners.
- Frame it in a shadow box as a piece of symbolic art.
- Create several branches to form a full wreath or garland!
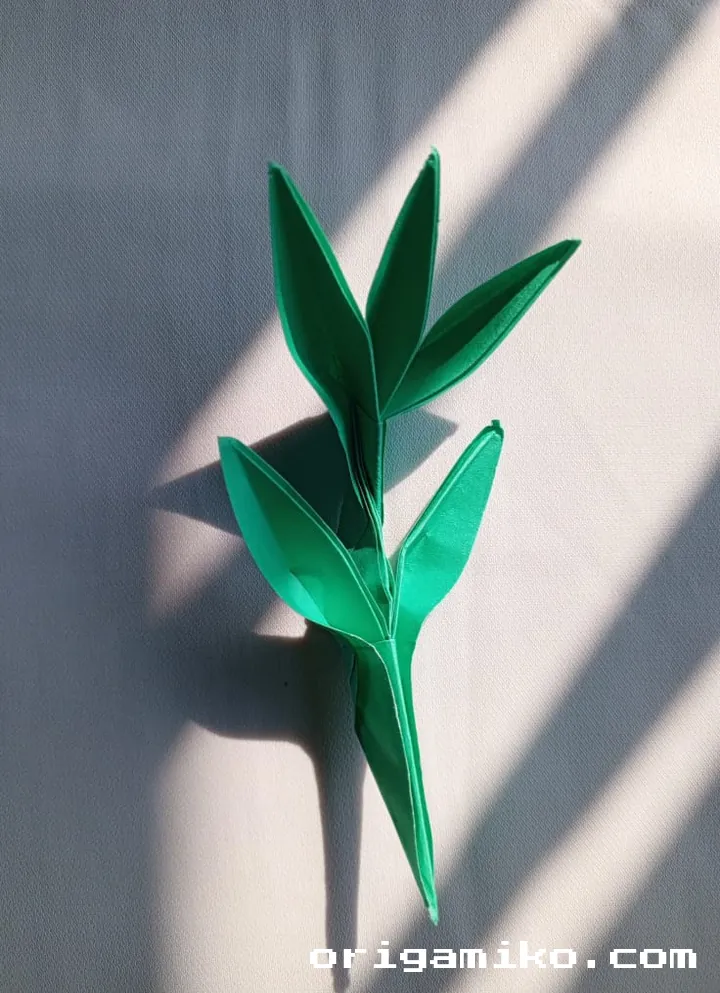
Closing Thoughts: The Magic of Paper and Patience
There’s something truly magical about turning a simple square of paper into a symbol of peace and hope.
Each fold carries intention, and each crease brings the creation to life, piece by piece.
Whether you’re crafting alone or sharing this experience with someone else, your origami olive branch is a beautiful reminder of creativity, patience, and quiet joy.