

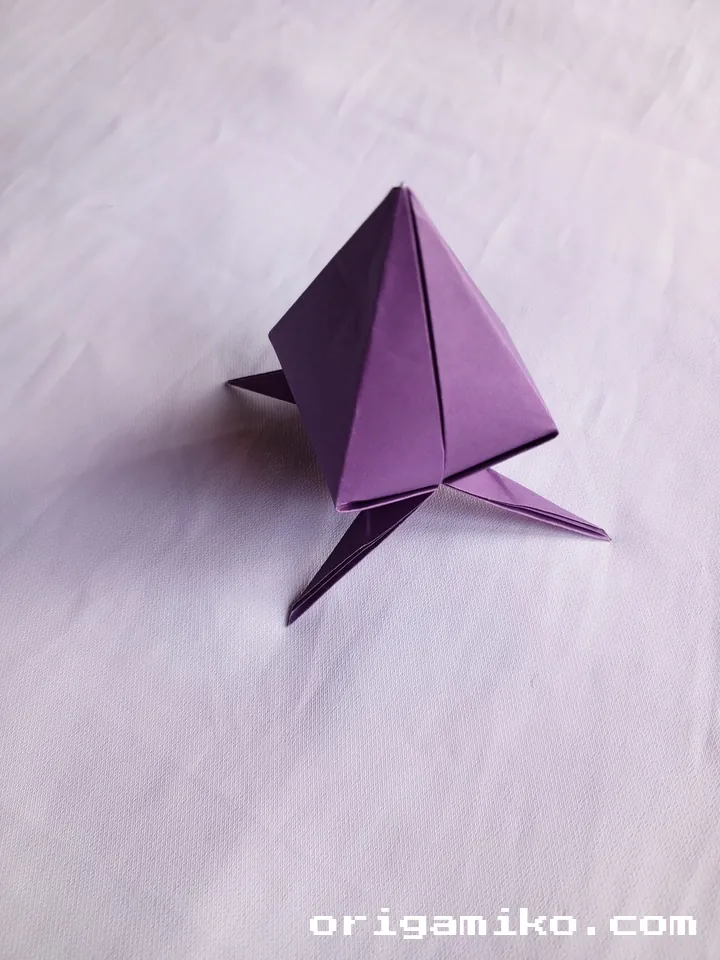
The delicate beauty of an origami peach captures hearts with its soft curves and vibrant charm.
Today, you’re invited on a journey where simple paper transforms into a symbol of sweetness and luck.
With clear steps and a little patience, you’ll create a delightful masterpiece that’s as enchanting as the process itself.
Why Make an Origami Peach?
Origami peaches are more than just adorable paper crafts — they carry rich symbolism. In many cultures, peaches represent longevity, happiness, and prosperity. Folding one by hand feels like weaving a little bit of magic into reality.
Whether you’re a beginner or a seasoned paper folder, this project offers a rewarding balance between simplicity and artistic flair. Plus, it’s a lovely decoration or heartfelt handmade gift for someone special.
Ready to unfold the wonder? Let’s dive into the step-by-step instructions!
Materials You’ll Need
Before we start, let’s make sure you have everything at your fingertips:
- Paper Size: 15″ × 15″ (square)
- Paper Type: Origami paper works best, but any flexible yet firm sheet will do.
- Optional: A flat surface and a bone folder (for extra crisp folds).
That’s it! Origami doesn’t need fancy tools — just your hands and a spark of creativity.
Step-by-Step Instructions for Folding a Stunning Origami Peach
Step 1: Begin with a Square Paper
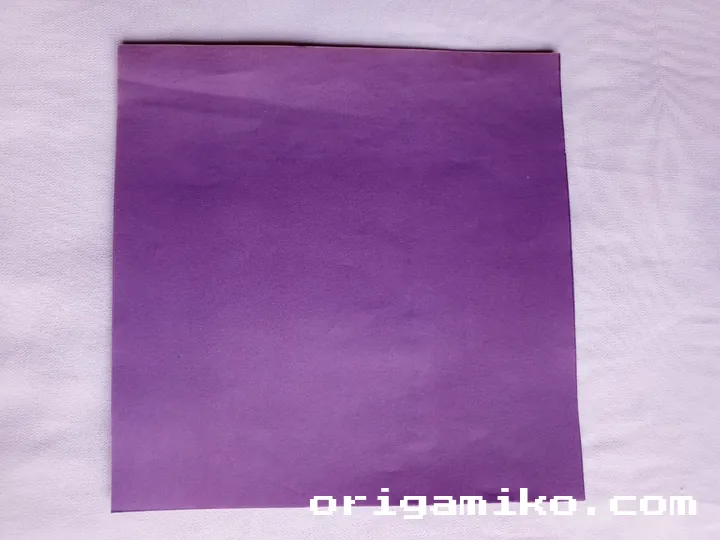
Lay your 15″ × 15″ paper flat on your surface.
Make sure it’s perfectly square — origami magic always begins with the right foundation.
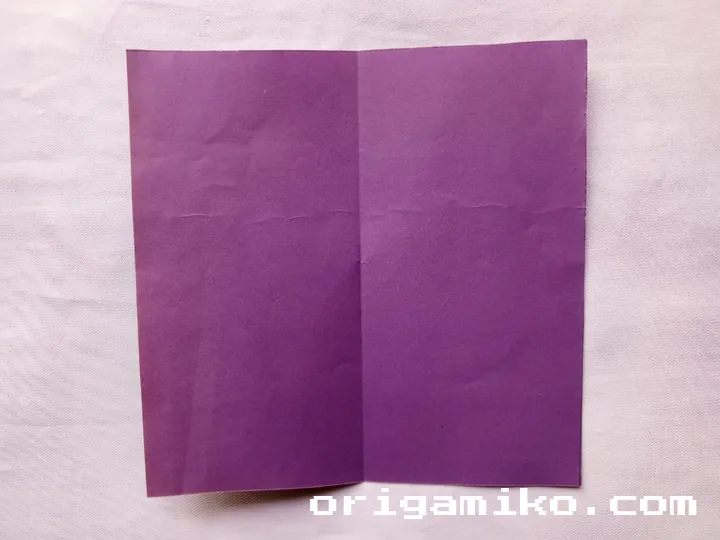
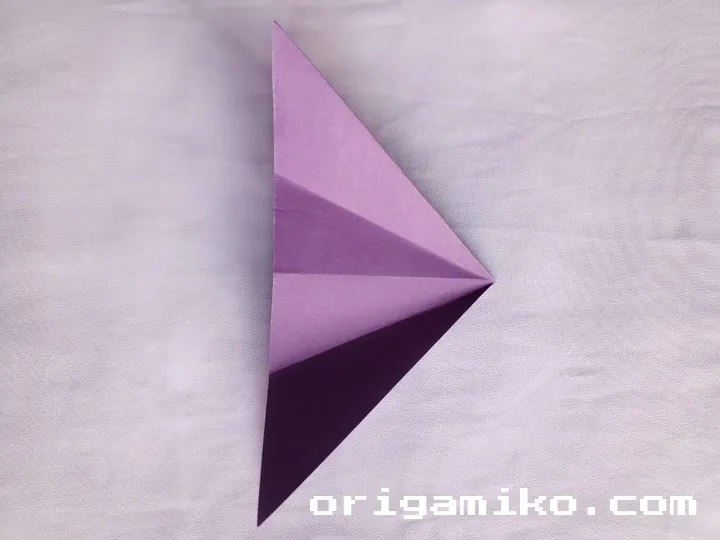
Step 2: Create Your Basic Guideline Folds
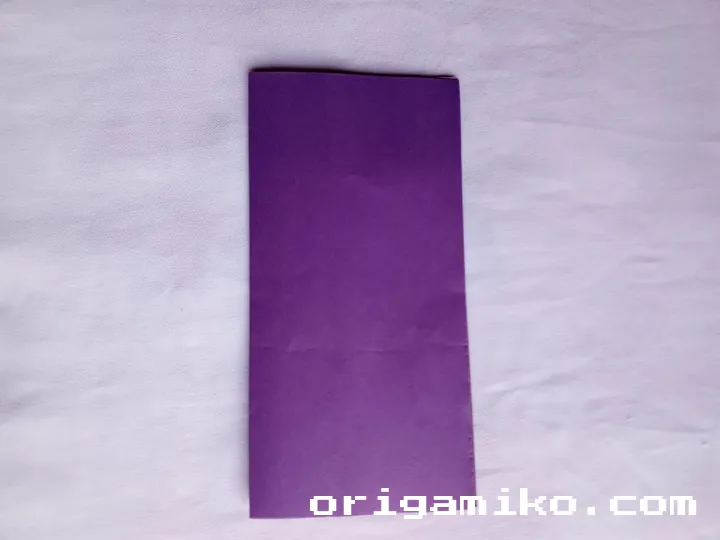
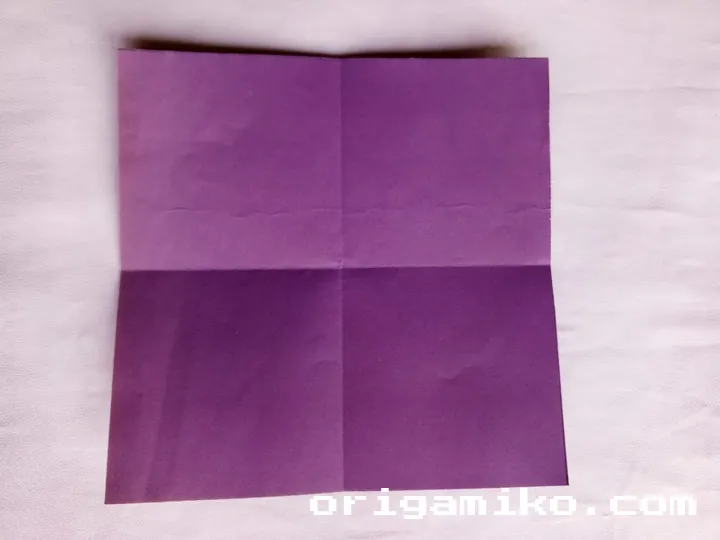

First, fold the paper vertically (top to bottom) so the edges meet. Crease firmly and unfold.
Next, fold it horizontally (left to right). Crease again and unfold.
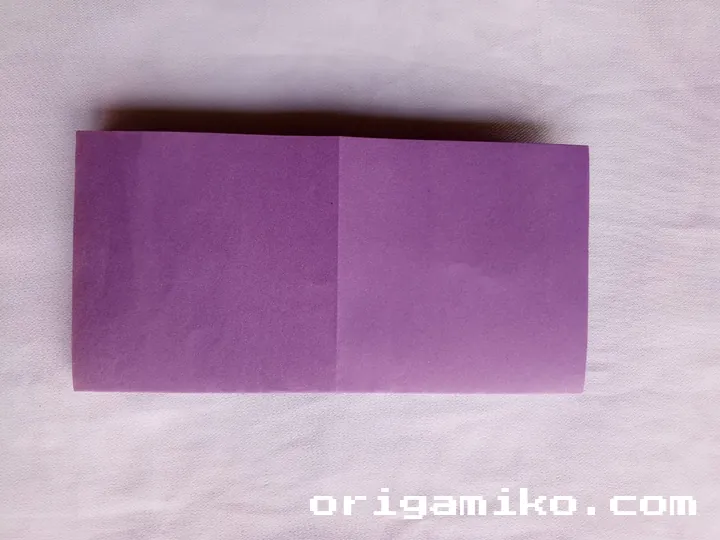
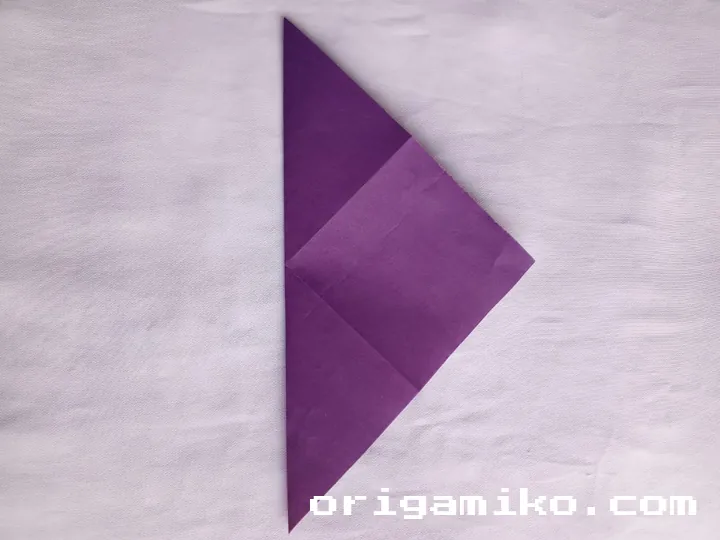
Now, fold each corner into the center point, pressing sharply along the edges. Unfold them after each corner is done.
These folds will act as your guiding map as you move forward. Think of them as drawing invisible trails for your fingers to follow.
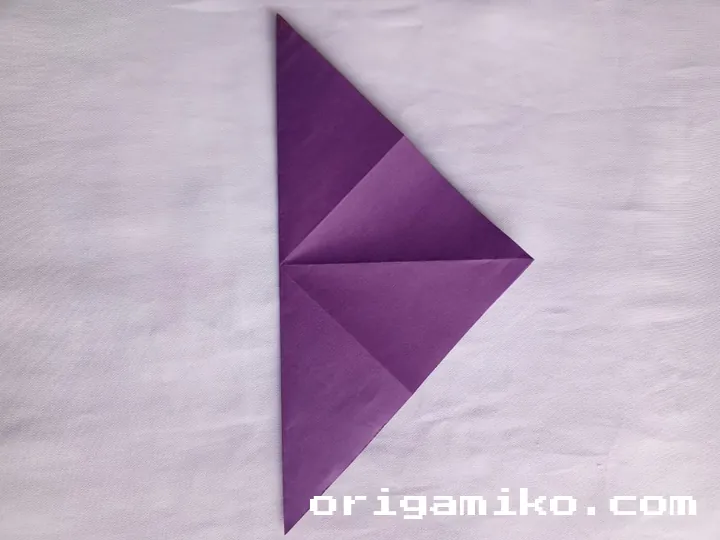
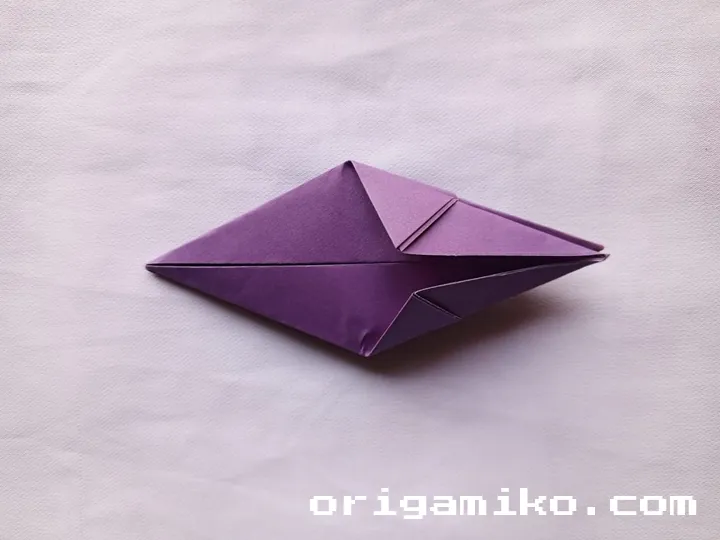
Step 3: Build the Base Form

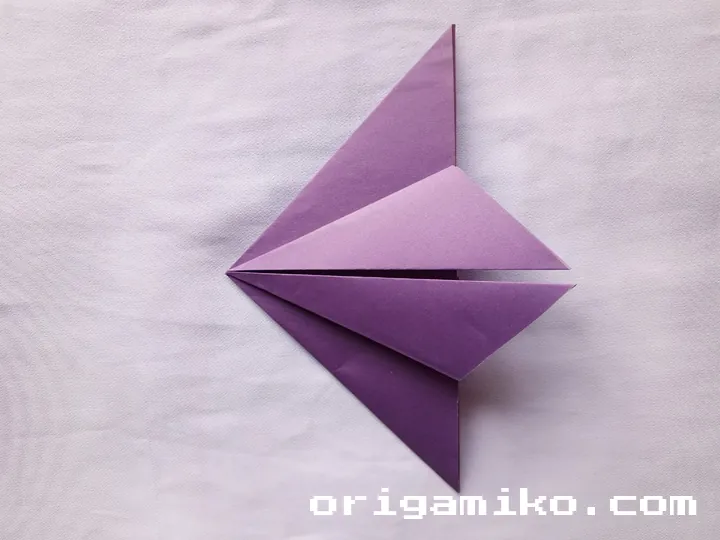
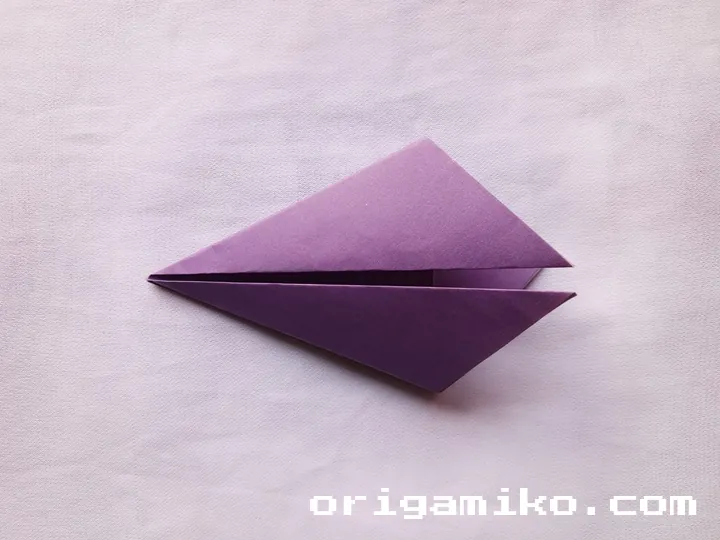
Take two opposite sides of your paper and gently fold them inward to the center line.
Tuck them inside so they stay hidden between the layers — like slipping a secret into a letter.
Now, fold the two remaining sides in the same manner, neatly aligning everything into a compact shape.
This compact base is the starting heartbeat of your peach.
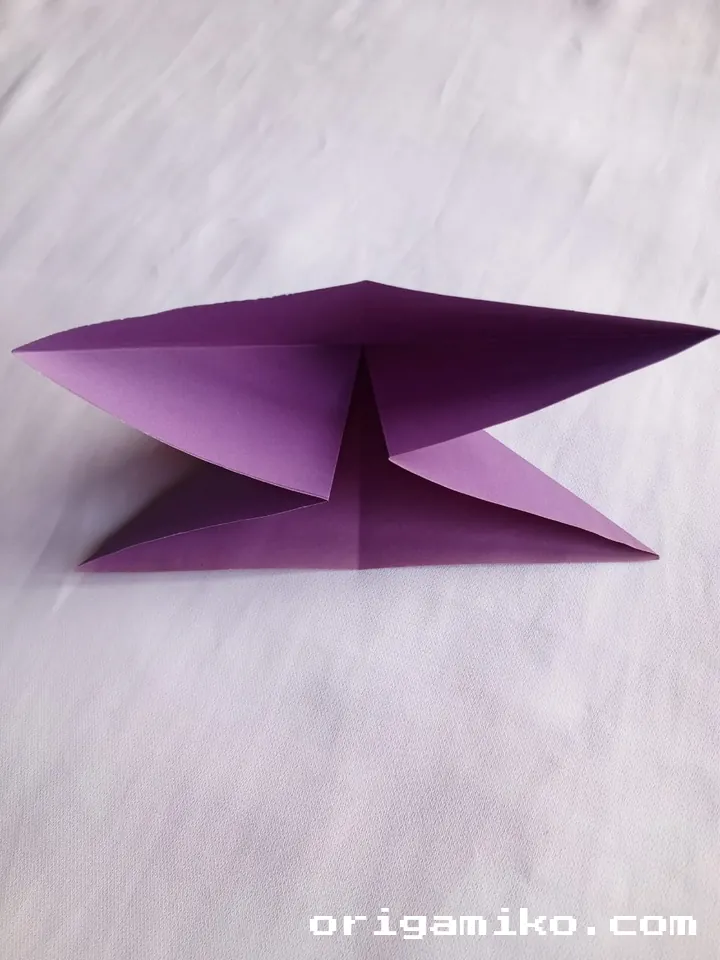
Step 4: Sculpt Your Peach Shape
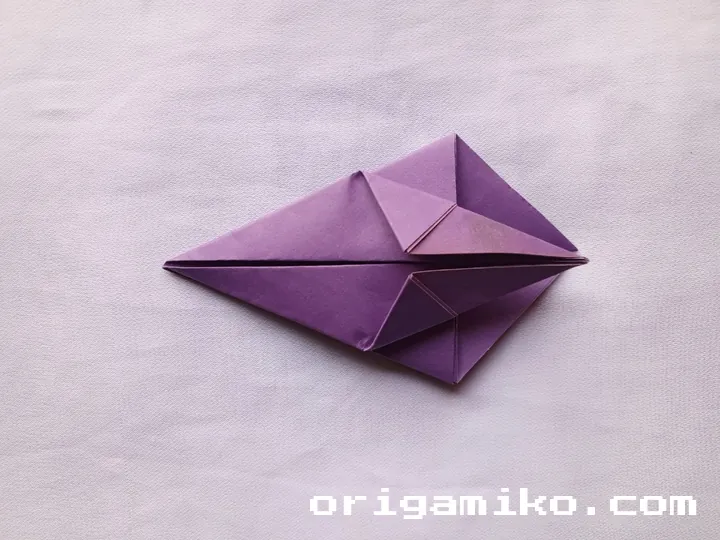
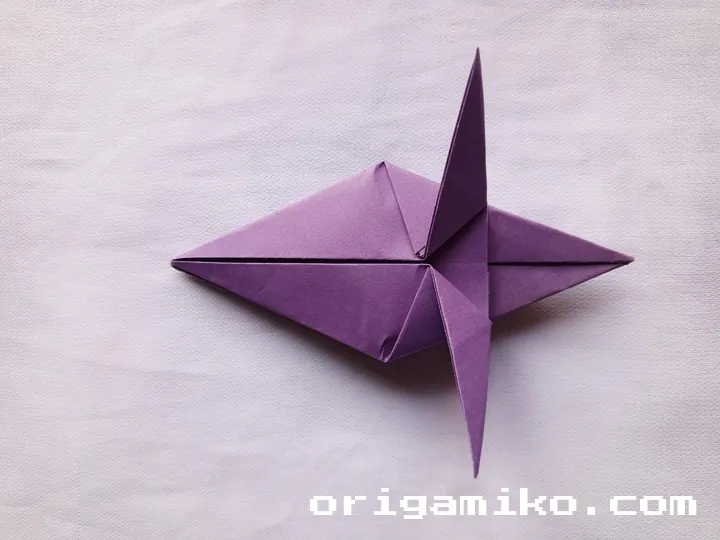
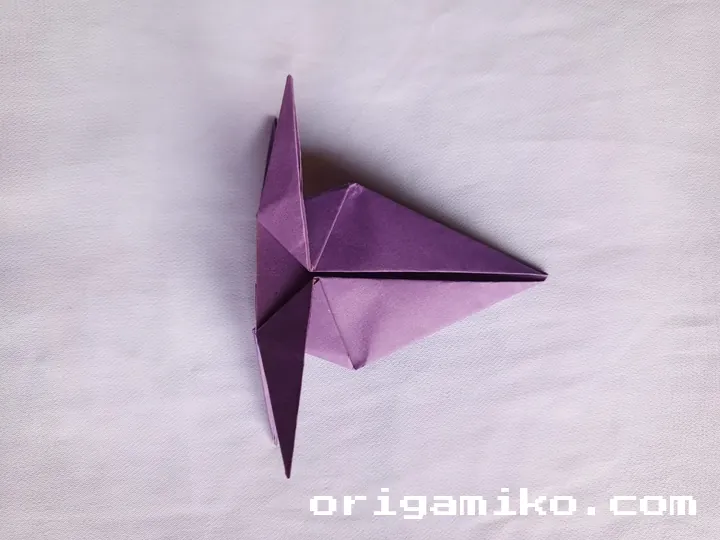
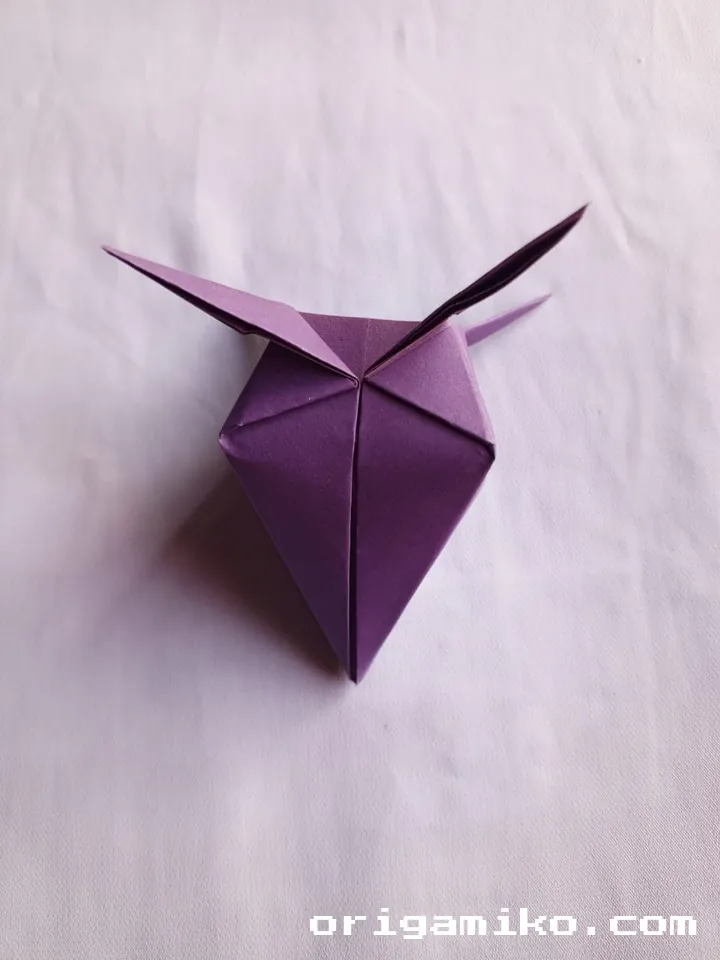
At this point, it’s time to fold and unfold specific sections carefully to shape the familiar peach curves.
Follow the creases you’ve made earlier to gently press and shape the body.
You might notice the form naturally puffing up, hinting at the plumpness of a real peach.
Adjust the curves as needed to get that round, organic look. It’s a bit like coaxing the paper into blossoming.
Helpful Tips for Perfecting Your Origami Peach
- Be Gentle but Firm: Paper is surprisingly strong but can also tear. Treat it like you would a real peach — firm, yet tender.
- Focus on Symmetry: Even folds create balance, which gives your peach a natural, realistic look.
- Adjust the Puffiness: You can lightly blow into the model or gently press from inside to make it rounder.
- Use Colored Paper: A soft pink or orange sheet will make your finished peach even more charming!
Creative Ideas for Using Your Origami Peach
Once you master the basic peach, you can get incredibly creative:
- Party Decorations: Scatter mini peaches around a summer party table.
- Gift Toppers: Attach one to a wrapped present for a whimsical finishing touch.
- Wall Art: Make a whole orchard by creating several peaches and gluing them to a canvas.
- Bookmarks: Flatten one slightly and tuck it into your favorite book.
Each folded peach feels like a little wish, waiting to be shared.
Common Mistakes to Watch Out For
Even experienced folders make small missteps. Here’s what to look out for:
- Misaligned folds: Always double-check that edges meet perfectly before creasing.
- Over-creasing: Folding too hard can make the final model look stiff instead of natural.
- Skipping the unfolding steps: Those first “practice folds” are vital — they prepare the paper for smooth transitions later.
If your peach looks a little off the first time, don’t worry! Every fold teaches you something new.
Final Thoughts: Your Enchanted Paper Peach Awaits
Crafting an origami peach isn’t just about the final result — it’s about the journey.
Each crease and fold carries a piece of your care, turning simple paper into a symbol of joy and creativity.
By following these steps, you’re not just making an origami peach — you’re weaving a little story with your own hands.
So pick up that square of paper, take a deep breath, and start folding.
A sweet, magical peach is waiting to bloom in your hands.