

Ever wonder how to make an origami ship that looks cool but doesn’t take forever to fold?
I get it. Most tutorials either skip steps or go way too fast.
But this one? It’s all here—clear, simple, and totally doable.
We’re diving into the world of paper folding to create something timeless: an origami ship.
This isn’t just some basic boat—it’s a paper model with character and charm.
Whether you’re new to this or have folded cranes in your sleep, you’re going to love it.
Stick with me.
This simple ship step by step guide is fun, surprisingly calming, and incredibly rewarding.
Let’s make something awesome with just a square sheet of paper.
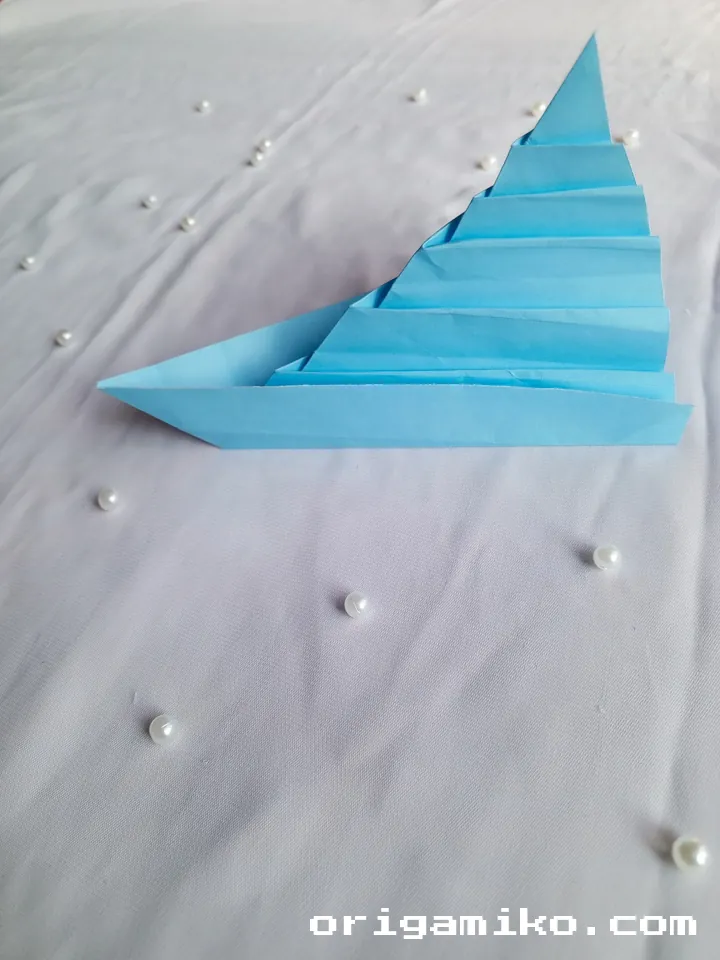
What Are We Making? A Classic Origami Ship
Let me tell you—I still remember the first time I made an origami ship.
It was a rainy afternoon, and I wanted to make something easy but meaningful.
By the time I finished, I had a neat little paper boat that looked like it could float off into a storybook.
So what’s so special about this project?
- It’s simple enough for a child.
- It’s elegant enough for a display.
- And best of all? It feels a little magical.
We’re not just folding a boat.
We’re creating a symbol of adventure, curiosity, and childhood wonder.
Materials Needed
Before we start folding, let’s make sure you’ve got everything on hand.
You don’t need much—just the right paper and a flat surface.
| Item | Details | Why It Matters |
|---|---|---|
| Paper Size | 12″ × 12″ square | The perfect dimensions for proportion and shape |
| Paper Type | Lightweight origami or printer paper | Folds easily without tearing |
| Surface | Flat and clean | Keeps your folds sharp and even |
| Fingertips | Gentle but firm pressure | Key to crisp folds and clean lines |
Tip: You don’t need expensive paper.
I’ve used notebook paper in a pinch, and it worked just fine.
Key Terms to Know
Origami
The traditional Japanese art of paper folding.
Valley Fold
A fold that creates a “V” shape—like a valley between hills.
Mountain Fold
The opposite of a valley fold; forms a peak.
Crease
A sharp line created by folding and pressing.
Unfold
Reversing a fold to prepare for the next step or to use the crease as a guide.
Step-by-Step Origami Ship Instructions
Got your 12″ × 12″ square paper? Great—let’s get to folding.
Here’s how to make origami ship in four clear steps:
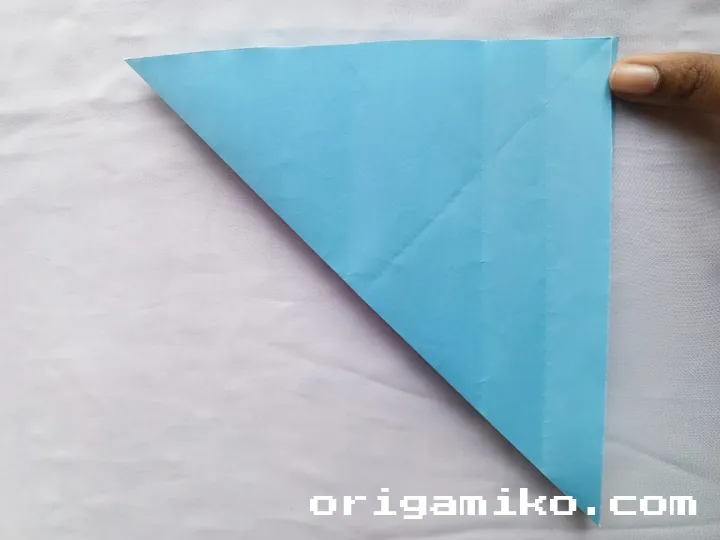
- Take a Square Sheet of Paper
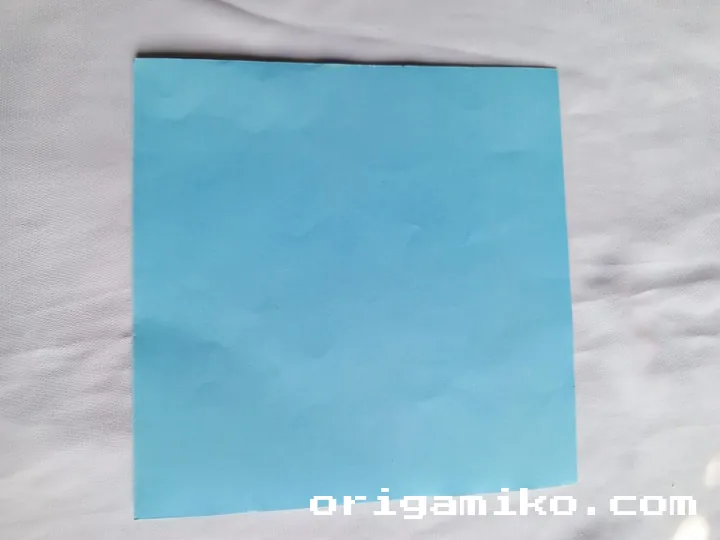
- Place it flat on your surface.
- Make sure all edges line up evenly.
- If it’s not perfectly square, trim it.
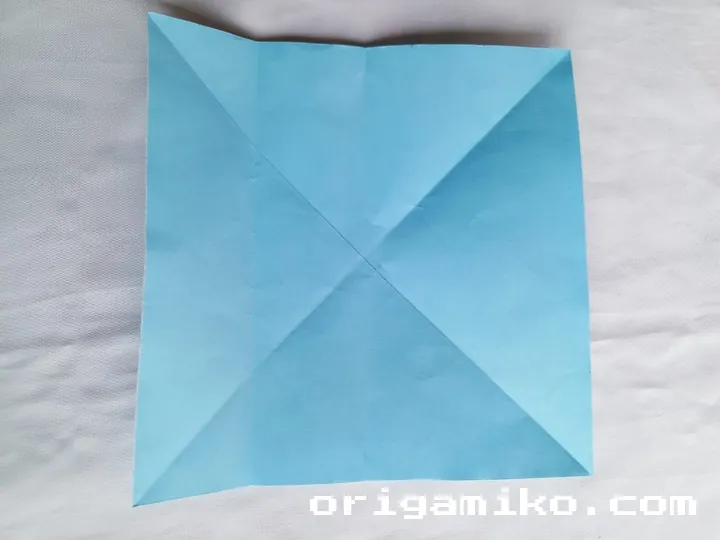
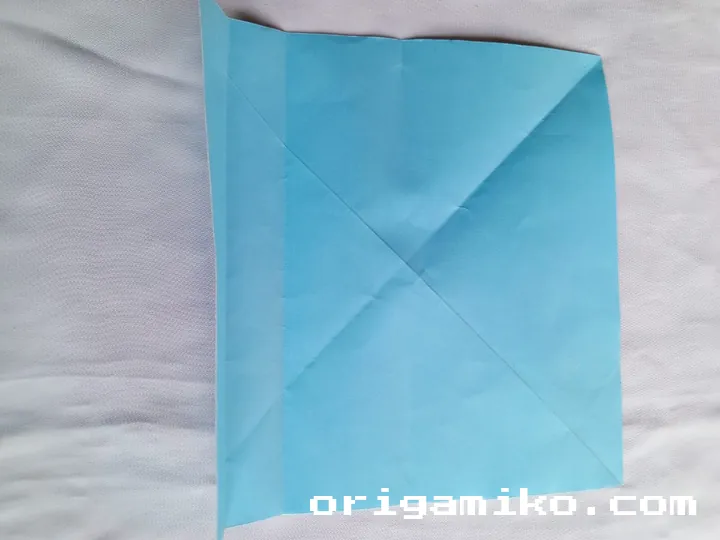
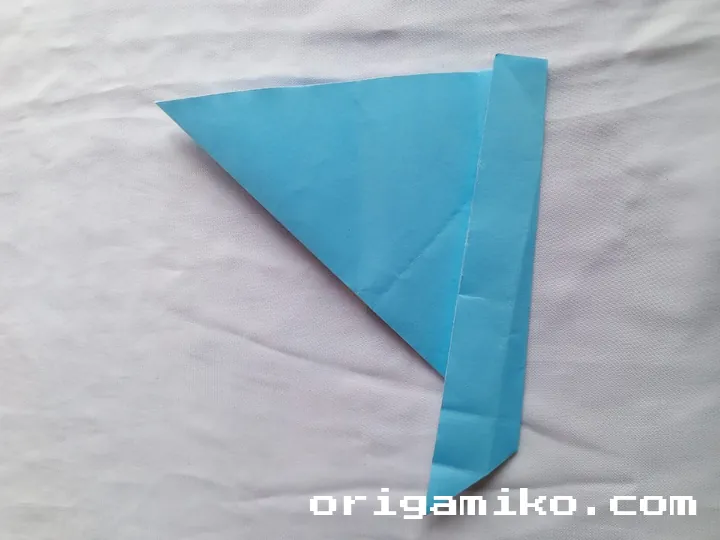
- Fold and Unfold the Corners
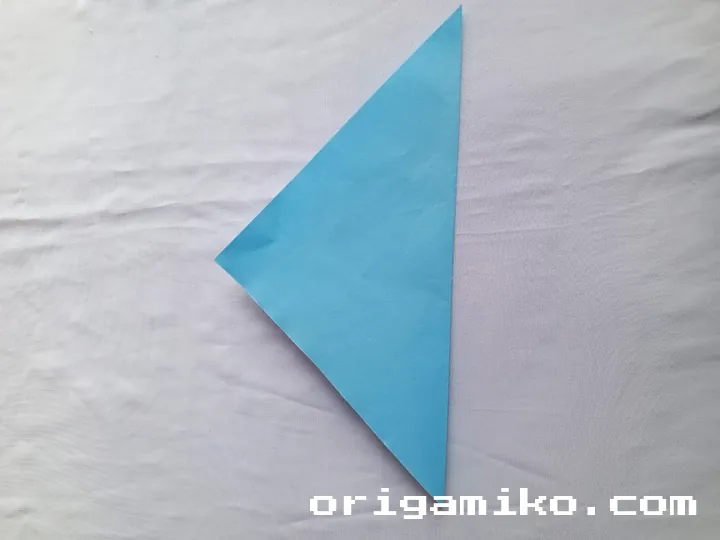
- Fold the bottom left corner up to the top right.
- Crease well, then unfold.
- Now fold the bottom right corner to the top left.
- Unfold again—you should see a big “X” across your paper.
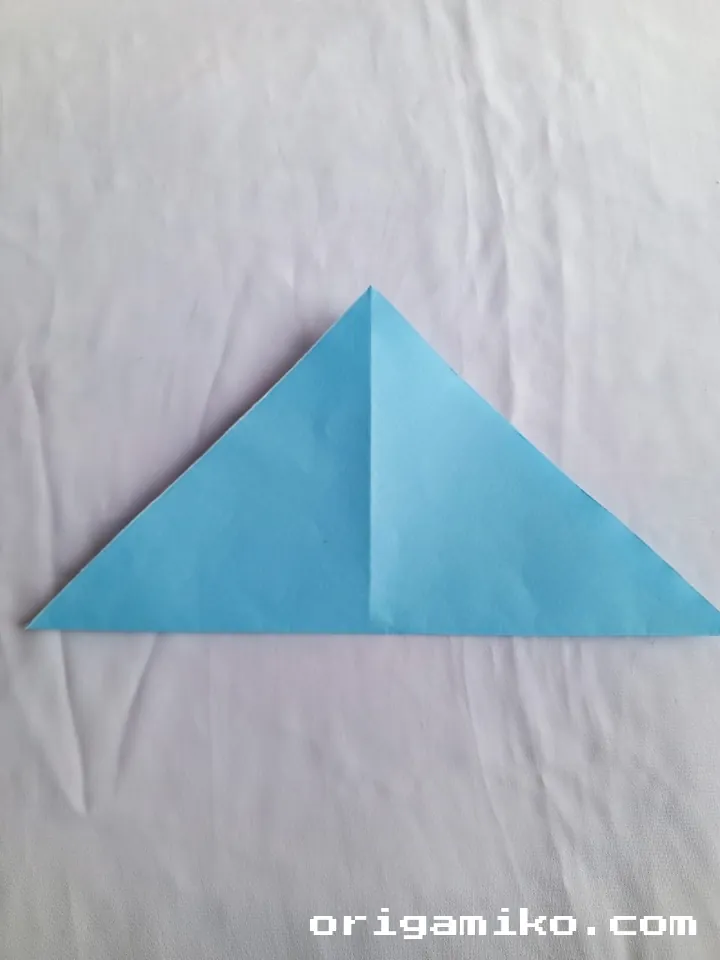
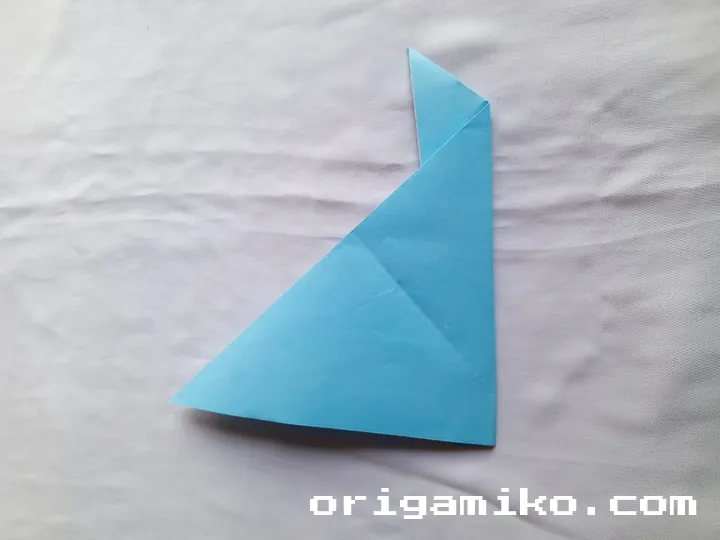
- Make a Fold from the Bottom Edge
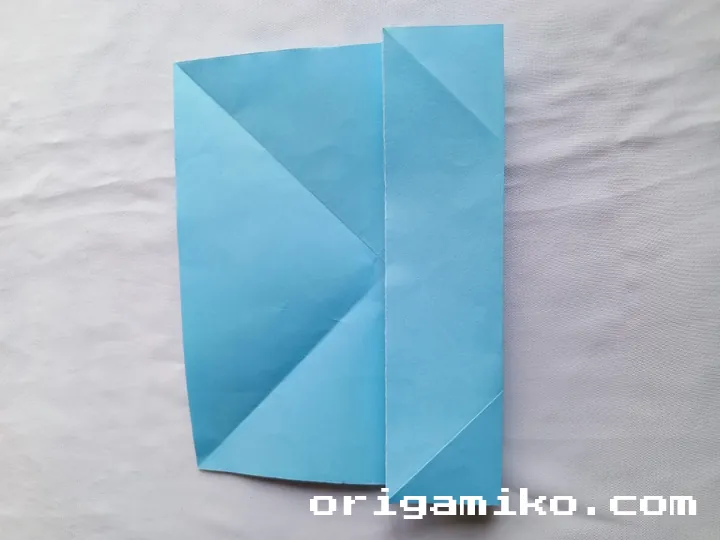
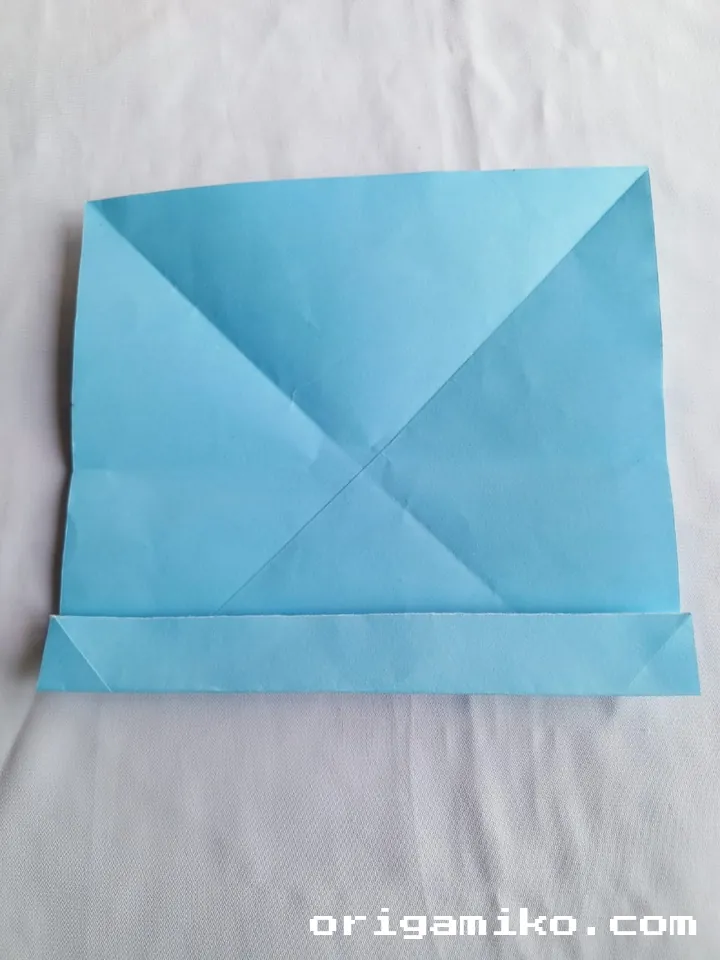
- Fold the bottom edge up to meet the top edge.
- Crease firmly, then unfold.
- Repeat that same fold again—bottom to top.
- Unfold once more. You now have horizontal and diagonal creases.
- Create the Origami Ship
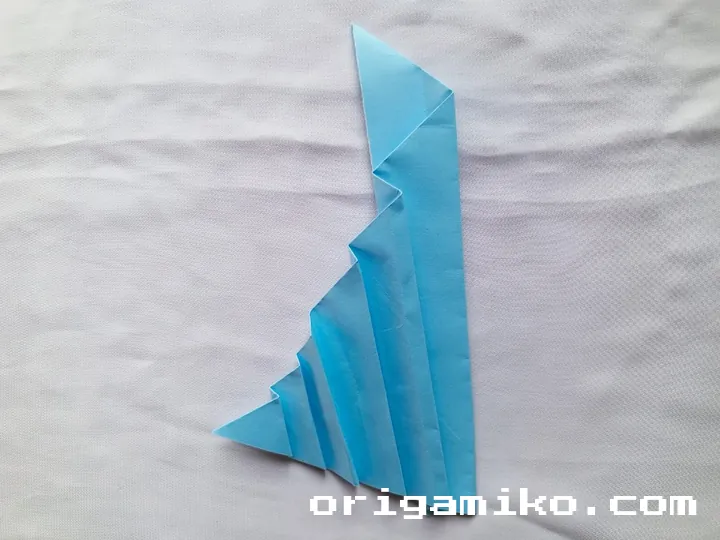
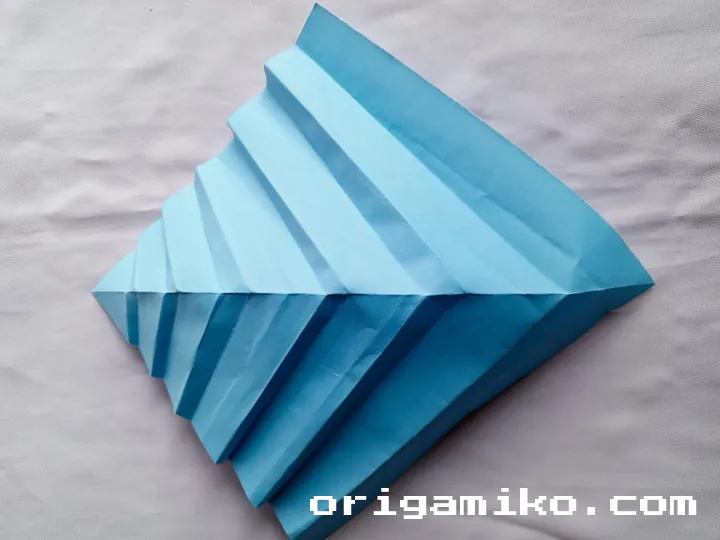

- Pinch the sides so the diagonal creases pop up.
- Fold the paper inward at the corners, guiding it into a 3D ship shape.
- Adjust the bottom folds so it stands or “floats” well.
- Done! You’ve just folded a classic easy origami ship.
This method blends sharp geometry with smooth transitions.
It’s tactile, intuitive, and yes—super satisfying.
Tips for Success
Want your origami ship to turn out crisp and clean? Here are some tips I live by:
- Use your nails or a ruler to sharpen each crease.
- Fold slowly, especially at the start.
- Pre-crease even if it feels unnecessary—it makes shaping way easier.
- Work on a hard surface—no soft beds or lap folding.
- Keep your hands clean to avoid smudging.
And remember—origami isn’t about perfection.
It’s about the experience of folding something with your own hands.
Common Mistakes (And How to Avoid Them)
Here’s what I’ve seen trip up folks, and how you can dodge the frustration:
- Using the wrong size paper
→ Stick to a true 12″ × 12″ square. - Forgetting to crease firmly
→ Press down every fold with purpose. - Skipping the “unfold” steps
→ They set up key structure later on. - Paper tearing mid-fold
→ Don’t rush. Use lighter pressure if your paper’s too thin. - Symmetry problems
→ Always align edges precisely before folding.
Mess-ups happen. Trust me—I’ve crumpled my share of paper ships.
But each fold teaches you something new.
Similar Variations You Can Try
Once you’ve got the basic ship down, here are a few cool twists:
- Double-Sail Origami Ship
Adds a second fold for a more dramatic look. - Flat-Bottom Boat
Easier to display, especially for school projects. - Color Layer Ship
Use two-tone paper to show off your layers. - Miniature Fleet
Shrink your paper and make a handful—great for dioramas or gifts.
I once made a whole birthday table display of mini origami ships.
People loved it—and asked how I pulled it off so fast.
FAQs
Q: Can I use regular printer paper?
A: Yes! Just cut it into a perfect square before starting.
Q: Will this float in water?
A: Technically yes, but only briefly. It’s more for display than bathtime.
Q: What if I mess up a fold?
A: Try unfolding and smoothing it out. Or grab a new sheet and give it another go.
Q: Is this good for kids?
A: Absolutely. Just help them with the creasing part if they’re young.
Q: Can I decorate it?
A: Please do! Add sails, flags, or even name your ship.
Final Thoughts: Set Sail with Your Own Origami Ship
There’s something magical about folding paper into a ship.
It’s simple, peaceful, and gives you something real at the end.
Now that you’ve learned how to make origami ship from a single square, you’ve got a creative skill that’s always at your fingertips.
Whether you’re teaching kids, relaxing after work, or decorating your desk, this little boat can bring a big smile.
So go ahead—fold another. Or five.
And maybe even start your own tiny fleet.