Close Menu
    Facebook X (Twitter) Instagram
    Facebook X (Twitter) Instagram
    Origamik
    Subscribe
    • Easy Origami

      30+ Dollar Bill Origami You Need to Try

      July 30, 2025

      45+ Fall Origami Ideas You Need to Try

      July 30, 2025

      15+ Origami Bookmarks You Need to Try

      July 29, 2025

      15+ Useful Origami You Need to Try

      July 29, 2025

      15+ Sticky Note Origami You Need to Try

      July 29, 2025
    • Functional Origami

      55+ Functional Origami You Need to Try

      July 28, 2025

      Easy Origami Gloves: Your Gateway to Magical Paper Folding

      July 23, 2025

      The Complete Guide to Making an Easy Origami Diamond

      July 23, 2025

      The Complete Guide to Creating an Easy Origami Combined Cube

      July 23, 2025

      How to Make an Easy Origami Samurai Hat (Simple Samurai Hat Step by Step)

      May 14, 2025
    • Gum Wrapper Origami

      8 Easy Gum Wrapper Origami

      July 28, 2025

      Easy Gum Wrapper Hearts Origami

      July 23, 2025

      Easy Gum Wrapper Crane Origami: Turn Trash Into Treasure

      July 23, 2025

      How to Make an Easy Gum Wrapper Star Origami: Your Complete Guide

      July 23, 2025

      The Ultimate Guide to Creating Beautiful Gum Wrapper Origami Butterflies

      July 23, 2025
    • Origami Flower

      18 Origami Leaves You Need to Try

      July 23, 2025

      The Complete Guide to Creating Your First Easy Origami Cherry

      July 23, 2025

      The Complete Guide to Creating a Beautiful Easy Origami Lily

      July 23, 2025

      11 Origami Roses You Need to Try

      July 22, 2025

      25+ Origami Flowers You Need to Try

      July 16, 2025
    • Origami For Beginners
      1. Origami Box
      2. Origami Heart
      3. Origami Star
      4. View All

      29+ Origami Boxes You Need to Try

      July 26, 2025

      How to Make an Easy Origami Divider Box (Simple Divider Box Step by Step)

      April 25, 2025

      Origami Magic Box Instructions: A Fun and Simple Paper Folding Project

      February 8, 2025

      How to Make an Easy Origami Star Box (Step by Step Guide)

      February 8, 2025

      35+ Origami Heart Ideas

      July 27, 2025

      How to Make an Origami Heart Box with Lid: Step-by-Step Guide

      February 8, 2025

      Easy Origami Heart with Blossom: A Step-by-Step Guide

      February 8, 2025

      How to Make an Origami Secret Heart Box

      January 23, 2025

      10 Origami Star Ideas You Need to Try

      July 22, 2025

      How to Make an Easy Origami 5 Pointed Star

      February 8, 2025

      Origami 6 Pointed Star: Step-by-Step Guide for Beginners & Experts

      February 8, 2025

      How to Make an Easy Origami Diamond Star: Step-by-Step Guide

      February 8, 2025

      30+ Dollar Bill Origami You Need to Try

      July 30, 2025

      17+ Origami Vehicles You Need to Try

      July 29, 2025

      15+ Useful Origami You Need to Try

      July 29, 2025

      35+ Cool Origami Ideas You Need to Try

      July 29, 2025
    • Sticky Note Origami

      15+ Sticky Note Origami You Need to Try

      July 29, 2025

      How to Make an Easy Origami Sticky Note Bookmark: A Step-by-Step Guide

      April 25, 2025

      How to Make Easy Origami Sticky Note Claws – Simple, Fierce, and Fun

      April 25, 2025

      How to Make an Easy Origami Sticky Note Fidget Toy

      April 25, 2025

      How to Make an Easy Origami Sticky Note Gown: Step-by-Step for Beginners

      April 25, 2025
    Origamik
    Home » How to Make an Easy Origami Sticky Note Fidget Toy
    Sticky Note Origami

    How to Make an Easy Origami Sticky Note Fidget Toy

    Orig AmiBy Orig AmiApril 25, 2025Updated:October 22, 2025No Comments5 Mins Read
    Facebook Twitter Pinterest LinkedIn Tumblr Email
    Featured image for How to Make an Easy Origami Sticky Note Fidget Toy
    Featured image for How to Make an Easy Origami Sticky Note Fidget Toy
    Share
    Facebook Twitter LinkedIn Pinterest Email

    Ever fidgeted with a sticky note during a long meeting or class?

    What if I told you that same sticky note could become a cool little toy?

    Stick around—I’m walking you through an easy Origami Sticky Note fidget toy that’s fun, relaxing, and super satisfying.

    Sticky note fidget toy final

    What Is an Origami Sticky Note Fidget Toy?

    This isn’t just any paper fold. It’s a fidget toy made from something you probably have lying around right now—a sticky note.

    We’re taking a humble square of paper and transforming it into a playful, pocket-sized paper transformer. It folds, flips, and shifts—like a tiny stress reliever with paper magic. The best part? You don’t need fancy supplies or expert skills. Just a little patience and a sticky note.


    Materials Needed

    Here’s everything you’ll need. It’s a short list, but trust me—it’ll take you far.

    Item Details Why You Need It
    Sticky Notes Standard 3×3 inch, square, any color The star of the show
    Flat Surface Desk or table For precise folds
    Clean Hands Optional but ideal Keeps paper neat and crease-friendly
    (Optional) Pencil For light marks if you want extra guidance Helps beginners get those folds just right

    Key Terms You Should Know

    Sticky note fidget toy final 6

    Before we jump into the Simple Sticky Note fidget toy step by step, here are a few quick terms:

    Fold Line
    The crease you make when folding the paper.

    Unfold
    Opening up the paper again after a fold, so you get visible lines.

    Corner Fold
    When you bring a corner into the center or edge of the square.

    Join Papers
    Connecting multiple folded units to make a final, moveable toy.


    How to Make Sticky Note Fidget Toy Origami (Step-by-Step)

    Let’s break this down. I’ll walk you through exactly what to do.

    Sticky note fidget toy final 7

    Step 1: Grab a Sticky Note

    Sticky note fidget toy step 1 b

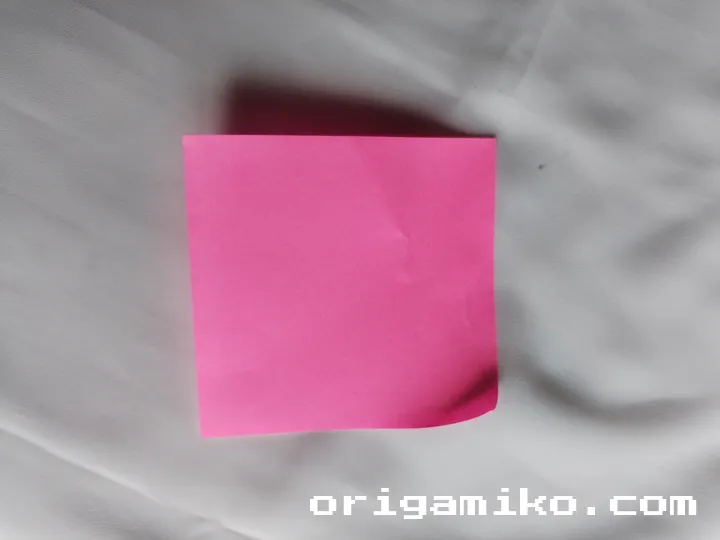
    Yep, just one to start. Make sure it’s square and sticky-side up (facing away from you).

    Step 2: Vertical Fold and Collapse

    Sticky note fidget toy step 2 a
    Sticky note fidget toy step 2 b
    Sticky note fidget toy step 2 c
    Sticky note fidget toy step 2 d
    Sticky note fidget toy step 2 e
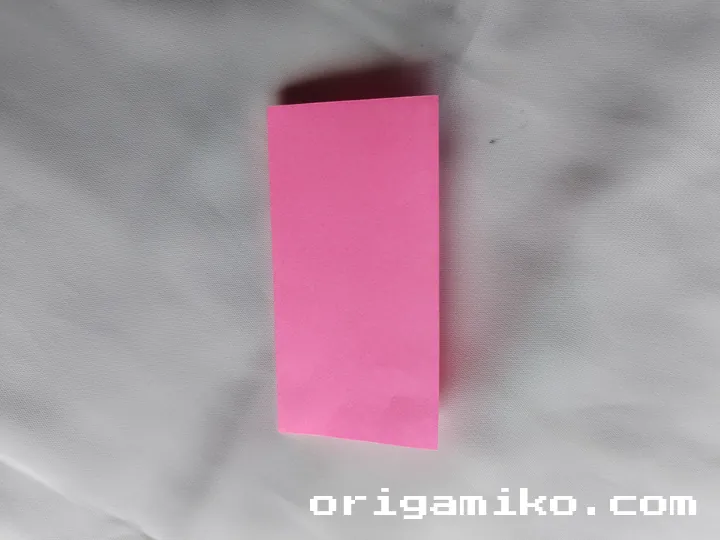
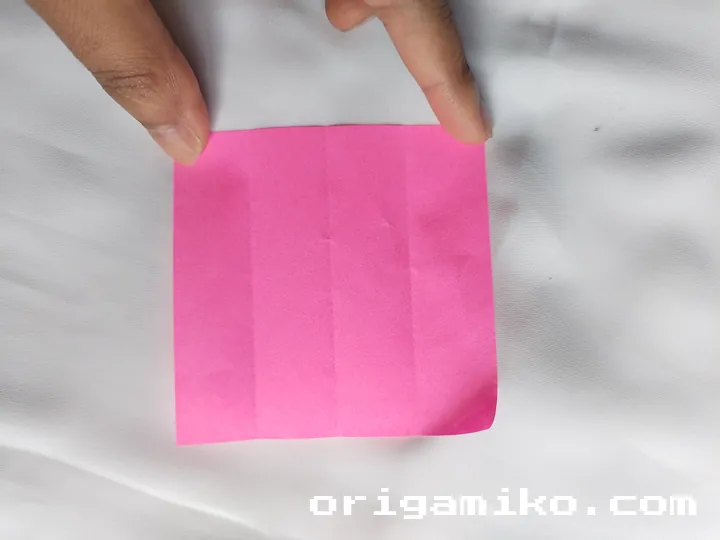
    • Fold the sticky note in half vertically (left edge to right edge).
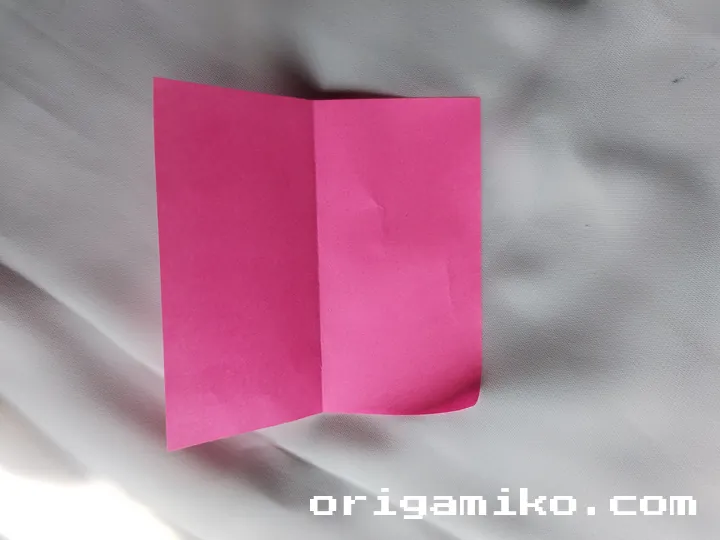
    • Unfold it.
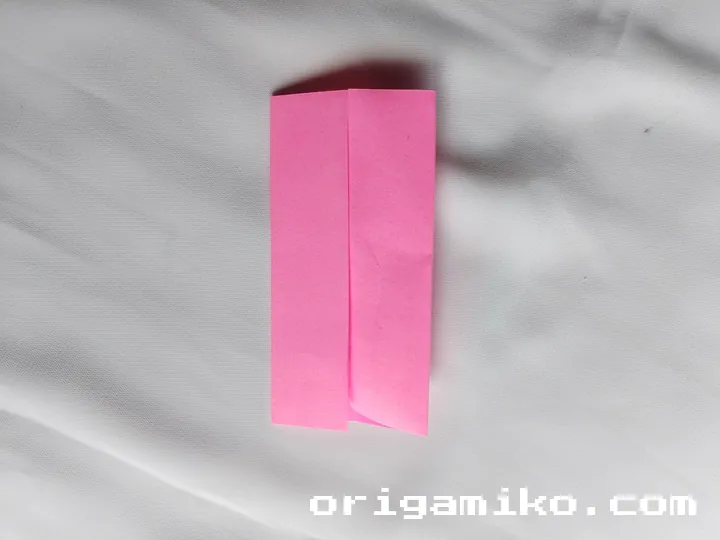
    • Now bring the two sides inward along that crease. Push the center back so it collapses into a tented shape. Flatten it. Looks like a doorframe? You’re golden.

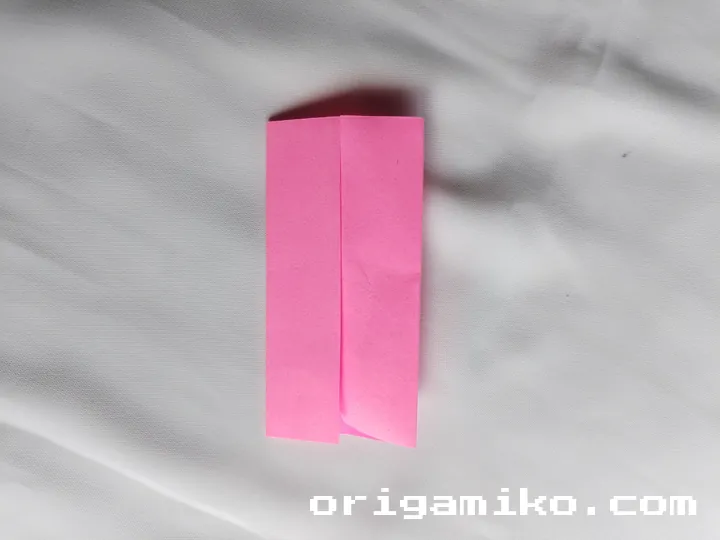
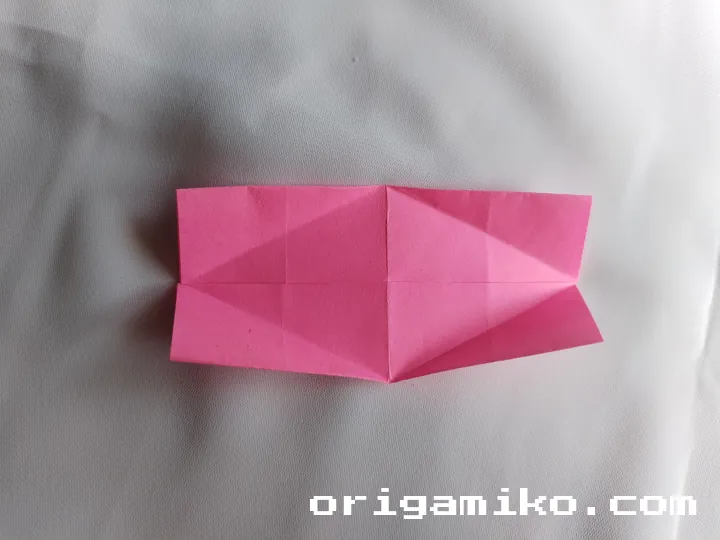
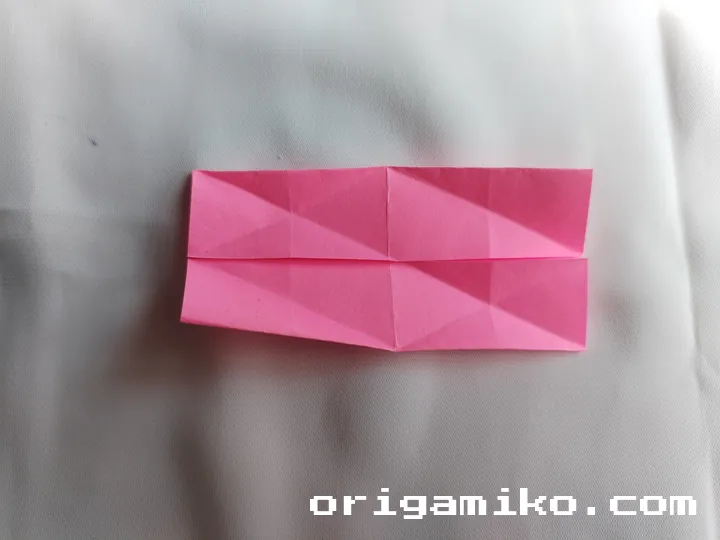
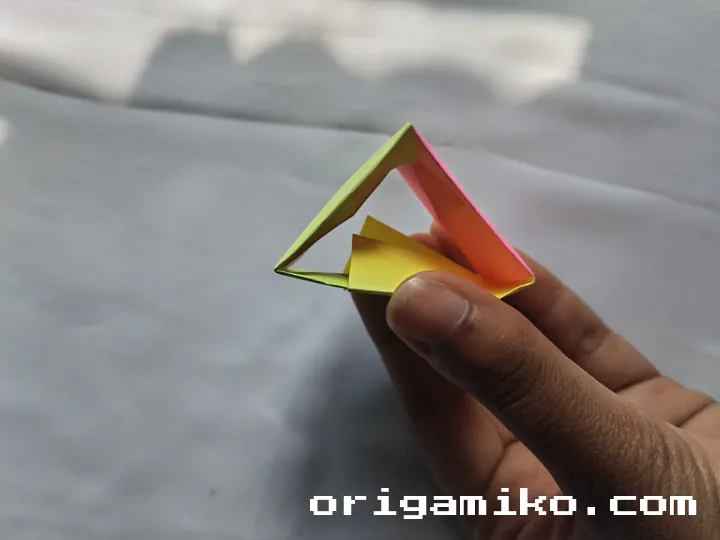
    Step 3: Horizontal Fold and Collapse

    Sticky note fidget toy step 3 a
    Sticky note fidget toy step 3 b
    Sticky note fidget toy step 3 c
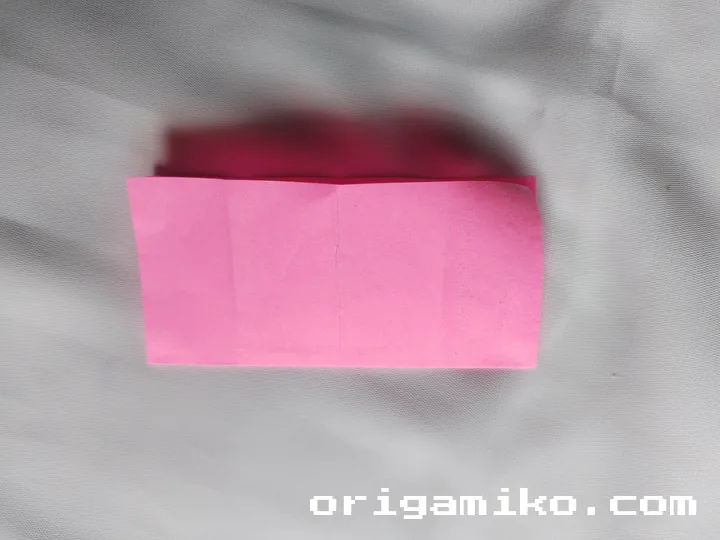
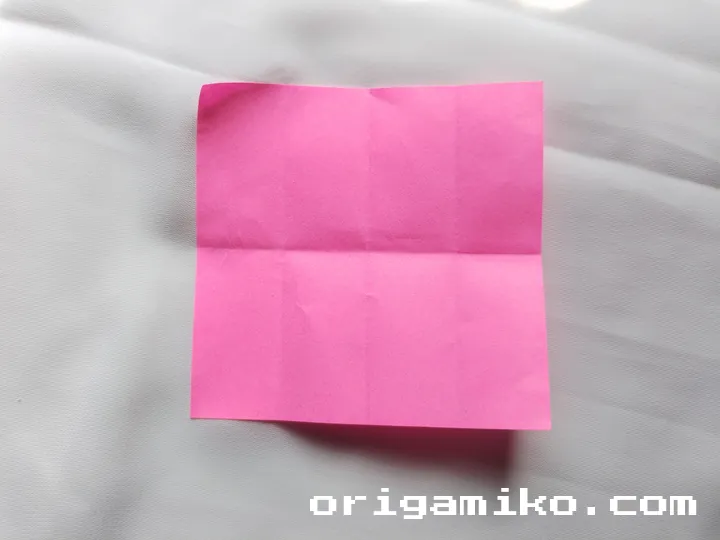
    • Fold it in half horizontally (top edge to bottom).
    • Unfold it.
    • Again, collapse it inward by bringing the top and bottom edges together along the horizontal crease. Flatten.

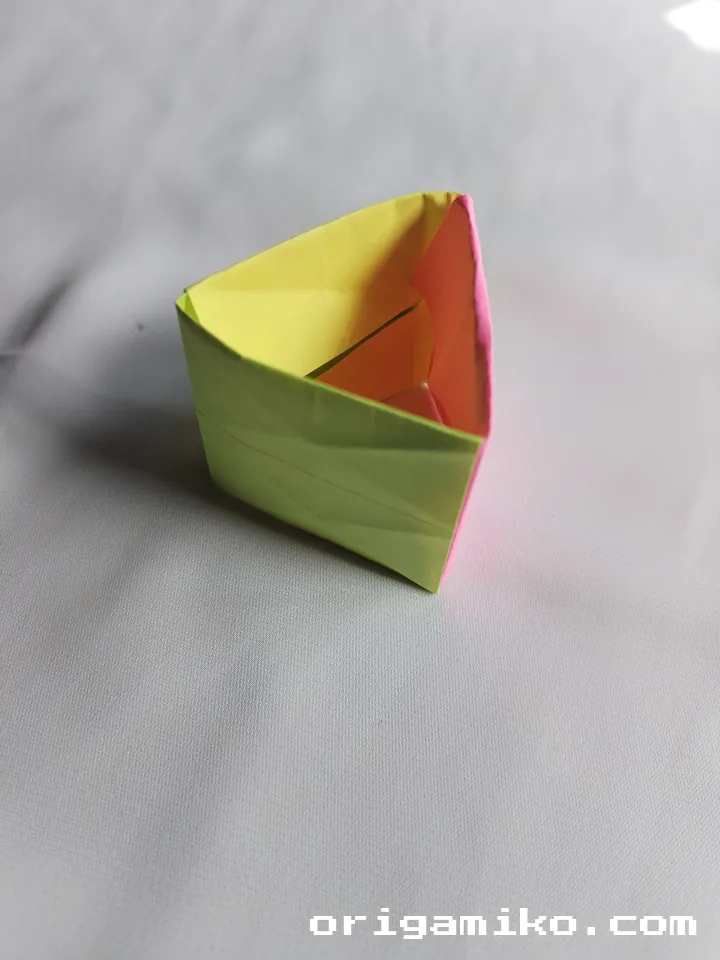
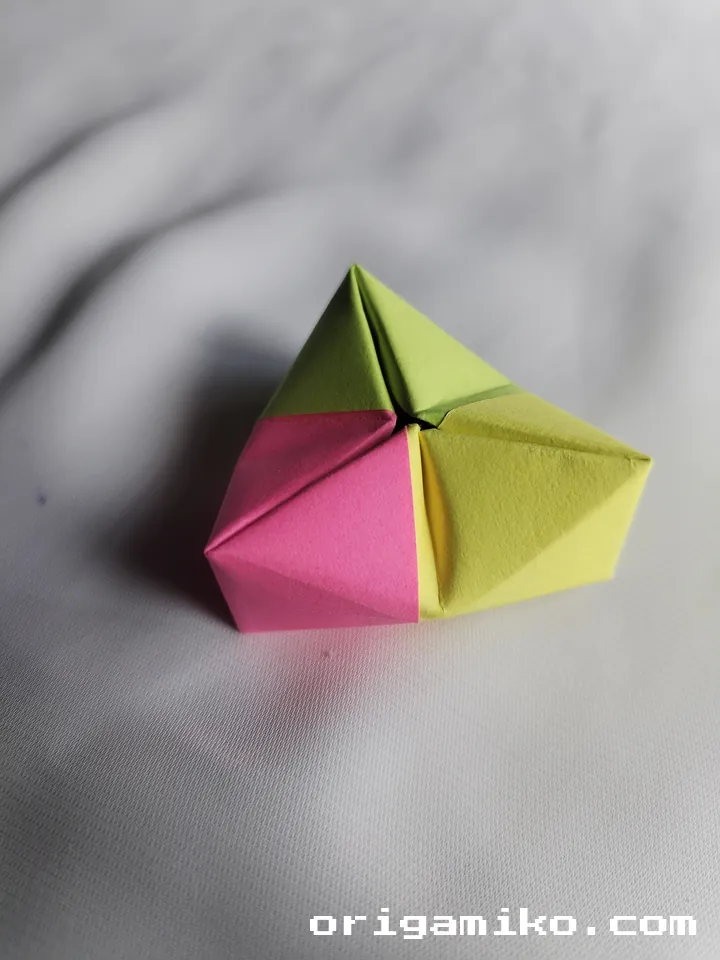
    At this point, your sticky note should now have four triangular flaps—like a mini paper tent or open box.

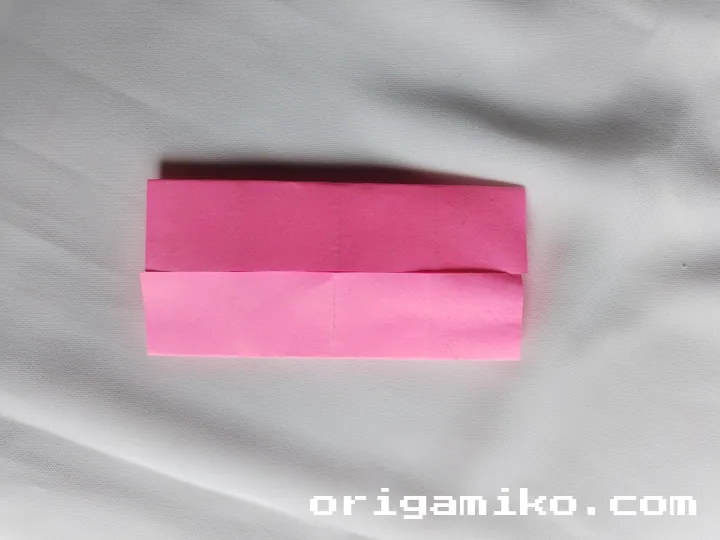
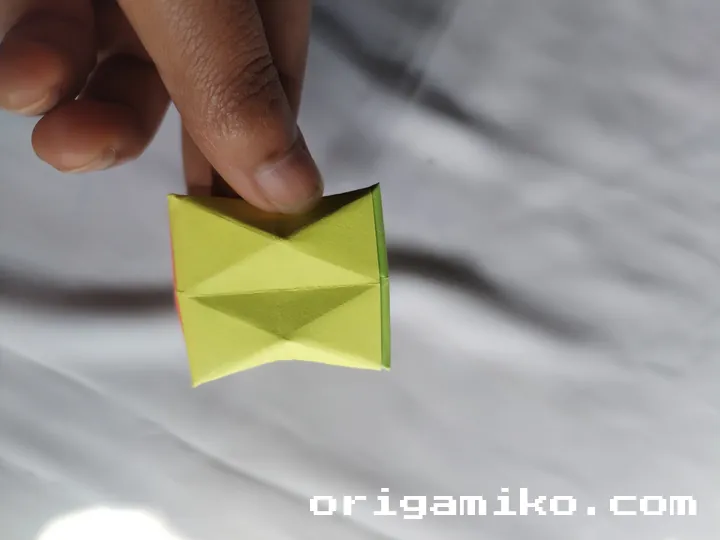
    Step 4: Fold All Four Corners

    Sticky note fidget toy step 4 a
    Sticky note fidget toy step 4 b
    Sticky note fidget toy step 4 c
    Sticky note fidget toy step 4 d
    Sticky note fidget toy step 4 e
    Sticky note fidget toy step 4 f
    Sticky note fidget toy step 4 g
    Sticky note fidget toy step 4 h
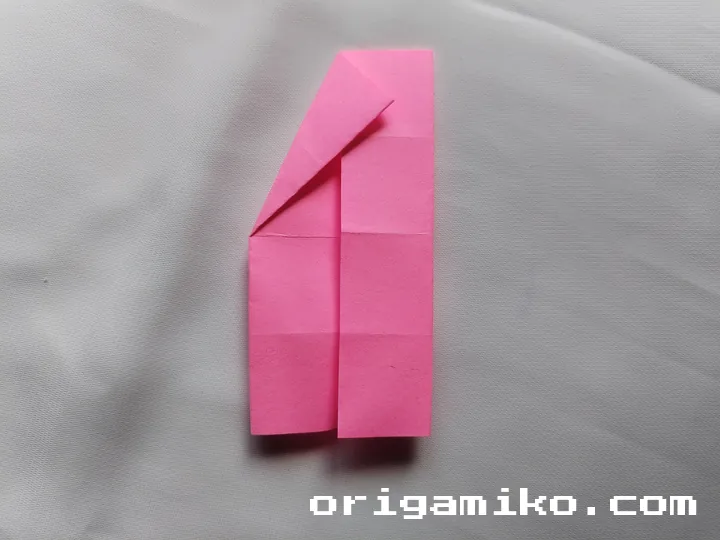
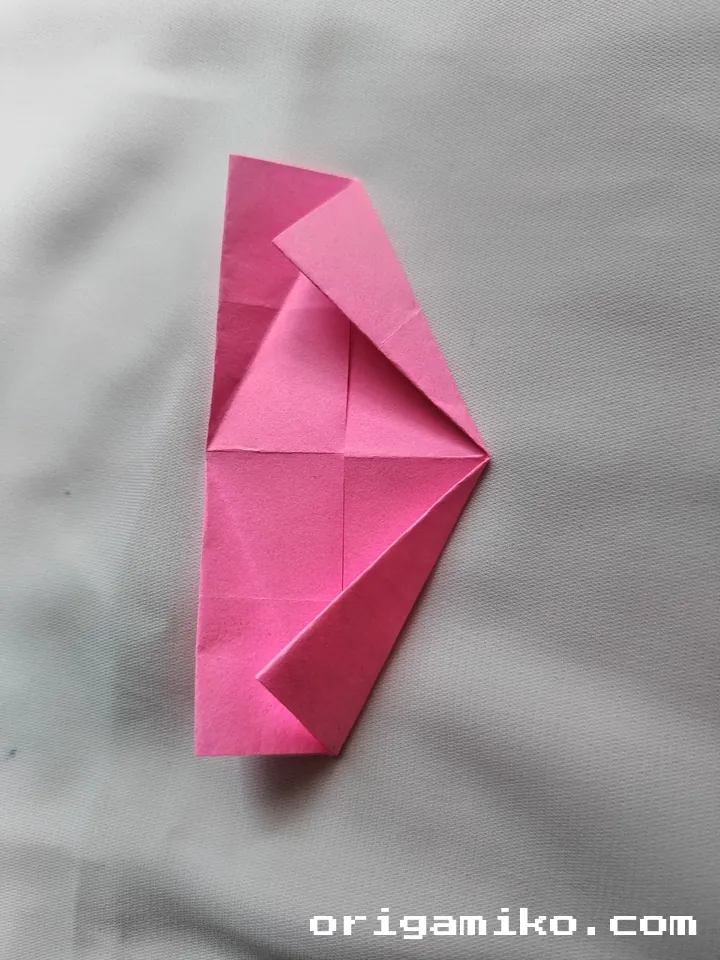
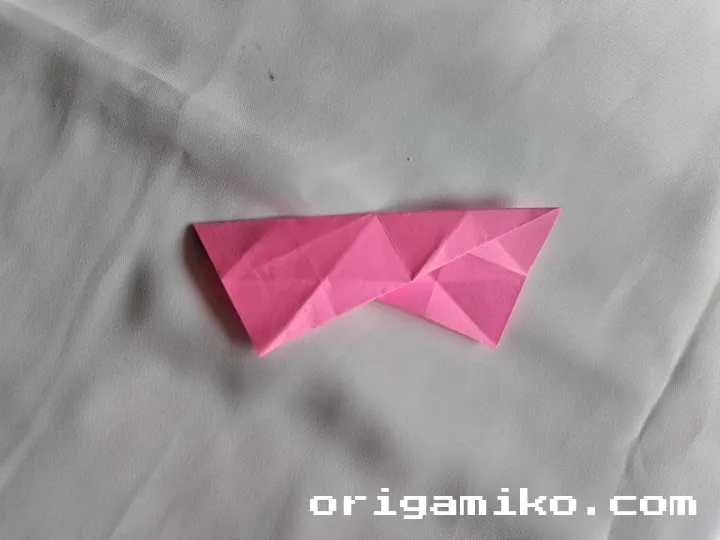
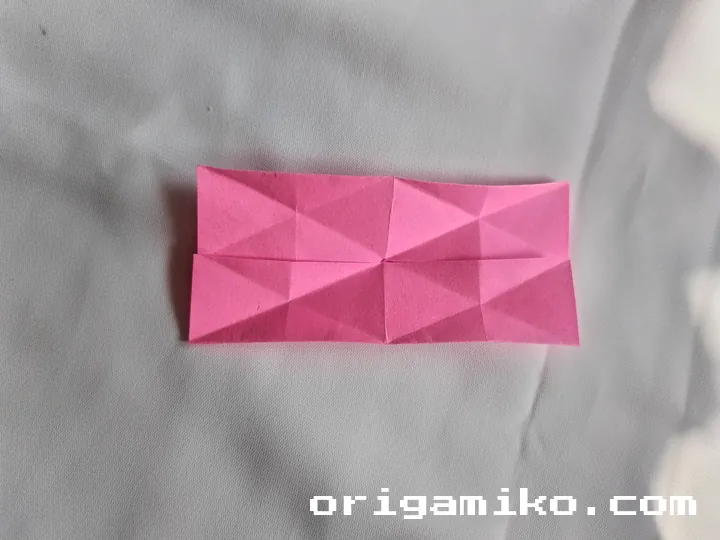
    • Take each corner—top left, top right, bottom left, bottom right—and fold them into the center.
    • These corner folds start forming the inner mechanics of the toy.

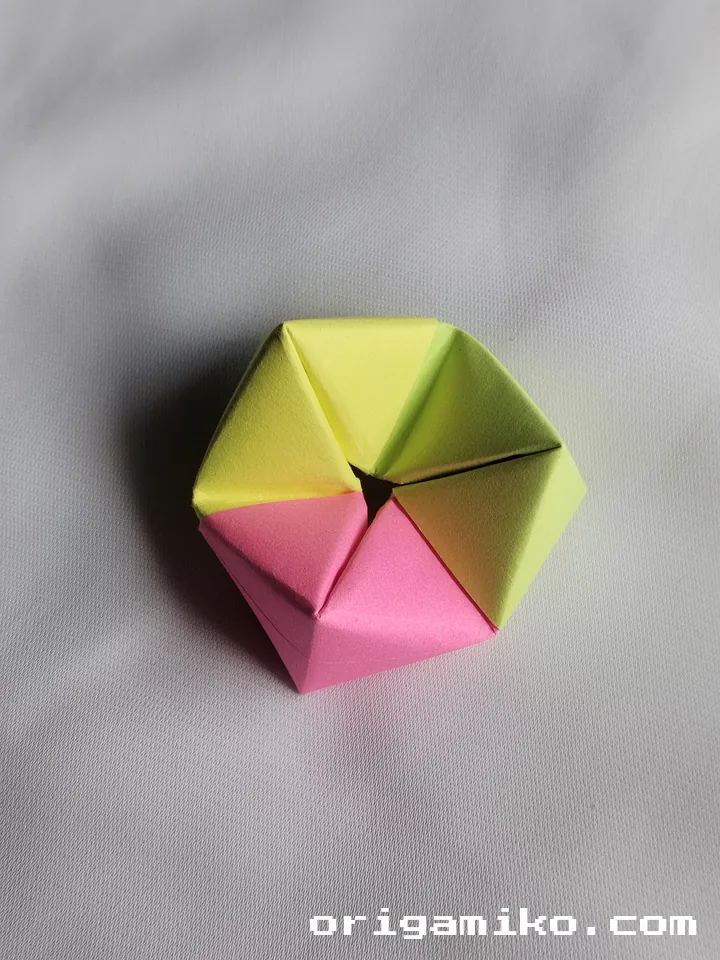
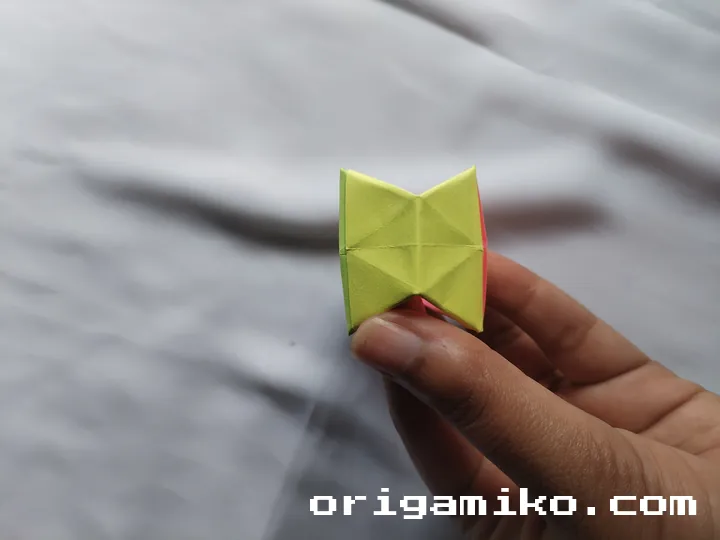
    Step 5: Make 3 More Units

    Sticky note fidget toy step 5 a
    Sticky note fidget toy step 5 b
    Sticky note fidget toy step 5 c
    Sticky note fidget toy step 5 d
    Sticky note fidget toy step 5 e
    Sticky note fidget toy step 5 f
    Sticky note fidget toy step 5 g

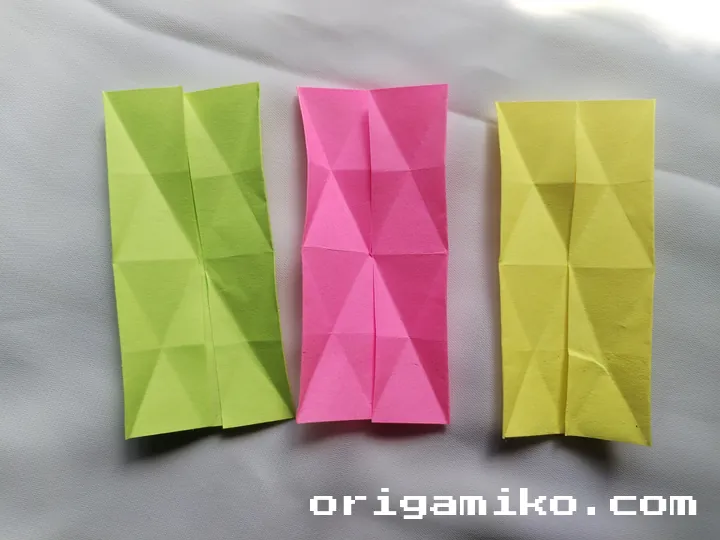
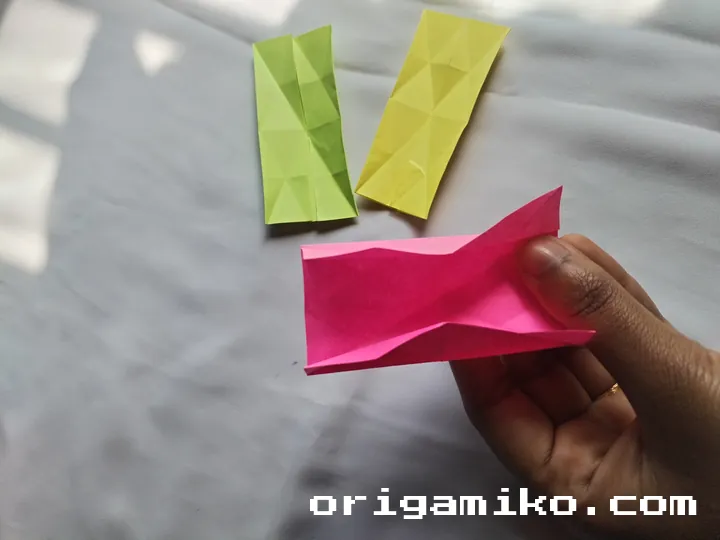
    You’ll need three total modules (so, repeat steps 1–4 three times using three sticky notes).
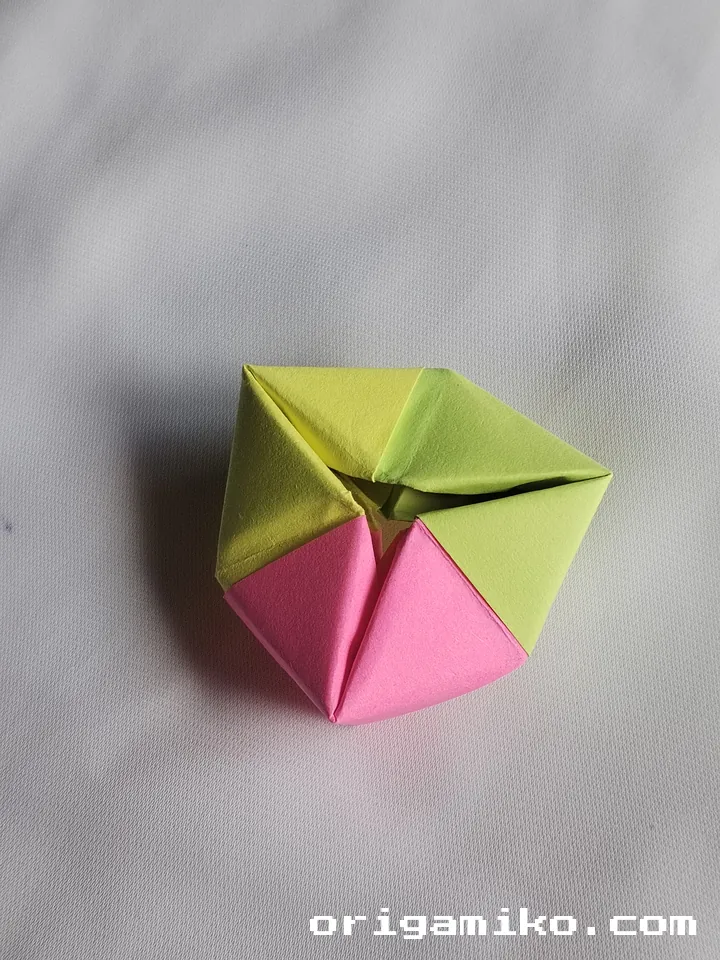
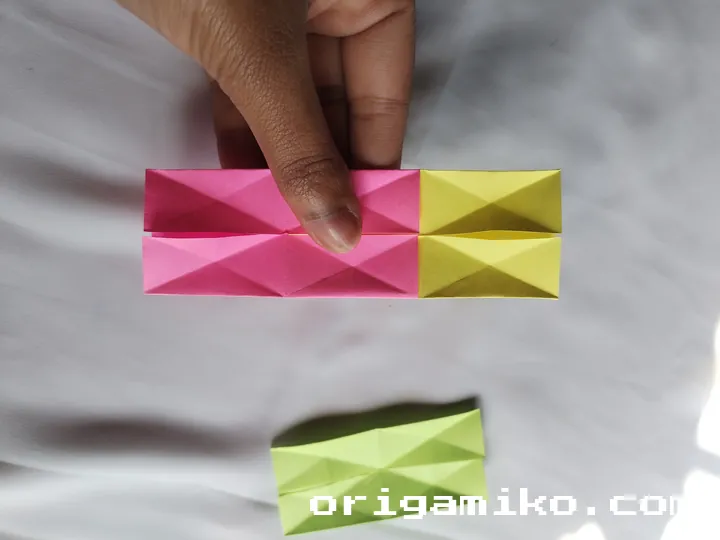
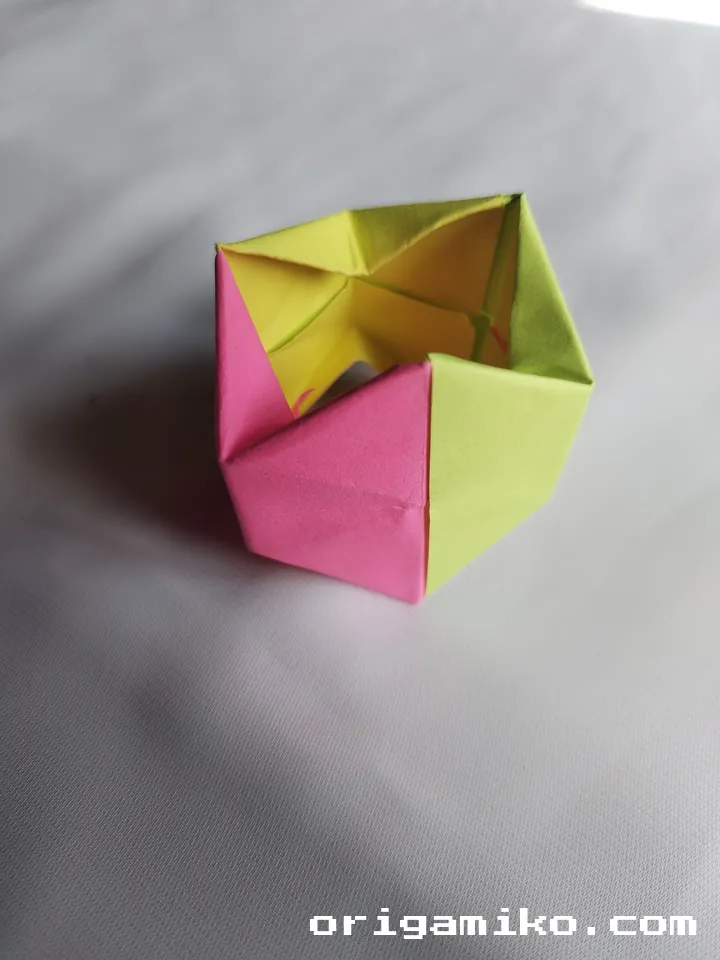
    Now connect them:

    • Tuck one folded piece into the pocket of another.
    • Keep going until all three are joined together.

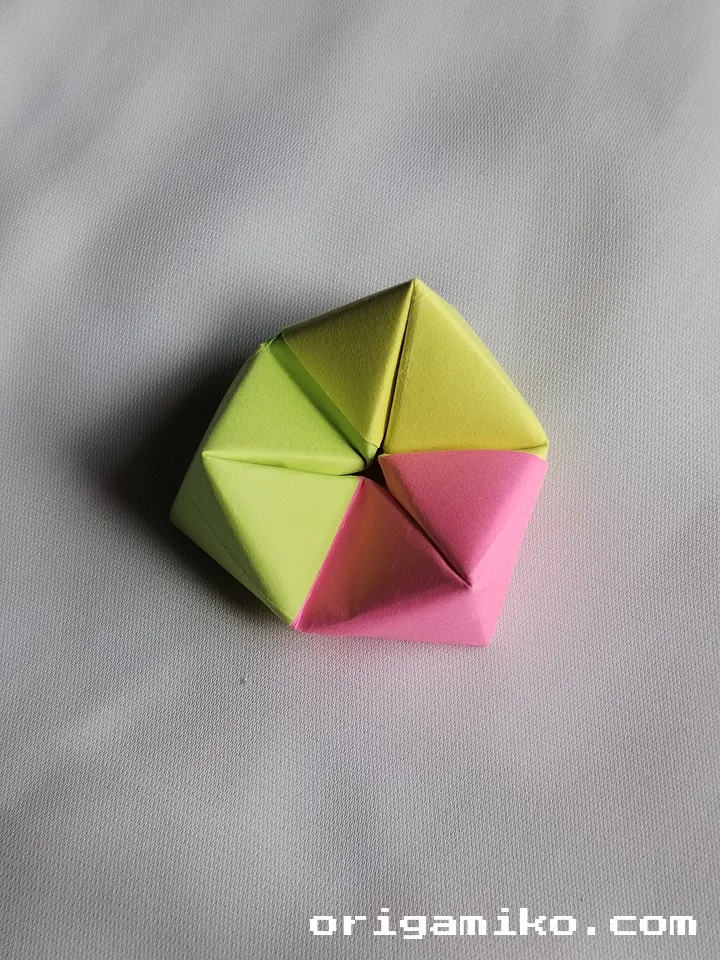
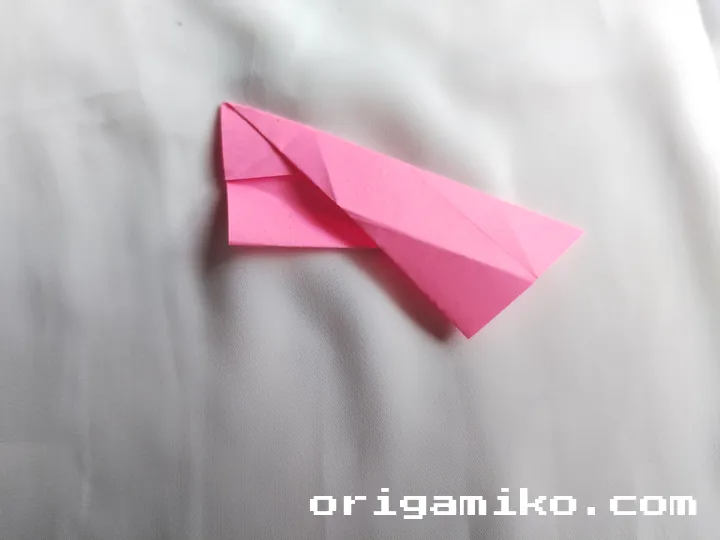
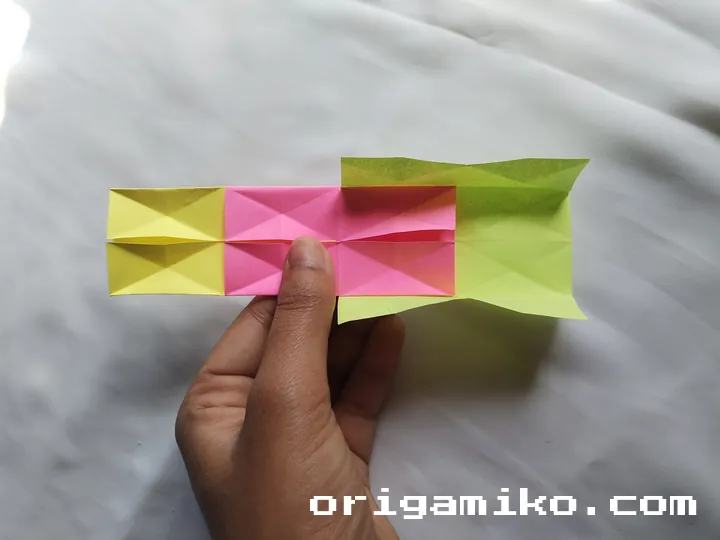
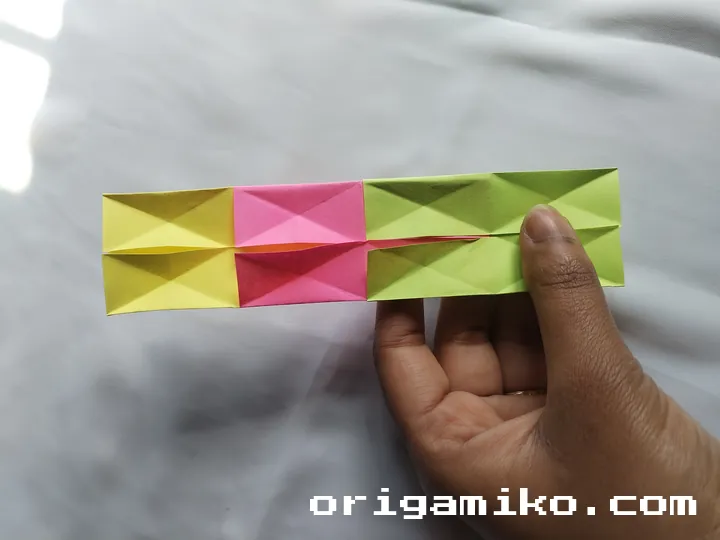
    Step 6: Final Fold (Follow the Picture Style)

    Sticky note fidget toy step 6 a
    Sticky note fidget toy step 6 b
    Sticky note fidget toy step 6 c
    Sticky note fidget toy step 6 d
    Sticky note fidget toy step 6 e
    Sticky note fidget toy step 6 f
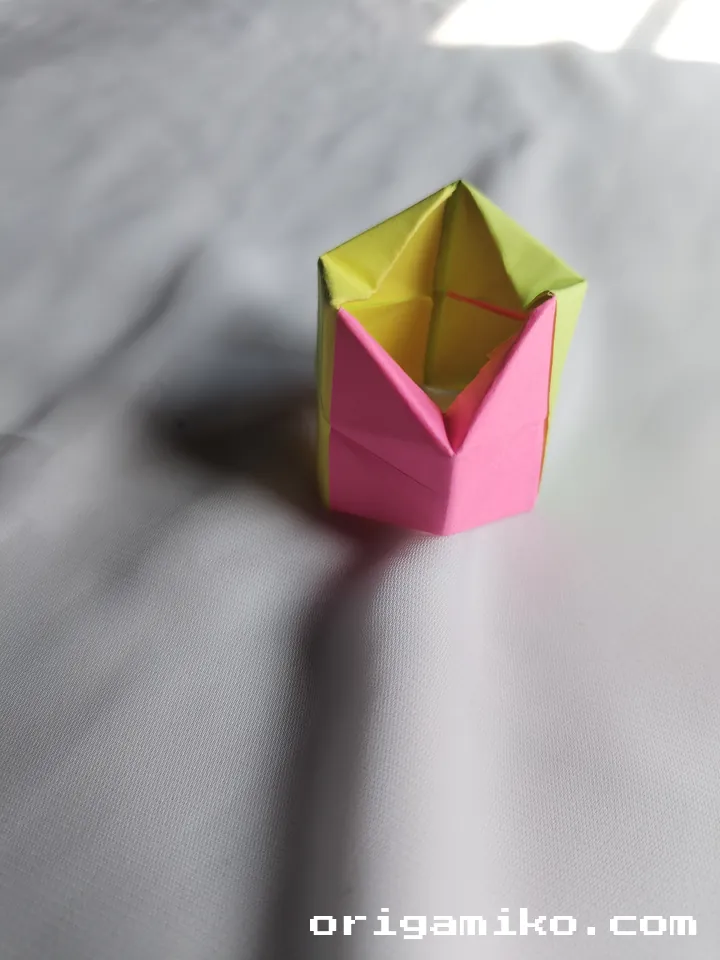
    • The shape should now resemble a small box or cube with openable flaps.
    • Carefully fold and rotate it along the creases so it flips smoothly.
    • Once you find that flow—bam! Your Origami Sticky Note fidget toy is complete.

    Tips for Success

    Want a smooth folding experience? Here’s what helps:

    • Use fresh sticky notes. Curled edges are harder to fold precisely.
    • Press down hard on creases. The sharper the fold, the better the movement.
    • Start slow. Precision now saves time later.
    • Work on a hard, flat surface. Don’t try folding on your lap or a soft couch.

    Common Mistakes and How to Avoid Them

    Even I made these when starting out. Here’s what to watch for:

    • Mistake: Folding too fast.
      Fix: Slow down. You’ll thank yourself when assembling.
    • Mistake: Using rectangle-shaped paper.
      Fix: Make sure your sticky note is a perfect square.
    • Mistake: Not flattening folds.
      Fix: Use the edge of a ruler or your nail to crease better.
    • Mistake: Skipping steps.
      Fix: Follow the Origami Sticky Note fidget toy instructions exactly in order.

    Similar Variations You Can Try

    Feel like exploring more? Try these ideas:

    • 4-Unit Fidget Toy – Adds an extra flip point. Slightly bulkier, more satisfying.
    • Mini Version – Use 1.5×1.5 inch sticky notes.
    • Rainbow Version – Use different colors for each module.
    • Glide Variant – Add tiny magnets or stickers for extra movement.

    These are all fun twists once you master the basic model.


    FAQs

    Q: Can I use regular paper instead of sticky notes?
    Yes, but cut it into a perfect square. Sticky notes are just easier to handle.

    Q: Is this safe for kids?
    Absolutely. No scissors or glue required. Just supervision for little ones.

    Q: How long does it take?
    About 10–15 minutes on your first try. Quicker once you know the steps.


    Final Thoughts

    Making an easy Origami Sticky Note fidget toy is more than just a fun craft—it’s a calming, hands-on break from screens. And it’s surprisingly satisfying to play with after you’re done.

    Whether you’re a beginner or a seasoned folder, this little project offers a rewarding journey in paper folding. Give it a shot, and don’t forget to share your creations with others!


    Ready to learn more origami? Try making an origami card holder or a four-pointed star next!

    Share. Facebook Twitter Pinterest LinkedIn Tumblr Email
    Orig Ami
    • Website

    Related Posts

    15+ Sticky Note Origami You Need to Try

    July 29, 2025

    How to Make an Easy Origami Sticky Note Bookmark: A Step-by-Step Guide

    April 25, 2025

    How to Make Easy Origami Sticky Note Claws – Simple, Fierce, and Fun

    April 25, 2025

    Comments are closed.

    Latest Posts

    30+ Dollar Bill Origami You Need to Try

    July 30, 2025

    45+ Fall Origami Ideas You Need to Try

    July 30, 2025

    17+ Origami Vehicles You Need to Try

    July 29, 2025

    15+ Origami Bookmarks You Need to Try

    July 29, 2025

    15+ Useful Origami You Need to Try

    July 29, 2025

    35+ Cool Origami Ideas You Need to Try

    July 29, 2025

    15+ Sticky Note Origami You Need to Try

    July 29, 2025

    20+ Easy Origami Airplanes You Need to Try

    July 29, 2025

    8 Easy Gum Wrapper Origami

    July 28, 2025

    75+ Origami Toys You Need to Try

    July 28, 2025

    About Origamiko

    Orig Ami shares carefully-crafted origami tutorials, models, and ideas to help you explore the art of paper folding. From simple beginner projects to intricate display pieces, we provide clear instructions and inspiration so you can enjoy the process and improve with confidence.

    Questions or feedback? Reach out anytime.

    📧 [email protected]
    📞 +1 714-801-8105

    Subscribe to Updates

    Get tutorials, paper-folding tips, and updates from Orig Ami.

    Footer Menu

    • About Us
    • Contact Us
    • Disclaimer
    • Privacy Policy