Close Menu
    Facebook X (Twitter) Instagram
    Facebook X (Twitter) Instagram
    Origamik
    Subscribe
    • Easy Origami

      30+ Dollar Bill Origami You Need to Try

      July 30, 2025

      45+ Fall Origami Ideas You Need to Try

      July 30, 2025

      15+ Origami Bookmarks You Need to Try

      July 29, 2025

      15+ Useful Origami You Need to Try

      July 29, 2025

      15+ Sticky Note Origami You Need to Try

      July 29, 2025
    • Functional Origami

      55+ Functional Origami You Need to Try

      July 28, 2025

      Easy Origami Gloves: Your Gateway to Magical Paper Folding

      July 23, 2025

      The Complete Guide to Making an Easy Origami Diamond

      July 23, 2025

      The Complete Guide to Creating an Easy Origami Combined Cube

      July 23, 2025

      How to Make an Easy Origami Samurai Hat (Simple Samurai Hat Step by Step)

      May 14, 2025
    • Gum Wrapper Origami

      8 Easy Gum Wrapper Origami

      July 28, 2025

      Easy Gum Wrapper Hearts Origami

      July 23, 2025

      Easy Gum Wrapper Crane Origami: Turn Trash Into Treasure

      July 23, 2025

      How to Make an Easy Gum Wrapper Star Origami: Your Complete Guide

      July 23, 2025

      The Ultimate Guide to Creating Beautiful Gum Wrapper Origami Butterflies

      July 23, 2025
    • Origami Flower

      18 Origami Leaves You Need to Try

      July 23, 2025

      The Complete Guide to Creating Your First Easy Origami Cherry

      July 23, 2025

      The Complete Guide to Creating a Beautiful Easy Origami Lily

      July 23, 2025

      11 Origami Roses You Need to Try

      July 22, 2025

      25+ Origami Flowers You Need to Try

      July 16, 2025
    • Origami For Beginners
      1. Origami Box
      2. Origami Heart
      3. Origami Star
      4. View All

      29+ Origami Boxes You Need to Try

      July 26, 2025

      How to Make an Easy Origami Divider Box (Simple Divider Box Step by Step)

      April 25, 2025

      Origami Magic Box Instructions: A Fun and Simple Paper Folding Project

      February 8, 2025

      How to Make an Easy Origami Star Box (Step by Step Guide)

      February 8, 2025

      35+ Origami Heart Ideas

      July 27, 2025

      How to Make an Origami Heart Box with Lid: Step-by-Step Guide

      February 8, 2025

      Easy Origami Heart with Blossom: A Step-by-Step Guide

      February 8, 2025

      How to Make an Origami Secret Heart Box

      January 23, 2025

      10 Origami Star Ideas You Need to Try

      July 22, 2025

      How to Make an Easy Origami 5 Pointed Star

      February 8, 2025

      Origami 6 Pointed Star: Step-by-Step Guide for Beginners & Experts

      February 8, 2025

      How to Make an Easy Origami Diamond Star: Step-by-Step Guide

      February 8, 2025

      30+ Dollar Bill Origami You Need to Try

      July 30, 2025

      17+ Origami Vehicles You Need to Try

      July 29, 2025

      15+ Useful Origami You Need to Try

      July 29, 2025

      35+ Cool Origami Ideas You Need to Try

      July 29, 2025
    • Sticky Note Origami

      15+ Sticky Note Origami You Need to Try

      July 29, 2025

      How to Make an Easy Origami Sticky Note Bookmark: A Step-by-Step Guide

      April 25, 2025

      How to Make Easy Origami Sticky Note Claws – Simple, Fierce, and Fun

      April 25, 2025

      How to Make an Easy Origami Sticky Note Fidget Toy

      April 25, 2025

      How to Make an Easy Origami Sticky Note Gown: Step-by-Step for Beginners

      April 25, 2025
    Origamik
    Home » How to Make an Easy Origami Sticky Note Gown: Step-by-Step for Beginners
    Sticky Note Origami

    How to Make an Easy Origami Sticky Note Gown: Step-by-Step for Beginners

    Orig AmiBy Orig AmiApril 25, 2025Updated:October 22, 2025No Comments4 Mins Read
    Facebook Twitter Pinterest LinkedIn Tumblr Email
    Share
    Facebook Twitter LinkedIn Pinterest Email

    Ever sat at your desk with a sticky note and thought, “Can I make something magical with this?”
    I did. And what I discovered? A mini paper gown that’s as cute as it is clever.
    In this post, I’ll guide you through how to make Sticky Note gown Origami in a way that’s fun, easy, and incredibly satisfying.


    What Is an Origami Sticky Note Gown?

    Picture this: a tiny, pleated paper dress made from nothing more than a square sticky note. Yep—just that one humble tool you normally use for reminders. But today, we’re turning it into a piece of wearable art for dolls, decoration, or desk flair.

    I remember the first time I folded one. It reminded me of those princess dresses I used to draw as a kid. But now, with a little folding magic, I was building them.

    This easy Origami Sticky Note gown project is not only fun, but it’s also surprisingly soothing. Whether you’re 8 or 80, once you get folding, you’ll want to make an entire paper wardrobe.


    Materials Needed

    Before we dive in, here’s what you’ll need. Super simple stuff. Probably already on your desk.

    ItemDescriptionWhy You Need It
    Sticky Note3×3 inch, square, any colorThis is the star of the show.
    Flat SurfaceTable or deskHelps with crisp, clean folds.
    Clean HandsSeriously, no greasy fingers!Keeps the paper neat and intact.
    Optional: Bone FolderA tool to make sharp creases (you can use your fingernail)For that ultra-crisp finish.

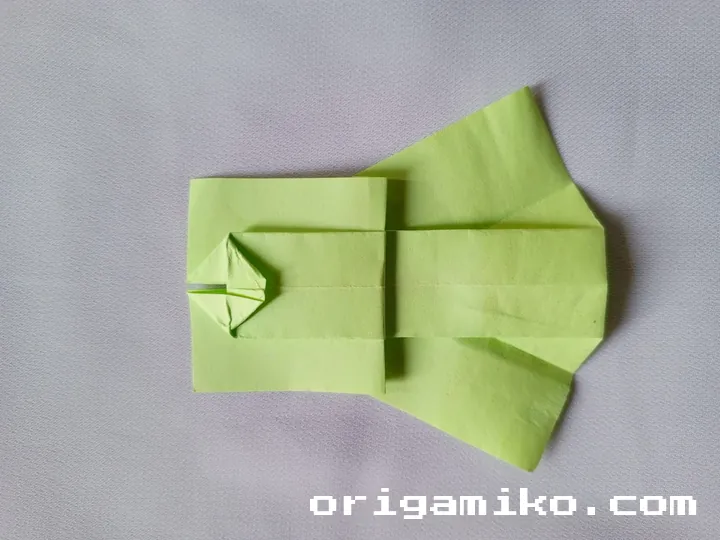
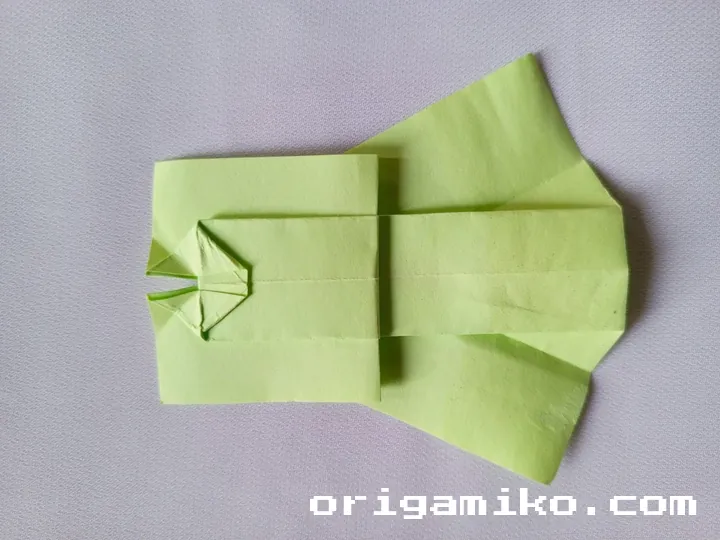
    Easy Sticky Note Gown Instructions

    This is where the magic happens! Let’s start folding:

    Step 1: Take a Sticky Note

    Sticky note grown step 1

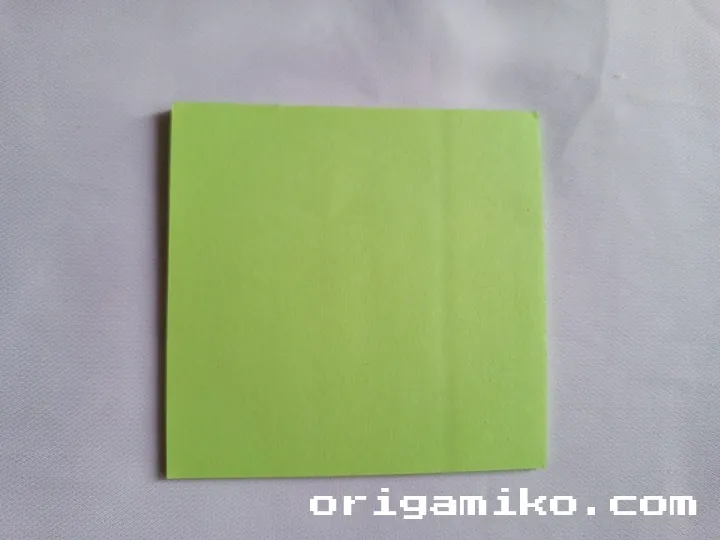
    Grab your sticky note and make sure it’s square. If it’s not, just trim it down. Now, we’re ready to fold.

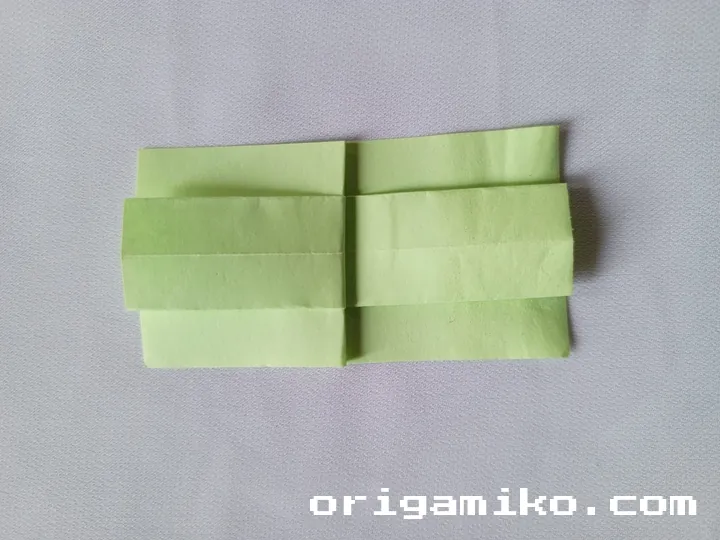
    Step 2: Fold Vertically, Then Horizontally (And Unfold!)

    Sticky note grown step 2 a
    Sticky note grown step 2 b
    Sticky note grown step 2 c
    Sticky note grown step 2 d
    Sticky note grown step 2 e

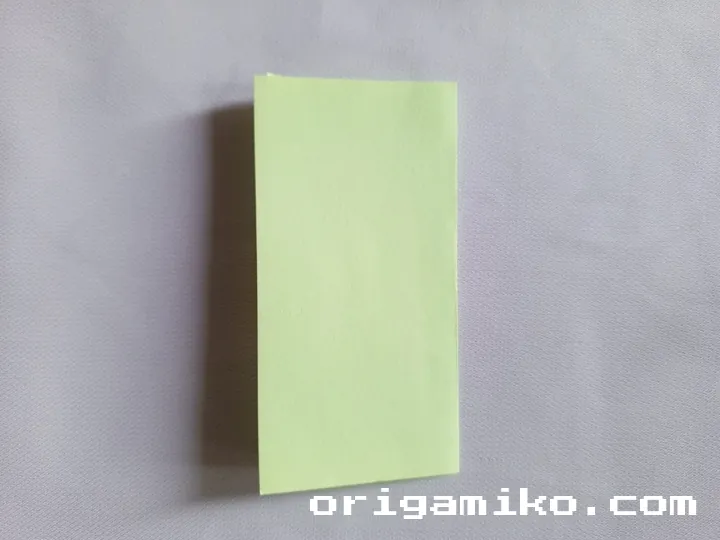
    First, fold your sticky note vertically (from top to bottom) and then unfold it.
    Next, fold it horizontally (side to side) and then unfold again.
    These folds help you establish the center lines of your paper.

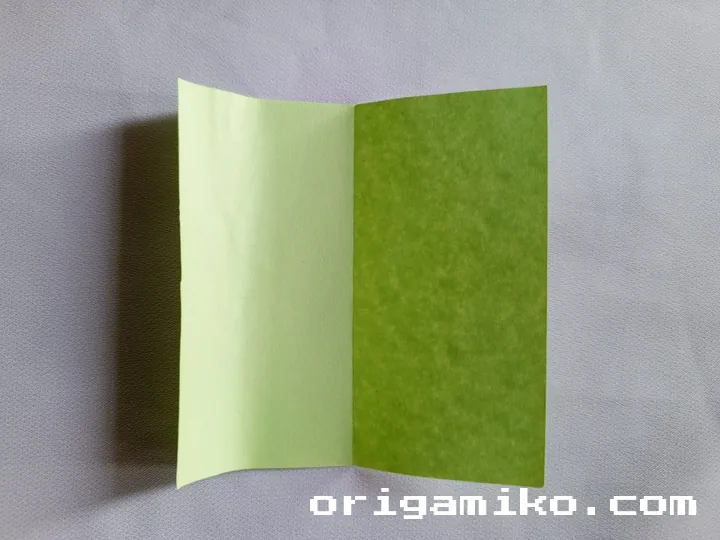
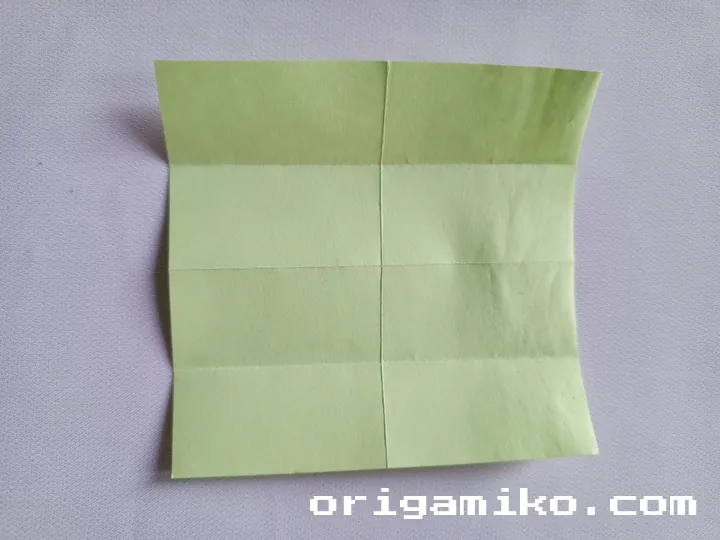
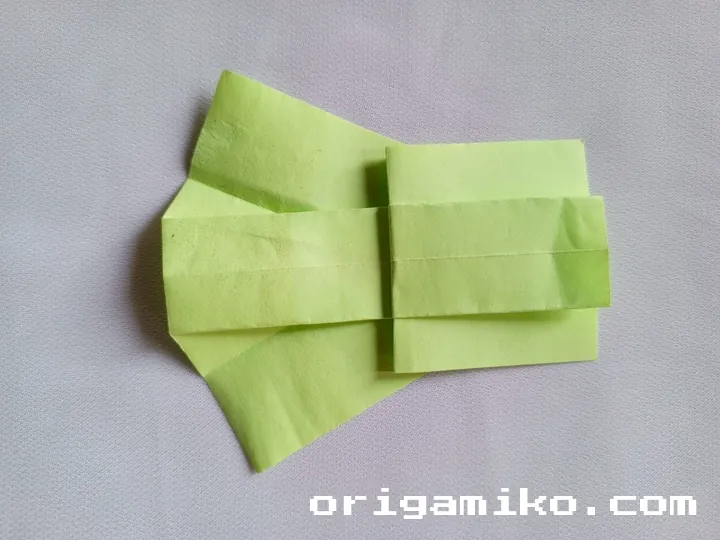
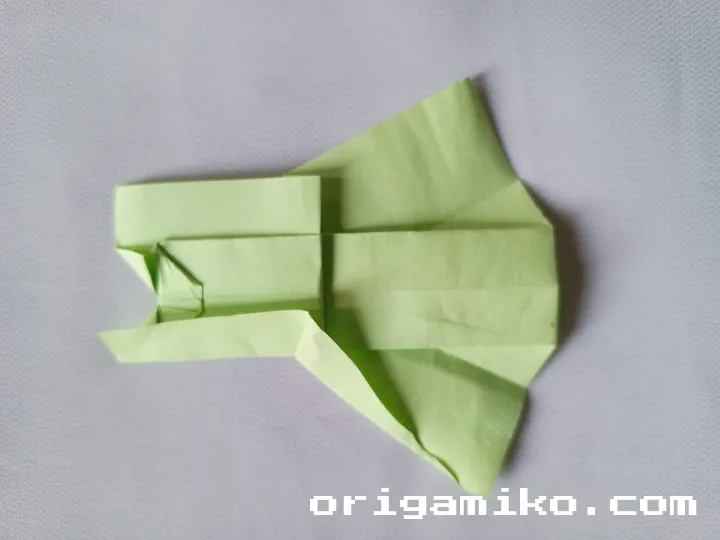
    Step 3: Housefold and Unfold

    Sticky note grown step 3 a
    Sticky note grown step 3 b
    Sticky note grown step 3 c
    Sticky note grown step 3 d
    Sticky note grown step 3 e
    Sticky note grown step 3 f
    Sticky note grown step 3 g

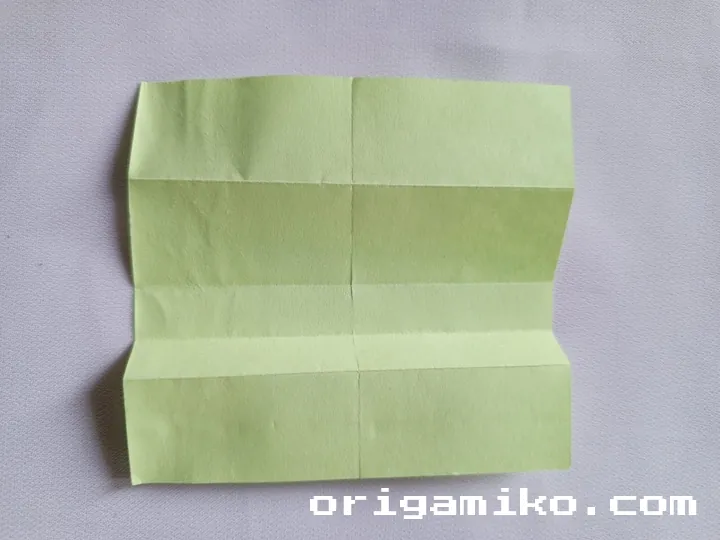
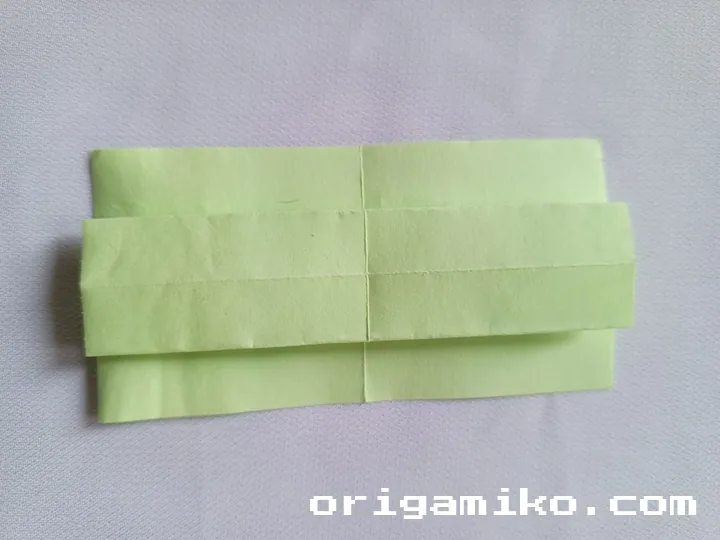
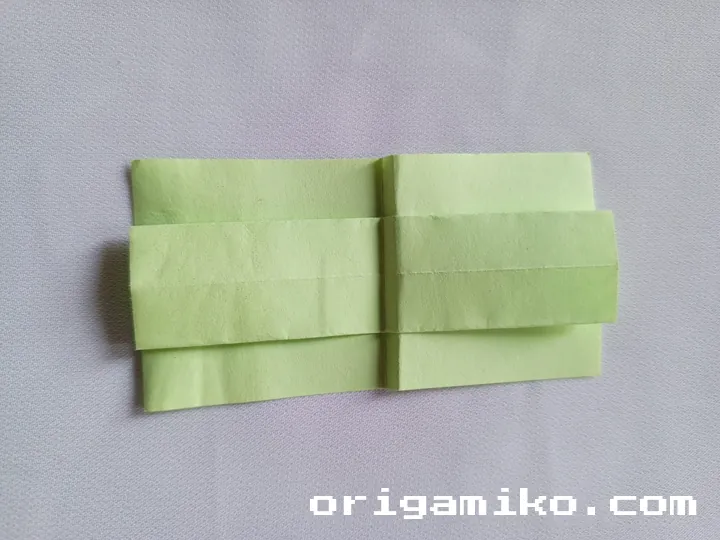
    Now it’s time for the housefold. Fold your sticky note’s edges inward to meet at the center line.
    Unfold the paper. These folds will act as the framework for the gown.

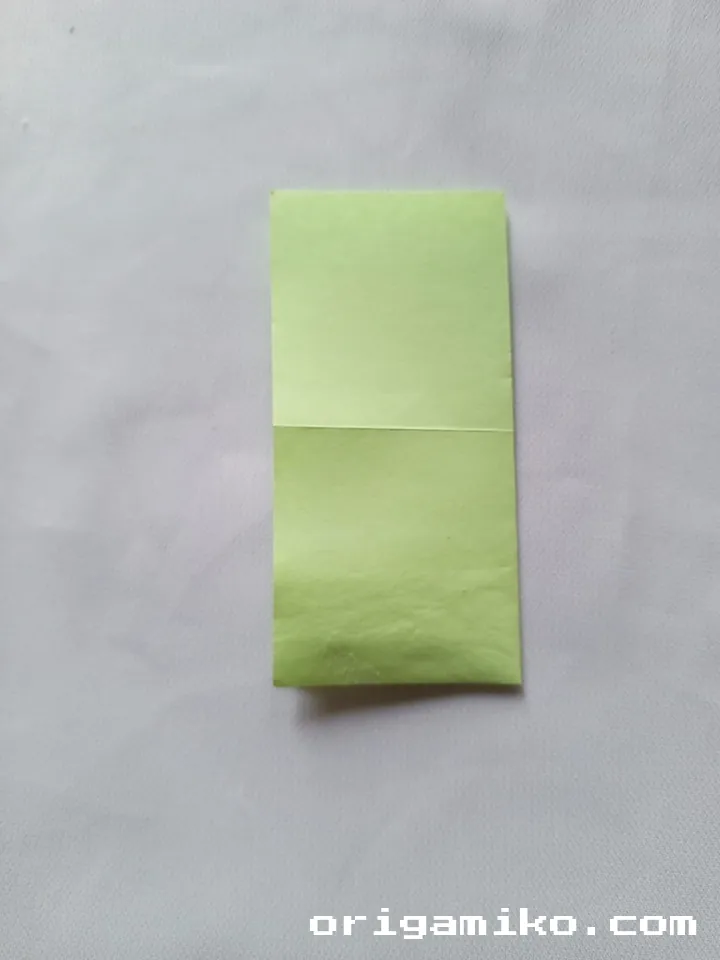
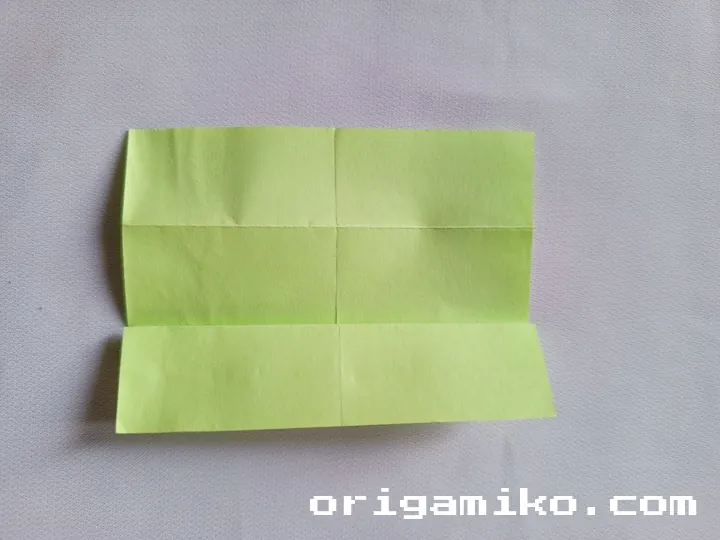
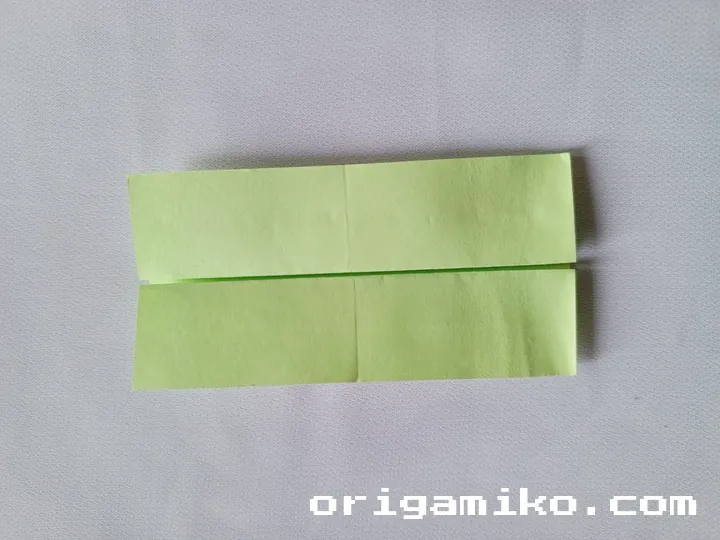
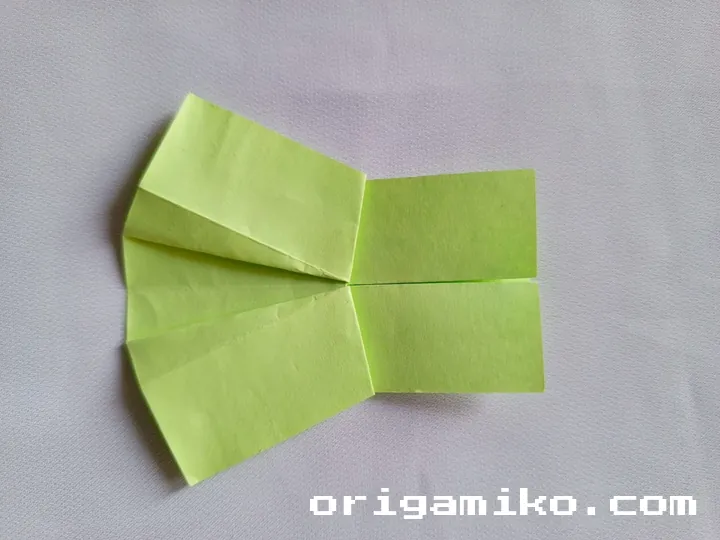
    Step 4: Fold the Back Side and Unfold

    Sticky note grown step 4 a
    Sticky note grown step 4 b
    Sticky note grown step 4 c
    Sticky note grown step 4 d
    Sticky note grown step 4 e
    Sticky note grown step 4 f
    Sticky note grown step 4 g
    Sticky note grown step 4 h
    Sticky note grown step 4 i
    Sticky note grown step 4 j

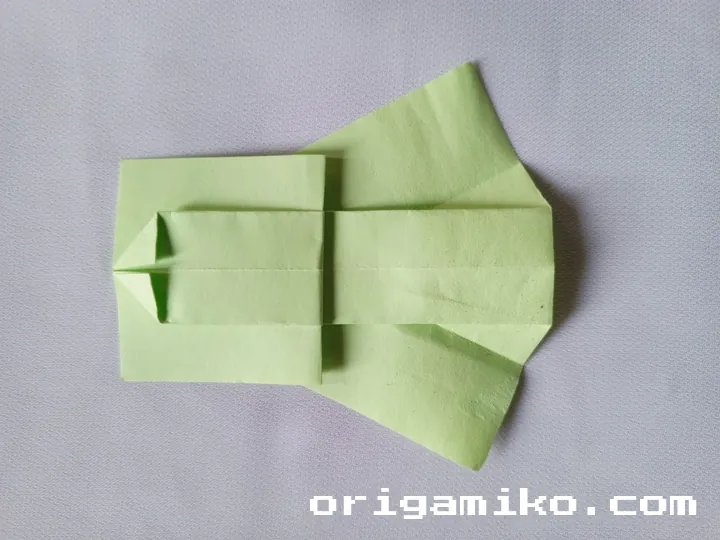
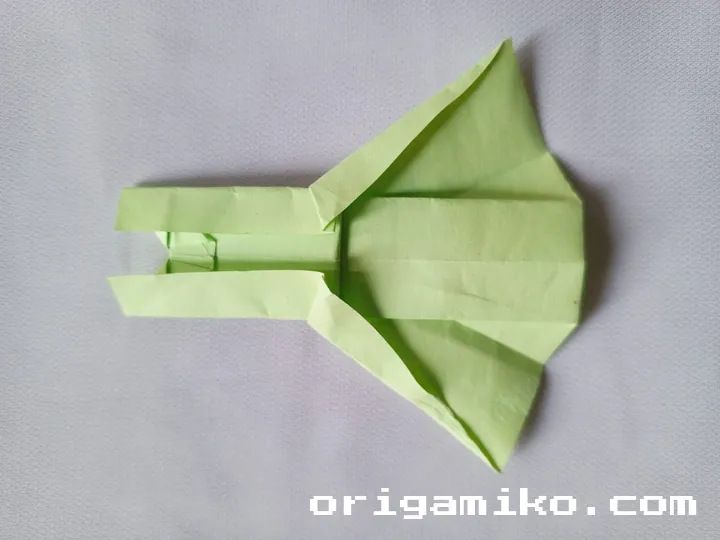
    Turn your paper over. Fold one side towards the middle, then unfold it. This fold will start to shape the gown’s back.


    Tips for Success

    • Sharp Folds: The more precise your folds, the better your gown will look. Use a bone folder or your fingernail for sharper creases.
    • Experiment with Colors: Try using different sticky note colors for a more colorful collection of gowns!
    • Go Slow: Take your time. Origami is about patience and precision, and the results are always worth it.

    Common Mistakes and How to Avoid Them

    • Not Creasing Properly: Be sure to crease each fold firmly. If the folds aren’t crisp, your gown may not hold its shape.
    • Folding the Wrong Way: Make sure you’re following the steps in order—some folds are just for structure, while others shape the gown.
    • Skipping the Unfolding: Don’t rush! Unfolding is important for adjusting the paper, and skipping this step can lead to uneven folds.

    Similar Variations You Can Try

    • Mini Origami Gown: Use a smaller sticky note to make a tiny, delicate gown for miniature figures.
    • Patterned Sticky Note Gown: Try using sticky notes with patterns or designs to give your gown a unique touch.
    • Add Accessories: Once you’ve mastered the basic gown, try adding small accessories like paper bows or a tiny belt to personalize your creation.

    Conclusion

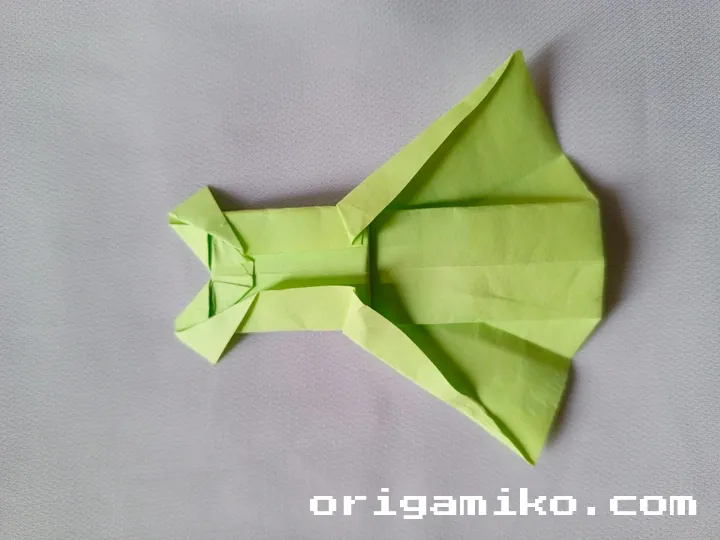
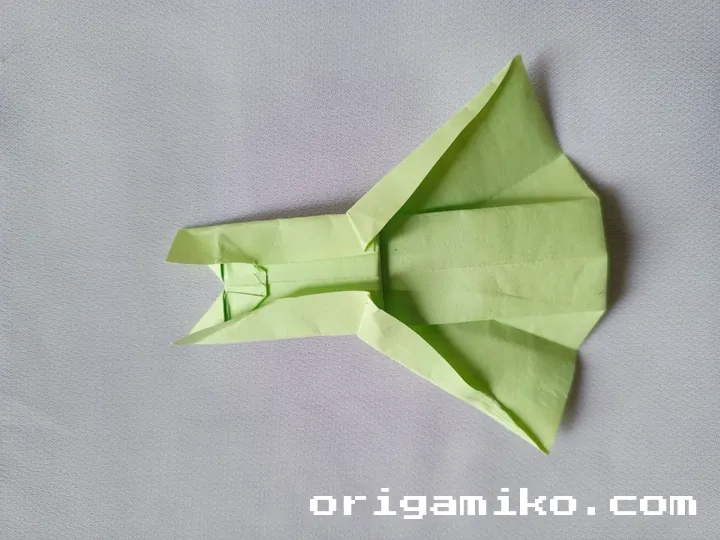
    And there you have it! With just a sticky note and a few folds, you’ve created a beautiful origami gown. Whether you’re making one for a doll, a gift, or just as a fun desk decoration, it’s a quick and rewarding project that’s perfect for beginners and experienced origami artists alike.

    I hope you enjoyed this Simple Sticky Note gown Step by step tutorial! Now, it’s your turn to create. Have fun folding, and don’t forget to share your creations with others!

    Share. Facebook Twitter Pinterest LinkedIn Tumblr Email
    Orig Ami
    • Website

    Related Posts

    15+ Sticky Note Origami You Need to Try

    July 29, 2025

    How to Make an Easy Origami Sticky Note Bookmark: A Step-by-Step Guide

    April 25, 2025

    How to Make Easy Origami Sticky Note Claws – Simple, Fierce, and Fun

    April 25, 2025

    Comments are closed.

    Latest Posts

    30+ Dollar Bill Origami You Need to Try

    July 30, 2025

    45+ Fall Origami Ideas You Need to Try

    July 30, 2025

    17+ Origami Vehicles You Need to Try

    July 29, 2025

    15+ Origami Bookmarks You Need to Try

    July 29, 2025

    15+ Useful Origami You Need to Try

    July 29, 2025

    35+ Cool Origami Ideas You Need to Try

    July 29, 2025

    15+ Sticky Note Origami You Need to Try

    July 29, 2025

    20+ Easy Origami Airplanes You Need to Try

    July 29, 2025

    8 Easy Gum Wrapper Origami

    July 28, 2025

    75+ Origami Toys You Need to Try

    July 28, 2025

    About Origamiko

    Orig Ami shares carefully-crafted origami tutorials, models, and ideas to help you explore the art of paper folding. From simple beginner projects to intricate display pieces, we provide clear instructions and inspiration so you can enjoy the process and improve with confidence.

    Questions or feedback? Reach out anytime.

    📧 [email protected]
    📞 +1 714-801-8105

    Subscribe to Updates

    Get tutorials, paper-folding tips, and updates from Orig Ami.

    Footer Menu

    • About Us
    • Contact Us
    • Disclaimer
    • Privacy Policy