

Ever struggled with making something fun, simple, and beautiful out of just a strip of paper?
That was me. Until I discovered the easy Origami Spring.
A folding trick that turns paper into a bouncy, joyful shape.
I’m excited to walk you through the Origami Spring instructions—a delightful paper craft that’s perfect for beginners but still satisfying for experienced folders.
We’ll follow a Simple Spring step-by-step process that transforms two long strips of paper into something that wiggles, stretches, and just feels fun.
So grab your materials, and let’s dive into how to make Origami Spring magic happen—no fancy tools or skills needed.
What Is an Origami Spring?
An Origami Spring is a paper structure that expands and contracts like a real spring. It’s made by folding two long paper strips in a zigzag pattern, then locking them together to create a flexible, bouncy shape.
Why do I love this project? Because it’s:
- Quick to make
- Visually satisfying
- Great for stress relief
- A cool intro to basic origami techniques
Think of it as a paper slinky. Simple idea, cool result. And once you make one, it’s kinda hard to stop.
Materials Needed
Before we get started, let’s make sure you’ve got everything. I’ve put together this quick table to help you prep.
| Item | Details | Notes |
|---|---|---|
| Paper strips | 2 pieces, 23 cm x 3 cm | Use colorful or patterned paper for flair |
| Glue | Craft glue or stick glue | Just enough to hold edges—don’t overdo it |
| Flat surface | Any clean table or desk | Helps keep folds crisp |
| Scissors (optional) | To trim ends if needed | Clean cuts look nicer |
| Clips (optional) | To hold glued ends while drying | Not required but helpful |
Key Terms to Know
Origami
The Japanese art of folding paper into decorative shapes.
Zigzag Fold
A repeated accordion-style fold—think of folding a paper fan.
Paper Strip
Long, thin rectangle used in modular origami projects like this one.
How to Make Origami Spring: Simple Spring Step-by-Step
This easy Origami Spring follows five main steps. Don’t worry—I’ll guide you through each one with tips and friendly pointers.
Step 1: Take Two Papers
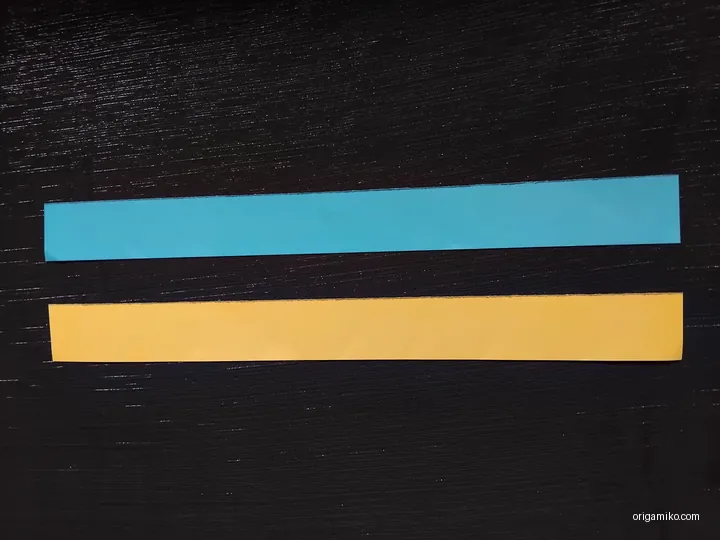
You’ll need two paper strips, each 23 cm by 3 cm.
Try choosing two different colors—it makes the pattern pop.
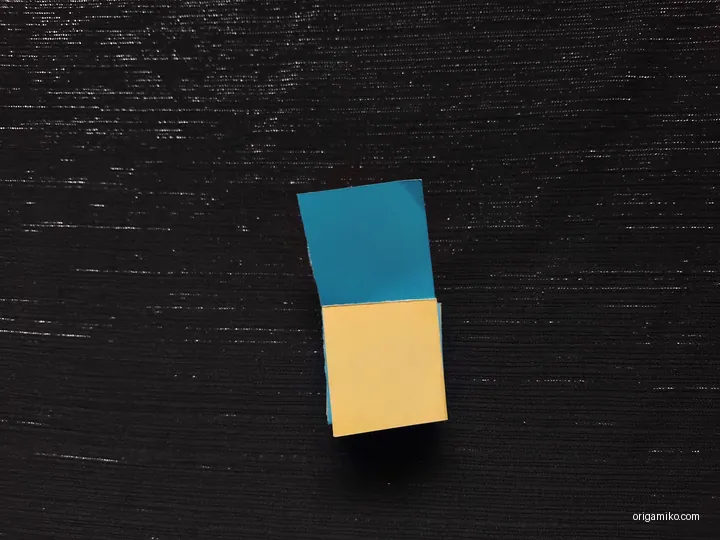
Step 2: Attach Two Papers with Glue
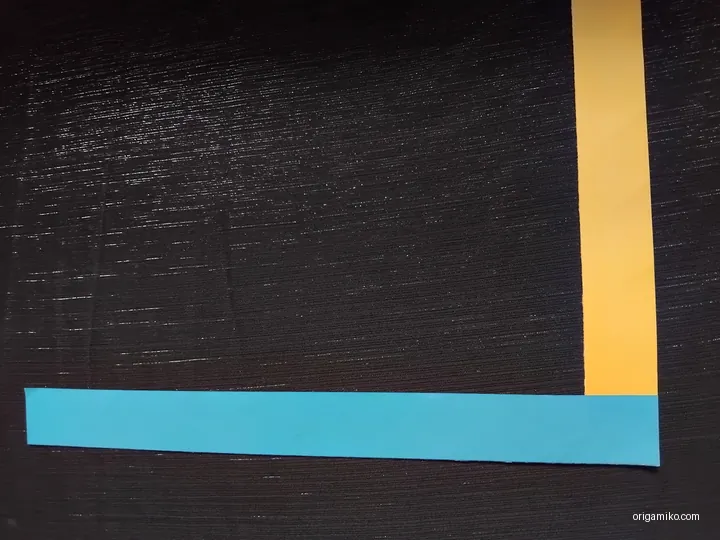
Place one strip horizontally and glue the end of the second strip vertically to it—forming an L shape.
This is your starting point. Press firmly and let it dry for a few seconds.
Step 3: Fold Like the Picture and Repeat
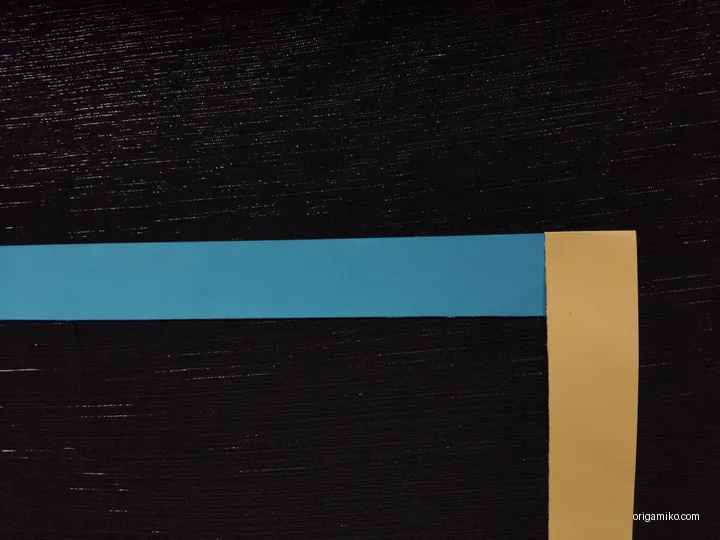
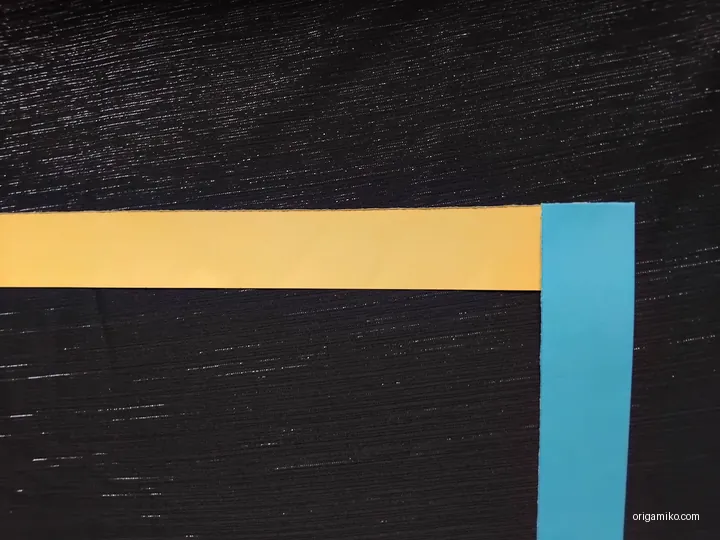
Start folding:
- Fold the horizontal strip over the vertical.
- Then fold the vertical strip over the horizontal.
- Keep repeating this zigzag pattern.
As you fold, you’ll see the spring shape forming. It’s kinda like braiding, but simpler.
Step 4: Attach Last Fold with Glue
When you run out of length, glue the final flap down to secure the spring.
Hold for a few seconds or use a paper clip while it dries.
Step 5: Now the Origami Spring Is Ready
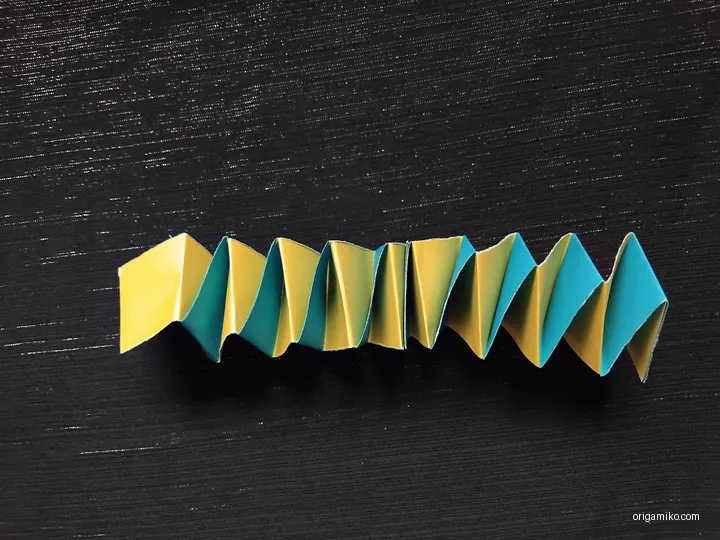


Done!
Stretch it, squish it, play with it. You just made your own easy Origami Spring.
Tips for Success
Want smooth folds and a snappy bounce? Keep these tips in mind:
- Use equal paper widths. Uneven strips can make the spring look wobbly.
- Press each fold tightly. The cleaner the crease, the better the spring.
- Let glue dry before stretching. Rushing it may pull the pieces apart.
- Try neon or gradient paper. It gives a really fun effect when the spring expands.
Common Mistakes and How to Avoid Them
Even simple crafts can trip you up. Here’s what I’ve messed up—and how you can avoid it.
- Mistake: Uneven folding.
Fix: Use a ruler or fold slowly to line up edges. - Mistake: Too much glue.
Fix: Just a dab does it. Too much makes it soggy. - Mistake: Strips popping apart.
Fix: Hold glued sections with clips until dry. - Mistake: Paper tearing.
Fix: Don’t over-stretch. It’s a spring, not a slingshot.
Similar Variations You Can Try
Once you’ve mastered the basic Origami Spring, try switching it up.
- Mini Spring: Use thinner strips (e.g., 15 cm x 1 cm)
- Rainbow Spring: Use multiple colored strips joined end-to-end
- Double Spiral Spring: Make two and glue them side-by-side
- Accordion Bookmark: Flatten the spring and add a label to the top
These make great DIY gifts, fidget toys, or creative bookmarks.
FAQs
Q: Can I use regular printer paper?
Yes, just cut it to size. Thicker paper holds shape better, though.
Q: Can kids make this?
Absolutely. Great for ages 7+ with a little glue supervision.
Q: How long does it take?
About 10–15 minutes max, even for beginners.
Q: Does it actually spring?
It won’t bounce like a metal spring, but it stretches and recoils in a super satisfying way.
Final Thoughts
If you’ve ever wondered how to make Origami Spring, now you’ve got everything you need. From strips of paper to a playful creation, you’ve followed a simple yet satisfying journey in the world of paper folding.
The good news? You can make dozens of these in different styles—and trust me, once you start, it’s hard to stop. This easy Origami Spring is fun, calming, and great for all ages.
I’d love to hear how your Origami Spring turned out! Got questions or creative ideas? Drop them in the comments or share your version with fellow crafters.
Happy folding!