Ever tried folding paper into something magical?
You’re in the right place.
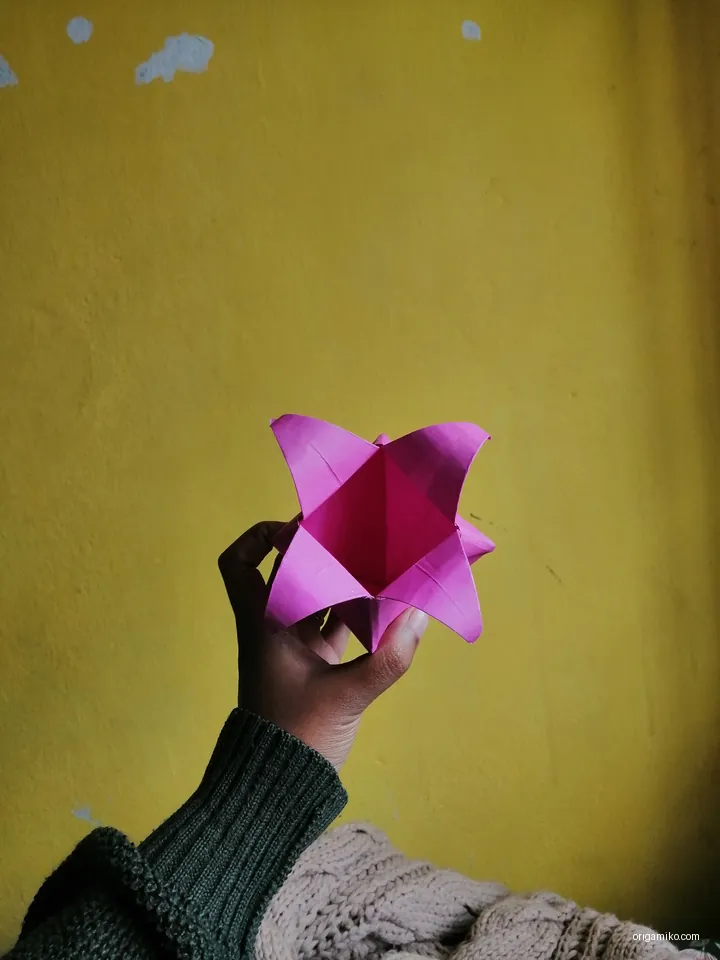
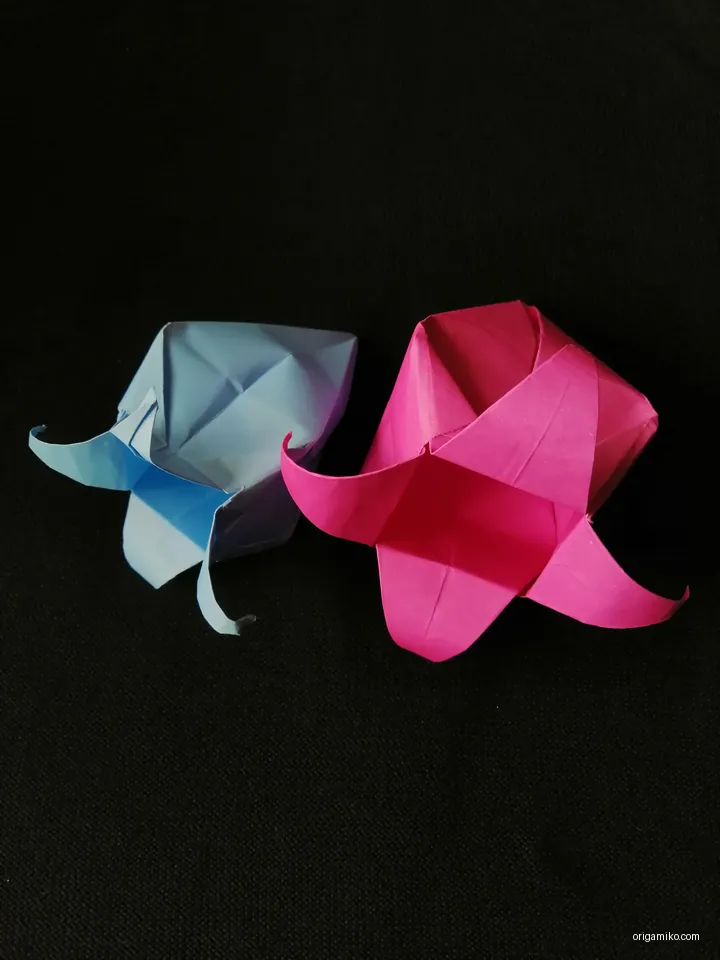
Today, I’ll show you how to make an Origami Harebell, and it’s going to be a fun ride.
This isn’t just another craft—this is a charming flower that blooms right from your fingers.
The folds are simple, and the outcome? Surprisingly beautiful.
Whether you’re new to origami or seasoned, this easy Origami Harebell will bring a little joy to your table.
Let’s dive in. I’ll walk you through the Simple Harebell Step by Step—with clear instructions, tips, and all the right folds.
No stress. Just paper, patience, and the promise of something beautiful.
What Is an Origami Harebell?
So, what exactly are we making here?
An Origami Harebell is a delicate, bell-shaped flower crafted entirely from paper. Inspired by the real-life harebell flower, it mimics its soft, elegant curves using simple folds.
The beauty of this project?
You need just one square sheet of paper and a few thoughtful creases.
It’s fast, peaceful, and wonderfully satisfying.
Materials Needed
Before we start folding, let’s gather what we need. You don’t want to be hunting for paper halfway through!
| Item | Description | Notes |
|---|---|---|
| Square Paper | 10 cm x 10 cm (4 in x 4 in) | Lightweight origami paper works best |
| Flat Surface | A clean desk or table | Avoid textured or uneven surfaces |
| Fingernail Tool | Optional—like a popsicle stick or bone folder | Helps with clean creases |
| Good Lighting | Natural or desk lamp | Makes a big difference with detail |
Key Terms to Know
Origami
The traditional Japanese art of paper folding, turning a flat sheet into a sculpture—no cuts or glue.
Crease
A fold that leaves a sharp line in the paper—think of it like a guide.
Unfold
Opening up the paper after making a crease or a temporary fold.
Peel
Gently lifting or separating a folded section of the paper to change shape or direction.
Simple Harebell Step by Step
Alright, let’s make this happen. Here’s how to make Origami Harebell using a square piece of paper:
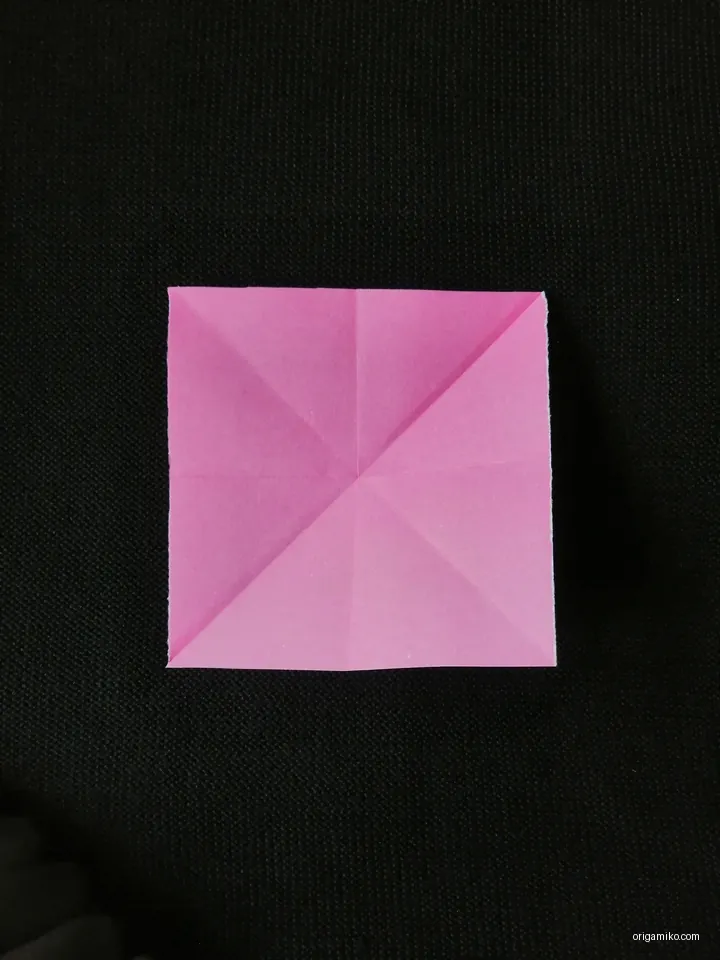
- Step 1: Take a 10×10 cm square sheet of paper.
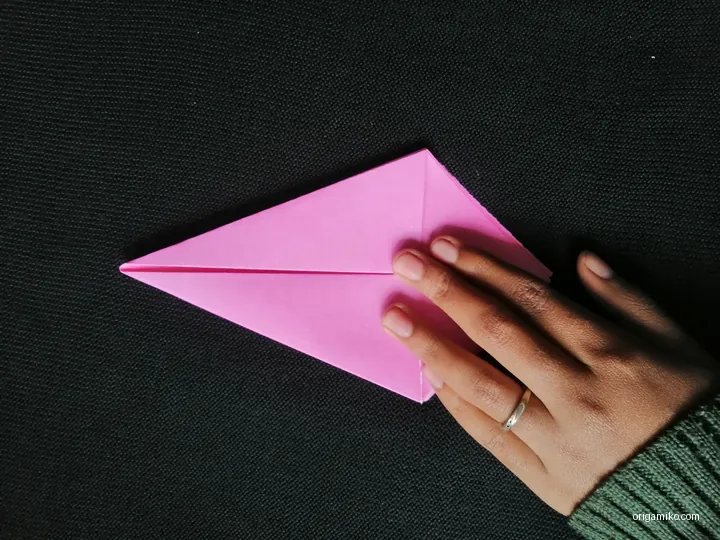
It doesn’t have to be fancy—any paper works, but thinner paper is easier to shape. - Step 2: Fold the paper in half vertically. Crease it well.
Then, unfold and fold both the top and bottom edges toward that center crease.
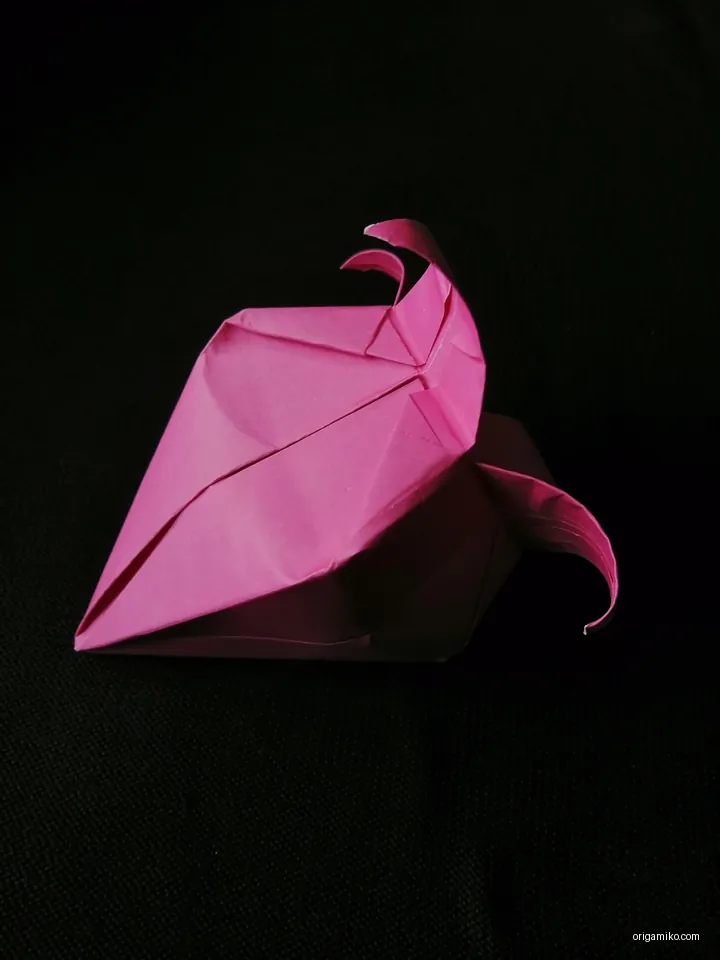
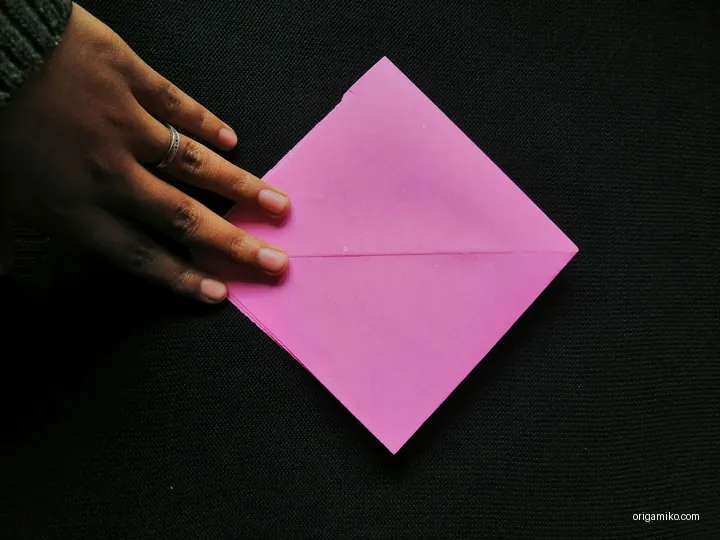
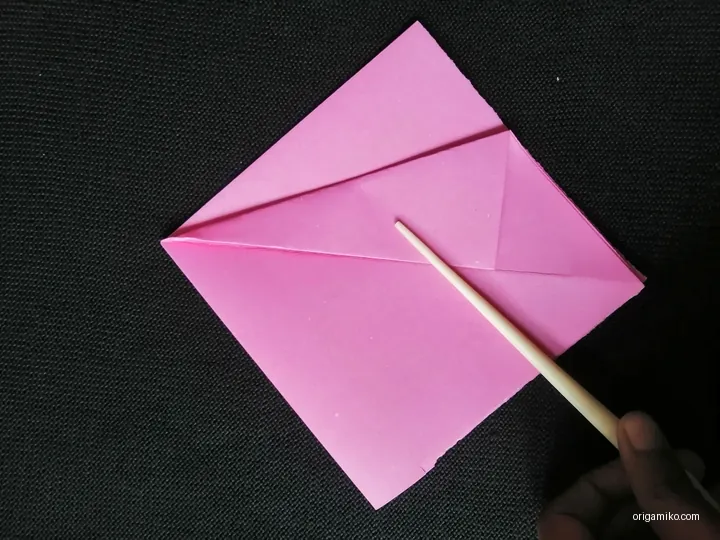
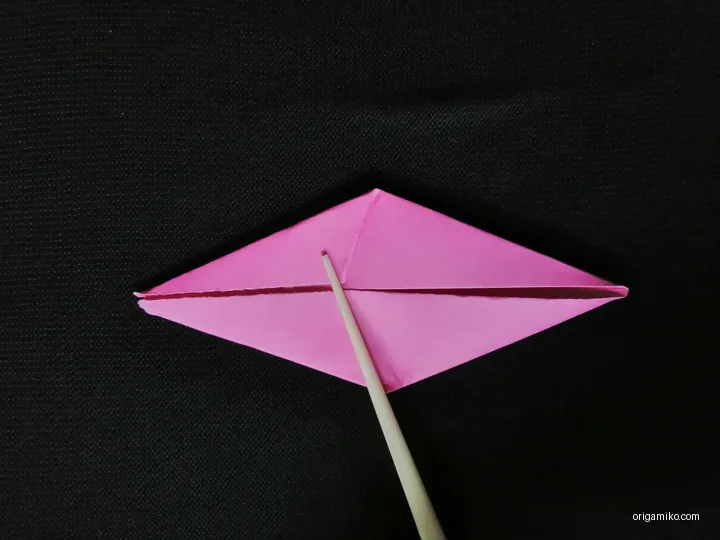
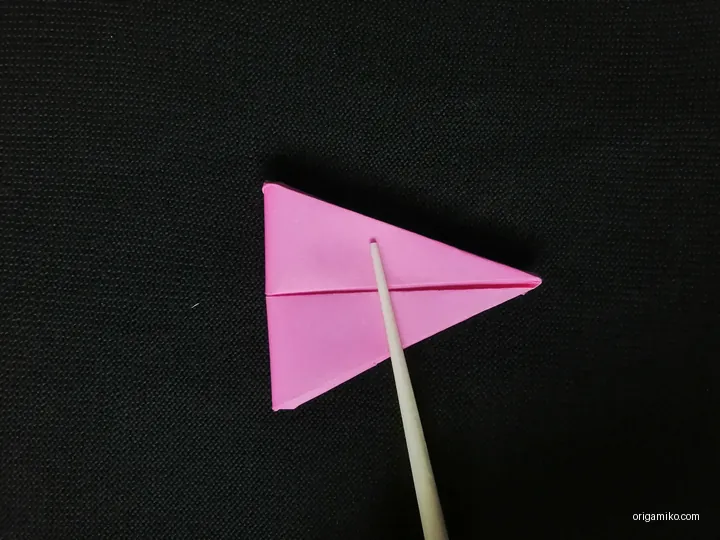
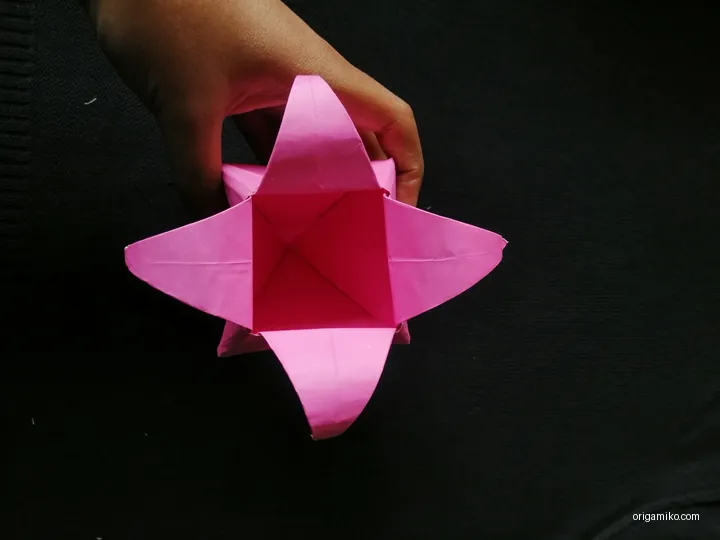
You should now have three horizontal sections. - Step 3: Now fold the paper like in the reference picture.
This usually means tucking the top corners inward diagonally, forming triangular flaps.
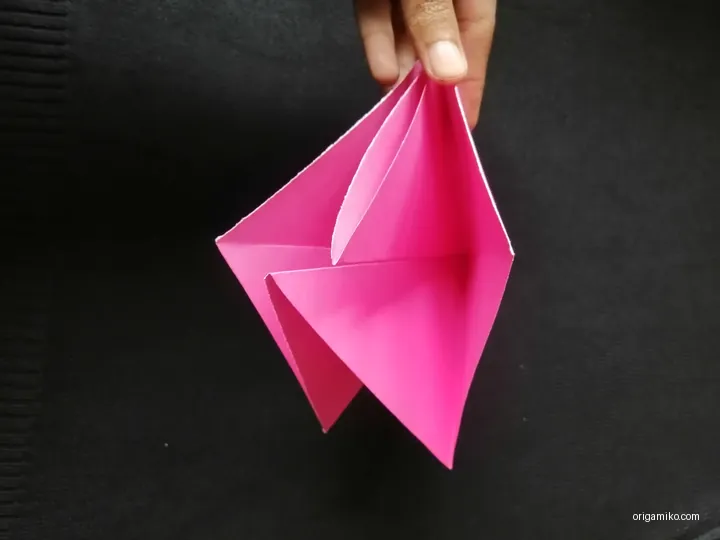
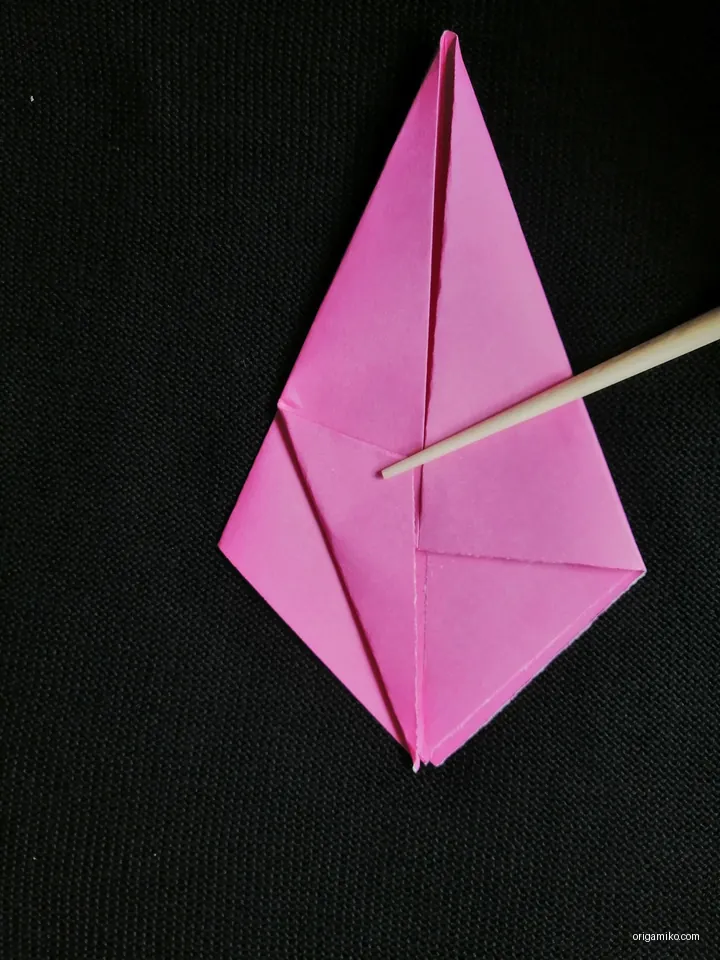
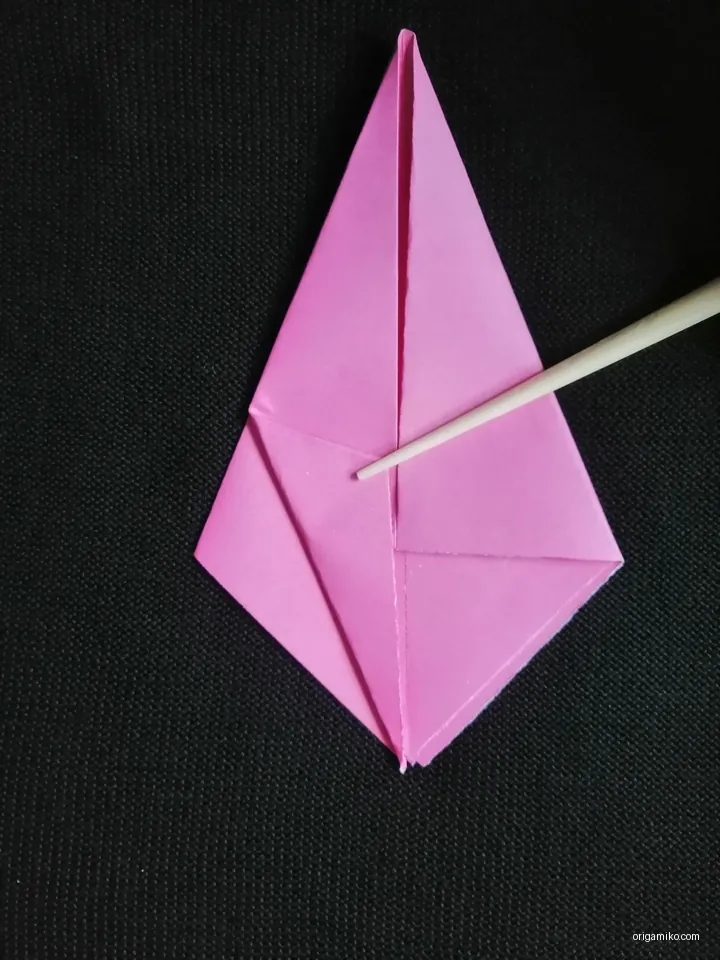
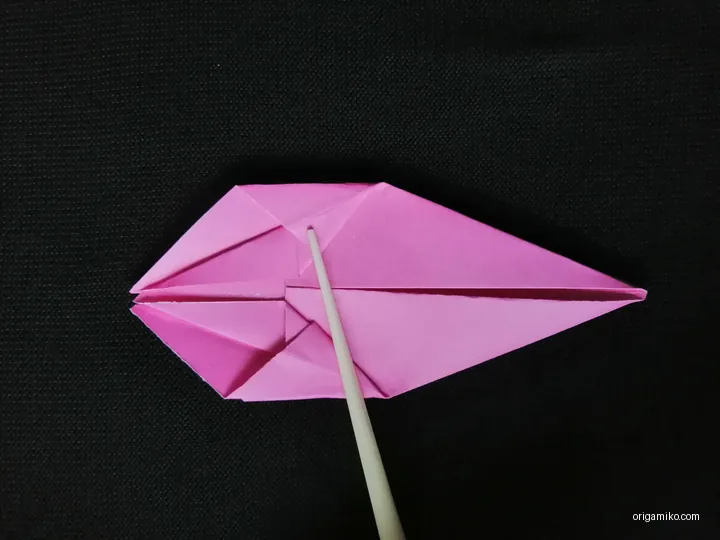
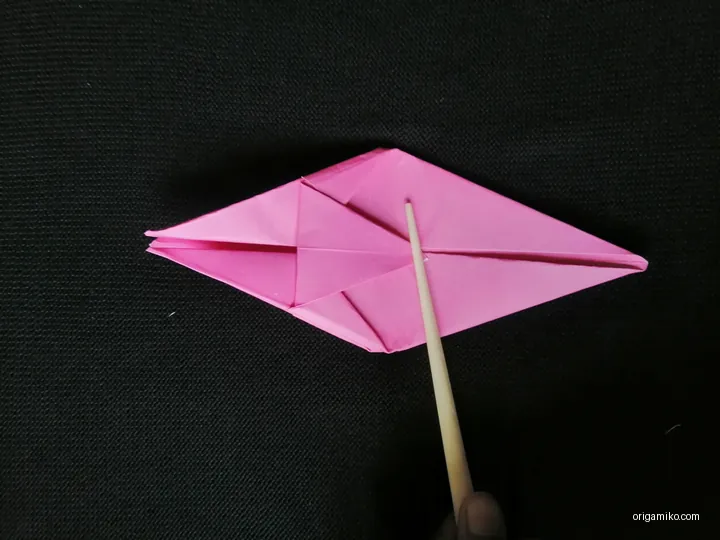
It’s okay if it’s not perfect—just follow the structure. - Step 4: Find the middle point of the folded paper and make a soft crease there.
Gently peel back the top flap from that midpoint outward.
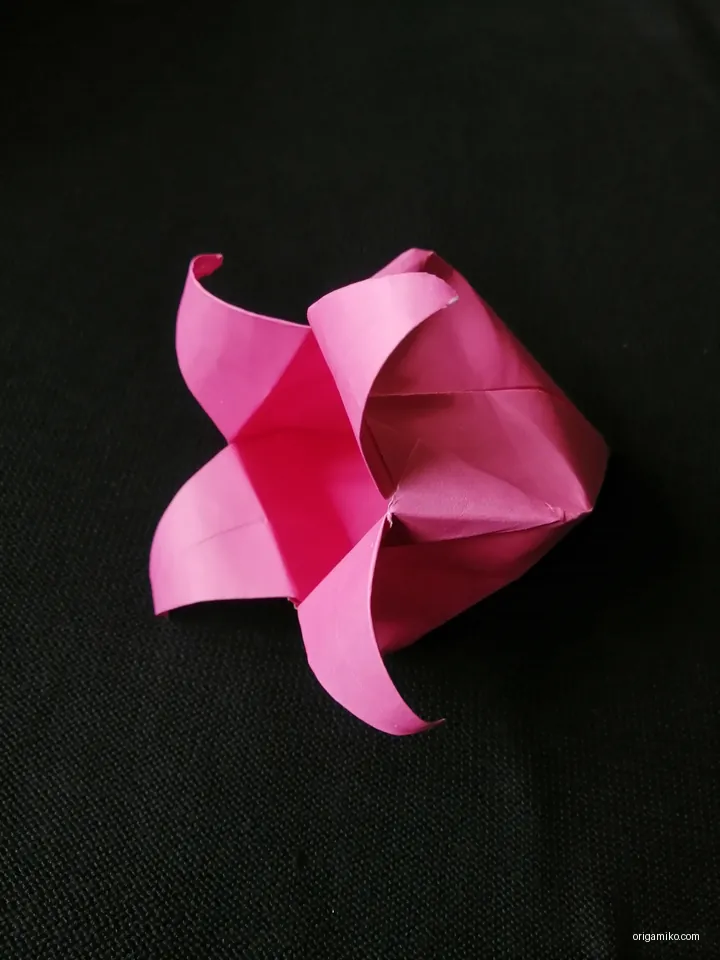
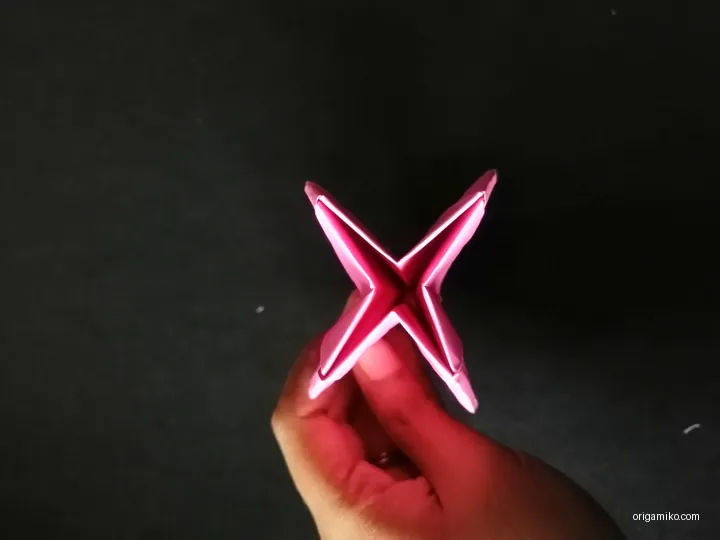
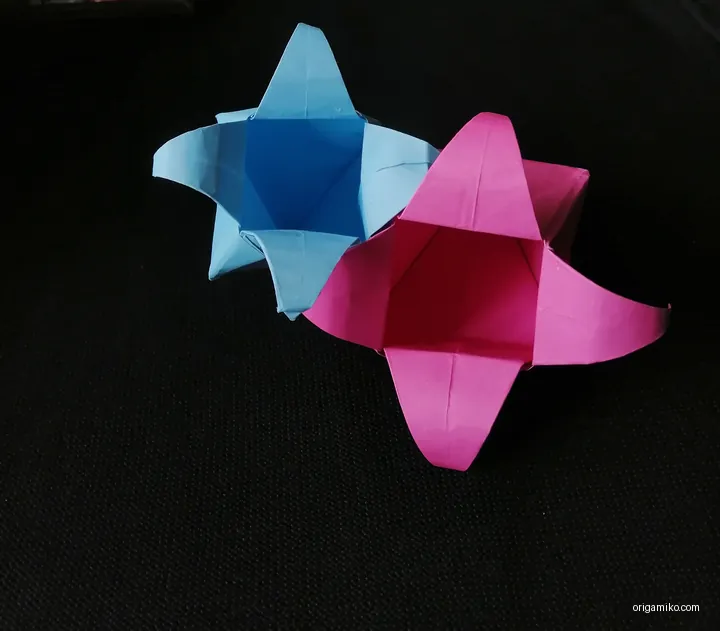
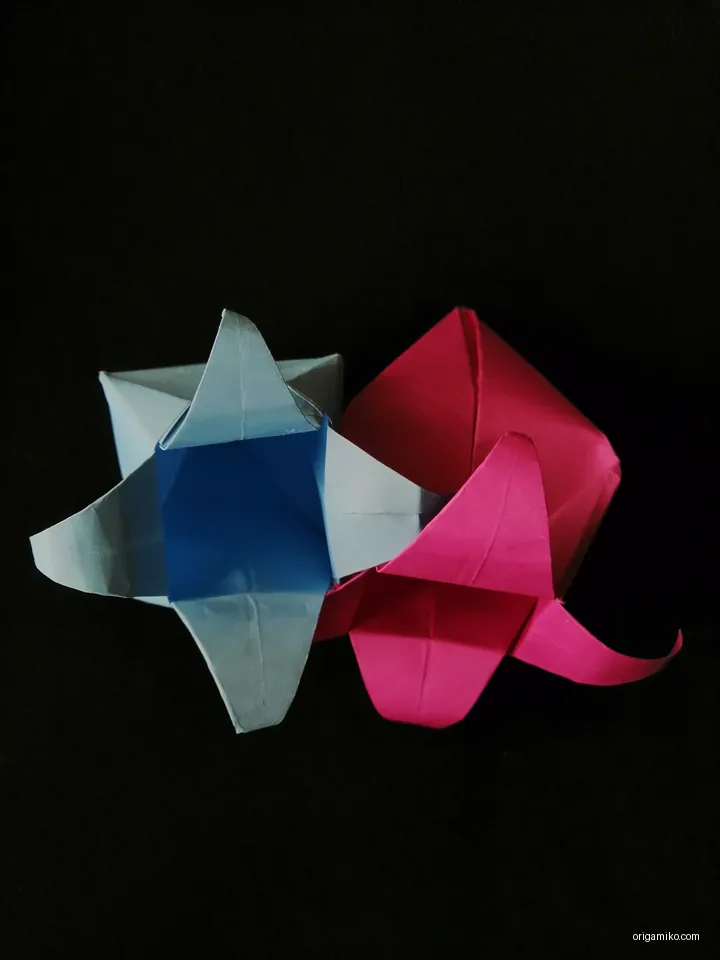
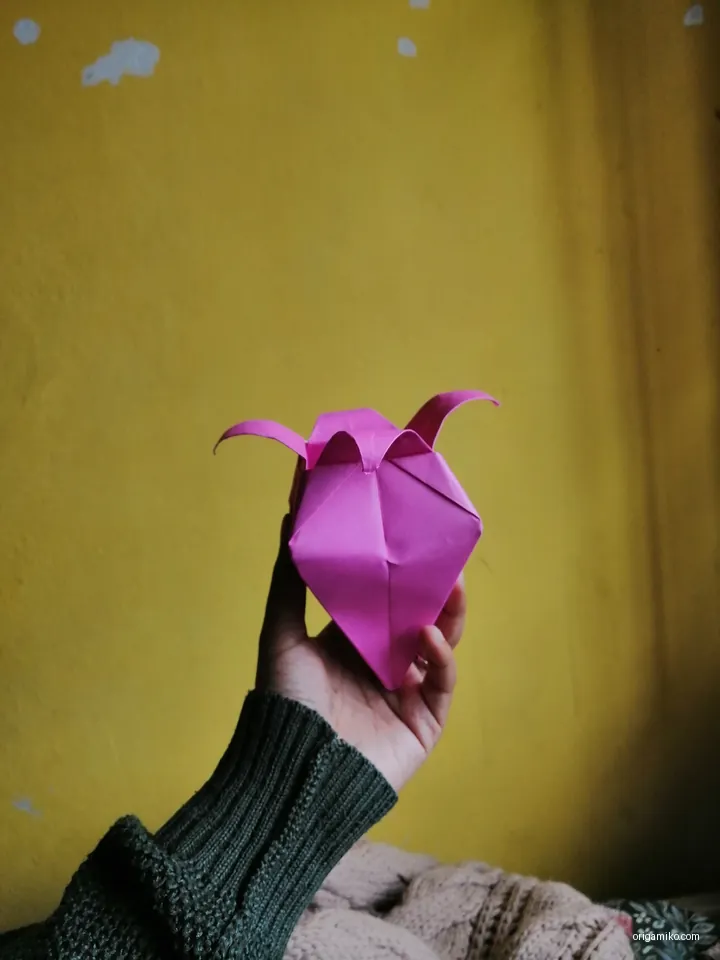
This gives the flower its bloom—its signature bell shape. - Step 5: Adjust the flaps and smooth out the edges.
And just like that—your harebell is ready!

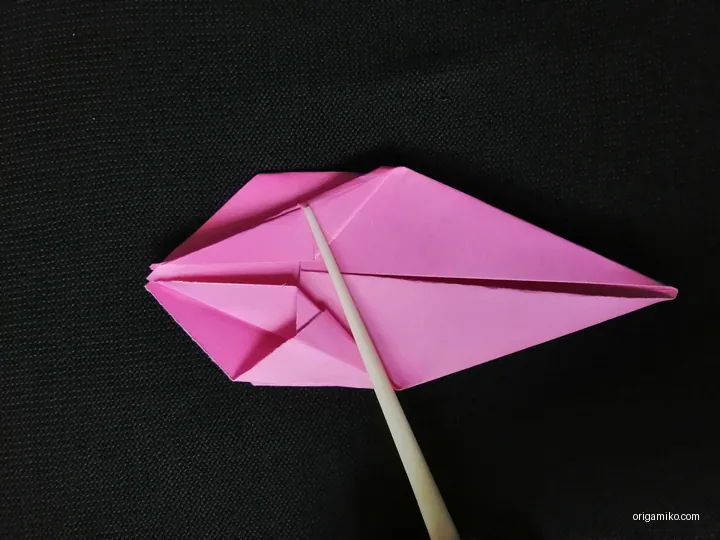
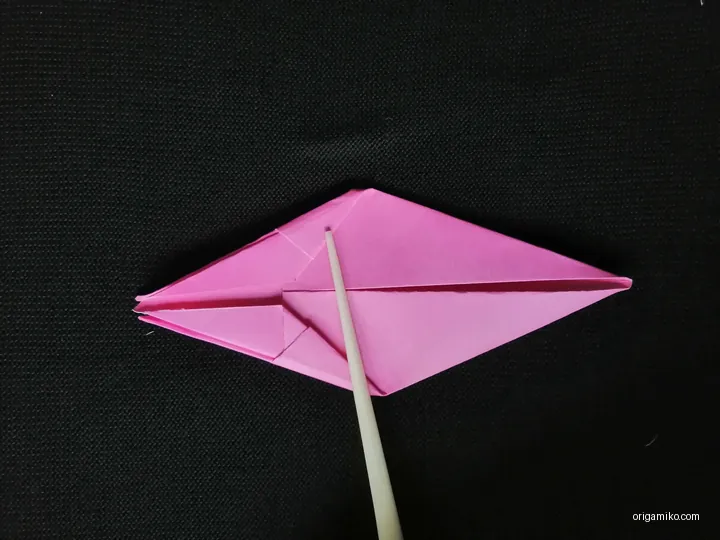
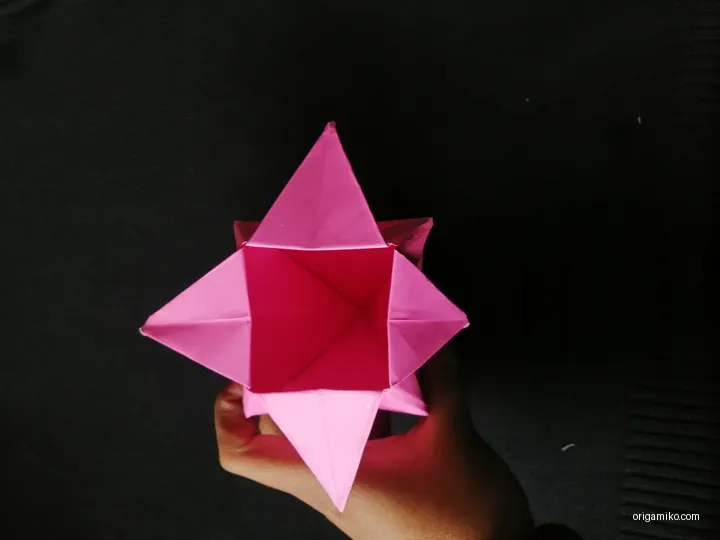
See? Simple. Quick. Beautiful.
That’s why this easy Origami Harebell is one of my favorites.
Tips for Success
Want a cleaner, more elegant look? Try these tricks:
- Use origami paper with a color on one side and white on the back. It adds a nice contrast.
- Press every fold firmly. Soft folds can make your flower sag.
- Don’t rush the peel step—be gentle and patient.
- If your flower looks uneven, go back and adjust the creases slightly.
Common Mistakes and How to Avoid Them
Rushing the creases
Take your time. If your folds are sloppy, the flower won’t hold its shape.
Using thick paper
Cardstock is a no-go. It’s too bulky and hard to shape.
Skipping the middle crease
That tiny middle point makes a huge difference in the final form. Don’t skip it!
Peeling too fast
Be slow and careful, like opening a delicate present.
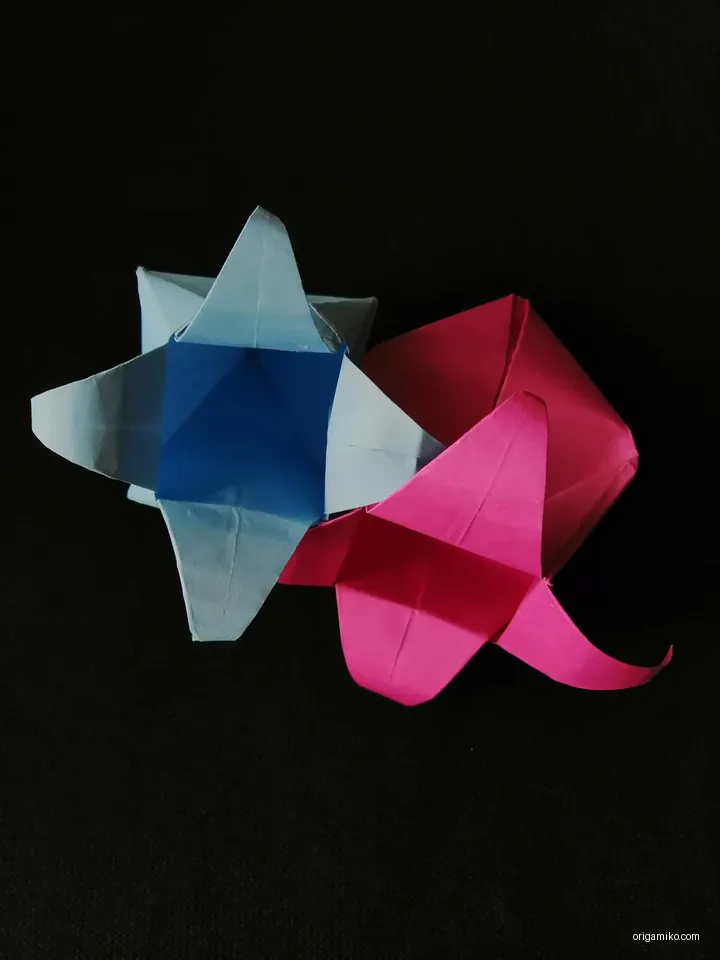
Similar Variations You Can Try
Once you’ve folded a few of these, try branching out. Here are some related paper flower ideas:
- Origami Lily — More petals, slightly more advanced.
- Origami Tulip — A bolder bloom with a stem.
- Bellflower — Very close to the harebell, but with softer folds and a slightly rounder bell.
Try different paper sizes, or double-layer the flower for a 3D look!
FAQs
Can I use printer paper?
Yes! Just cut it into a 10×10 cm square first. It’s thicker than ideal but doable.
What’s the best paper for this?
Light origami paper or recycled notebook paper. Anything foldable but not too stiff.
Do I need glue or scissors?
Nope. That’s the beauty of origami. One square sheet. Just folds.
Can I make a bouquet with these?
Absolutely! Use green wire or pipe cleaners for stems, and you’ve got a handmade bouquet.
Final Thoughts
There you have it—a Simple Harebell Step by Step that turns a flat square into something enchanting. I remember the first time I folded one. It felt like magic—like I was crafting nature with nothing but paper.
So next time you want a peaceful craft session or a quick handmade gift, come back to this. This easy Origami Harebell is always worth folding.
Want more paper-folding fun? Check out my guides on origami tulips and butterflies.
Got questions or want to share your harebell? Drop a comment—I’d love to see it!