

Origami is more than just folding paper; it’s a journey of creativity and patience. Whether you’re a beginner or a seasoned artist, the magic of transforming a flat piece of paper into something dynamic never gets old. Today, I’m excited to share with you how to make an easy Origami Car, a fun and simple project that will have you folding like a pro in no time!
This Origami Car isn’t just for experts—anyone can do it. With a few folds, you’ll have your very own paper vehicle that’s sure to impress. Ready to get started? Let’s dive in!
What’s the Origami Car All About?
An Origami Car is a simple and fun paper craft that turns a regular sheet of paper into a miniature car. The best part? You don’t need any fancy tools—just a square piece of paper and a little bit of patience. This project is perfect for beginners who want to try their hand at origami, as well as for those looking for a quick and easy craft.
When I first tried this, I was amazed at how such a simple set of folds could turn into a car. It’s like watching magic unfold right in front of you! So, let’s break it down step by step and get that paper car rolling.
Materials Needed
Before we get started, here’s a quick overview of what you’ll need to make this Origami Car:
| Item | Details |
|---|---|
| Paper Size | 15cm x 15cm (square) |
| Paper Type | Any regular origami paper |
| Tools | None (Just your hands!) |
Simple Car Step by Step
Ready to fold? Here’s the step-by-step process on how to make Origami Car. Follow along, and soon you’ll have your very own car!
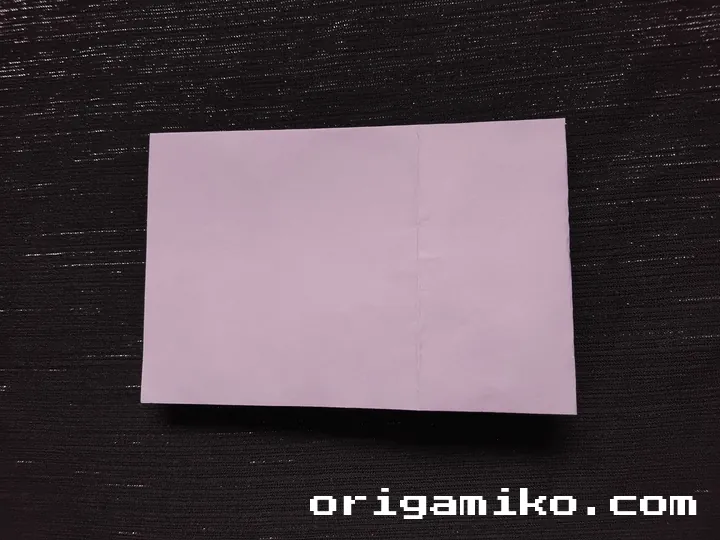
- Take a Paper
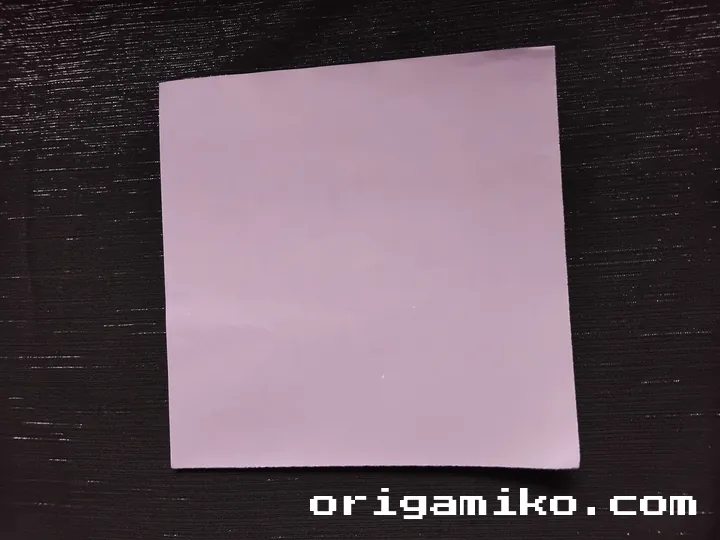
Start with a square piece of paper, measuring 15cm x 15cm. Place it flat on a table with the colored side facing up.
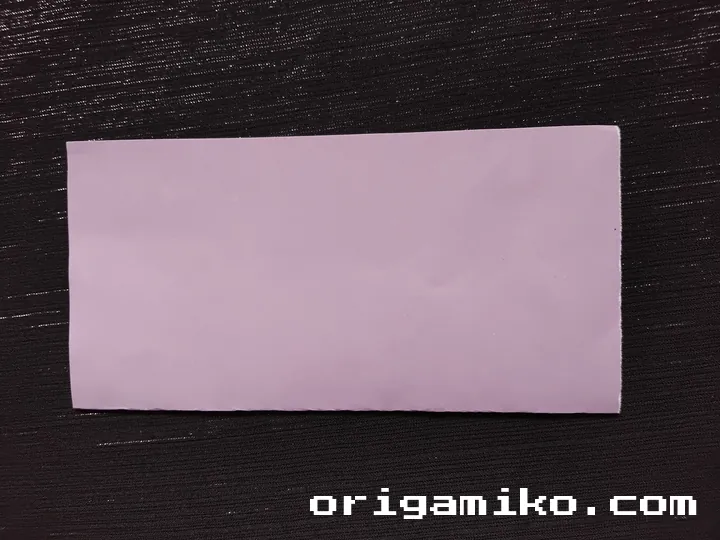
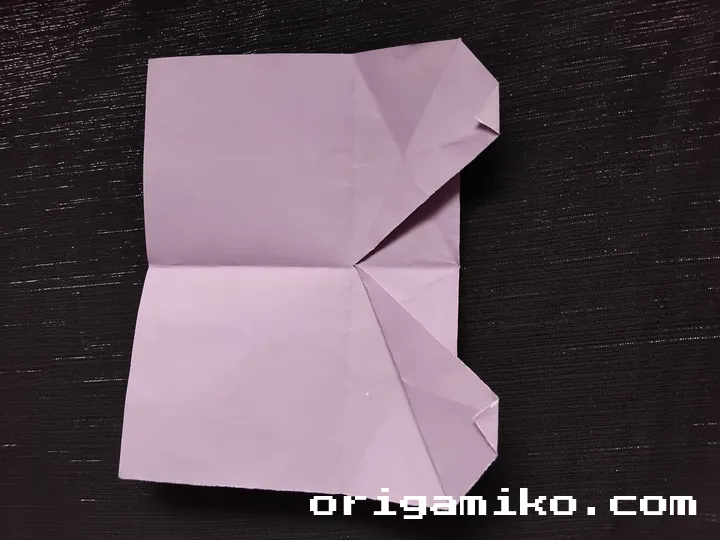
Fold the paper in half horizontally and then unfold it. This will create a center crease. Now, fold one side of the paper to the middle crease and unfold it again.
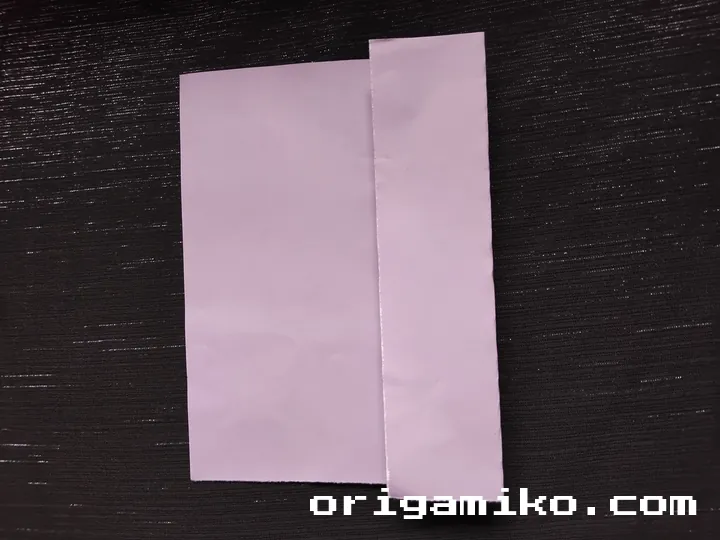
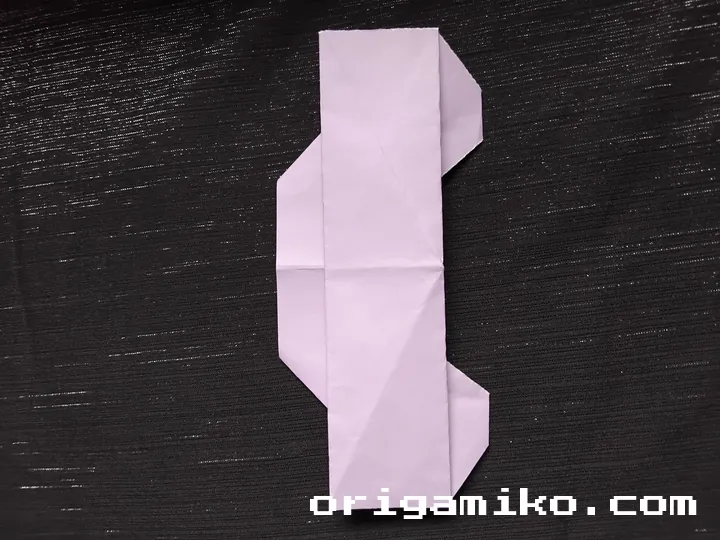
Take the top corners and fold them towards the middle crease, forming a triangle shape at the top. Then, fold the lower corners up to the middle, creating a rectangle-like shape.

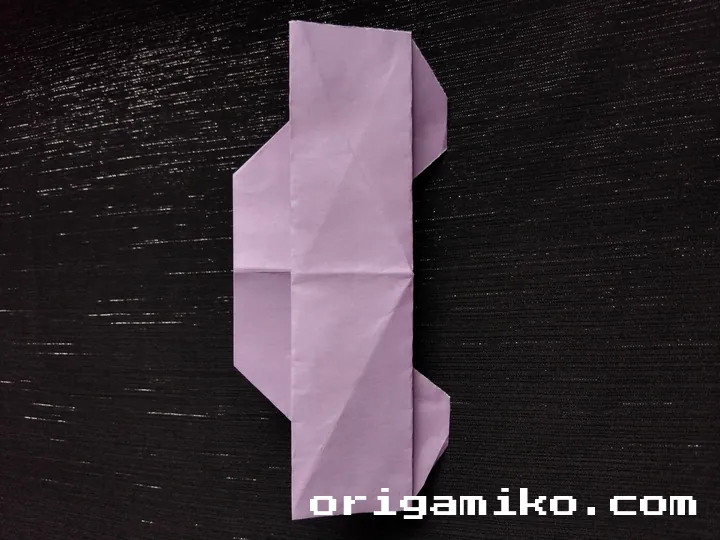
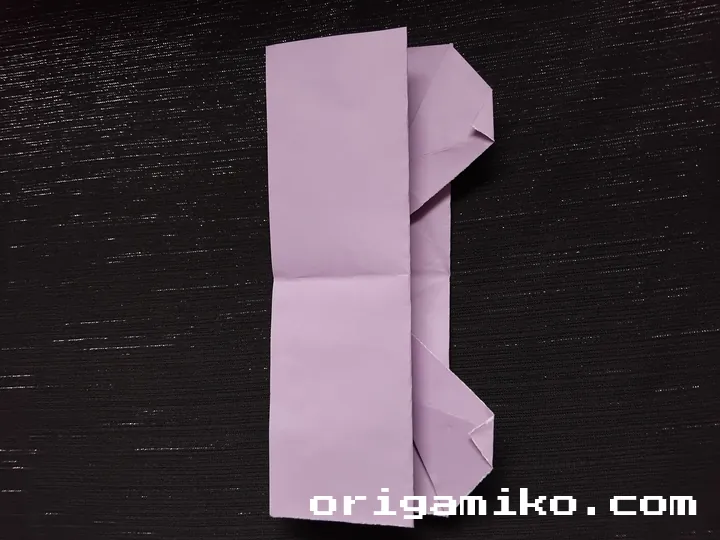
Now, fold the paper from the middle again, aligning the edges to meet. Then, make another fold like the one shown in the picture. This will form the base of your car.
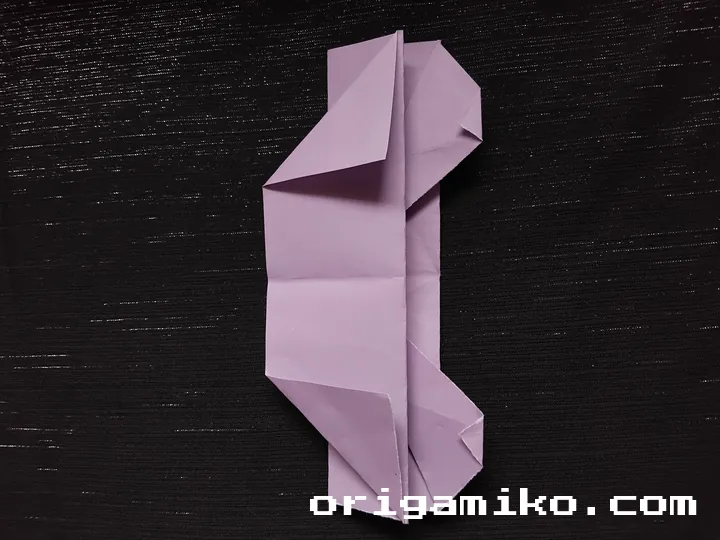
Finally, fold the upper corners down to meet the center line. After this step, your Origami Car is ready to roll!
Tips for Success
- Use square paper: This helps ensure the folds are even and the car shape turns out nicely.
- Make precise folds: The more accurate your folds, the better your Origami Car will look. Take your time with each fold.
- Practice makes perfect: If your car doesn’t look perfect on the first try, no worries! Keep practicing, and soon it’ll be second nature.
Common Mistakes and How to Avoid Them
While folding an Origami Car is simple, there are a few mistakes that can happen. Here’s how to avoid them:
- Uneven folds: Always make sure your folds are straight and crisp. If the paper is uneven, it can throw off the shape of the car.
- Skipping steps: It’s tempting to rush through the steps, but each fold is essential for getting the perfect car shape. Be patient!
Similar Variations You Can Make
Once you’ve mastered the basic Origami Car, why not try out some variations? Here are a few ideas to get you started:
- Origami Truck: Try adjusting the fold slightly to create a larger vehicle, like a truck.
- Origami Bus: By adding more folds, you can create a bus shape with larger sides.
- Origami Boat: If you’re feeling adventurous, try folding the same paper into an origami boat!
Frequently Asked Questions (FAQs)
Q: Can I make this Origami Car with any size paper?
A: While you can use different sizes, it’s recommended to stick to a square piece, like 15cm x 15cm, for the best result.
Q: What if I make a mistake while folding?
A: Don’t worry! Just unfold the paper and start over. Origami is all about patience and practice.
Conclusion
Now you know exactly how to make an Origami Car! Whether you’re a beginner or an experienced artist, this simple car folding project is a great way to dive into the world of origami. I hope you’ve enjoyed this step-by-step guide and that you’re feeling confident about your new paper car creation.
Ready to fold? I’d love to hear how your easy Origami Car turns out. Leave a comment below or share your results with me!