

Ever feel like creating something magical with just your hands and a square piece of paper?
You’re in the right place. In just a few folds, we’ll turn flat paper into a 3D cube that pops to life.
It’s easy. It’s fun. And if you follow my steps, you’ll have an easy Origami 3D Cube in no time.
What We’re Making: A Pop-Up Origami 3D Cube
Okay, let’s get real—this isn’t just a boring cube.
This little paper box comes alive the moment it locks into place. There’s something oddly satisfying about the final click when all the pieces connect. The best part? You only need six squares of paper. That’s it.
I first tried making one on a rainy afternoon. I was bored, and I had leftover origami paper. A few folds later, I was smiling at a perfect paper cube. So today, I’ll walk you through the same process—Simple 3D Cube step by step.
Key Terms You Should Know
Origami
The Japanese art of folding paper into decorative shapes and figures.
Modular Origami
A technique where you create several identical units and combine them to form a single structure.
Valley Fold
A basic fold where the paper is folded toward you, forming a “V” shape.
Mountain Fold
The opposite of a valley fold—it bends the paper away from you.
Flaps and Pockets
Think puzzle pieces. One fits into the other to keep your shape stable.
Materials Needed
Let’s talk gear. You won’t need much, but quality matters.
| Item | Details | Tips |
|---|---|---|
| Paper | 6 sheets of 15×15 cm square paper | Origami paper is ideal, but even colored printer paper works. |
| Flat Surface | Clean desk or table | Avoid carpets or fabric that causes bends. |
| Good Lighting | Natural or bright white light | To help you see folds and corners clearly. |
| Steady Hands | Patience included | Rushing ruins creases. Take your time. |
How to Make Origami 3D Cube – Step by Step
Let’s fold together! I’ll guide you through each phase with easy instructions.
Step 1: Start With One Square
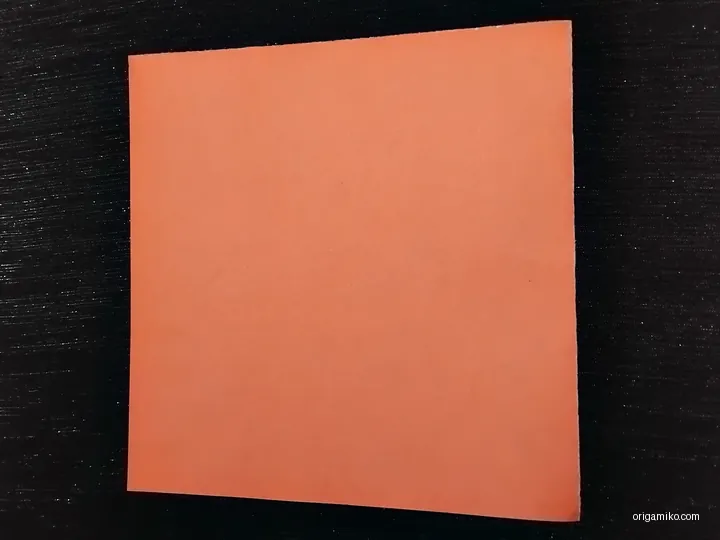
Take one 15×15 cm piece of paper and place it color side down (if it has one).
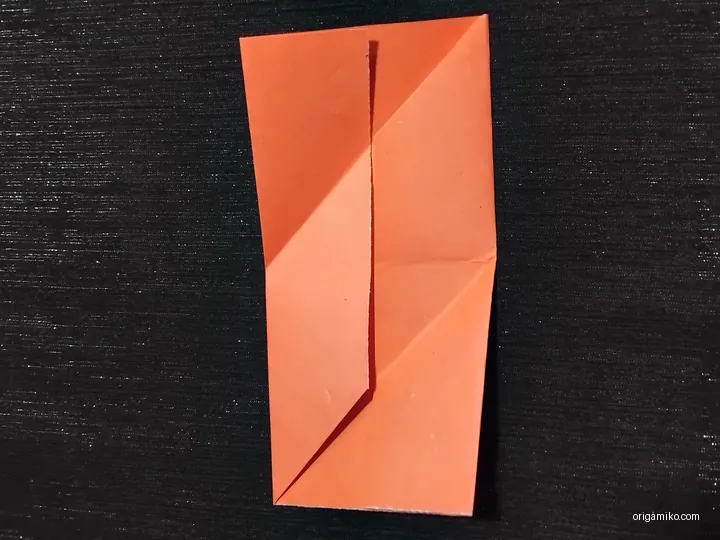
Step 2: Make the Guide Folds
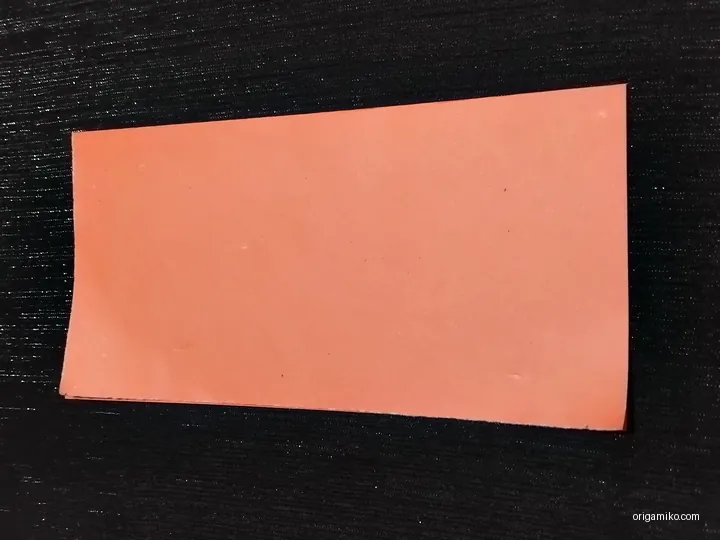
- Fold the paper in half vertically.
- Unfold it.
- Fold it in half horizontally.
- Unfold again.
Now your paper should have a cross crease in the middle. This is your base grid.
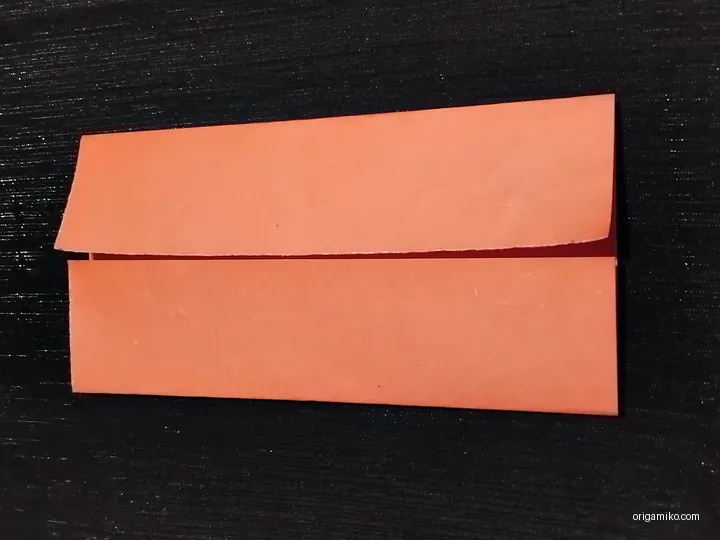
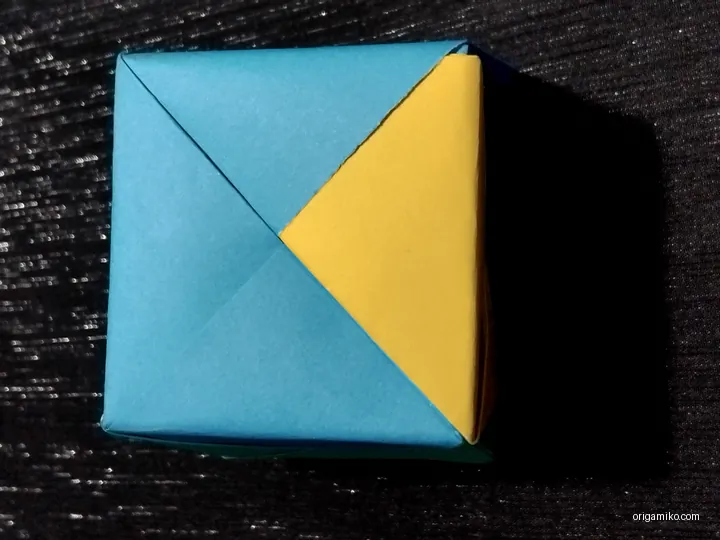
Step 3: Fold Both Corners In
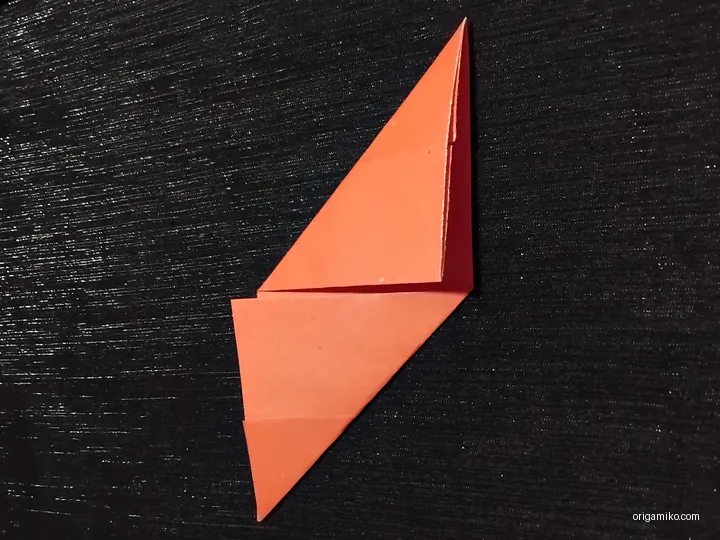
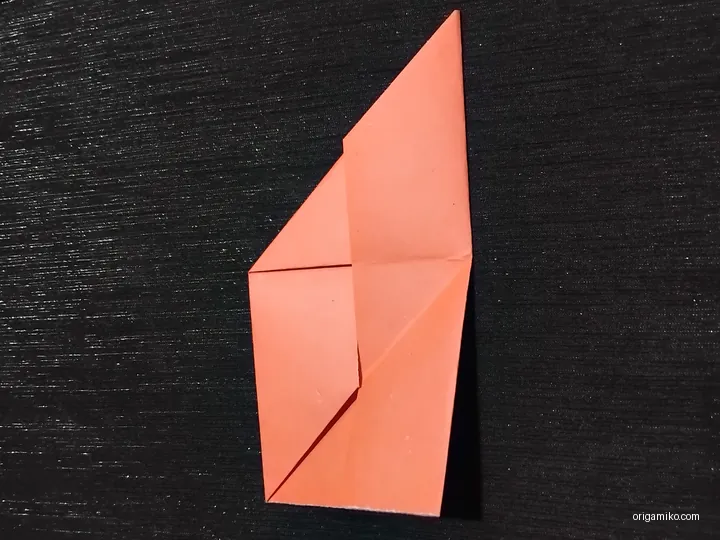
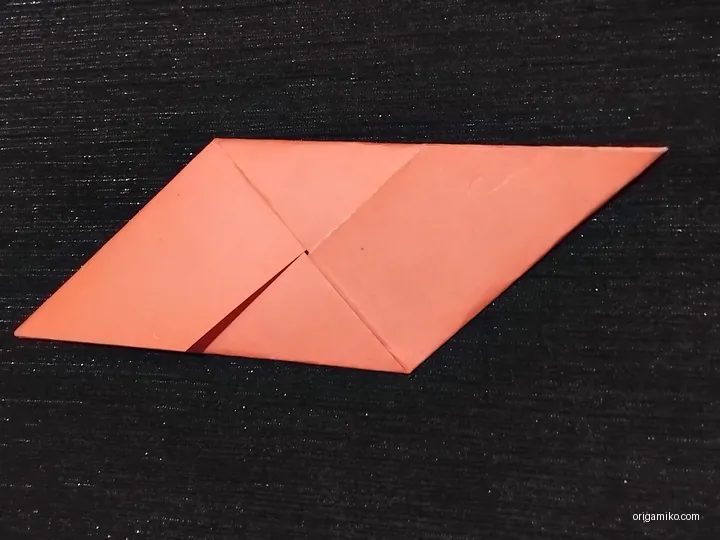
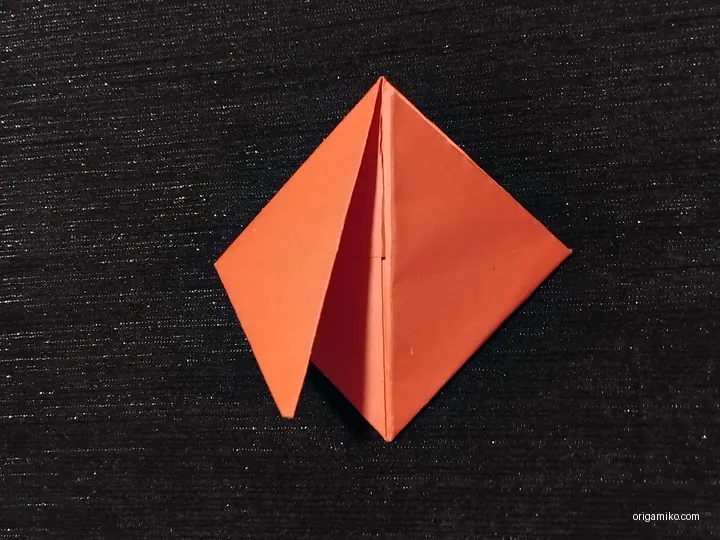
- Take the top right and bottom left corners.
- Fold them diagonally inward toward the center cross.
- Unfold both.
Now look closely—your paper should have X-shaped creases overlapping the plus-shaped ones.
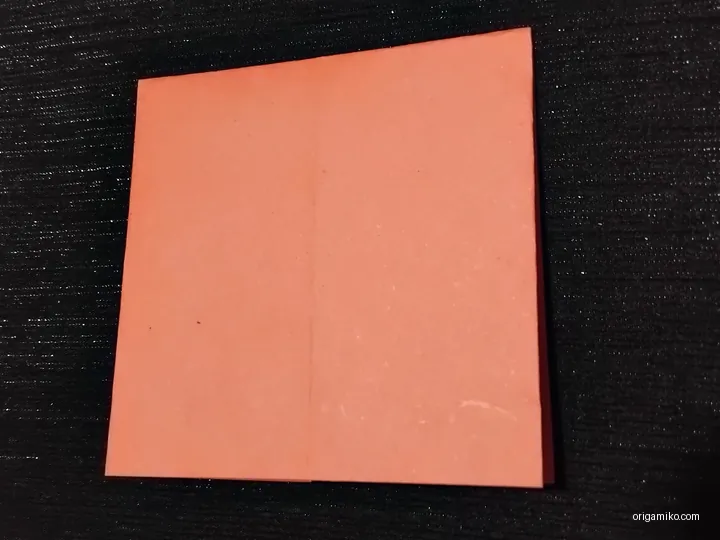
Step 4: Create Five More
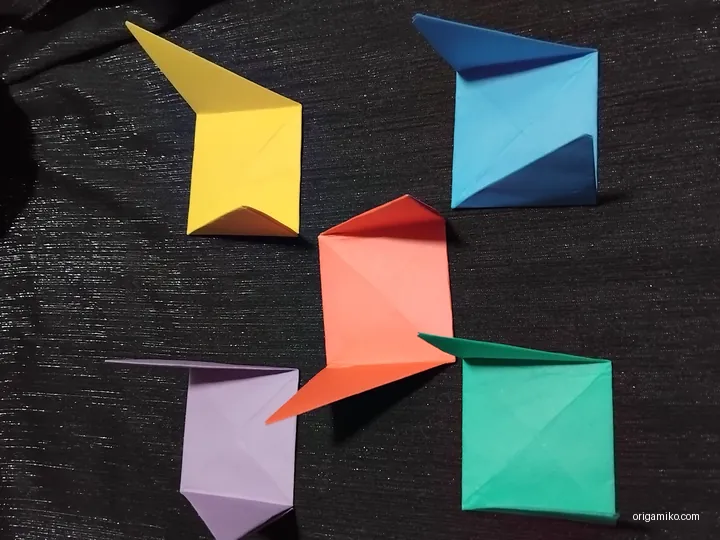
Repeat steps 1 to 3 five more times. You need six identical folded papers in total. These are your modules.
Pro tip: Stack them up after folding so they don’t get wrinkled or lost.
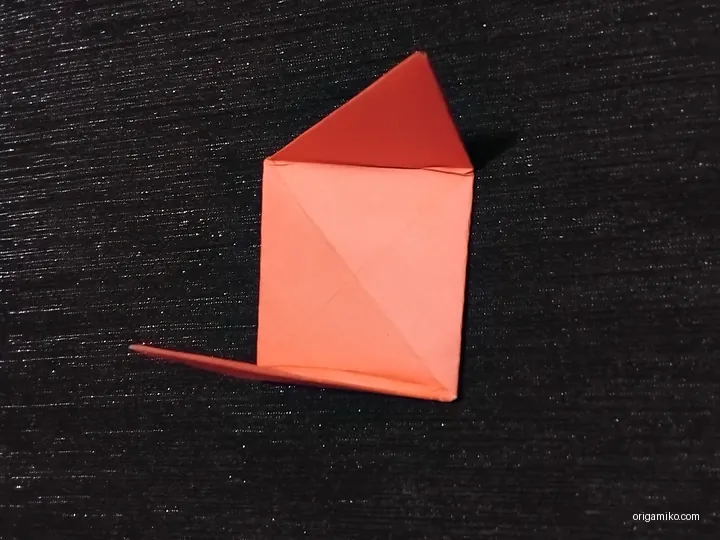
Step 5: Time to Connect the Papers
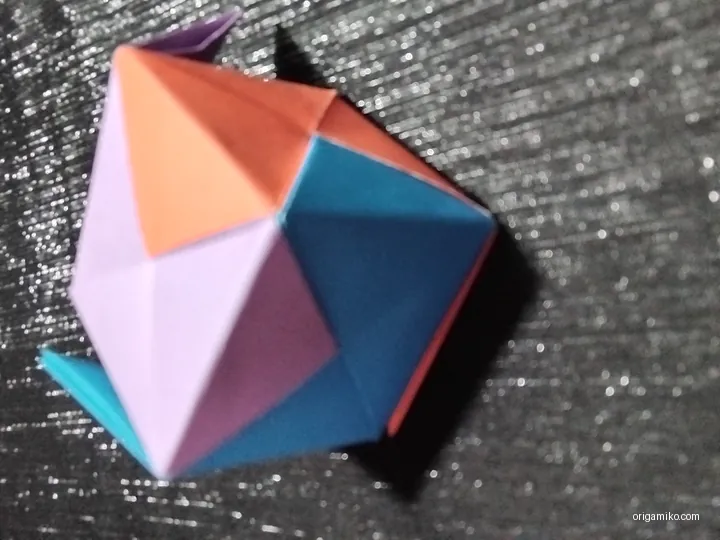
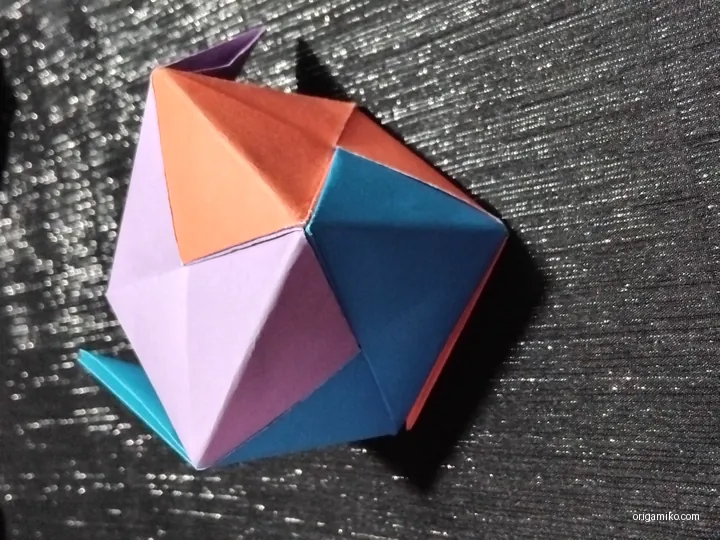
Here’s the fun part—connecting them:
- Take two folded papers.
- Look for the flap (pointy tip) on one and the pocket (slit) on another.
- Slide the flap into the pocket.
- Repeat this process, connecting all six.
It should feel like assembling a cardboard box, only softer.
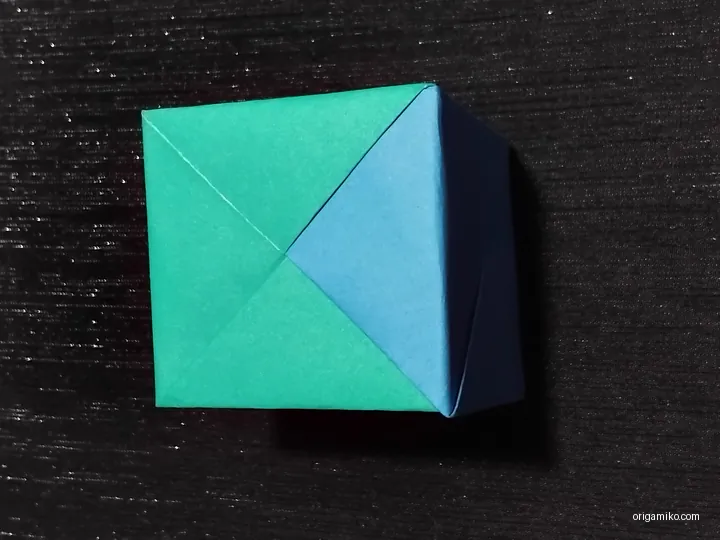
Step 6: Finish and Shape It
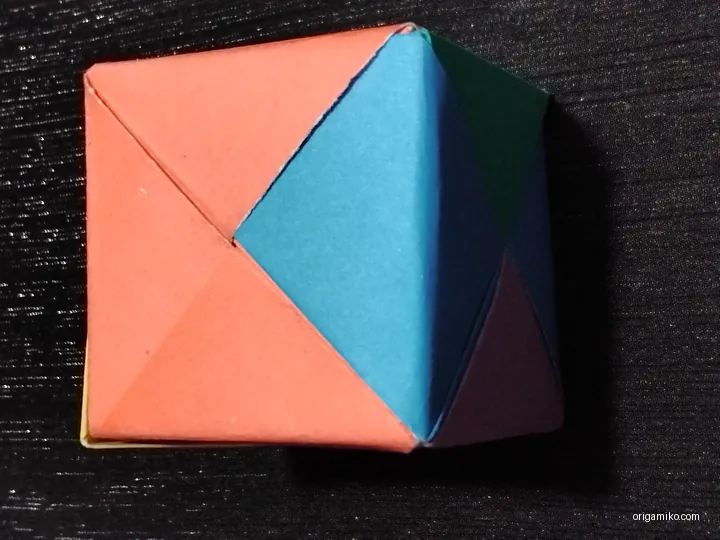
As the last flaps slide in, gently press the cube into shape. Check each side to make sure nothing is sticking out or uneven.
Boom! Your Origami 3D Cube is done.
Tips for Success
Want to make it look super clean and pro-level? Try these:
- Use thick origami paper – It holds shape better than thin ones.
- Sharpen your folds – Use a fingernail or ruler edge.
- Align corners perfectly – A tiny misstep adds up in 3D form.
- Practice on scrap paper – Before jumping into fancy paper.
- Take your time – The cube rewards patience, not speed.
Common Mistakes and How to Avoid Them
Here are a few hiccups I’ve seen (and made):
- Too much pressure when folding
Solution: Fold gently and slowly. Let the paper move naturally. - Papers tear during assembly
Solution: If it’s tearing, your paper might be too thin. Try something thicker. - Cube doesn’t hold its shape
Solution: Make sure each flap is inserted snugly. Don’t leave gaps. - Wrong corner folded
Solution: Always start with the top-right and bottom-left folds.
Similar Variations You Can Try
Once you’ve nailed the basic cube, try spicing things up:
- Origami Water Ball Cube – Add a small hole so you can blow air into it and inflate the cube.
- Patterned Paper Cubes – Use printed scrapbook paper for visual texture.
- Mini Cubes – Cut your squares smaller for cute tiny cubes.
- Colorful Mix and Match – Use six different colors—each face will be unique!
FAQs
Q: Can I use sticky notes?
A: Yes, as long as they’re square and not too sticky. Peel carefully.
Q: What if my cube keeps falling apart?
A: You might not be inserting the flaps deep enough. Try refolding with tighter creases.
Q: Is glue allowed?
A: Technically not in traditional origami—but for durability, a dot of glue at the end is okay.
Q: Can kids make this?
A: Definitely! With a little help, it’s great for ages 7+.
Final Thoughts
Creating an easy Origami 3D Cube might seem simple—but it’s oddly magical.
It’s a calming little craft with a rewarding finish. And trust me, once you make one, you’ll want to make a dozen. So go grab that stack of paper and fold your first cube. The first of many.
Got questions or tips of your own? I’d love to hear from you. Let’s fold better, together.