

Ever wonder how to make an Origami four leaf clover that actually looks charming?
I’ve been there—struggling with folds that don’t sit right, paper that won’t stay flat.
But this guide? It’ll walk you through the whole process, step by step.
This isn’t just another paper craft.
It’s a simple four leaf clover step by step project that feels magical once you finish.
Plus, it makes a perfect gift, decoration, or lucky charm.
So grab your square sheet.
Let’s turn that flat piece into something vibrant.
Your easy Origami Four leaf clover awaits.
What Are We Making Today?
We’re crafting an Origami four leaf clover—a symbol of luck and love, all from a tiny square of paper.
It’s not hard, but you’ll want to follow the folds carefully.
I promise it’s worth the effort.
This project is great for kids, adults, or anyone who just wants to try something relaxing.
You don’t need any fancy tools—just a small paper square, your fingers, and a little focus.
And by the end? You’ll have a lucky charm that feels like it came straight from nature.
Key Terms to Know Before Folding
Origami
The Japanese art of folding paper into shapes without cutting or gluing.
Valley Fold
Fold the paper toward you, forming a “V” shape.
Mountain Fold
Fold the paper away from you, creating a peak.
Crease Line
The sharp line made when a fold is pressed firmly.
Symmetry
Keeping both sides of your work even and balanced—critical in origami.
Materials Needed
| Item | Description | Notes |
|---|---|---|
| Origami Paper | 7.5 cm x 7.5 cm (3 in x 3 in) square | Use green for a traditional clover look |
| Flat Surface | Clean and smooth workspace | Helps with sharp creases |
| Fingertips | Your hands are enough | Optional: bone folder for extra precision |
| Glue (Optional) | For attaching the leaves together | Use sparingly if needed |
Step-by-Step Instructions
Let’s break it down, leaf by leaf.
Step 1: Take a Paper
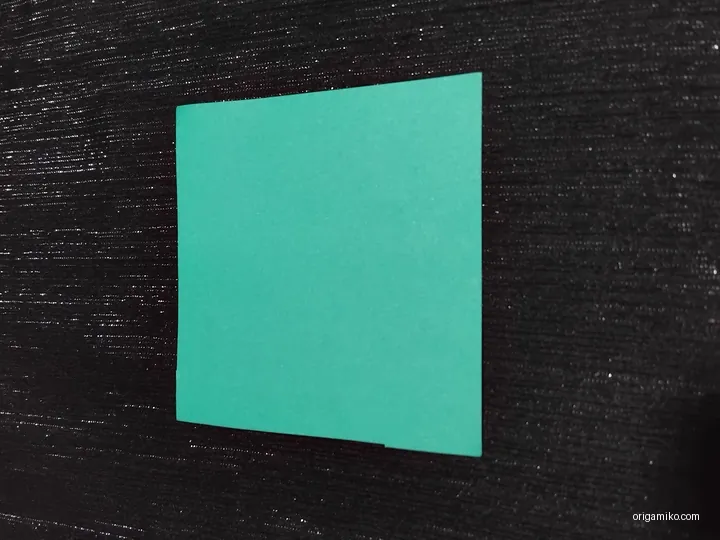
Grab one square of origami paper. Preferably green, but honestly—go wild with colors if you want.
Step 2: Fold it in Half, Then Half Again
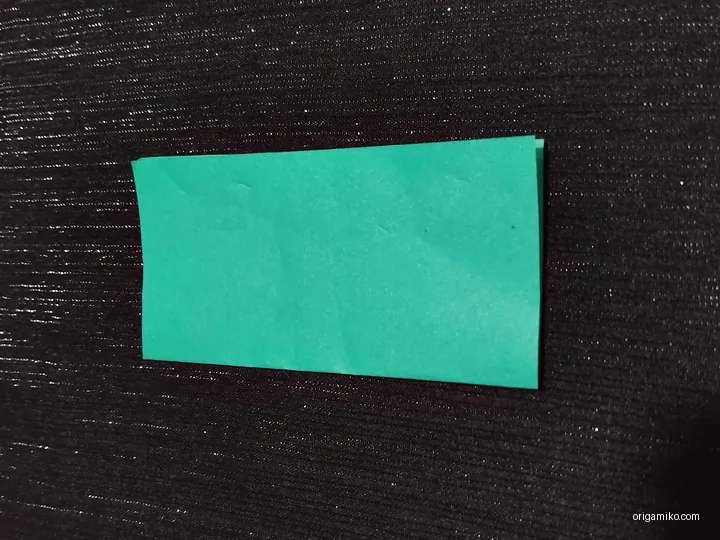

First, fold your square in half vertically.
Then fold it in half again horizontally.
You’ll now see four small square sections when you unfold.
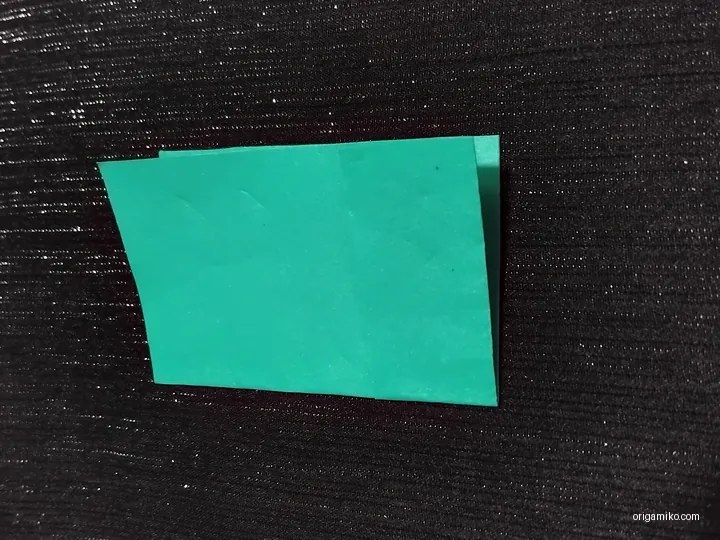
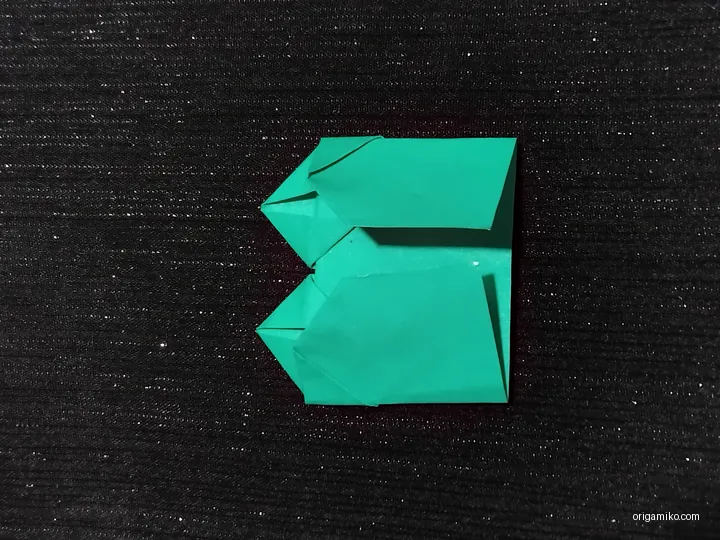
Step 3: Fold Both Lower Corners, Then Again Like the Picture
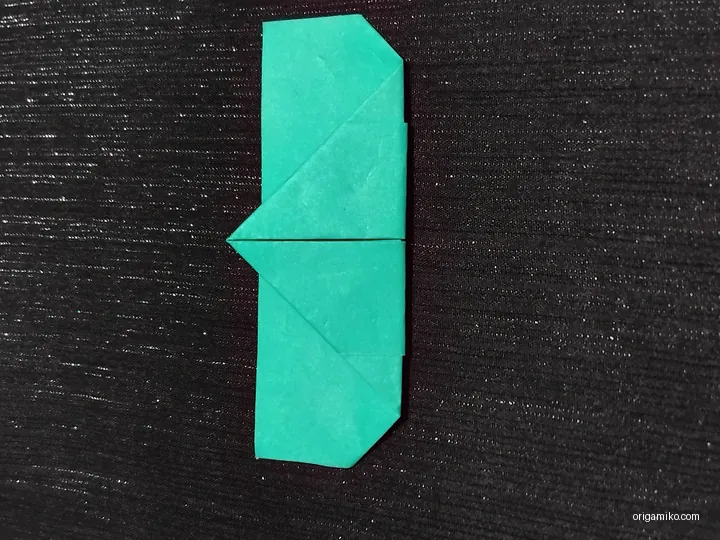
Take the bottom two corners and fold them up toward the center line.
Now fold again, shaping a petal—just like in a heart fold.
The folds should resemble a triangle with soft, petal-like edges.
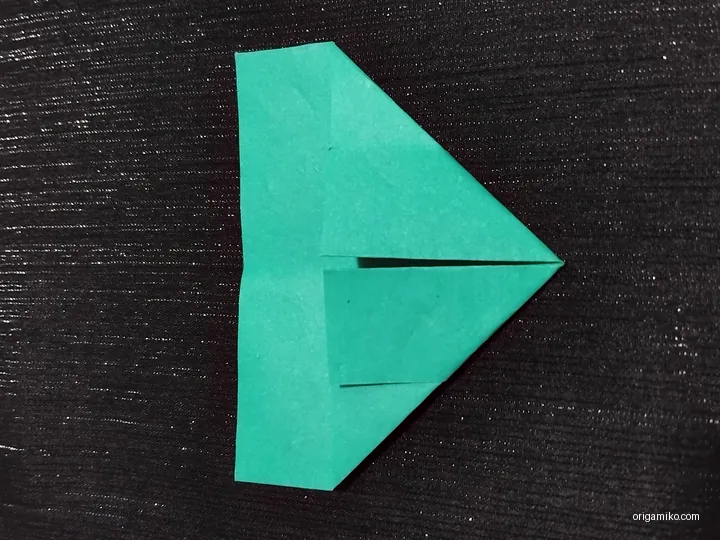
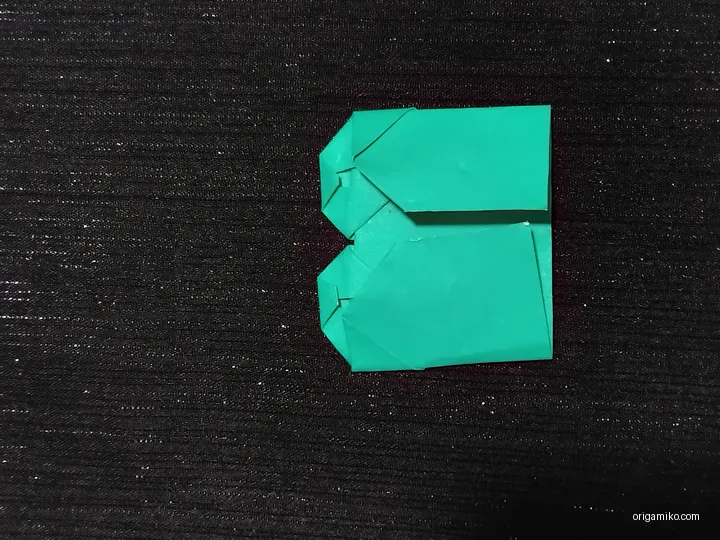
Step 4: Turn It Over and Fold Like the Picture
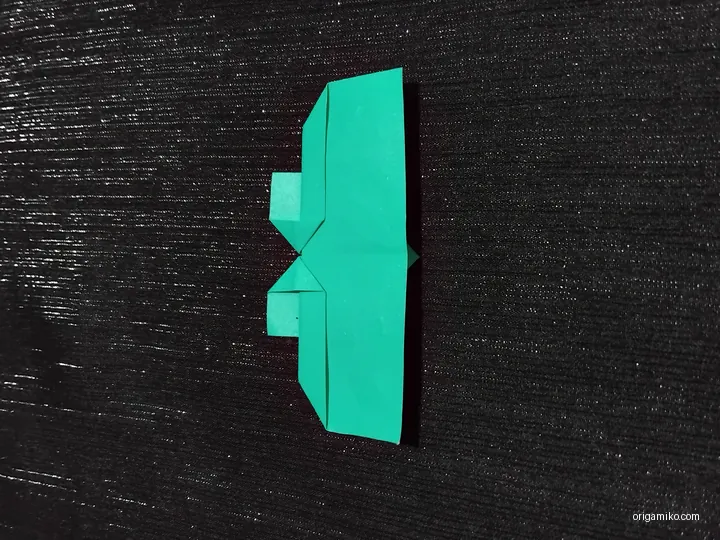
Flip the paper.
Now fold the edges inward, angling slightly to shape the outer curves of the leaf.
These will help create the clover’s rounded appearance.
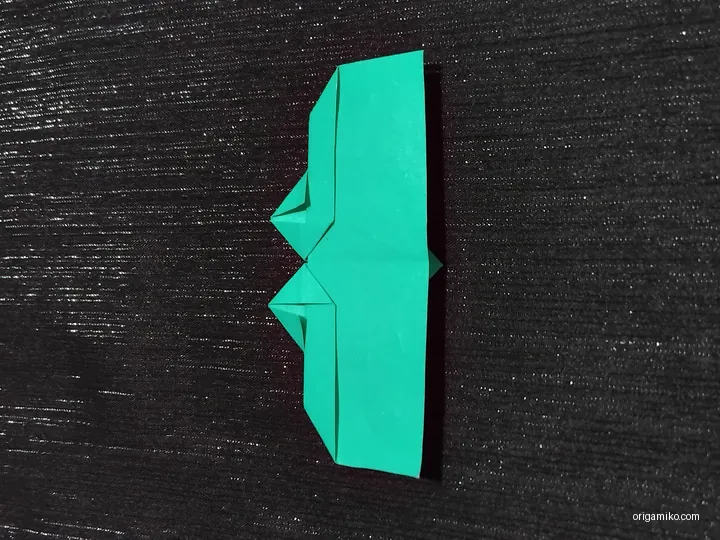
Step 5: Fold Both Sides Toward the Middle, Then the Upper Corner
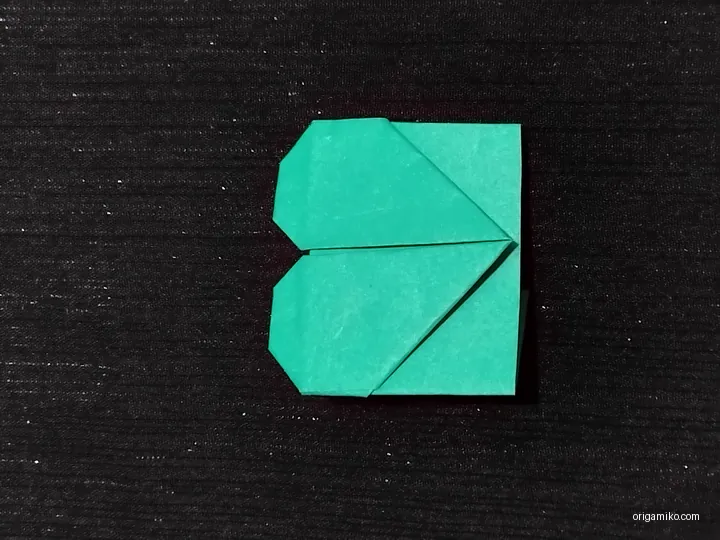
Fold the left and right sides toward the center crease.
Now, fold the top corner down, aligning with the center.
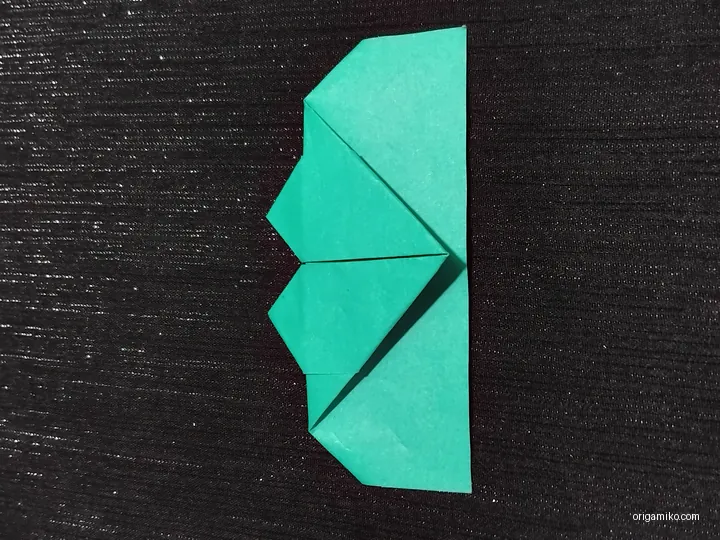
You’ll see the final leaf shape take form.
Step 6: Repeat to Make Four Leaves
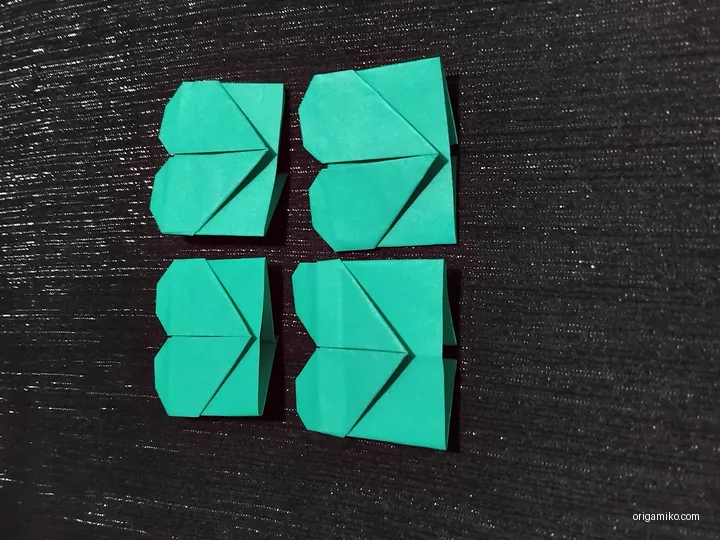
You need four of these.
Repeat Steps 1 through 5 three more times.
Each leaf will look similar—and they should!
Step 7: Attach the Leaves Together
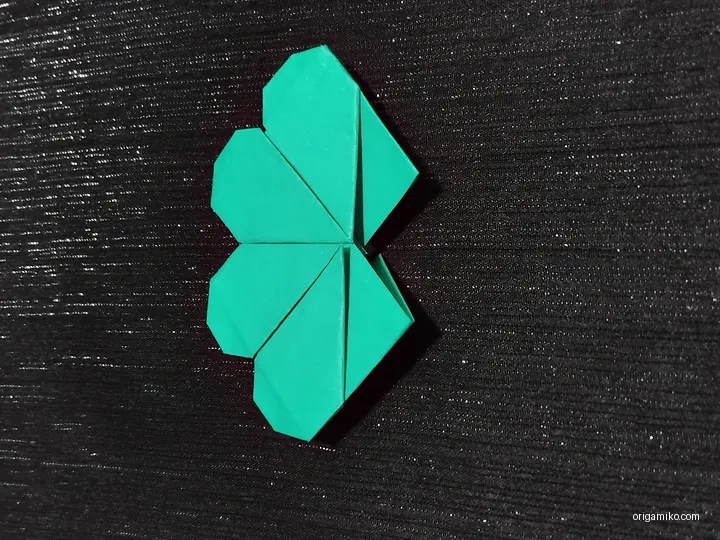
Lay two leaves side by side, tips slightly overlapping.
Dab a little glue (or fold the tips tightly together).
Repeat until all four leaves form a clover shape.
Step 8: Done! You Now Have a Paper Four Leaf Clover
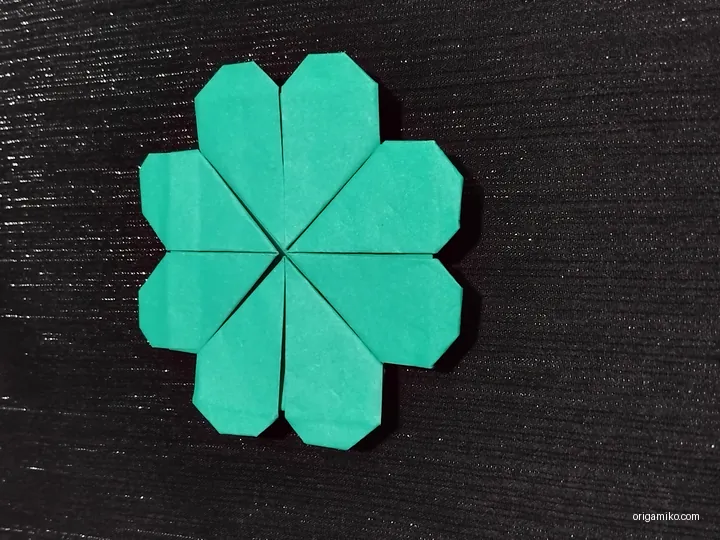
Step back and admire your work.
You just created a simple four leaf clover step by step, and it looks amazing.
This is a great piece for cards, gifts, or good luck charms.
Tips for Success
Here’s what I’ve learned from folding clovers again and again:
- Use thinner paper – it’s easier to shape and doesn’t bulk up.
- Crease firmly – a weak fold will throw off the symmetry.
- Practice one leaf a few times before making all four.
- Work in good lighting so you can align folds more accurately.
- Take your time—origami is as much about patience as precision.
Common Mistakes and How to Avoid Them
Let me save you from some of my past blunders:
- Uneven folds? Always align edges perfectly before creasing.
- Paper tearing? You’re probably folding too forcefully or using thick paper.
- Leaves not matching? Double-check your first fold for symmetry.
- Bulky center? Try flattening each layer firmly as you go.
Similar Variations You Can Try
Feeling adventurous? Try switching it up.
- Three Leaf Clover – Skip one leaf for a classic shamrock shape.
- Miniature Clovers – Use 5×5 cm paper to make tiny charms.
- Colorful Clovers – Use patterned origami paper for a playful touch.
- Lucky Garland – String several clovers together for seasonal décor.
FAQs
Q: Can I use regular printer paper?
A: You can, but it’s stiffer and harder to fold precisely. Thinner origami paper works better.
Q: How long does it take to make one?
A: Once you get the hang of it, about 3–5 minutes per leaf.
Q: Do I need glue?
A: Not necessarily. You can tuck the leaves together, but glue helps keep them in place.
Q: Can kids try this?
A: Definitely! Just help with the trickier folds.
Q: What’s the hardest part?
A: Making each leaf look identical—but that’s what makes it fun!
Final Thoughts
Creating an easy Origami Four leaf clover is more than just folding paper.
It’s a calming, creative process that results in something you can truly feel proud of.
Whether you’re making one for fun, a gift, or your classroom project, this simple four leaf clover step by step guide should help you every time.
Got feedback or questions? I’d love to hear how your clover turned out!
Now you know exactly how to make Origami four leaf clover—so go fold your luck into shape.