
Ever wondered how to transform trash into treasure? I’m about to show you something magical.
Today we’re turning ordinary gum wrappers into stunning origami stars. Get ready for some serious paper-folding fun!
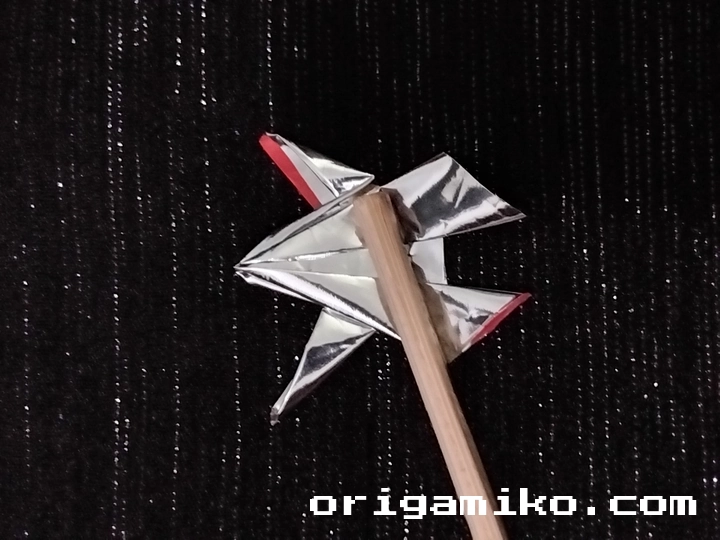
What Is an Origami Gum Wrapper Star?
You know that moment when you unwrap a piece of gum and toss the wrapper in the trash? Stop right there! That little piece of foil can become something absolutely beautiful. An origami gum wrapper star is exactly what it sounds like – a gorgeous star shape folded from those shiny wrappers we usually throw away.
I discovered this craft during a boring afternoon, and it completely changed how I look at everyday items. The best part? You don’t need expensive origami paper or fancy tools. Just grab those gum wrappers you’ve been discarding and let’s create some magic together.
These stars aren’t just pretty decorations. They’re conversation starters, stress relievers, and perfect little gifts that show you care about both creativity and the environment. Plus, there’s something deeply satisfying about turning something destined for the garbage into a work of art.
Materials Needed
Let me break down everything you’ll need for this Simple Origami Gum Wrapper Star Step by step project:
| Item | Description | Quantity | Where to Find | Cost |
|---|---|---|---|---|
| Gum Wrappers | Foil or paper wrappers from stick gum | 1-5 pieces | Your pocket, purse, or desk drawer | Free |
| Clean Surface | Flat workspace for folding | 1 | Any table or desk | Free |
| Good Lighting | Bright light to see fold lines clearly | 1 source | Desk lamp or natural light | Free |
| Patience | Essential for precise folding | Unlimited | Within yourself | Priceless |
| Optional: Ruler | For measuring and creating sharp creases | 1 | Office supplies | $1-3 |
The beauty of this project lies in its simplicity. I love how accessible it is – you probably have everything you need right now without spending a single penny.
Step-by-Step Instructions for Your Origami Gum Wrapper Star
Here’s how to make Origami Gum Wrapper Star using the traditional method I’ve perfected over countless folding sessions:
Step 1: Prepare Your Paper
Take a gum wrapper and smooth it out completely. Remove any sticky residue if present. The cleaner your starting material, the crisper your final star will be.
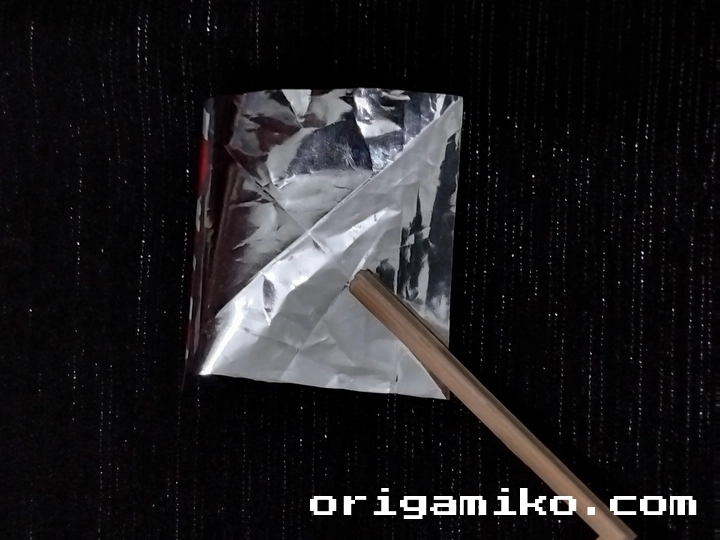
Step 2: Create the Foundation Folds
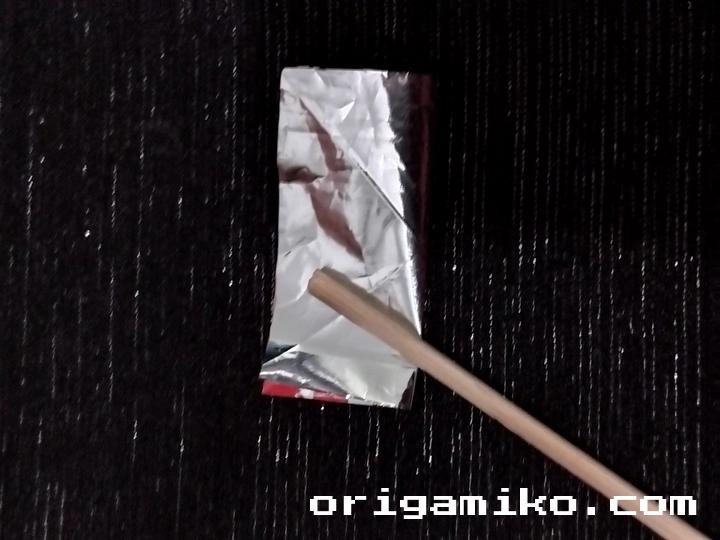
Fold the wrapper in a crisscross pattern, then fold it from the middle. This creates your basic grid system that guides the rest of your folding journey.
Step 3: Form the Crease

Make a sharp crease along your fold lines. Press firmly with your fingernail or the edge of a ruler. These creases are your roadmap – the clearer they are, the easier your next steps become.
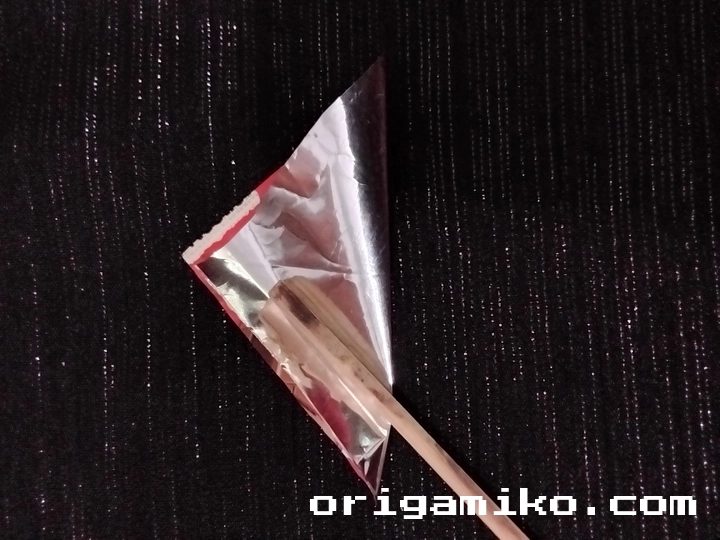
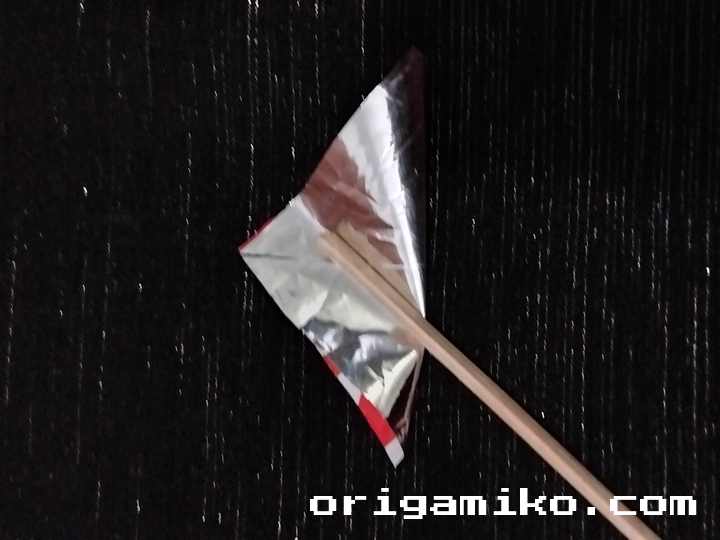
Step 4: Shape the Star Points


Make folds following the natural lines created in your crisscross pattern. Each fold brings you closer to that perfect star shape. Take your time here – rushing leads to uneven points.
Step 5: Final Assembly

Now your Gum Wrapper Origami Star is ready! Adjust any loose points and admire your handiwork. You’ve just transformed trash into treasure.
Tips for Success
After folding hundreds of these stars, I’ve learned some tricks that make the difference between frustration and success:
Work with fresh wrappers when possible. Old, crumpled wrappers fight back during folding. Fresh ones cooperate beautifully.
Use your fingernails for sharp creases. Blunt fingers create soft folds that don’t hold their shape well.
Practice the crisscross fold first. This is the foundation of your entire star. Get this right, and everything else falls into place.
Take breaks if you get frustrated. Sometimes stepping away for five minutes helps your fingers remember what they’re supposed to do.
Start with larger wrappers. Bigger pieces are more forgiving while you’re learning the technique.
Common Mistakes and How to Avoid Them
Let me save you from the frustrations I experienced when starting out:
Mistake #1: Rushing the initial folds I used to hurry through the crisscross step, thinking it was just preparation. Wrong! These foundation folds determine your star’s final shape. Take time to make them precise.
Mistake #2: Using torn or damaged wrappers Ripped wrappers create weak points that split during folding. Always inspect your wrapper first and choose the best one available.
Mistake #3: Skipping the crease-making step Soft folds create floppy stars that won’t hold their shape. Press those creases firmly – your star will thank you with better structure.
Mistake #4: Forcing stubborn folds When a fold resists, don’t muscle through it. Step back, check your previous folds, and approach it differently. Gentle persistence beats brute force every time.
Mistake #5: Working in poor lighting I’ve tried folding in dim light. It’s nearly impossible to see the subtle fold lines that guide your work. Good lighting isn’t optional – it’s essential.
Similar Variations You Can Make
Once you’ve mastered the basic Origami Gum Wrapper Star instructions, try these exciting variations:
Multi-Wrapper Stars Combine multiple wrappers for larger, more complex stars. I’ve created stunning decorations using five or six wrappers in different colors.
Textured Stars Use wrappers with different textures – some gums come in foil, others in paper. Mixing textures creates visual interest.
Miniature Star Garlands String multiple small stars together for party decorations or holiday ornaments. I made a beautiful garland for my friend’s birthday using twenty tiny stars.
Gift Box Stars Make larger stars using candy bar wrappers or other food packaging. These work perfectly as gift toppers that recipients can keep.
Layered Stars Create depth by making stars of different sizes and layering them. The dimensional effect is absolutely stunning.
Advanced Techniques for Star Perfection
Ready to take your skills to the next level? Here are some pro techniques I’ve developed:
Precision Folding Methods
The Quarter-Turn Technique After each major fold, rotate your star a quarter turn. This helps you maintain symmetry and catch any uneven sections before they become permanent.
The Pressure Point Method Use specific pressure points along your folds rather than pressing the entire length at once. This creates cleaner, more defined edges.
Finishing Touches
Edge Refinement Once your star is complete, go back and refine each point. Gentle adjustments can transform a good star into a great one.
Shape Balancing Hold your finished star up to the light and check for evenness. Minor tweaks at this stage make major improvements in appearance.
Troubleshooting Common Issues
Sometimes things don’t go as planned. Here’s how I handle the most frequent problems:
Uneven Star Points
If your points look lopsided, check your initial crisscross folds. Usually, one section was folded at a slightly different angle. Unfold carefully and try again.
Wrapper Tearing
Thin wrappers sometimes split during folding. Keep folding anyway – you can often work around small tears, and the finished star may still look beautiful.
Lost Fold Lines
If you lose track of where you are in the process, don’t panic. Unfold partially and look for the fold pattern. Most mistakes can be corrected by backing up one or two steps.
Creative Display Ideas
Your finished stars deserve to be shown off! Here are my favorite ways to display these little masterpieces:
Shadow Box Collections Arrange multiple stars in a shadow box frame. The depth creates beautiful shadows and highlights.
Window Displays Tape stars to windows where sunlight can catch the foil surfaces. The light play is mesmerizing.
Gift Wrapping Accents Use stars as unique gift toppers instead of traditional bows. Recipients always ask where I found such creative decorations.
Seasonal Decorations Group stars by color for holiday themes – gold and silver for Christmas, pastels for Easter, orange and black for Halloween.
The Science Behind the Folds
Understanding why certain folds work helps improve your technique. Paper folding relies on geometric principles that create structural integrity.
The crisscross pattern distributes stress evenly across the wrapper. When you fold from the middle, you’re creating a central axis that supports the entire structure.
Each subsequent fold builds upon this foundation, creating triangular sections that naturally form star points. The mathematics of origami ensure that if you follow the steps correctly, the star shape emerges almost automatically.
Environmental Impact of Wrapper Crafting
Every gum wrapper you transform into art is one less piece of trash in our environment. I love that this hobby contributes to sustainability while creating beauty.
Consider starting a collection drive at work or school. People are usually happy to save their wrappers when they know they’re going toward a creative project.
Some statistics that might surprise you: The average person chews about 1.8 pounds of gum per year, generating hundreds of wrappers. Imagine if even half of those became art instead of trash!
Teaching Others This Craft
Sharing this skill multiplies the joy. I’ve taught friends, family members, and even strangers who noticed me folding during lunch breaks.
Kids especially love this project because the materials are free and the results are immediate. It’s also an excellent fine motor skill developer for younger children.
When teaching others, emphasize patience over speed. The meditative aspect of folding is just as valuable as the finished product.
Building Your Origami Skills
This gum wrapper star is an excellent stepping stone to more complex origami projects. The basic folding principles you learn here apply to countless other designs.
Once you’ve mastered this technique, consider exploring traditional origami papers and more challenging patterns. But don’t abandon your gum wrapper stars – they’ll always hold a special place in your crafting repertoire.
FAQ Section
Q: How long does it take to make one star? A: With practice, about 2-3 minutes. Beginners might need 5-10 minutes initially.
Q: Can I use other types of wrappers? A: Absolutely! Candy wrappers, small food packages, and even magazine pages work beautifully.
Q: Do the stars hold their shape permanently? A: Yes, if folded properly with good creases, they maintain their shape for years.
Q: What’s the smallest wrapper that works? A: I’ve successfully used tiny Starburst wrappers, though they require more patience.
Q: Can these be made with children? A: Yes! Kids age 6 and up can typically handle this project with minimal help.
Q: How do I store completed stars? A: Small boxes or clear containers work well. Avoid crushing them under heavy items.
Summary
Learning how to make Origami Gum Wrapper Star transforms ordinary waste into extraordinary art. This simple yet satisfying craft requires nothing more than discarded wrappers and a few minutes of focused attention.
The journey from trash to treasure never gets old. Each star represents a small victory over waste and a celebration of creativity. I hope you’ll find as much joy in this craft as I have, and maybe you’ll discover your own variations along the way. Happy folding, and remember – every expert was once a beginner who refused to give up on their Easy Gum Wrapper Star Origami dreams!