


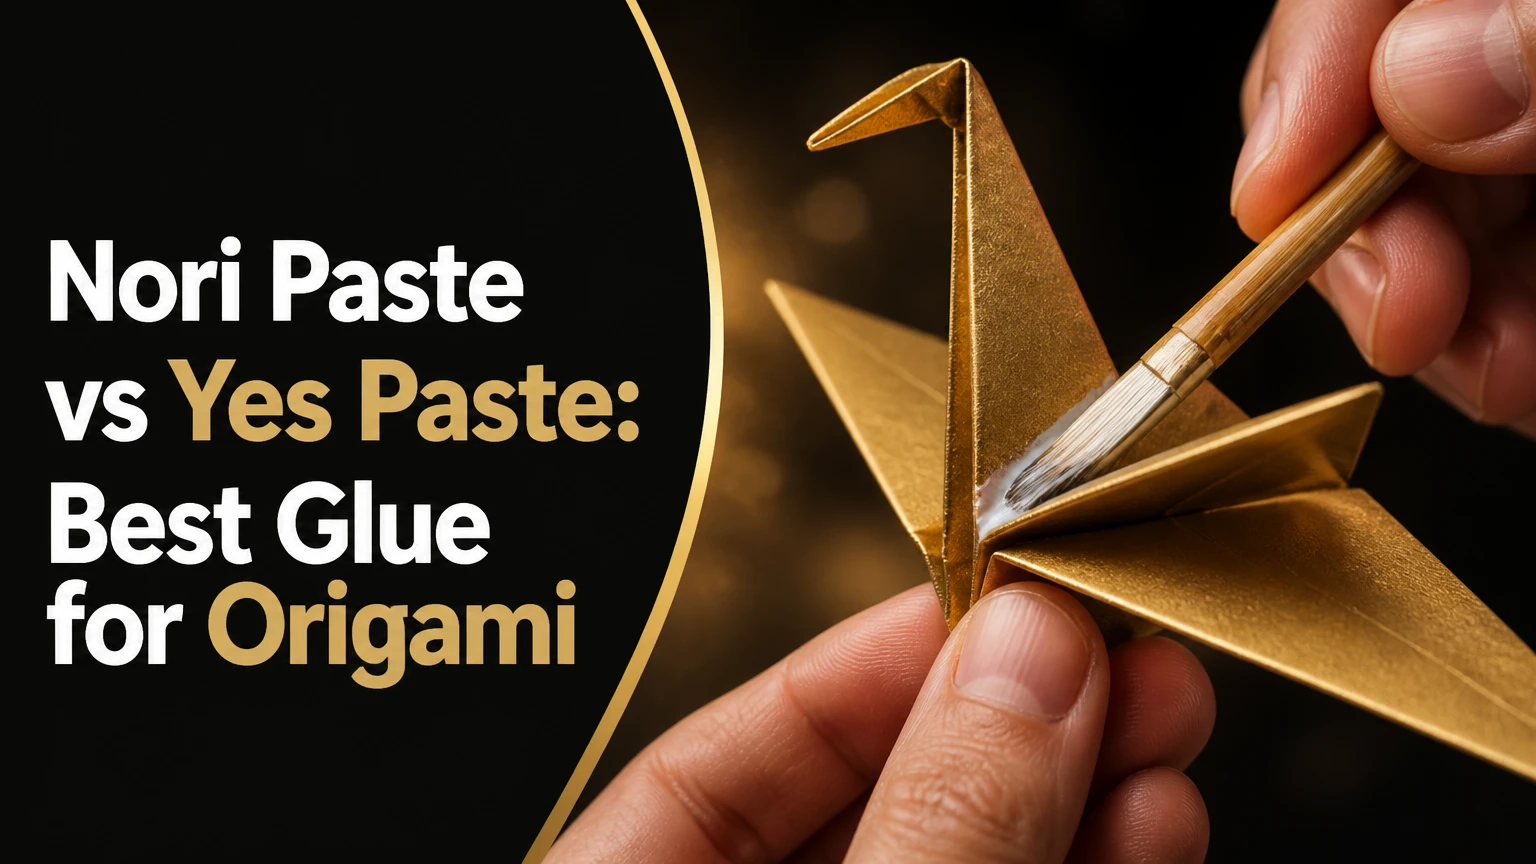
Nori Paste is usually the better choice for precision origami, thin kami, washi, and reversible paper joints because it spreads more gently and introduces less aggressive tack. Yes! Paste is the better choice for thick cardstock, layered models, fabric-backed pieces, and rigid displays where stronger grab matters more than easy repositioning.
Key Facts at a Glance
- Nori Paste is a starch-based adhesive family; commercial formulas vary by manufacturer and are not identical to homemade rice or wheat starch paste.
- Yes! Paste is a thick, water-based dextrin adhesive designed for strong, relatively flat bonds on paper and selected mixed-media surfaces.
- Neither paste is automatically wrinkle-proof; excessive adhesive, added water, or uneven pressure can still cockle origami paper.
- Nori Paste normally gives the longer adjustment period and the easier release on porous paper.
- Yes! Paste normally gives stronger initial grab, but its dense texture makes thin, even application more difficult.
- For heirloom origami, test the exact product, paper, pigment, and finish together before committing to the model.
What Are Nori Paste and Yes! Paste?
Nori Paste and Yes! Paste are both water-based pastes used to join paper, but they are not interchangeable formulations. Nori generally refers to a smooth Japanese-style starch paste, while Yes! Paste is a branded dextrin-based adhesive with a thicker, more cohesive consistency.
Traditional Japanese pastes may use rice starch, wheat starch, or another refined starch cooked with water. Commercial products sold as nori paste can contain preservatives, stabilizers, or other proprietary ingredients. Yasutomo describes its Nori Paste as a water-based, non-toxic adhesive, but the product label remains the correct authority for the current formula.
Yes! Paste is commonly described in conservation-supply and adhesive references as a dextrin adhesive. Dextrin is modified starch produced by heating or hydrolyzing starch, and its behavior differs from a freshly cooked starch paste. The result is usually a dense gel with stronger grab and more body.
The distinction matters in origami. A paste that is excellent for mounting a postcard to board may be awkward for a tiny reverse-fold tab. Bond strength is only one part of adhesive suitability.
How Do the Two Pastes Affect Origami Paper?
Nori Paste and Yes! Paste dry mainly as water leaves the adhesive film, so paper distortion depends on the amount of water, adhesive thickness, paper sizing, and drying restraint. Neither product traps moisture in a special polymer matrix that makes wrinkling impossible.
Paper fibers swell when they absorb water. If one side of a sheet becomes wetter than the other, the sheet develops differential expansion and may curl, buckle, or cockle. A thin adhesive film reduces that risk, but it does not eliminate the underlying physics.
Nori Paste is usually easier to distribute in a very thin layer. That advantage is significant for kami, tissue, and lightweight washi, where a visible ridge can permanently alter a fold. Yes! Paste can also dry flat, but the user must break up the dense paste and remove excess material before joining the sheets.
Origami paper has another complication: fold memory. A glued tab may remain flat while the surrounding sheet pulls away because the original crease wants to reopen. Adhesive cannot compensate for an incorrect crease sequence or insufficient mechanical support.
Moisture and Wrinkle Risk
| Variable | Nori Paste | Yes! Paste | Origami consequence |
|---|---|---|---|
| Typical wet body | Soft cream to gel | Dense gel or paste | Yes! Paste needs more working pressure |
| Water tolerance | A few drops can improve spread | Micro-drops are safer than free dilution | Excess water increases cockling |
| Thin-paper risk | Low when brushed thin | Moderate if ridges remain | Tissue and kami need minimal film |
| Drying restraint | Light weighting, usually 30-120 minutes | Firm weighting, often 1-12 hours | Thick tabs need longer compression |
A practical rule is to use the minimum adhesive that produces continuous contact. For a 10-millimeter origami tab, a film roughly comparable to a thin coat of paint is usually safer than a visible mound. The exact quantity changes with paper absorbency and tab width.
Which Paste Has the Better Reversibility?
Nori Paste generally has the stronger reversibility advantage on porous, uncoated paper, while Yes! Paste can also soften with water but may release less cleanly after heavy application or bonding to a non-porous substrate. Reversibility is product-specific, so “water-soluble” should not be treated as a guarantee of damage-free removal.
A damp cotton swab can soften a small Nori Paste joint on absorbent paper, especially when the bond is recent and the adhesive layer is thin. That does not mean the paper will return to its original condition. Water can disturb dyes, metallic coatings, surface sizing, or fragile fibers before the paste releases.
Yes! Paste is often described as water-reversible on paper, but its stronger grab and thicker film can require more moisture and dwell time during removal. On wood, glass, metal, plastic, or sealed board, the substrate may prevent water from reaching the adhesive evenly.
Conservators do not select an adhesive from reversibility alone. They also consider pH, aging behavior, staining, additives, paper composition, access for future treatment, and whether the object has cultural or monetary significance. Product-level conservation testing is more reliable than a generic “archival” label.
Nori Paste vs Yes Paste: Which Performs Better?
For most folded-paper origami, Nori Paste wins because controlled spread, moderate tack, and easier release reduce the chance of distorting small joints. Yes! Paste wins for thick, layered, or mixed-media origami displays that need immediate grip on heavier components.
| Decision criterion | Nori Paste | Yes! Paste | Practical winner |
|---|---|---|---|
| Thin kami, 60-80 gsm | Thin, gentle film | Can leave ridges | Nori Paste |
| Medium washi, 80-150 gsm | Easy to brush | Stronger than needed for tabs | Nori Paste |
| Cardstock, 180-300 gsm | Adequate with weighting | Better initial grab | Yes! Paste |
| Adjustment after contact | Typically 1-5 minutes | Typically shorter, about 1-3 minutes | Nori Paste |
| Small tab control | Smooth and predictable | Dense and easy to over-apply | Nori Paste |
| Fabric or board backing | Limited strength | Better mixed-media grip | Yes! Paste |
| Removal from porous paper | Usually easier | Often requires more softening | Nori Paste |
| Long-term product certainty | Depends on brand and label | Depends on current formulation | Tie, verify label |
These time ranges are typical studio observations, not universal manufacturer specifications. Temperature, humidity, film thickness, paper sizing, and pressure can change them substantially.
Which Is Better for Fold Detail?
Nori Paste is better for fold detail because a thin, low-profile adhesive layer preserves the geometry of reverse folds, squash folds, and narrow locking tabs. A heavy Yes! Paste ridge can create a raised line that prevents two layers from seating tightly.
Origami joints often fail through misalignment rather than insufficient strength. If a tab is placed two millimeters off-center, aggressive tack can make correction harder. Nori Paste’s slower initial grab gives the folder time to align layers under magnification or strong task lighting.
Yes! Paste becomes more attractive when the model has thick layers that spring apart. For example, a 250-gsm architectural model with laminated fins may need the stronger hold, especially when the adhesive is applied to a broad hidden tab rather than a delicate crease.
Winner verdict: Nori Paste is the better default for precision fold detail; Yes! Paste is better when thickness and springback overwhelm alignment concerns.
Which Is Stronger on Thick Paper?
Yes! Paste usually provides the stronger initial grab on thick paper, board, fabric, and some sealed surfaces. Nori Paste can bond medium-weight paper effectively, but its softer starch film is less suited to high-stress joints or heavy unsupported components.
Strength depends on joint design as much as chemistry. A broad tab with full contact can outperform a narrow tab made with a stronger adhesive. A 20-millimeter tab on 200-gsm paper spreads stress more effectively than a 5-millimeter tab carrying the same load.
For thick origami, score the fold accurately, flatten the glued tab under silicone release paper, and keep pressure on the joint until the adhesive has set. If the model will be handled, a hidden mechanical interlock is preferable to relying on adhesive alone.
Winner verdict: Yes! Paste is the stronger choice for heavy paper and display structures, provided the user can apply it in a thin, uniform film.
What Are the Main Specifications and Costs?
Nori Paste commonly costs less per container and is sold in small squeeze bottles or jars, while Yes! Paste is often sold in 16-ounce containers and can cost more upfront. Prices vary by country, retailer, shipping, and package size, so cost per usable gram is more meaningful than shelf price.
| Product category | Typical package | Typical retail range | Best purchasing use |
|---|---|---|---|
| Commercial nori paste | 1.84-10 oz | US$6-US$15 | Small origami and paper studios |
| Large nori paste jar | 20 oz | US$15-US$25 | Frequent model construction |
| Yes! Paste | 16 oz | US$18-US$30 | Heavy paper and mixed media |
| Homemade starch paste | 100-250 g batch | US$1-US$4 ingredients | Same-day experimental work |
These are typical US retail ranges, not fixed prices. A small jar may have a lower cash cost but a higher cost per ounce. Homemade paste has the lowest material cost, yet labor, cooking, straining, refrigeration, and spoilage change the real cost.
Fresh homemade starch paste is not automatically superior. It can be excellent for conservation-style paper work when prepared correctly, but an uncontrolled kitchen batch may contain lumps, inconsistent concentration, microbial growth, or a pH that has not been checked.
How Should You Apply Paste to Origami?
Apply either adhesive to the hidden tab, spread a nearly transparent film, align the layers once, and compress the joint under release paper. A typical small model takes 10-20 minutes of active gluing and 30-120 minutes of restrained drying, with larger structures requiring overnight pressure.
Step 1: Test the Paper and Surface
Cut two scraps from the actual origami paper and make a sample tab. Test color bleed, gloss change, curl, release, and dry-film visibility before using the finished model.
Use a white ceramic tile, glass palette, or silicone mat as the mixing surface. Avoid cardboard palettes because paper fibers can transfer into the adhesive.
Step 2: Prepare a Small Working Portion
Scoop approximately 1-2 grams into a clean dish rather than working from the main container. Close the original jar immediately to slow evaporation and reduce contamination.
Use a palette knife, small flat synthetic brush, or silicone wedge. A pointed round brush tends to deposit a bead at the tab edge.
Step 3: Adjust the Consistency
Stir Nori Paste until smooth. Add water only in single-drop increments when the paste cannot form a thin film; distilled water is preferable for sensitive work.
Work Yes! Paste with a palette knife before adding water. If necessary, incorporate one drop at a time, aiming for a spreadable butter-like consistency rather than a liquid adhesive.
| Consistency | Visual test | Suitable origami use | Correction |
|---|---|---|---|
| Too thick | Brush leaves ridges | None on thin paper | Mix and add one water drop |
| Usable | Film looks almost transparent | Most hidden tabs | Use immediately |
| Too thin | Film pools or shines wet | Only broad, absorbent paper | Add paste and remix |
| Contaminated | Specks, odor, color change | Do not use on finished work | Discard portion |
Step 4: Spread the Smallest Useful Film
Hold the tab flat and brush from its center toward the edge. Stop short of the perimeter by about 0.5-1 millimeter so paste cannot squeeze onto the visible face.
The correct film should cover the contact area without forming a wet puddle. Excess adhesive is the most common cause of a raised seam, delayed drying, and paper cockling.
Step 5: Align and Close the Joint
Bring the layers together from one edge to the other instead of dropping the entire surface at once. That method pushes air outward and reduces trapped bubbles.
Nori Paste generally allows more adjustment. Yes! Paste should be aligned promptly because its stronger grab can lock a mispositioned tab sooner.
Step 6: Burnish Through Release Paper
Place silicone release paper or clean polyethylene film over the joint. Press with a bone folder, smooth teaspoon, or small brayer using moderate pressure for 10-20 seconds.
Do not rub directly over metallic foil, soft pigment, or damp tissue. Direct friction can polish a matte surface or move loose color.
Step 7: Restrain While Drying
Keep the joint flat under clean blotter paper and a light, evenly distributed weight. Small Nori Paste joints may stabilize in 30-60 minutes; thick Yes! Paste joints may need several hours or overnight restraint.
You know the joint is ready when the paper feels dry at the edge, the tab does not creep under light pressure, and no cool or soft adhesive remains beneath the release sheet.
What Are Common Failure Modes?
| Failure | Likely cause | Recovery action | Prevention |
|---|---|---|---|
| Wrinkles or cockling | Too much water or paste | Relax under light humidity, then flatten | Use a thinner film |
| Visible lump | Paste was not worked smooth | Lift only if still wet; soften later with swab | Mix on a palette |
| Edge staining | Adhesive reached the face | Blot immediately, avoid rubbing | Leave a 0.5-1 mm margin |
| Joint opens | Tab was narrow or underweighted | Add a larger hidden support tab | Improve joint geometry |
| Paste dries in jar | Lid left open | Remove skin, do not mix debris inward | Close container between uses |
| Glossy patch | Uneven adhesive thickness | Do not over-wet the surface | Test on a scrap first |
A counterintuitive rule is that stronger paste does not repair a weak origami joint. Increasing the tab width by 5 millimeters often improves durability more reliably than changing from Nori Paste to Yes! Paste.
Another practitioner rule is to glue after the major creases are established, not before. Wet adhesive can stiffen a crease and make later folding inaccurate, particularly in thin kami.
Do not mist the surface of a paste jar routinely to prevent drying. Added water can introduce contaminants and alter the concentration. A clean film pressed against the paste and a tightly closed lid are safer storage practices.
Is Either Paste Archival for Heirloom Origami?
Neither Nori Paste nor Yes! Paste should be called archival for every paper, pigment, and substrate without product-specific evidence. “Archival” may refer to neutral pH, low staining, reversibility, or a manufacturer’s intended market, but those properties are not identical.
For heirloom origami, record the brand, product name, batch if available, paper type, and test result. Keep a glued sample in darkness and another in ordinary studio conditions for several weeks before making a valuable display.
Avoid applying either paste directly to original photographs, unstable digital prints, friable pigments, or papers with unknown coatings. Conservation Support Systems and museum conservation references treat adhesive choice as substrate-dependent, not as a universal ranking between two retail products.
If future removal matters, use a small hidden tab, keep the adhesive layer thin, and design the model so the joint can be accessed from the reverse. Reversibility is a construction property as well as a chemical property.
What Alternatives Should Origami Makers Consider?
Methylcellulose is often the most controllable alternative for lightweight paper because the user can mix it to a known concentration and adjust viscosity. Wheat starch paste offers strong conservation precedent, but preparation requires cooking, straining, cleanliness, and practical experience.
PVA dries strongly but introduces more water and usually creates a less reversible joint. Glue sticks are convenient for classroom models, yet many products have weaker long-term bonds and can leave a waxy or rubbery film.
Double-sided tissue tape works for clean, instant assembly, but it is difficult to reposition and may be unsuitable for work expected to be conserved. Test all alternatives against the actual paper finish.
| Alternative | Typical bond behavior | Reversibility | Origami fit |
|---|---|---|---|
| Methylcellulose | Adjustable, low-tack film | Water-softenable | Thin washi and reversible work |
| Wheat starch paste | Strong porous-paper bond | High when properly prepared | Conservation-style construction |
| PVA glue | Strong, faster set | Limited compared with starch | Durable craft displays |
| Glue stick | Low moisture, moderate tack | Product-dependent | Classroom and temporary models |
| Double-sided tissue tape | Instant, pressure-sensitive | Low to moderate | Clean hidden tabs and prototypes |
Which Paste Should Each Origami Maker Choose?
Choose Nori Paste for Kami and Thin Washi
Nori Paste is the safer first purchase for 60-120 gsm paper, delicate folds, small tabs, and models that may need correction. Use a small brush and a nearly transparent film, then flatten the joint under release paper.
Choose Yes! Paste for Cardstock and Layered Displays
Yes! Paste suits 180-300 gsm cardstock, layered architectural models, fabric-backed forms, and components that spring apart after folding. Its dense body requires palette mixing and careful control near visible edges.
Choose Methylcellulose for Reversible Testing
Methylcellulose is worth considering when the project has high conservation sensitivity and the maker wants to control concentration. It is slower to prepare and may lack the convenience of a ready-made jar.
Choose PVA Only for Non-Reversible Utility Models
PVA can be appropriate for robust display pieces, school prototypes, and joints hidden inside thick construction. It is a poor default for fragile paper or models whose folds must remain adjustable.
FAQ
Can Nori Paste be used on metallic origami paper?
Nori Paste can adhere to some metallic-coated papers, but the coating may prevent penetration and cause peeling. Test a hidden scrap for adhesion, color change, and surface lifting. Apply a very thin film and avoid burnishing directly on the metallic face, because pressure can scratch or polish the coating.
Does Yes! Paste dry clear?
Yes! Paste generally dries to a pale or translucent film, but thick deposits can remain visible, glossy, or slightly raised. Visibility depends on film thickness, paper color, and the surface beneath the joint. Apply less paste than seems necessary, then verify the dry appearance on a scrap.
Can I mix Nori Paste and Yes! Paste?
Mixing Nori Paste and Yes! Paste is not recommended for finished origami because the combined viscosity, drying behavior, and reversibility are unpredictable. If experimentation is worthwhile, make separate samples and compare curl, bond strength, surface change, and release after complete drying.
How should unopened and opened paste be stored?
Store both products sealed at room temperature, away from heat and direct sunlight. Keep a clean working portion separate from the main jar, remove dried skins rather than blending them into fresh paste, and discard material with mold, persistent odor, or an unusual color change.
Is homemade rice paste better than commercial Nori Paste?
Homemade rice paste can provide excellent control and reversibility, but quality depends on starch choice, cooking, straining, cleanliness, and storage. Commercial Nori Paste is more convenient and consistent between sessions. For valuable origami, compare a tested homemade batch with the exact commercial product on the actual paper.
The Bottom Line
For the query nori paste vs yes paste, choose Nori Paste for most precision origami, especially thin kami, washi, narrow tabs, and reversible paper construction. Choose Yes! Paste for thick cardstock, layered forms, fabric, board, and display pieces that need stronger initial grab. Whichever adhesive you select, the decisive technique is a thin, smooth film applied to a correctly sized hidden tab and dried under even pressure.
