


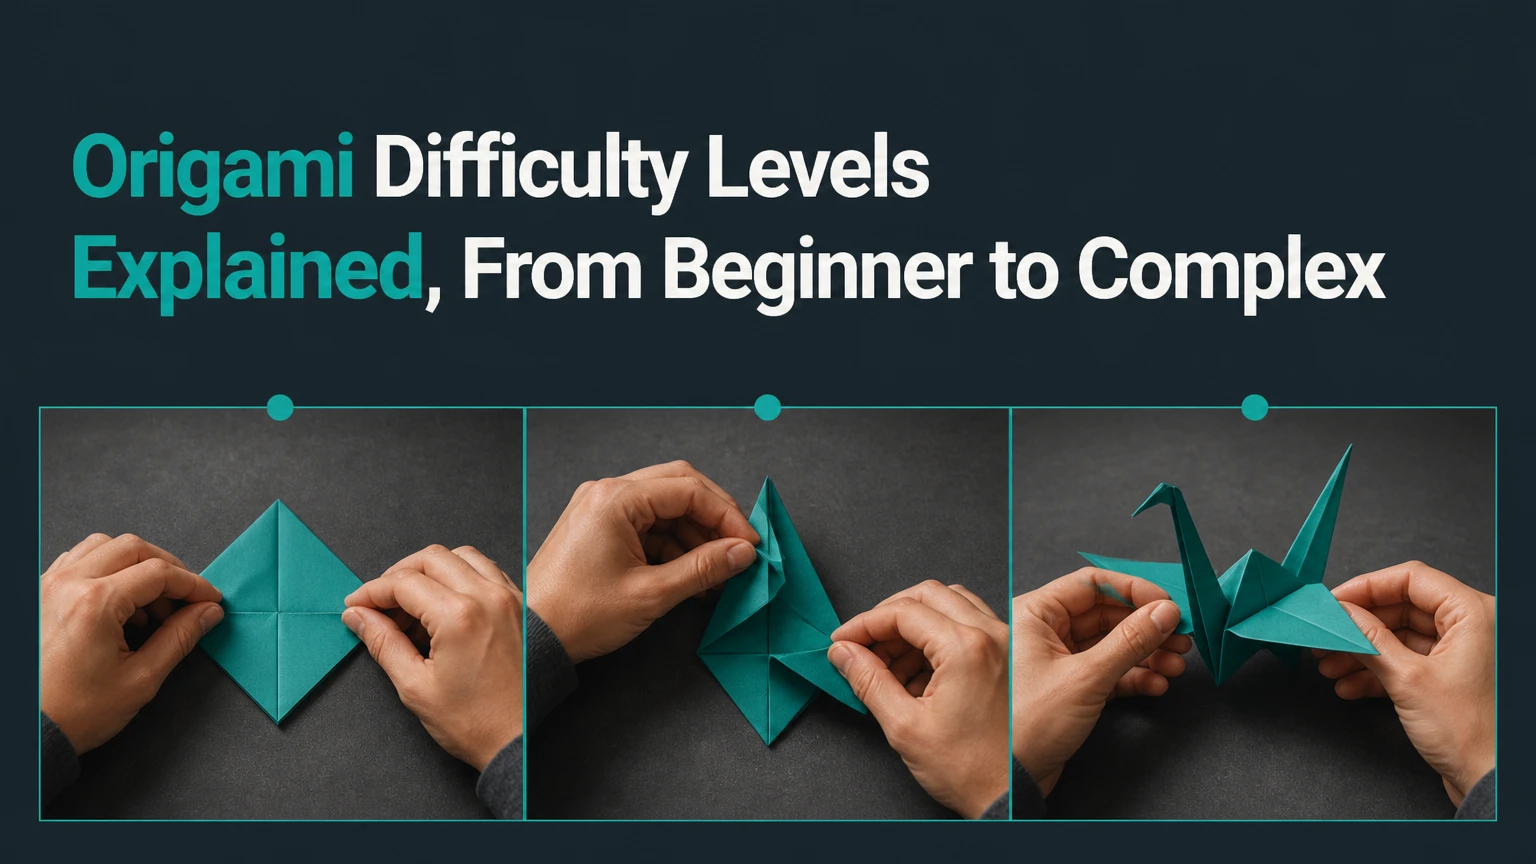
Origami difficulty levels describe how much geometric reasoning, precision, layer management, shaping, paper control, and diagram literacy a model requires. The commonly used progression runs from simple, traditional beginner, intermediate, high-intermediate, complex, to super-complex, but these labels are community conventions rather than a single globally enforced standard.
Key Facts at a Glance
- Simple origami typically takes 1-5 minutes and uses 1-10 major steps.
- Traditional beginner models commonly take 5-15 minutes and introduce standard bases.
- Intermediate difficulty usually requires 15-45 minutes, layered folds, and three-dimensional shaping.
- Complex origami often takes 2-6 hours and may require 30-50 cm thin, strong paper.
- Super-complex models can take 6-30 or more hours and may use crease patterns instead of complete diagrams.
- Step count is only one difficulty signal; precision, paper thickness, hidden layers, and shaping can matter more.
What Do Origami Difficulty Levels Measure?
Origami difficulty measures the combined demands of a model, not simply the number of diagram steps. A 25-step traditional crane can be easier than a 12-step model containing a difficult sink, because the second model may require more accurate geometry and more forceful layer manipulation.
Five attributes usually determine a model’s practical difficulty:
- Fold vocabulary: The number and sophistication of folds required.
- Geometric planning: Whether the folder follows visible landmarks or calculates divisions.
- Layer density: How many layers must be folded, spread, sunk, or shaped together.
- Precision tolerance: How much an early error affects later steps.
- Paper behavior: Whether the sheet remains thin, crisp, flexible, and strong after repeated folding.
Robert J. Lang describes origami simply as “the art of folding paper.” That definition is useful because difficulty belongs to the folding process, not merely to the finished subject. A visually plain tessellation can be harder than a recognizable animal if its repeated geometry permits almost no alignment error.
Are Origami Difficulty Levels Official?
Origami difficulty levels are not governed by one official international grading body. Designers, book publishers, databases, teachers, and folding communities use overlapping labels such as easy, intermediate, complex, and super-complex, but their thresholds differ.
Step counts therefore need a qualification. One designer may count every preliminary crease, while another counts only diagram panels or major actions. The ranges below are practical benchmarks, not a formal examination system.
Origami Difficulty Levels Explained by Skill
The six-level model below gives a useful shared vocabulary. Time, steps, and paper sizes are typical ranges for a first competent attempt, not guarantees for every folder or design.
| Level | Typical time | Major steps | Main demand | Typical paper |
|---|---|---|---|---|
| Simple | 1-5 minutes | 1-10 | Basic two-dimensional folds | 15 cm copy paper or Kami |
| Traditional beginner | 5-15 minutes | 10-30 | Bases and reverse folds | 15 cm Kami |
| Intermediate | 15-45 minutes | 30-60 | Layer control and 3D shaping | 15-20 cm Kami or Tant |
| High-intermediate | 45 minutes-2 hours | 60-100 | Precision and dense layers | 20-30 cm thin paper |
| Complex | 2-6 hours | 100-200 | Structural collapse and shaping | 30-50 cm specialty paper |
| Super-complex | 6-30+ hours | 200-1,000+ or CP | Micro-detail and engineering | 50-100+ cm treated paper |
1. Simple Origami
Simple origami uses valley folds, mountain folds, turn-overs, and obvious corner-to-corner alignment. The model usually remains flat, and the folder can correct small inaccuracies without destroying the final shape.
A paper cup, boat, house, dog face, hat, or basic fan fits this level. Standard printer paper works, although a 15 cm Kami square produces cleaner creases and more predictable proportions. Most models take 1-5 minutes and contain roughly 1-10 major actions.
Simple origami is appropriate for young children, first-time folders, classroom demonstrations, and quick decorative projects. It is less useful for practicing dense layers, three-dimensional shaping, or complex diagram symbols.
2. Traditional Beginner Origami
Traditional beginner origami introduces recognizable bases and folds that change the paper’s structure. Squash folds, inside-reverse folds, petal folds, and basic outside-reverse folds become part of the folder’s working vocabulary.
The traditional crane, waterbomb, flapping bird, jumping frog, tulip, and balloon commonly fit this category. A 15 cm Kami square is inexpensive, thin enough for repeated folds, and available in many colors.
These models typically require 10-30 major steps and 5-15 minutes. The main readiness test is consistency: a folder should be able to create a centered waterbomb or bird base without forcing corners into place.
3. Intermediate Origami
Intermediate origami creates a more convincing three-dimensional subject through layered manipulation, sinks, crimps, pleats, and reverse folds. The folder must understand which layers move and which layers remain behind.
The Kawasaki Rose, basic dragons, elephants, horses, and moderately detailed birds often appear at this level. The classification varies, however. The Kawasaki Rose is short enough for many beginners but its preliminary grid and twisting action can make it an intermediate project for a first attempt.
A typical model takes 15-45 minutes and uses 15-20 cm Kami, Tant, duo paper, or another thin sheet with enough stiffness to hold edges. Common obstacles include closed sinks, double reverse folds, and losing orientation after turning the model over.
4. High-Intermediate Origami
High-intermediate origami combines many demanding actions before the final subject becomes visible. The folder needs accurate reference points, controlled layer separation, and enough experience to interpret partially hidden folds.
Models in this range may include moderately detailed insects, Lang-style animals, complex flowers, and mythical creatures with several appendages. A 1 mm error early in a dense sequence can remove the paper margin needed for a later leg, wing, or horn.
Typical sessions last 45 minutes to 2 hours and use 20-30 cm thin paper. Biotope, thin Kraft, shadow Kami, double tissue, or carefully selected handmade paper can outperform ordinary Kami because the sheet must remain foldable after many layers accumulate.
5. Complex Origami
Complex origami produces highly detailed subjects through systematic pre-creasing, box-pleating, multi-layer sinks, advanced reverse folds, and sculptural shaping. The model may contain fingers, claws, scales, antennae, facial features, or several narrow appendages.
Examples include Satoshi Kamiya’s Ancient Dragon, detailed insects by Robert J. Lang, and advanced animal designs derived from box-pleated or combination-based crease patterns. Many models take 2-6 hours, although shaping and finishing can extend the session substantially.
A 30-50 cm sheet gives narrow features more usable paper. Thin, strong materials such as tissue foil, Biotope, Unryu, Origamido, or well-made double tissue reduce bulk and tearing. A bone folder can help with long preliminary creases, but sharp creases are not always desirable during final sculpting.
6. Super-Complex Origami
Super-complex origami demands sustained precision, high layer tolerance, advanced crease-pattern interpretation, and detailed shaping over many hours. The finished design may contain hundreds of scales, individual toes, overlapping feathers, or extremely narrow structural features.
Satoshi Kamiya’s Ryujin designs and Kade Chan’s Fiery Dragon are representative examples, although classification differs between designers and editions. A model may take 6-30 or more hours, often across several days, and a crease pattern may replace ordinary step-by-step instructions.
Large specialty sheets, often 50-100 cm or larger, provide the margin needed for micro-details. Treated double tissue, mulberry-based paper, Lokta, tissue foil, or custom handmade sheets are common choices. The challenge is structural engineering with paper, not merely patience.
Which Techniques Mark Each Level?
Basic folds identify the beginner range, while sinks, layer management, pre-creasing, and shaping distinguish advanced levels. The transition from intermediate to complex occurs when a folder must predict hidden geometry rather than react only to visible diagram instructions.
| Technique | First common level | What the folder must control | Typical failure |
|---|---|---|---|
| Valley and mountain fold | Simple | Crease direction and alignment | Reversed crease |
| Squash fold | Traditional beginner | Opening a pocket symmetrically | Torn pocket or offset point |
| Inside-reverse fold | Traditional beginner | Layer reversal around a hinge | Collapsed wrong flap |
| Petal fold | Beginner to intermediate | Several layers and reference points | Uneven petal |
| Outside-reverse fold | Intermediate | Reversing an exposed tip | Blunt or split tip |
| Sink fold | Intermediate | Moving a point inside the model | Crushed layers |
| Crimp and pleat | Intermediate | Parallel or angled compression | Unequal spacing |
| Unsink and open sink | High-intermediate | Reconstructing hidden geometry | Paper rupture |
| Box-pleating grid | Complex | Allocating points systematically | Wrong appendage proportions |
| Micro-shaping | Super-complex | Curving tiny layers without tearing | Flattened detail |
A useful practitioner rule is to distinguish fold difficulty from model difficulty. A familiar fold can still be hard when it is performed on 24 layers, near the center of a large collapse, or under a narrow paper margin.
How Does Paper Change Origami Difficulty?
Paper changes origami difficulty by controlling crease memory, layer bulk, stretching, and tear resistance. Beginners usually need inexpensive, thin paper, while complex models need a sheet that remains strong after repeated folding without becoming too thick.
| Paper | Typical size | Typical retail cost per sheet | Best use | Main limitation |
|---|---|---|---|---|
| Copy paper | A4 cut square, 15-21 cm | $0.01-$0.10 | Simple models and practice | Weak color and poor layer memory |
| Kami | 15 cm | $0.05-$0.50 | Traditional beginner models | Tears during dense sinks |
| Tant | 15-24 cm | $0.30-$1.50 | Intermediate geometric and animal models | Can become bulky |
| Tissue foil | 30-50 cm | $2-$8 | Complex insects and dragons | Requires preparation and careful handling |
| Unryu or washi | 30-60 cm | $3-$15 | Organic shaping and large models | Fibers can obscure tiny creases |
| Double tissue with MC | 40-100 cm | $2-$12 in materials | Complex and super-complex models | Preparation takes several hours |
| Origamido | 40-100+ cm | $10-$50+ | Large detailed display models | High cost and limited availability |
Paper size is a difficulty variable because a larger square gives each appendage more area, but it does not make the crease pattern simpler. A 50 cm sheet can make a dragon physically manageable while making the session harder to transport, pre-crease, and shape.
Wet-folding creates a separate trade-off. Slightly dampened thick paper can hold smooth animal curves, but moisture reduces the crispness needed for many geometric models and can permanently mark weak fibers.
How Can You Tell Which Level Fits You?
Choose a model by the hardest technique it contains, not by the attractiveness of the finished picture. A beginner who can fold a clean bird base but cannot reverse-fold a narrow flap should select a model that teaches one new technique, rather than one that introduces six at once.
| Folder capability | Suitable level | Good next models | Move up when |
|---|---|---|---|
| Can make straight valley folds | Simple | Boat, cup, dog face | Corners align consistently |
| Understands basic symbols | Traditional beginner | Crane, frog, waterbomb | Bases finish centered |
| Controls several layers | Intermediate | Rose, simple dragon, elephant | Sinks close cleanly |
| Reads hidden layers | High-intermediate | Detailed flower, insect, animal | Errors stay below 1-2 mm |
| Follows dense pre-creasing | Complex | Lang insect, Kamiya animal | Collapse remains flat and organized |
| Reads CPs and shapes details | Super-complex | Ryujin-style dragon, scale-heavy creature | Paper survives long collapses |
Where Should a Beginner Start?
A complete beginner should start with simple models, then move to traditional beginner designs after learning valley folds, mountain folds, turn-overs, and four basic symbols. The best first session lasts 10-20 minutes and uses two or three inexpensive 15 cm squares, because repetition teaches alignment faster than attempting one elaborate subject.
A practical sequence is a boat, a dog face, a waterbomb, a jumping frog, and then a traditional crane. Action models such as the frog or flapping bird add a functional reward without requiring advanced shaping.
Children often progress faster with models that move or stand. Adults who prefer decoration may choose flowers or modular units, but both groups benefit from repeating one model until the sequence is understood rather than collecting many unfinished diagrams.
When Do Crease Patterns Become Necessary?
Crease patterns become useful when a model’s instructions show a dense geometric map instead of every collapse step. Folders usually encounter them at high-intermediate or complex level, although simple CPs can teach geometry earlier.
A crease pattern does not provide the same information as a conventional diagram. It may show mountain and valley assignments, but it often leaves the order of collapses, layer order, hidden reference points, and three-dimensional shaping to the folder.
TreeMaker, developed by Robert J. Lang, is associated with designing crease patterns through tree structures and box-pleating approaches. Software can allocate points mathematically, but it cannot automatically provide the tactile judgment needed to separate layers, avoid tearing, or shape a convincing animal.
Learn CPs after becoming comfortable with:
- Reading mountain and valley assignments.
- Identifying symmetry axes and reference grids.
- Locating layer boundaries.
- Collapsing a simple base from a map.
- Testing whether a narrow flap has enough paper margin.
Simple Versus Complex Origami: What Changes?
Simple origami prioritizes accessibility and visible geometry, while complex origami prioritizes structural detail, precision, and controlled shaping. The difference affects time, paper, tools, error recovery, and the kind of satisfaction the model provides.
| Decision factor | Simple or beginner | Complex or super-complex |
|---|---|---|
| First-attempt time | 1-15 minutes | 2-30+ hours |
| Typical sheet size | 15 cm | 30-100+ cm |
| Error recovery | Often possible by unfolding | Frequently impossible after collapse |
| Instruction format | 5-30 diagram steps | 100+ steps or CP |
| Detail level | Symbolic subject | Anatomical or geometric detail |
| Material cost | $0.01-$1 per sheet | $2-$50+ per sheet |
| Best setting | Classroom, family, casual practice | Quiet workspace and long sessions |
| Main reward | Fast completion and repetition | Design analysis and sculptural finish |
Complex origami is not automatically more artistic. Simple folding can be better for teaching symmetry, motor control, and spatial reasoning, while complex folding is poorly suited to a rushed classroom or a first encounter with paper craft.
How Should You Progress Without Hitting a Skill Wall?
Progress by adding one major demand at a time: first symbol literacy, then bases, then layered folds, then shaping, and finally crease patterns. The most reliable progression uses several short models before each difficult jump, rather than treating a level label as a certification.
- Master diagram symbols. Identify valley, mountain, unfold, turn-over, rotate, and repeat instructions before folding.
- Practice four bases. Learn kite, fish, bird, and waterbomb bases, but focus on accurate landmarks rather than blind memorization.
- Add one layer technique. Practice squash, petal, inside-reverse, outside-reverse, and sink folds on separate models.
- Increase paper tolerance. Fold a model that reaches 4-8 layers, then one that reaches 8-16 layers, using fresh paper.
- Try controlled shaping. Use a simple animal or flower to practice rounding, pinching, and opening layers.
- Move to dense pre-creasing. Mark reference points carefully and inspect the next diagram before committing to a collapse.
- Study a simple CP. Begin with a symmetric base map and compare the predicted flaps with the finished model.
A folder is ready for the next level when the current level feels repeatable, not when one lucky attempt succeeds. If the same model fails in the same place three times, isolate that fold and practice it separately.
What Does Origami Cost at Each Level?
Typical origami costs range from a few cents for practice paper to more than $50 for a large specialty sheet. Tools are optional at beginner level, but advanced folders may use a bone folder, tweezers, clips, rulers, brushes, methyl cellulose, and a clean shaping surface.
| Level | Typical paper spend | Tool spend | Typical total for a project | Cost-control choice |
|---|---|---|---|---|
| Simple | $0.01-$0.10 | $0 | $0.01-$0.10 | Recycle office paper |
| Traditional beginner | $0.05-$0.50 | $0-$10 | $0.05-$10.50 | Buy a Kami multipack |
| Intermediate | $0.30-$2 | $5-$20 | $0.30-$22 | Use Tant only for final attempts |
| High-intermediate | $1-$6 | $10-$35 | $1-$41 | Practice on thin Kraft |
| Complex | $2-$20 | $20-$75 | $2-$95 | Make tissue foil or double tissue |
| Super-complex | $10-$50+ | $30-$150+ | $10-$200+ | Test a small prototype first |
Prices vary sharply by country, retailer, shipping, and sheet size. A local stationery shop may be cheaper for Kami, while specialty origami retailers are more likely to stock large treated sheets.
What Problems Make Origami Feel Harder Than Its Level?
Origami feels harder than its label when paper thickness, unclear references, or cumulative alignment errors create a problem before the folder recognizes it. Most failures are recoverable if the folder stops forcing the model and identifies whether the error concerns orientation, layer order, or paper capacity.
| Failure mode | Likely cause | Immediate fix | Prevention |
|---|---|---|---|
| Corners drift | Early reference error | Return to the last verified step | Pre-crease with a ruler |
| Paper tears at a sink | Too many thick layers | Unfold gently and change paper | Use larger, thinner paper |
| Model becomes lopsided | Unequal squash or petal fold | Compare both sides before locking | Match landmarks, not edges |
| Creases disappear | Soft or fibrous paper | Reinforce only structural lines | Use crisper practice paper |
| Final flap is too short | Poor paper allocation | Restart with a larger square | Inspect the CP or next step |
| Diagram seems impossible | Missing turn-over or rotation | Read the next two panels | Mark front and back orientation |
How Do You Fix Creep and Layer Bulk?
Creep is the gradual displacement caused by paper thickness and repeated folding, while layer bulk is the physical accumulation that prevents later edges from meeting. Neither problem has one universal 0.5 mm correction, because paper thickness, fold angle, and model geometry change the required allowance.
The practical fix is to use thinner paper, a larger sheet, and less aggressive creasing in early layers. When a model repeatedly loses alignment at a known center crease, a folder can test a tiny offset on scrap paper, but should not apply the same gap to every design.
Expert rule: if a model is technically correct but physically impossible in the final quarter, the problem usually began during paper allocation, not during the last fold.
Should You Use Tools?
Beginners generally need only paper and clean hands. A bone folder helps make long, deliberate preliminary creases, while tweezers and clips become useful for narrow tips and temporary layer control in complex models.
Methyl cellulose can strengthen or stiffen prepared tissue paper, but it is a material treatment rather than a beginner tool. Wet-folding also requires restraint: excessive water rounds edges, weakens paper, and makes a geometric model harder to close.
Which Origami Style Fits Different Situations?
The right difficulty level depends on the user’s goal, available time, paper, and tolerance for irreversible mistakes. A modular model may provide three-dimensional geometry with repeated units, while a single-sheet complex model concentrates all difficulty into one collapse.
| Situation | Recommended level or style | Example | Reason |
|---|---|---|---|
| Child or first lesson | Simple to traditional beginner | Frog, boat, crane | Short sessions and visible results |
| Mathematics activity | Intermediate modular | Sonobe unit polyhedron | Repeated units reveal symmetry |
| Mindfulness practice | Intermediate tessellation or flower | Repeating geometric tile | Rhythmic repetition without long collapse |
| Display sculpture | High-intermediate wet-folding | Animal or flower | Thick paper supports smooth curves |
| Technical challenge | Complex to super-complex | Insect or dragon | Dense geometry rewards precision |
| Group activity | Traditional or modular | Waterbomb or modular star | Easy to pause and restart |
Modular origami is often easier to repair because one damaged unit can be replaced, although assembling dozens of units introduces a different endurance challenge. Tessellations are usually repetitive rather than subject-based, so they suit folders who prefer geometry over figurative sculpture.
Frequently Asked Questions
Is a crane beginner origami?
A traditional origami crane is usually beginner or lower-intermediate, depending on the learner’s experience. The crane uses a bird base, inside-reverse folds, petal-fold logic, and narrow reverse-folded sections, so a first-time folder may need several attempts even though experienced folders can complete it in 5-15 minutes.
What is the hardest origami model?
There is no universally agreed hardest origami model because difficulty depends on diagram quality, paper, design complexity, and whether a crease pattern is provided. Scale-heavy dragons, highly detailed insects, and large multi-featured animals often occupy the super-complex range and can require 20 or more hours.
Can I fold complex origami with normal Kami paper?
Normal Kami paper can work for prototypes and some intermediate models, but it is usually unsuitable for large complex designs with dense layers. Kami tears and becomes bulky sooner than tissue foil, double tissue, or strong handmade paper, so a larger thin sheet is usually a better upgrade than simply applying more force.
Is modular origami easier than one-sheet origami?
Modular origami is often easier for beginners because each unit uses a short repeatable sequence and damaged units can be replaced. Assembly creates its own difficulty, especially when a model needs 30-90 identical units, precise locking, and consistent orientation across the complete polyhedron.
How many origami models should I fold before advancing?
Fold at least three to five models at a level before advancing, including one repeat of a model that initially caused trouble. Advancement should follow reliable alignment, controlled layer handling, and successful use of the level’s main techniques, not a fixed number of completed models.
The Bottom Line
Origami difficulty levels explained from beginner to complex are best understood as a progression of geometry, precision, layers, paper behavior, and shaping rather than a strict step-count scale. Start with simple and traditional models, build intermediate fold control, then move into high-intermediate, complex, and super-complex designs when your technique is repeatable. Choose paper size and material according to layer density, and treat community level labels as practical guidance rather than official grades.
