


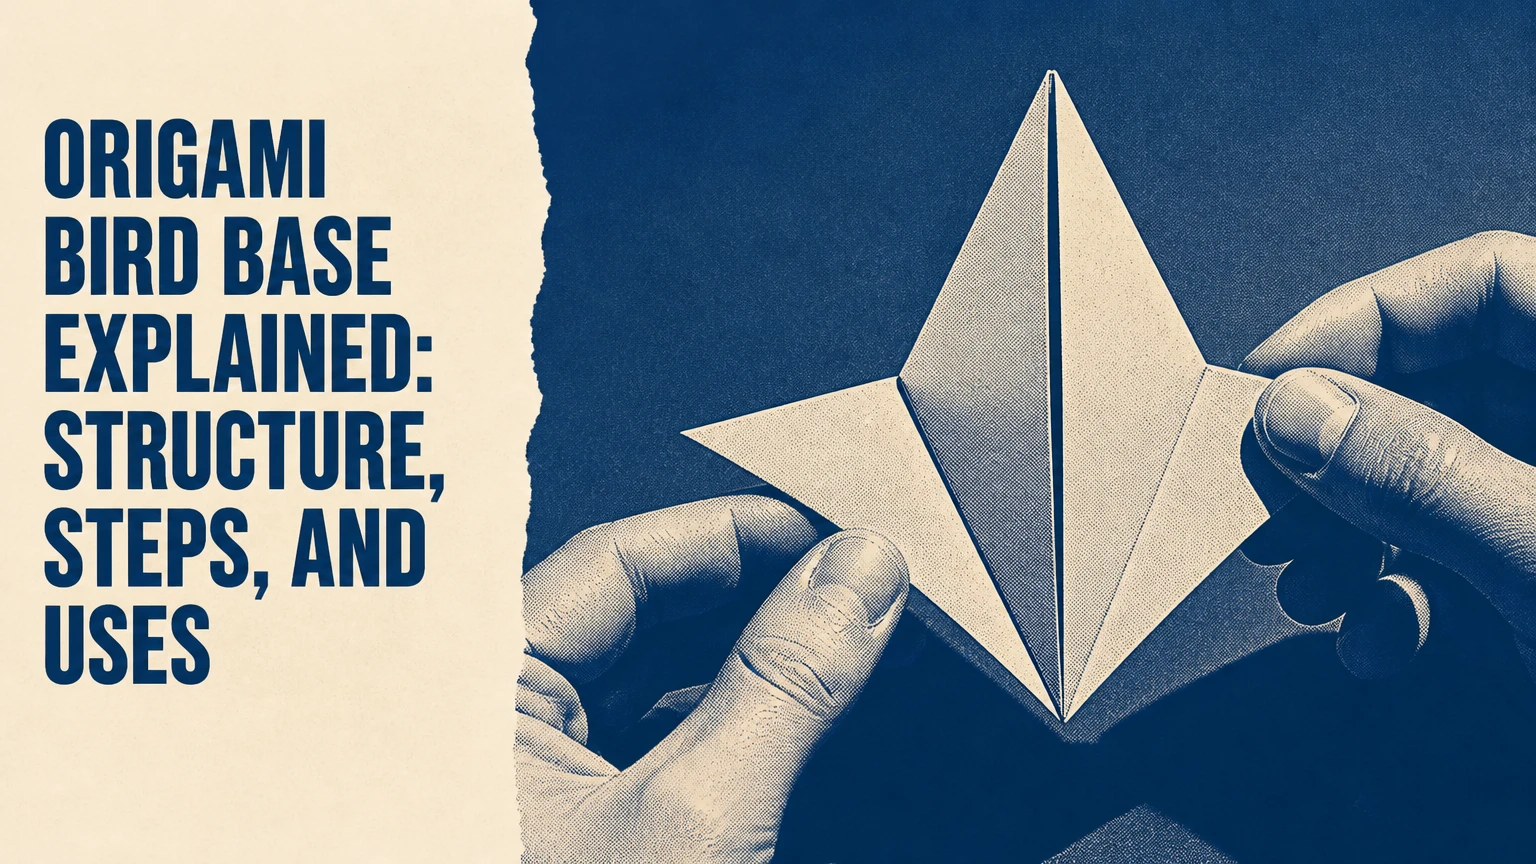
The origami Bird Base is a preliminary folding structure made from a square sheet, combining a Square Base with four Petal Folds to create four long points. Those points can later become wings, a head, a tail, legs, or other extensions in models such as the traditional crane, flapping bird, insects, and animals.
Key Facts at a Glance
- A traditional Bird Base has four primary points arranged around a narrow central diamond.
- The structure requires diagonal, vertical, and horizontal pre-creases before collapse.
- A Bird Base removes no paper, because traditional origami folds the entire square without cutting.
- The four points are interchangeable during construction, but a finished model assigns them different functions.
- A practiced folder can usually collapse the base in 1-3 minutes; a first attempt commonly takes 5-10 minutes.
- Kami paper around 60-70 GSM and 15 cm square is a practical starting material.
Origami Bird Base Explained: What It Is
The Bird Base is a traditional origami base with a long diamond-shaped body and four narrow flaps. Origami designers use the base because its folded layers concentrate paper at the center while preserving long, movable regions around the perimeter.
The name comes from its association with bird models, especially the Japanese paper crane. The base itself is not a bird and does not contain a finished neck, beak, wing, or tail. Those features appear only after later folds reshape selected points.
What are the four points?
The four points are potential extensions created by the Petal Fold. In a crane, two opposing points usually become wings, while the other two become the neck and tail. In another model, the same structural points can become legs, antennae, horns, or decorative rays.
| Structural part | Typical geometry | Common later use | Recognition clue |
|---|---|---|---|
| Central body | Narrow folded diamond | Torso or flower center | Thickest layered area |
| Upper point | Long triangular flap | Neck, head, or upper wing | Connected to closed end |
| Lower point | Long triangular flap | Tail, leg, or lower extension | Often split at open end |
| Side points | Two matching flaps | Wings, legs, or arms | Project laterally after collapse |
| Four-point arrangement | 4 primary extensions | Multi-part model foundation | Symmetric before shaping |
The points are long because the square’s corners travel inward during the collapse. Their length depends on the crease geometry, paper thickness, and how accurately the Petal Folds meet the centerline.
How Does the Bird Base Work?
The Bird Base works by converting a flat square’s diagonal grid into a compact diamond with four layered flaps. A Square Base supplies the underlying symmetry, while four preliminary edge folds and a top fold define the hinges needed for the Petal Folds.
The process is geometric rather than magical. Each side flap folds toward the vertical center crease, and the upper triangular flap establishes a horizontal hinge. When the lower corner rises, the pre-creased sides swing inward and flatten into a long diamond.
Why are pre-creases important?
Pre-creases tell several paper layers where to move during the collapse. Without sharp valley and mountain creases, the paper may buckle, drift away from the centerline, or tear at the lower vertex.
The Bird Base also demonstrates a useful origami principle: a visible final shape can depend on hidden crease preparation. A beginner may see only a few folding actions, but the finished base contains a coordinated crease pattern that controls four separate flaps.
Is the “50 percent paper use” claim exact?
The Bird Base uses the full square with zero cutting waste, but “50 percent of the surface area for the main body flaps” is not a universal geometric specification. The proportion changes with paper thickness, layer stacking, crease placement, and how the base is measured.
A more reliable description is that the Bird Base concentrates multiple layers near the central diamond while extending paper toward four points. The concentration explains both its strength and its tendency to become bulky when thick paper is used.
How Do You Fold a Bird Base?
A traditional Bird Base takes about 5-10 minutes for a first attempt and about 1-3 minutes after practice. Use a square sheet, make the reference creases accurately, and flatten the Petal Fold without forcing the center vertex.
Before you start
| Requirement | Typical specification | Why it matters |
|---|---|---|
| Paper | 1 square, 15 x 15 cm | Provides enough area for clear beginner folds |
| Paper weight | 60-70 GSM | Creases easily without excessive center bulk |
| Tools | 0 tools required | Origami is normally folded by hand |
| Optional aid | Bone folder, 1 | Sharpens creases on heavier paper |
| First-attempt time | 5-10 minutes | Allows orientation checks |
| Practiced time | 1-3 minutes | Suitable for repeated model construction |
Step 1: Form the Square Base
Place the paper with the intended outside color facing down if the sheet is two-sided. Fold the square diagonally in both directions, then fold it horizontally and vertically in both directions. Collapse the creases into a smaller square with the open layers toward you.
Checkpoint: The collapsed Square Base has a closed vertex at the top and several open layers at the bottom. The vertical center crease should run straight through the middle.
Common mistake: Rotating the model so the open end points sideways. Orientation errors at this stage make later instructions appear reversed.
Step 2: Fold the lower side edges inward
Keep the Square Base with the open end at the bottom. Fold the lower left edge toward the vertical center crease, then fold the lower right edge toward the same crease. Align the edges carefully without crushing the central layers.
Checkpoint: Both folded edges meet the centerline symmetrically, forming a narrow kite-like outline.
Common mistake: Folding one side higher than the other. Compare the two diagonal edges before sharpening either crease.
Step 3: Fold the top triangle downward
Fold the upper triangular point downward over the side flaps. The fold creates a horizontal crease that later controls the Petal Fold’s height.
Checkpoint: The horizontal crease crosses both side flaps at the same level. It should remain visible after unfolding.
Common mistake: Folding the triangle only partway. The crease must reach the side edges so the hinge is continuous.
Step 4: Unfold the preparation folds
Unfold the two side folds and the top triangle fold, returning to the Square Base. Keep every crease visible. Do not flatten the entire model randomly, because the next movement depends on the crease directions.
Checkpoint: The base shows two diagonal creases leading toward the center and one horizontal crease near the top.
Common mistake: Losing track of which folds were valley folds. Re-creasing lightly in the same direction can restore the reference structure.
Step 5: Perform the Petal Fold
Lift the bottom corner of the uppermost layer toward the top. As the point rises, push the left and right sides inward along the creases from Step 2. Flatten the raised layer into a long diamond.
Checkpoint: The lifted point reaches the upper vertex, and the side edges meet the vertical centerline. The new diamond should have two long outer edges and a centered tip.
Common mistake: Pulling the bottom point upward before the side layers begin moving. The sides must collapse inward as the point rises.
Step 6: Repeat on the reverse side
Turn the model over and repeat the side-edge folds, top-triangle fold, unfolding, and Petal Fold on the reverse side. The final form is a tall, narrow diamond with four long points and an open split end.
Checkpoint: Both faces look symmetrical, and the four points have similar starting lengths.
Common mistake: Treating the reverse side as a mirror image without checking the open layers. Follow the same physical sequence rather than guessing from appearance.
What Are the Four Points Used For?
The four Bird Base points become different model features after later shaping folds. The base gives a designer several long paper extensions, but the final subject determines which point becomes a wing, neck, tail, leg, or decorative element.
In the classic crane, two side points become wings, one point becomes the neck and head, and the remaining point becomes the tail. A flapping bird uses similar anatomy but adds movement through later folds and careful tension in the body.
What can you make from a Bird Base?
| Model category | Example subject | Primary point assignment | Later techniques |
|---|---|---|---|
| Traditional bird | Paper crane | 2 wings, 1 neck, 1 tail | Inside reverse folds |
| Moving bird | Flapping bird | 2 wings, 1 head, 1 tail | Tension folds and pulling motion |
| Insect | Butterfly or dragonfly | Wings, body, antennae | Thin folds and spread shaping |
| Animal | Four-legged creature | 4 legs or 2 legs plus neck and tail | Reverse folds and squash folds |
| Fantasy subject | Dragon | Neck, tail, wings, legs | Layer management and shaping |
| Decorative form | Four-point star | 4 radial points | Repeated narrowing and shaping |
A Bird Base is most useful when a design needs long, narrow extensions. It is less suitable for subjects that require a broad, inflated body or many short, evenly distributed limbs.
What Variations Should You Know?
The traditional Bird Base is symmetric, while Blintzed and stretched forms alter the number, length, or direction of available flaps. Variations are design tools, not separate beginner requirements, so a folder should understand the traditional form before modifying its proportions.
| Variation | Primary points | Typical preparation | Suitable use | Main limitation |
|---|---|---|---|---|
| Traditional Bird Base | 4 | Square Base plus Petal Folds | Cranes and standard birds | Limited point count |
| Blintzed Bird Base | 8 potential points | Four corners folded to center first | Insects and complex animals | More layers and bulk |
| Stretched Bird Base | 4, with unequal lengths | Skewed or elongated crease geometry | Long-necked birds and dragons | Symmetry becomes harder |
| Box-pleated derivative | Varies by design | Grid-based crease planning | Advanced insects and creatures | Requires precise planning |
What is a Blintzed Bird Base?
A Blintzed Bird Base begins with a Blintz fold, in which all four corners move to the center before the Bird Base structure is formed. The extra folded layers can produce eight usable points or additional internal material, depending on the model design.
The trade-off is thickness. Blintzing gives a designer more paper to divide into limbs, wings, or antennae, but it also makes the central region harder to flatten. Thin tissue foil or treated washi is more appropriate than ordinary thick craft paper for advanced versions.
When is a stretched Bird Base useful?
A stretched Bird Base is useful when a model needs one exceptionally long neck, tail, or pair of wings. Its asymmetry comes from changing the crease proportions before collapse, so the resulting points no longer share equal lengths.
Use the variation only when the subject requires it. A stretched structure is harder to align and may produce a visibly twisted body if the paper grain, crease angle, or centerline is inconsistent.
Which Paper Works Best?
Kami paper around 60-70 GSM is the most forgiving material for a first Bird Base, while Tant, Kraft, tissue foil, and treated washi suit increasingly complex versions. Paper size matters too: a 15 cm square is convenient for practice, whereas a 20 cm square gives more control for thick or layered paper.
| Folder level | Paper type | Typical GSM | Recommended size | Best purpose |
|---|---|---|---|---|
| Beginner | Kami | 60-70 GSM | 15 x 15 cm | First traditional Bird Base |
| Intermediate | Tant | 70-80 GSM | 20 x 20 cm | Repeated shaping and crane practice |
| Intermediate | Kraft | 70-90 GSM | 20 x 20 cm | Firm creases and durable practice |
| Advanced | Tissue foil | 20-40 GSM | 25 x 25 cm | Blintzed and multi-layer designs |
| Advanced | Unryu or treated washi | 20-40 GSM | 25 x 25 cm | Organic textures and complex shaping |
Two-sided colored paper helps beginners distinguish layers and faces. Very soft paper can lose the center crease, while very stiff paper resists the Petal Fold and increases tearing risk.
A practical rule is to scale the sheet upward when the model has many later folds. A 20 cm square gives more room for finger placement and reduces accidental crushing at the narrow vertex.
How Does It Compare With Other Origami Bases?
The Bird Base is the best choice among common primary bases when a design needs four long, narrow extensions from a compact body. The Frog Base offers more points, the Fish Base emphasizes two dominant points, and the Waterbomb Base expands more broadly rather than producing a tall, narrow structure.
| Base | Primary point pattern | Typical difficulty | Strongest application | Main limitation |
|---|---|---|---|---|
| Bird Base | 4 long points | Beginner to intermediate | Cranes, birds, dragons | Thick central diamond |
| Frog Base | 4 long plus 4 short points | Intermediate | Frogs, spiders, flowers | More pre-creasing |
| Fish Base | 2 dominant points | Beginner | Fish and seals | Fewer long extensions |
| Waterbomb Base | 2 broad triangular sections | Beginner | Balloons, frogs, crabs | Poor for narrow limbs |
| Preliminary Base | 4 corner flaps | Beginner | Flowers and modular forms | Less specialized anatomy |
Bird Base versus Frog Base
Choose the Bird Base for long necks, tails, and wings; choose the Frog Base when a subject needs eight differentiated points. The Frog Base usually requires more crease preparation and produces a more complicated layered center.
The two bases can resemble each other when viewed from above, but their point behavior differs. Bird Base flaps are long and narrow, whereas Frog Base construction provides both long and short extensions that suit spread-legged subjects.
Bird Base versus Fish Base
Choose the Fish Base when two main points are sufficient and speed matters. Choose the Bird Base when four potential extensions will later receive separate functions.
A Fish Base often reaches a usable preliminary form quickly, but it does not provide the same four-way structural distribution. Trying to force a Fish Base into a four-limbed design usually creates short or poorly positioned extensions.
How Difficult and How Long Is It?
The Bird Base is beginner-friendly after a folder understands the Square Base and the Petal Fold. A first attempt typically takes 5-10 minutes, while an experienced folder can produce a clean traditional base in approximately 1-3 minutes.
| Experience level | Expected time | Recommended paper | Success target |
|---|---|---|---|
| First attempt | 5-10 minutes | 60-70 GSM Kami | Correct collapse without tearing |
| After 3 practices | 3-5 minutes | Kami or Tant | Symmetric points and clean center |
| Regular folder | 1-3 minutes | 60-80 GSM paper | Memorized sequence |
| Advanced variation | 10-30 minutes | Thin tissue foil or washi | Controlled layers and unequal points |
The main difficulty is not recognizing the final diamond. The difficult action is coordinating the rising point with the inward movement of both side layers during the Petal Fold.
Who should learn it first?
Beginners should learn the Bird Base after practicing a Square Base and basic valley and mountain folds. The base is a useful bridge between simple preliminary forms and recognizable models such as the crane.
Intermediate folders can use the base to improve reverse folds, layer control, and model reading. Advanced folders can treat it as a platform for proportion changes, grafting, and complex creature design.
Why Does the Center Tear?
The Bird Base center tears when a sharp load is placed on a poorly prepared or overly thick vertex. Insufficient pre-creasing, pulling the lifted point too aggressively, and using stiff paper are the most common causes.
| Failure mode | Likely cause | Immediate fix | Prevention |
|---|---|---|---|
| Torn center vertex | Force applied before side collapse | Unfold, soften crease, retry slowly | Pre-crease all hinges sharply |
| Uneven diamond | Side edges miss centerline | Open the petal and realign | Compare both sides before flattening |
| Buckled layers | Paper trapped inside pocket | Open layers and flatten one at a time | Keep the pocket open during lift |
| Short point | Top triangle crease placed low | Restart with correct hinge | Extend crease fully across model |
| Twisted base | Reverse side folded in wrong orientation | Rotate to match first face | Track closed and open vertices |
| Crushed center | Heavy paper or excessive pressure | Use larger, thinner paper | Limit layers during early practice |
How do you repair uneven flaps?
Open the Bird Base back to the point where the Petal Fold began, then align each side edge with the vertical center crease before flattening again. Small differences can be corrected by easing the paper along an existing crease; large differences usually require restarting.
Do not trim a flap or force a finished point into alignment. Cutting violates the traditional no-cut construction, and forced corrections create stress that becomes visible during later reverse folds.
Should you blow into the pocket?
A gentle breath can open a collapsed pocket during the Petal Fold, but it is an optional handling technique rather than a required step. Finger pressure along the pre-creases gives better control when the paper is thin or the model will receive detailed shaping.
What Are the Most Important Practitioner Rules?
Three rules prevent most Bird Base failures: sharpen reference creases before unfolding, move the rising point and side layers together, and check symmetry before adding decorative folds. These rules matter more than speed because later model shaping cannot fully hide a distorted base.
- Crease before you need the crease. A hinge that looks faint after unfolding may disappear when several layers move together.
- Use the centerline as a measurement tool. Do not judge symmetry only by the outer silhouette, because layered paper can make unequal flaps appear similar.
- Reduce pressure at the vertex. The broad areas can tolerate firm flattening, but the narrow center concentrates stress.
- Scale up for learning. A 20 cm sheet often teaches the movement more clearly than a 15 cm sheet, even when the final model will be smaller.
- Separate base practice from model practice. Fold several Bird Bases without shaping them first, then begin cranes or animals.
One counterintuitive point matters: thicker paper can feel easier during the first folds because it holds its shape, yet it often performs worse during the Petal Fold because accumulated layers resist flattening.
FAQ
Is the Bird Base the same as a crane base?
The Bird Base is the preliminary structure used to begin many crane models, but the completed crane requires additional folds. Neck shaping, tail shaping, wing formation, and head details transform the base into a bird.
Can you make a bird without a Bird Base?
Yes. Fish Bases, preliminary forms, box pleating, and freeform folding can produce bird models. The Bird Base remains useful when the design needs four long points and a compact symmetrical body.
Does the Bird Base require special origami paper?
No. A square sheet is sufficient, and 60-70 GSM Kami is a practical beginner choice. Heavier paper becomes useful for durability, while thin tissue foil works better for Blintzed or highly layered designs.
Why is my Bird Base flat instead of long?
A flat result usually indicates that the Petal Fold was not raised to the upper vertex or that the side creases were misplaced. Recheck the horizontal top crease and confirm that both side edges move inward during the collapse.
How many times should I practice the base?
Practice three to five traditional Bird Bases before attempting a complex animal or Blintzed variation. The goal is consistent symmetry and a clean center, not merely completing the collapse once.
Does origami allow glue or scissors in a Bird Base?
Traditional origami uses one uncut square and no adhesive. Some modern designs use glue, foil treatments, or cuts, but those methods create modified constructions rather than a strict traditional Bird Base.
The Bottom Line
The origami Bird Base explained in practical terms is a four-point preliminary form built from a Square Base and four Petal Folds. Its long flaps support wings, necks, tails, legs, and antennae, which explains its importance in cranes and advanced animal designs. Start with 60-70 GSM Kami paper, prioritize symmetry over speed, and repair alignment before adding later folds.
