


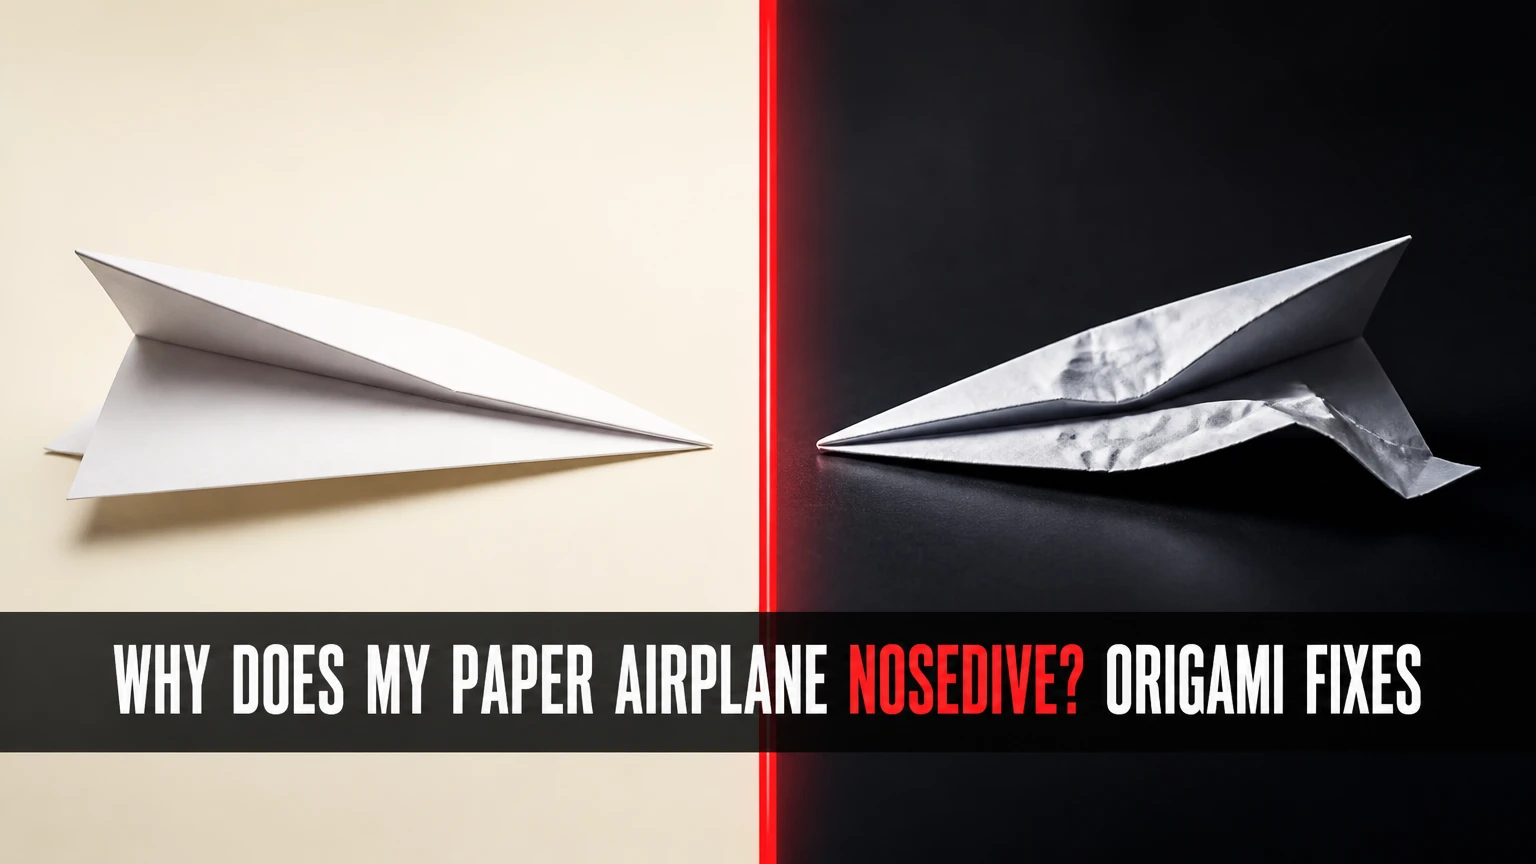
A paper airplane nosedives when its folded structure produces more nose-down pitching moment than its wings and tail can counter. The usual causes are a nose-heavy origami fold, insufficient rear lift, excessive launch speed, or warped and asymmetrical wings. Small crease and trim changes usually correct the problem within five test flights.
Key Facts at a Glance
- A stable paper airplane usually needs its center of gravity slightly ahead of its effective lifting point, not directly behind it.
- A nose that drops immediately usually indicates excessive front weight, excessive nose-down trim, or insufficient launch speed.
- A plane that climbs sharply before diving is usually stalling, so adding more upward bend can worsen the cycle.
- Standard 75-90 gsm copy paper is a practical starting range for most origami airplanes.
- A 2-5 mm trim change is large enough to matter on a paper airplane, so adjust one fold at a time.
- Symmetry matters more than razor-sharp creases when the airplane spirals, rolls, or dives to one side.
Why Does My Paper Airplane Nosedive?
A paper airplane nosedives because the airplane rotates nose-down when its weight, lift, drag, and trim forces are out of balance. Origami folds concentrate several paper layers near the front, while a flat or poorly trimmed wing may produce too little lift or may direct its aerodynamic force in the wrong place.
The center of gravity, or CG, is the point where the folded airplane balances on a fingertip. The center of pressure, or CP, is a simplified location for the combined aerodynamic force on the wings. These points are not fixed during every part of a flight, because speed, angle of attack, and wing shape change as the airplane moves.
A forward CG generally improves pitch stability. The problem begins when the nose becomes so heavy that the tail and wings cannot create enough counteracting moment. In practical terms, the nose falls, the angle of attack decreases, lift drops, and gravity steepens the descent.
The Federal Aviation Administration describes lift as “the component of aerodynamic force that is perpendicular to the relative wind” in its Pilot’s Handbook of Aeronautical Knowledge. A paper airplane must keep enough relative wind over its wing surfaces to generate that force. A badly folded nose or a weak launch can remove that airflow before the airplane reaches stable flight.
How Do Origami Folds Create a Nose-Down Force?
Origami folds create a nose-down force when they place too much mass ahead of the balance point or change the wing and tail angles. A pointed dart can have six or more paper layers at its nose, while the rear may contain only one layer, creating a strong forward-weight bias.
A sharply folded nose is not automatically bad. Many dart designs use front layers to keep the airplane rigid at high speed. The failure occurs when the nose weight is combined with small wings, a flat rear section, or a launch that gives the airplane too little time to establish lift.
Crease direction also matters. A center crease that is not straight can twist the fuselage. A wing crease that slopes upward on one side changes both lift and drag, so the airplane may roll before its nose drops. Repeated unfolding weakens paper fibers and creates rounded bends that move during flight.
What Do CG and CP Do?
The CG controls how the airplane responds to rotation, while the CP describes where the wing force acts. A CG slightly ahead of the effective lifting point tends to restore the nose toward a lower angle after a disturbance, but a very large separation makes the airplane pitch down aggressively unless the tail supplies balancing force.
Balance your finished origami airplane on one fingertip beneath the fuselage. For many conventional paper designs, a starting CG around 25-40% of the body length measured from the nose is workable, although wide gliders and canard designs can differ. The balance point is a diagnostic, not a universal specification.
Do not solve every dive by cutting paper from the nose. Removing material can weaken the leading edge and shift the CG unpredictably. First inspect the tail angle, wing alignment, and launch speed, then make the smallest reversible adjustment.
What Kind of Nosedive Is Happening?
The flight pattern identifies the likely origami fault. An immediate vertical drop points toward severe nose heaviness or nose-down trim, while a delayed dive often indicates a stall, inadequate speed, or a gradual structural deformation.
| Flight symptom | Likely origami cause | First correction | Test condition |
|---|---|---|---|
| Nose drops within 0.5 second | Front layers, crushed nose, low tail lift | Bend tail or rear trim slightly down | Smooth 10-degree launch |
| Flies 2-5 meters, then dives | Stall, weak speed, oversized lift angle | Flatten trim and reduce launch angle | Indoor corridor |
| Climbs 1-2 meters, then drops | Excessive angle of attack | Reduce rear-edge bend | Medium-speed throw |
| Spirals left or right | Unequal wings, twisted center crease | Match wing angles and lengths | Head-on inspection |
| Wobbles and loses height | Flexible paper or loose folds | Sharpen creases and reinforce fuselage | 75-90 gsm sheet |
| Dives only outdoors | Crosswind or turbulent air | Retest indoors before trimming | Calm indoor air |
Why Does a Plane Climb Before It Nosedives?
A paper airplane that climbs and then nosedives is usually stalling, not suffering from a simple lack of nose lift. The airplane launches at too high an angle of attack, slows while climbing, loses smooth airflow over the wings, and then pitches down to regain speed.
This pattern often follows an overcorrection. If the rear edges are bent too far, the airplane may initially point upward, but drag and reduced forward speed soon become dominant. The recovery is to flatten the trim by 1-2 mm, throw more level, and use less force.
A stall is different from an immediate nose-heavy dive. Adding more upward trim to a stalled airplane commonly produces a larger climb and a harder crash. Diagnose the first second of flight before changing the folds.
Why Does a Paper Airplane Spiral While Diving?
A spiral dive usually comes from unequal lift or drag on the two sides of the origami airplane. One wing may be longer, one tip may be folded lower, or the central crease may be skewed enough to introduce roll and yaw together.
Hold the airplane at eye level and view it from the nose. Both wings should have matching height, sweep, and dihedral. Measure the wingspan with a ruler if the difference is visible. A 1-2 mm mismatch can matter on a small model, especially when the wing is narrow.
Correct the high wing first by matching the lower wing to it, rather than bending both sides randomly. Add a tiny correction only after the basic geometry matches. Spiral dives require symmetry work before pitch trimming.
How Can You Fix a Nosediving Origami Airplane?
Fix a nosediving origami airplane by checking symmetry, reducing excess front weight, correcting tail or wing trim, and repeating controlled launches. The most reliable sequence takes about 5-10 minutes and changes one variable at a time, which prevents one correction from hiding another fault.
Before You Start
| Item | Practical value | Why it matters | Typical cost |
|---|---|---|---|
| Copy paper | 75-90 gsm, A4 or Letter | Balances stiffness and low mass | $0.05-$0.20 per sheet |
| Ruler | 15-30 cm | Measures trim and symmetry | $1-$5 |
| Card edge | 1 plastic card | Sharpens creases without tearing | Existing household item |
| Pencil | 1, soft or HB | Marks center and balance points | $0.10-$1 |
| Test area | 8-15 meters long | Allows complete flight observation | Free |
| Repair time | 5-10 minutes | Covers inspection and testing | No purchase required |
Step 1: Inspect the Origami Centerline
Open the wings only as far as necessary and check whether the central fuselage crease runs straight from nose to tail. Press the fold flat with a plastic card, then refold each side to the same position. Do not crease one wing several times while leaving the opposite wing loose.
You will know this step worked when the airplane rests flat on a table without rocking and the nose points along the centerline. A common mistake is correcting a dive before noticing that the fuselage is twisted.
Step 2: Match the Wings From the Front
View the airplane directly from the nose and compare wingspan, sweep, and dihedral. A practical beginner setting is a shallow V shape, with each wing raised approximately 10-15 degrees from horizontal, producing a total included angle of roughly 20-30 degrees.
| Geometry feature | Starting value | Visible test | Fault if exceeded |
|---|---|---|---|
| Total dihedral angle | 20-30 degrees | Wings form a shallow V | Excessive roll stability, lower lift |
| Wing-height difference | 0-1 mm | Tips appear level side to side | Spiral or constant turn |
| Rear trim movement | 2-5 mm | Bend remains even across span | Pitch oscillation |
| CG location | 25-40% body length | Balances under forward fuselage | Immediate dive if too far forward |
| Launch angle | 5-15 degrees upward | Nose rises slightly, not steeply | Stall when too high |
A common mistake is creating a dramatic Y shape because it looks stable. Excessive dihedral can reduce effective lifting area and make the model climb, roll, or lose distance.
Step 3: Correct the Pitch Trim
For a conventional paper airplane with a rear horizontal tail, bend the tail’s trailing edge down by about 1-2 mm to increase tail lift and encourage the nose upward. For a delta-shaped dart with no separate tail, bend the rear edge of both main wings upward by about 2-5 mm to create reflex and a nose-up pitching effect.
The direction depends on which surface you are bending. A rear tail elevator bent upward generally pushes the tail upward and pitches the nose down, while an upward-reflexed rear edge on a tailless delta can shift the aerodynamic force forward and pitch the nose up. Treat these as different origami geometries.
You will know the trim is closer when the airplane travels forward with a shallow descent instead of dropping immediately. The common mistake is making a large bend that looks obvious. Paper airplanes respond to millimeter-scale changes.
Step 4: Check the Nose Weight
Place one fingertip under the fuselage and find the balance point. If the CG is far forward, unfold one unnecessary nose layer or move a fold line backward by 3-5 mm. If the nose has become soft, reinforce the existing fold with a sharper crease rather than adding heavy tape.
| Nose modification | Approximate effect | Appropriate use | Main risk |
|---|---|---|---|
| Remove one folded layer | Reduces front mass | Immediate lawn-dart dive | Weakens nose rigidity |
| Move nose crease backward 3-5 mm | Shifts CG rearward | Dense dart front | Can blunt the point |
| Add 1 cm tape strip | Adds front mass | Rear-heavy glider only | Often worsens diving |
| Flatten crushed nose | Restores clean airflow | Creased or damaged point | Requires careful refolding |
| Add rear paper tab | Shifts balance slightly rearward | Experimental trim | Increases drag |
Adding a paper clip or tape to the nose is a poor first fix for a dive because it increases the very forward mass that often causes the problem. Nose weight helps a rear-heavy model, but diagnosis must come before modification.
Step 5: Use a Controlled Launch Test
Throw the airplane at 5-15 degrees above level with a smooth push, not a hard snap. Use the same hand position, speed, and direction for three flights, because one launch cannot distinguish a folding error from a release error.
A practical test sequence is: launch gently, record the first 2 meters, change one trim by 1-2 mm, then repeat. Keep the plane indoors if possible. A draft can create a false spiral, and a strong outdoor throw can flex thin paper enough to produce a dive that disappears at lower speed.
You will know the adjustment worked when at least two of three flights show a stable forward path with a gradual descent. A paper airplane is not meant to remain level indefinitely because it is an unpowered glider losing energy to drag.
Which Origami Design Is Least Likely to Nosedive?
The least troublesome origami design for beginners is a medium-wing dart or simple glider with a straight fuselage, moderate front layers, and broad symmetric wings. High-speed darts tolerate firm throws but can dive when their nose is overbuilt, while broad gliders are forgiving but may stall when launched too steeply.
| Origami design | Typical paper | Launch style | Nosedive tendency | Best use |
|---|---|---|---|---|
| Classic dart | 75-80 gsm | Firm, 5-10 degrees | Medium to high | Distance practice |
| Wide glider | 80-90 gsm | Gentle, 5-10 degrees | Low, if trimmed | Beginner stability |
| Nakamura Lock | 75-90 gsm | Medium, nearly level | Medium | Balanced learning |
| Suzanne-style glider | 80-90 gsm | Firm, 5-10 degrees | Low to medium | Distance and control |
| Canard design | 75-80 gsm | Medium, 5-15 degrees | Low after tuning | Advanced experiments |
The Nakamura Lock and broad glider formats are useful for learning because their folds create a visible fuselage and enough wing area to reveal trim changes. A narrow dart is less suitable for diagnosing a beginner’s first nosedive because its small wing area makes launch speed and fold precision more demanding.
The world-record paper airplane associated with John Collins demonstrates that folding precision and design geometry matter together. A famous distance design is not automatically the best repair platform. Use a forgiving glider to learn trim, then move to a dart when you can reproduce the same fold accurately.
Does Paper Weight Change the Dive?
Paper weight changes the dive by altering total mass, stiffness, folding thickness, and resistance to bending. Standard 75-90 gsm office paper is the most reliable starting range; lighter sheets flex under a firm throw, while heavier sheets demand more lift and can become front-heavy after multiple folds.
| Paper type | Typical mass | Folding behavior | Flight consequence | Recommendation |
|---|---|---|---|---|
| Newspaper | 45-55 gsm | Soft, tears at creases | Bends and stalls | Avoid for darts |
| Lightweight copy paper | 65-75 gsm | Easy, moderately flexible | Gentle glides | Good for wide wings |
| Standard copy paper | 75-90 gsm | Crisp, predictable | Balanced general flight | Best starting range |
| Heavy presentation paper | 100-120 gsm | Rigid, dense folds | Needs stronger launch | Use for large gliders |
| Cardstock | 160-220 gsm | Hard to fold cleanly | High mass and drag | Poor for small planes |
Paper size also changes the result. A4 and Letter sheets have similar area but different proportions, so the same crease measurements can produce a slightly different wing loading. Keep paper size constant while troubleshooting.
Avoid damp, glossy, or heavily recycled sheets during diagnosis. Moisture rounds creases, and glossy coatings can make layers slide apart. Recycled paper may have inconsistent stiffness across the sheet, which can create a persistent turn even when measurements match.
What Are the Correct Trim Measurements?
Practical paper-airplane trim measurements begin with 2-5 mm of rear-edge adjustment, 20-30 degrees of total dihedral, and a CG around 25-40% of body length from the nose. These figures are starting points for common A4 or Letter origami planes, not aerodynamic laws that apply to every design.
Aspect ratio also influences behavior. A long, narrow wing has less drag at efficient speed but is more sensitive to warping, while a short, broad wing is easier to stabilize but may descend more steeply.
| Feature | Broad glider | Medium dart | Long narrow dart | Canard plane |
|---|---|---|---|---|
| Typical wingspan | 18-24 cm | 14-20 cm | 10-16 cm | 14-20 cm |
| Approximate aspect ratio | 1.2-2.0 | 2.0-3.5 | 3.0-5.0 | 1.5-3.0 |
| Useful trim change | 1-3 mm | 2-5 mm | 1-3 mm | 1-4 mm |
| Suitable throw | Gentle | Medium to firm | Firm and level | Medium |
| Beginner tolerance | High | Medium | Low | Low to medium |
A 15-30 degree dihedral recommendation is often useful for roll stability, but a paper airplane’s exact wing angle depends on wing width, fuselage depth, and paper stiffness. The airplane should not look like a sharply folded V. The outer wing panels should still expose usable lifting area to the airflow.
Origami accuracy matters at the scale of the model. On a 20 cm wingspan, a 2 mm error equals 1% of the span, enough to introduce a visible rolling moment when the wings are narrow. This is why matching folds with a ruler can outperform adding decorative winglets.
What If the Plane Dives Only Sometimes?
An intermittent dive usually comes from inconsistent launches, shifting folds, or airflow rather than a fixed CG error. If the plane dives after a hard throw but glides after a gentle one, the paper is probably flexing or the launch angle is creating a stall and recovery cycle.
Use a simple control protocol:
- Test indoors in still air.
- Launch three times at the same height.
- Hold the fuselage at the same grip point.
- Record whether the first 1 meter rises, falls, or rolls.
- Adjust only one fold by 1-2 mm.
- Repeat three launches.
A fold that moves between flights needs reinforcement. Press the crease firmly with a card edge, align the layers, and avoid adding tape unless a torn section needs structural repair. Tape changes mass and surface drag, so place it near the damaged fold rather than automatically at the nose.
Outdoor conditions can overwhelm a small paper airplane. A 2-meter-per-second crosswind can push a lightweight model sideways before its trim behavior becomes visible. Diagnose indoors, then test outdoors only after the airplane produces repeatable flights.
How Much Time and Money Does a Repair Need?
Most paper-airplane repairs take 5-15 minutes and cost nothing when the original sheet remains usable. A new sheet costs approximately $0.05-$0.20 in ordinary office-paper quantities, while optional measuring and folding tools usually cost $1-$10.
| Repair activity | Typical time | Material quantity | Typical cost | Expected result |
|---|---|---|---|---|
| Symmetry inspection | 1-2 minutes | 1 ruler or card | $0-$5 | Removes roll faults |
| Re-creasing folds | 2-4 minutes | 1 plastic card | $0-$5 | Increases stiffness |
| Pitch trimming | 3-6 minutes | No added material | $0 | Changes climb or dive |
| Rebuilding plane | 5-12 minutes | 1 sheet, 75-90 gsm | $0.05-$0.20 | Resets damaged geometry |
| Classroom test session | 15-30 minutes | 3-5 sheets | $0.15-$1 | Compares designs |
A bone folder is optional, not necessary. A plastic card produces sufficiently sharp creases for ordinary copy paper, and a ruler provides more useful diagnostic information than an expensive folding tool.
Motorized paper-airplane kits do not solve a fundamentally incorrect origami fold. Propulsion can mask a weak glide during acceleration and create a harder crash when power stops. Learn the unpowered trim first.
Common Mistakes That Make the Dive Worse
Adding a Paper Clip to the Nose
A paper clip increases forward mass and moves the CG toward the nose. That change can stabilize a rear-heavy model, but it usually deepens an immediate nose-first dive. Test balance before adding weight.
Bending Both Sides Randomly
Random adjustments destroy symmetry and make the result impossible to interpret. Mark the left and right folds with a pencil, then make matching changes before introducing a deliberate one-sided correction.
Throwing Harder
A harder throw does not guarantee more lift. Thin paper can bend under high acceleration, and a steep release can produce a stall followed by a dive. Increase speed only after the airplane leaves the hand at a shallow angle.
Making the Rear Edge Too Large
A 5 mm trim tab is significant on a small airplane. Larger bends increase drag and may create a climb-dive oscillation. Start at 1-2 mm, especially on a narrow dart.
Using Wind to Test Stability
Wind makes a defective plane look unpredictable and can make a good plane appear unstable. Indoor testing gives cleaner evidence about folds, balance, and trim.
When Should You Rebuild Instead of Trim?
Rebuild the origami airplane when the center crease is twisted, the nose has crushed layers, the paper has several competing fold lines, or one wing cannot match the other without visible tension. Trimming is effective for small pitch errors, but it cannot reliably repair damaged geometry.
| Condition | Trim first? | Rebuild first? | Reason |
|---|---|---|---|
| Dive begins immediately | Yes | No | Pitch or CG may be adjustable |
| One wing is 3 mm longer | No | Yes | Symmetry error is structural |
| Nose has one extra layer | Yes | No | Remove or refold a layer |
| Paper is soft and creased repeatedly | Rarely | Yes | Shape will not remain stable |
| Plane climbs then drops | Yes | No | Stall can respond to small trim |
| Fuselage curves visibly | No | Yes | Centerline controls every surface |
A fresh fold is often faster than endless correction. If four to six small adjustments produce four different failures, the original sheet probably contains too much crease memory to remain predictable.
The Bottom Line
Why does my paper airplane nosedive? The origami airplane is usually too nose-heavy, incorrectly trimmed, stalled by an overly steep launch, or distorted by asymmetrical folds. Inspect the centerline and wings first, then make a 1-2 mm pitch adjustment, test with a smooth 5-15 degree launch, and change only one variable at a time.
The best repair is not automatically more nose weight or a harder throw. A stable paper airplane needs a repeatable folded shape, a moderate forward CG, enough lifting surface, and trim that produces a shallow descent instead of a vertical dive.
Frequently Asked Questions
Should I make the nose of a paper airplane heavier?
Make the nose heavier only when the airplane is rear-heavy, unstable, or repeatedly stalls despite correct wing symmetry. A nose weight can move the CG forward and improve pitch stability, but it also increases the nose-down moment. For an immediate dive, remove excess front layers before adding a clip or tape.
Can flat wings make an origami airplane dive?
Flat wings can contribute to a dive when the design depends on dihedral for roll stability or when the wing fold leaves little effective angle of attack. Flat wings are not automatically defective. Match both sides first, then raise each wing approximately 10-15 degrees if the design uses a shallow V geometry.
Why does my paper airplane fly backward after trimming?
A backward or sharply climbing flight usually means the pitch correction is too large or the launch angle is too high. Flatten the trim by 1-2 mm and throw nearly level. A paper airplane should gain a small amount of height or travel level briefly, then descend gradually as it loses speed.
Is A4 or Letter paper better for paper airplanes?
A4 and Letter paper both work well for origami airplanes, but the same fold measurements produce slightly different proportions. A4 is narrower and longer, while Letter is wider and shorter. Choose one size and keep it constant during testing so paper shape does not confound the trim diagnosis.
How can I make a paper airplane fly straight?
Make the center crease straight, match both wings within about 1 mm, use a shallow dihedral, and launch without side spin. If the airplane still turns, adjust the trailing edge on the side opposite the turn by less than 1 mm, then repeat three identical flights before changing anything else.
Are gliders better than darts for beginners?
Wide gliders are usually better for beginners because their larger wings produce slower, more visible flight and tolerate small folding errors. Darts are useful for distance and firm throws, but dense nose folds, narrow wings, and high launch speeds make them more likely to nosedive during early experiments.
