


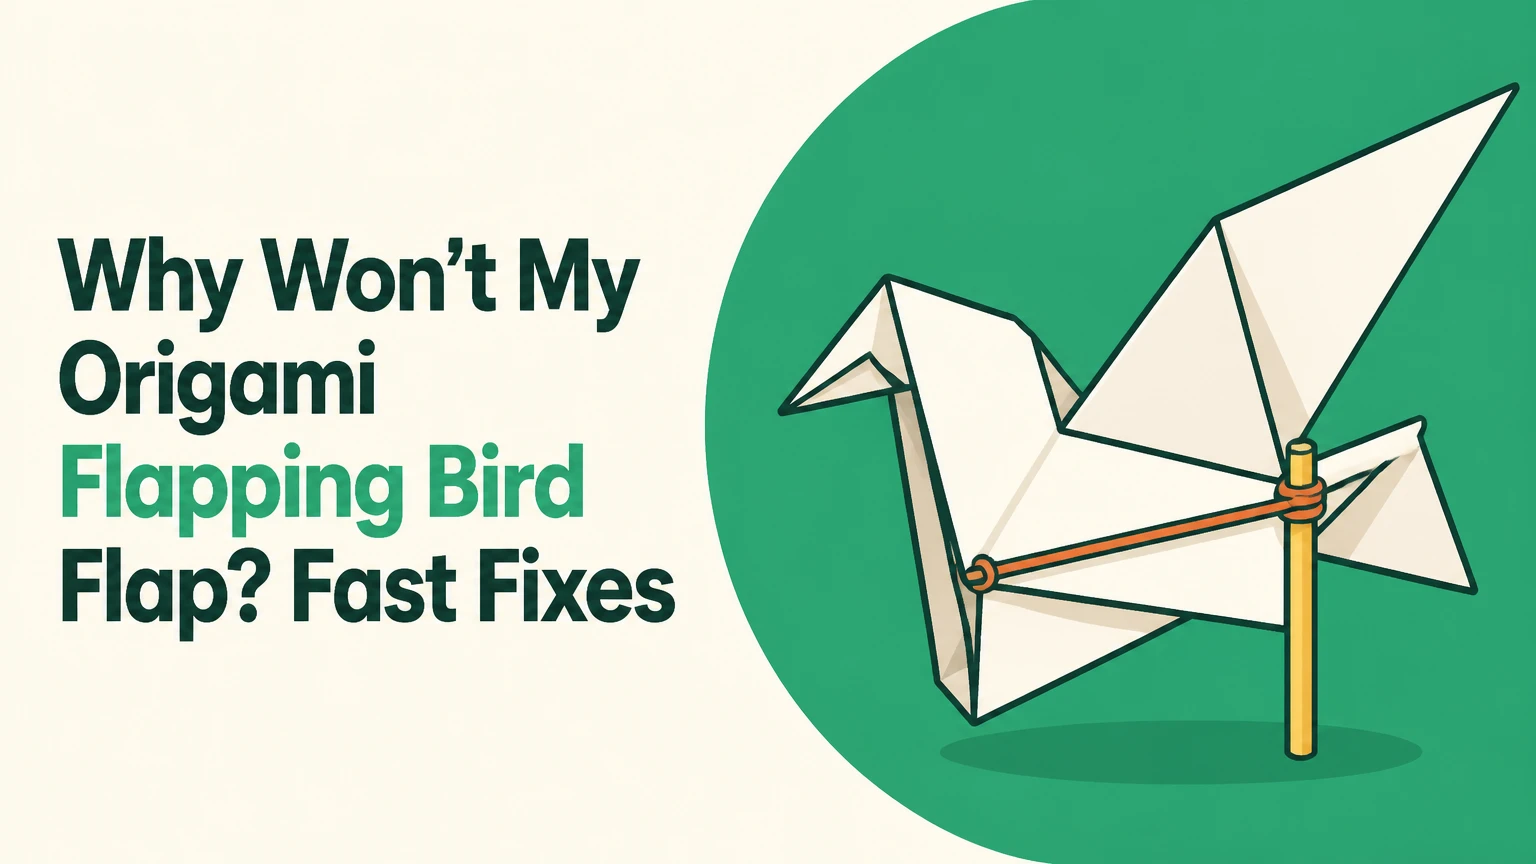
An origami flapping bird usually fails because its internal hinge is misaligned, its tail lock is folded incorrectly, its paper is too stiff, or the paper joint has torn. The quickest diagnosis is to pull the tail gently while holding the breast: a rigid bird has a jammed mechanism, while a soft bird that bends without lifting its wings has a weakened or misplaced crease.
Key Facts at a Glance
- An origami flapping bird converts tail movement into wing movement through folded-paper hinges and internal tension.
- The tail should move outward from the body, while the breast is held firmly but not crushed.
- Thin origami paper around 50-70 gsm usually works more reliably than 80-100 gsm printer paper.
- A flat diamond back often indicates a traditional crane rather than a moving flapping-bird model.
- Five to ten gentle pulls can condition a fresh model, but conditioning cannot repair a torn joint.
- If the tail-to-body crotch is split, replacing the model is usually more reliable than adding tape.
Why Won’t My Origami Flapping Bird Flap?
The most likely cause is a mechanical fault at the wing hinge, tail anchor, or internal body pocket. Origami flapping birds depend on controlled flexibility, so a fold can be too tight, too weak, or positioned incorrectly; the same outward pull then produces no motion, a bent body, or a single weak stroke.
A correctly folded model does not flap because the paper is “springy” everywhere. It flaps because specific layers guide force along a repeatable path. The tail changes the geometry of the body pocket, the pocket transfers motion to the wing bases, and the diagonal folds let the wings rotate. Small alignment errors interrupt that path.
Start with the symptom rather than refolding immediately. A jammed model may be recoverable in under three minutes. A torn model usually is not.
| What you observe | Most likely fault | First action | Recovery outlook |
|---|---|---|---|
| Tail will not move outward | Locked tail pivot or crushed pocket | Loosen chest pocket and test 5 mm movement | Often recoverable |
| Tail moves but wings stay still | Wing base misalignment | Align both wing roots across the back | Often recoverable |
| Body collapses into a soft lump | Weak or misplaced structural folds | Re-crease only the intended hinge lines | Sometimes recoverable |
| One wing moves lower than the other | Unequal wing-base folds | Compare wing-root angles side by side | Usually recoverable |
| Paper splits at the tail joint | Torn internal crotch | Stop pulling and inspect the seam | Usually replace |
| Wings move once, then lock | Fiber damage or over-compression | Release tension and reshape pocket | Depends on damage |
How Does the Origami Flapping Bird Mechanism Work?
The origami flapping bird is a compliant paper mechanism: folded surfaces act as hinges, levers, and tension members without separate pins or metal joints. Holding the breast and pulling the tail changes the distance between folded body layers, which rotates the wing bases and produces the visible stroke.
The internal system has four functional parts:
- Wing hinges: diagonal or angled creases near the wing roots permit rotation.
- Tail anchor: the tail joins the lower body and supplies the input movement.
- Body pocket: overlapping layers guide the tail force toward the wings.
- Elastic folds: paper fibers and crease geometry return the wings after release.
Paper cannot stretch like a rubber band, but it can bend repeatedly around a crease. That distinction matters. The model needs flexible rotation at selected folds and enough stiffness elsewhere to transmit force. If every crease is crushed flat, the model loses spring. If too few structural folds are made, the body simply buckles.
The exact geometry varies between diagrams and designers. Therefore, a tail angle described as approximately 45 degrees is a useful diagnostic reference, not a universal measurement for every flapping-bird crease pattern.
What should a working bird feel like?
A working model has light resistance, limited travel, and a definite return after release. The tail should move outward several millimeters without tearing, and the wings should respond during that same movement rather than after the body has collapsed.
Do not test the bird with a full-force pull. A typical first test uses 5-10 mm of tail travel and no more force than needed to overcome ordinary paper friction. Excess force can turn a correct diagnosis into a permanent tear.
How Can You Diagnose the Failure in Three Minutes?
A three-minute inspection can separate a wrong model, a jammed mechanism, a weak crease, and structural damage. Inspect the back, tail, breast pocket, and tail joint in that order, because each check is reversible and the final check involves the greatest risk of tearing.
Step 1: Identify the model
Look between the wings from above. A traditional origami crane commonly has a broad, flat diamond or saddle-like back, while many flapping-bird designs retain a narrower ridge and a body pocket that can open slightly.
The silhouette alone is not conclusive because several crane-derived models look similar. Test the tail gently. If the tail is merely a decorative point with no connected movement, the model is probably not a mechanical flapping bird.
Success checkpoint: the tail has a clear connection to the lower body and moves a small distance without unfolding the entire model.
Common mistake: assuming every bird-shaped origami model has a flapping mechanism.
Step 2: Check the wing bases
Spread the wings only enough to see their roots. The two wing bases should meet across the central body at similar heights. A wing that sits noticeably forward, backward, or lower than its partner usually has a misaligned hinge.
Avoid flattening the whole back. The central ridge or pocket must retain its three-dimensional shape for the force path to work.
Success checkpoint: both wing roots form a continuous transverse line when viewed from behind.
Common mistake: forcing the wing tips into symmetry while leaving the wing-root folds misaligned.
Step 3: Inspect the tail anchor
The tail should sweep downward and outward from the body rather than pointing straight up or lying nearly horizontal. Many instructions place the tail pivot near the lower crotch of the body, but diagrams differ, so compare the tail position with the crease pattern used.
A pivot folded too high can make the tail act like a rigid extension. A pivot folded too low can remove the leverage needed to move the pocket.
Success checkpoint: the tail pivots from the lower body instead of bending in its middle.
Common mistake: correcting the tail tip while ignoring the location of the internal reverse fold.
Step 4: Open the breast pocket
Place one thumb lightly inside the front body pocket and expand the pocket by a few millimeters. This separates layers that may have fused through friction or excessive creasing.
Hold the breast near its base, not across the entire body. Squeezing the body shut clamps the mechanism and makes a correct model appear defective.
Success checkpoint: the pocket opens slightly and closes without a crackling tear.
Common mistake: pulling the tail while compressing the breast between two fingers.
Step 5: Test the tail direction
Pull the tail directly outward from the breast, following the model’s existing axis. Do not yank straight down, twist sideways, or pull sharply upward.
A short, horizontal movement is safer than a long pull. Release the tail after each test so the paper can return to its resting geometry.
Success checkpoint: the wings lift or lower during the pull and return when released.
Common mistake: increasing force when the first movement feels stiff.
Step 6: Check the crotch for tearing
Inspect the point where the tail joins the lower body. Look for a split fiber line, white stress mark, detached layer, or widening hole.
A visible tear changes the mechanism’s geometry. Tape may hold the paper together, but it usually adds thickness and prevents the layers from moving naturally.
Success checkpoint: the joint remains continuous after five gentle test pulls.
Common mistake: continuing to test a damaged seam until the tear reaches the body pocket.
Which Paper Works Best for a Flapping Bird?
Thin, flexible paper between about 50 and 70 gsm is the most dependable starting range for an origami flapping bird. Standard kami, light kraft, and some washi papers provide enough stiffness for the body while allowing the wing hinges and tail pocket to flex.
Paper choice is a mechanical decision, not simply an appearance choice. Heavy copy paper resists tight internal folds and can crack at repeated hinges. Very soft tissue can form the mechanism but may not transmit enough force through the body.
Paper grain also affects performance. On a small square, the grain direction is difficult to control, but on larger handmade sheets, fold the primary hinge across the grain when possible for a more flexible bend. Humidity can soften paper and reduce crispness, while very dry conditions can make brittle fibers crack sooner.
| Paper type | Typical weight | Typical pack cost | Best use | Main limitation |
|---|---|---|---|---|
| Standard kami | 50-60 gsm | $5-$12 | Beginner practice | Softens after repeated handling |
| Light kraft | 60-70 gsm | $3-$8 | Durable testing | May resist compact folds |
| Thin washi | 30-50 gsm | $15-$40 | Flexible advanced models | Higher cost and variable texture |
| Copy paper | 80-100 gsm | $0-$10 | One-time experiments | Stiff wing hinges and body layers |
| Tissue foil | 25-50 gsm | $8-$20 | Flexible custom models | Weakness at unreinforced tears |
| Cardstock | 160-300 gsm | $5-$15 | Display only | Usually too rigid to flap |
Is printer paper too thick?
Printer paper is usually too stiff for a small flapping bird, especially at 80-100 gsm and in models with several overlapping layers. Printer paper can work for a larger prototype, but increasing the square size is often necessary because larger hinges distribute bending over a longer crease.
For a 15 cm model, try 50-70 gsm paper first. If only printer paper is available, use a 20-25 cm square, make moderate creases, and expect reduced flap amplitude and a shorter hinge life.
Does foil-backed paper work?
Foil-backed paper can hold a precise shape, but that strength can become a weakness in a moving model. The foil layer resists the repeated elastic recovery needed at the wing roots, and a sharply crushed fold may remain fixed instead of returning smoothly.
Use foil-backed sheets for display or for testing a pattern’s geometry. Use flexible kami or thin washi when repeated motion is the priority.
What Are the Main Folding Mistakes?
The main folding mistakes are confusing the model with a crane, placing the tail pivot too high, crushing the wing hinges, pulling in the wrong direction, and using excessive force on a stiff pocket. Each error produces a different physical symptom, so the repair should match the failure rather than apply more pressure.
| Folding mistake | Visible symptom | Reversible fix | Point to replace |
|---|---|---|---|
| Traditional crane substituted | Flat back and inactive tail | Refold the moving model | No mechanical joint exists |
| Tail pivot too high | Tail barely pivots | Re-fold near lower crotch | Paper is sharply split |
| Wing hinge over-creased | Wing droops or stays fixed | Open and soften crease | Fiber line is broken |
| Body pocket clamped | Tail feels locked | Expand pocket 2-3 mm | Layers are glued by damage |
| Pulling at a diagonal | One wing twists | Reset tail axis | Tail seam has widened |
| Thick paper selected | Body buckles before wings move | Refold with lighter paper | Multiple hinge cracks appear |
Why does the bird bend instead of flap?
A bird bends instead of flapping when the body is too soft, the wing-root creases are misplaced, or the paper layers are not locked into a force-transmitting pocket. The tail movement then deforms the body rather than rotating the wings.
Inspect whether the wing bases remain connected to the central body line. If both roots move with the body, add definition to the intended structural folds without crushing the diagonal hinge. If the body is made from 100 gsm paper or thicker, refolding with thinner stock is usually faster than repeated adjustment.
A bent model may also indicate that the tail is being pulled from its tip at an angle. Hold the tail farther from the body only if the instructions show that grip; otherwise, guide the tail along its existing axis.
Can You Reset a Jammed Origami Flapping Bird?
You can often reset a jammed origami flapping bird when the paper is intact and the tail still has a small amount of movement. The safest reset loosens the chest pocket, realigns the wing roots, and tests the tail with short outward pulls before any major re-creasing.
Use this sequence:
- Stop pulling for 10 seconds. Let compressed layers relax.
- Open the breast pocket 2-3 mm. Use a fingertip rather than a tool.
- Raise both wings to matching positions. Compare the roots, not the tips.
- Trace the tail pivot. Re-establish the crease near the lower body crotch if it has drifted.
- Make one 5 mm outward pull. Hold the breast base without flattening it.
- Repeat five times. Increase travel only if the wings respond.
- Stop after ten tests. Continued resistance suggests a structural error or damage.
| Reset condition | Test movement | Recommended action | Maximum routine tests |
|---|---|---|---|
| Tail moves freely | 5-10 mm | Continue gentle conditioning | 10 pulls |
| Tail moves with friction | 2-5 mm | Open pocket and align roots | 5 pulls |
| Tail does not move | 0-1 mm | Inspect lock and pivot | 2 pulls |
| Tail joint opens | Visible split | Do not pull again | 0 pulls |
| One wing responds | 5-10 mm | Compare hinge positions | 10 pulls |
| Body folds inward | 3-8 mm | Reduce force and reset pocket | 5 pulls |
Do not insert scissors, a ruler, or a bone folder into the pocket during a reset. A tool can stretch or cut a hidden layer that finger pressure would preserve.
Should You Refold the Bird or Start Over?
Start over when the tail-to-body seam is torn, the paper has a permanent crack across a wing hinge, or the model has been flattened so thoroughly that its pocket no longer reopens. Refold the existing bird when the layers remain intact and the fault is limited to alignment or moderate stiffness.
A new model costs little compared with the time spent forcing a damaged mechanism. Typical folding time is 2-5 minutes for a practiced folder and 5-12 minutes for a first attempt, while a careful reset usually takes 1-3 minutes.
| Condition | Repair time | Material cost | Best decision |
|---|---|---|---|
| Misaligned wing root | 1-3 minutes | $0 | Reset |
| Tight chest pocket | 30-60 seconds | $0 | Loosen |
| High tail pivot | 2-5 minutes | $0 | Re-fold section |
| One weak crease | 1-2 minutes | $0 | Re-crease lightly |
| Crotch tear under 3 mm | 1 minute to inspect | Under $0.25 | Usually replace |
| Hinge crack over 5 mm | 1 minute to inspect | Under $0.25 | Replace |
| Wrong paper choice | 5-12 minutes | $0.05-$0.50 | Refold with thinner paper |
Can tape repair a torn joint?
Tape can hold a torn origami bird together for display, but it rarely restores a reliable flapping mechanism. Tape increases layer thickness, changes friction, and prevents the damaged paper from bending along its original crease.
A small external tear away from the moving hinge may accept a narrow piece of transparent tape on the back. Do not tape across the tail pivot, body pocket, or wing root if movement matters.
How Do Paper Size and Conditioning Change the Result?
A larger square usually produces a more forgiving flapping bird because its folds and hinges have greater length, while a smaller square concentrates stress in fewer millimeters of paper. A fresh model commonly needs five to ten gentle micro-pulls before its layers settle into a consistent path.
| Square size | Suitable paper range | Typical first-fold time | Typical handling result |
|---|---|---|---|
| 10 cm | 40-60 gsm | 4-8 minutes | Small, delicate movement |
| 15 cm | 50-70 gsm | 3-6 minutes | Best beginner balance |
| 20 cm | 50-80 gsm | 4-8 minutes | Easier inspection and testing |
| 25 cm | 60-90 gsm | 6-12 minutes | Larger stroke, heavier body |
Conditioning is not the same as forcing. Pull the tail only a short distance, release it completely, and repeat slowly. If the wings do not respond after ten gentle pulls, more repetitions will not correct a wrong pivot or a torn hinge.
Keep the model dry and away from direct heat. Moisture can relax creases unevenly, while heat can warp thin paper and make the pocket collapse asymmetrically.
Which Flapping-Bird Setup Should You Choose?
A 15 cm square of 50-60 gsm kami is the best beginner setup because it balances fold visibility, flexibility, low cost, and manageable size. A 20-25 cm square is better for children or troubleshooting because the larger body makes the pocket and wing roots easier to inspect.
| User or situation | Paper and size | Expected advantage | Trade-off |
|---|---|---|---|
| Beginner | 15 cm, 50-60 gsm kami | Clear folds and low cost | Moderate lifespan |
| Child learning model | 20 cm, 50-70 gsm kami | Larger grip and safer force | More paper use |
| Durable practice | 20 cm, 60-70 gsm kraft | Stronger repeated hinges | Stiffer initial folds |
| Advanced folder | 15-20 cm, 30-50 gsm washi | Smooth flexible movement | Cost and paper variation |
| Emergency household test | 25 cm, 80 gsm copy paper | Immediately available | Reduced stroke and hinge life |
For repeated demonstrations, light kraft paper is often a practical compromise. For the first successful model, however, thinner kami usually produces fewer frustrating jams than a resilient but stiff sheet.
An origami flapping bird is not a good candidate for cardstock, laminated paper, or heavily sized decorative paper. Those materials can make crisp display folds but resist the controlled flexing that creates the stroke.
Why Does One Wing Flap More Than the Other?
One wing flaps more than the other when the wing-root hinges have unequal angles, the central ridge is off-center, or one wing contains a shorter crease path. Unequal wing tips do not necessarily indicate failure, but a large difference means the force is reaching the two sides unevenly.
Place the bird at eye level and compare the wing roots while the wings are relaxed. Reposition the higher or lower root with light finger pressure, then test the tail without changing the outer wing shape.
Do not trim one wing to correct an asymmetry. Trimming changes mass and outline but does not repair the internal lever geometry. Re-fold the root instead.
Can Humidity or Storage Stop the Bird From Flapping?
Humidity can reduce flap quality by softening creases and making the body pocket collapse, while dry storage can make heavily stressed hinges brittle. Storage damage is more likely when the model is compressed under books, packed with its wings folded sharply, or exposed to heat.
Store a working bird in an open box at ordinary indoor conditions. Avoid sealed plastic bags if condensation is likely. If the paper feels limp, allow it to dry naturally for several hours before testing; do not use a hair dryer.
A stored model with a permanently flattened pocket may not recover. Paper fibers can relax into a new shape, especially after repeated compression, so replacement is often the cleanest solution.
What If the Bird Flaps Once and Then Stops?
A bird that flaps once and then stops usually has a settling layer, an over-tight crease, or early hinge damage rather than a completely wrong design. Release the tail, reopen the chest pocket, and inspect the wing roots before attempting another pull.
If the model works after five gentle micro-pulls, the paper was probably settling. If the stroke becomes weaker each time, the hinge may be accumulating a crack or the tail seam may be stretching. Stop when resistance changes suddenly or a white line appears in the paper.
A correct model should not require increasing force from pull to pull. Declining performance is a warning, not a conditioning target.
What Are the Limits of the Flapping Mechanism?
The flapping mechanism is designed for repeated gentle cycles, not forceful pulling, long-distance flight, or load carrying. A paper bird may move convincingly in the hand but cannot match a rubber-powered toy because its available elastic recovery comes from thin folded fibers.
| Intended use | Suitable? | Typical operating condition | Main risk |
|---|---|---|---|
| Classroom demonstration | Yes | 5-10 gentle pulls | Seam wear |
| Short home display | Yes | 10-30 total cycles | Softened hinges |
| Continuous repeated play | Limited | Under 100 cycles typical | Crease fatigue |
| Outdoor use | Poor | Wind and moisture exposure | Deformation |
| Carrying decorations | No | Added mass over 1 g | Weak wing stroke |
| Motorized modification | No | External force applied | Rapid tearing |
Lifespan varies widely with paper, fold sharpness, hand strength, and humidity. A typical kami model may remain functional for dozens of cycles, while an especially careful model can last longer; the 50-100 flap range sometimes quoted for light paper should be treated as an approximate handling range, not a guaranteed specification.
FAQ
Can a traditional origami crane be made to flap?
A traditional crane generally cannot be made to flap simply by pulling its tail because its crease pattern and internal layers serve a different structure. Fold a dedicated flapping-bird pattern instead. Similar outer shapes do not prove that two origami models share the same mechanism.
Should I pull the tail down or sideways?
Pull the tail outward along the direction established by the model, usually approximately horizontal from the breast rather than straight down or sharply sideways. Use 5-10 mm of travel during testing. If the tail twists, stop and realign the pivot before applying more force.
How many pulls does a new bird need?
A new origami flapping bird typically needs five to ten gentle micro-pulls to settle its layers. Release the tail after each pull. If the wings remain inactive after ten careful tests, inspect the model rather than increasing force, because conditioning cannot correct a wrong model or torn hinge.
Why does my origami bird flap without returning?
The bird may flap without returning when its hinge is over-creased, the paper is too soft, or the wing-root fibers have been damaged. Lightly open the hinge and try thinner but still resilient paper on the next model. A visibly cracked hinge will not regain its spring through repeated pulling.
Can I use notebook paper for an origami flapping bird?
Notebook paper can work for a large experimental model, but many sheets are thin, coated, or weak along their perforated edge. A 15 cm bird usually performs more consistently with 50-70 gsm kami. If notebook paper bends into a soft body, switch materials rather than sharpening every crease.
Is a larger bird easier to make flap?
A larger bird is often easier to inspect and grip because its pocket and wing roots have more room, but size alone does not fix incorrect geometry. A 20 cm square can be a useful troubleshooting size. Pair it with paper around 50-80 gsm so the larger hinges remain flexible without collapsing.
The Bottom Line
Why won’t my origami flapping bird flap? Check the model identity, wing-root alignment, tail pivot, breast pocket, paper thickness, and tail-to-body seam in that order. A clean, intact bird made from 50-70 gsm paper should respond to a gentle outward tail pull and return after release. If the joint is torn or the paper is permanently cracked, refolding a new model is safer and faster than forcing a repair.
