


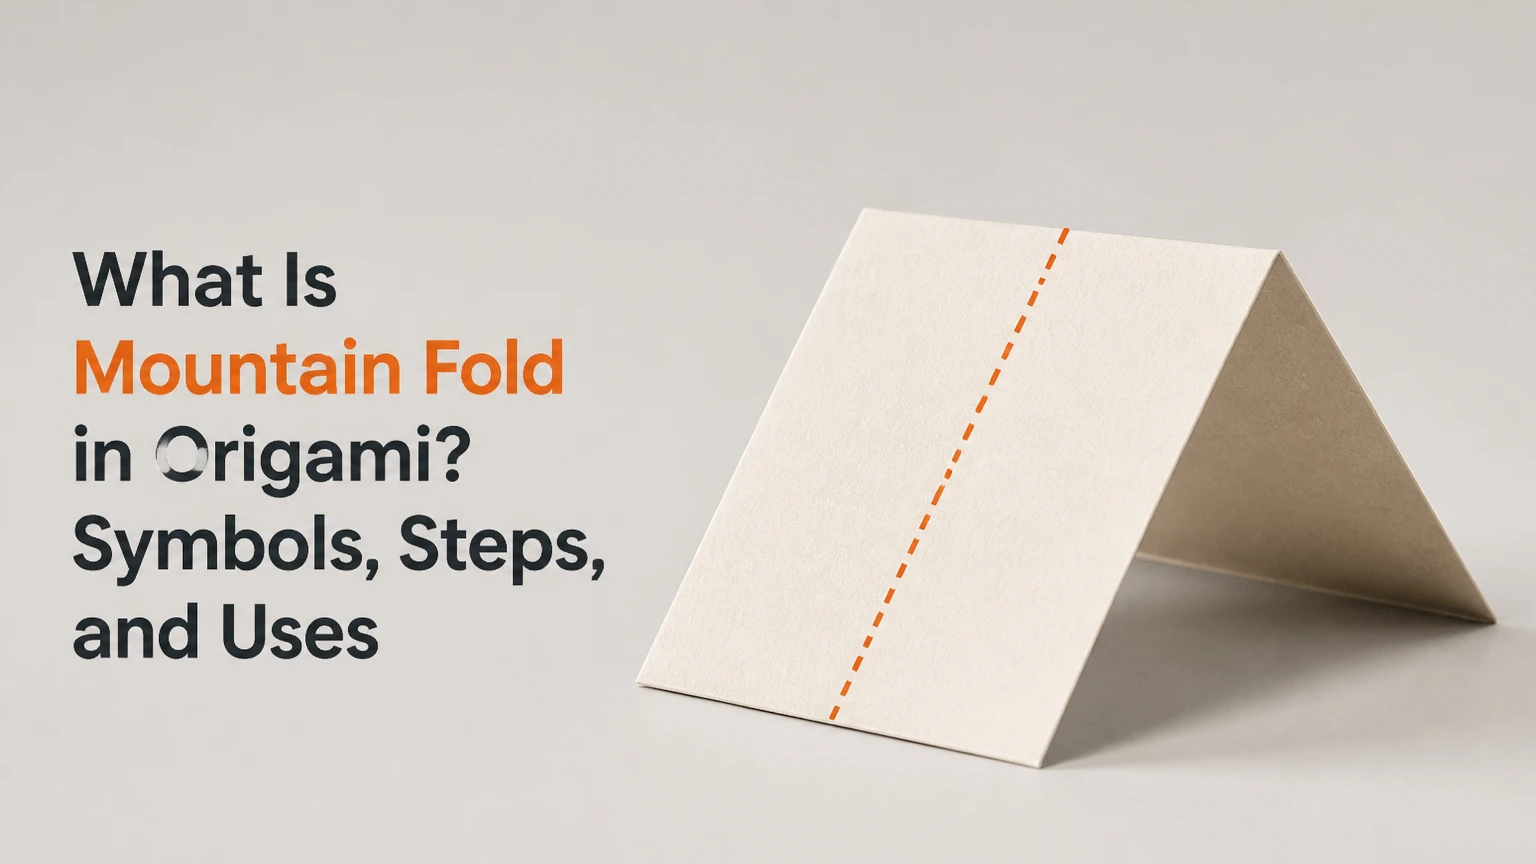
A mountain fold in origami is a crease that makes the paper rise toward the viewer like a ridge or mountain peak. The fold usually sends the folded portion away from the viewer, creating an inverted V when viewed from the front; its opposite is the valley fold, which sinks toward the viewer.
Key Facts at a Glance
A mountain fold creates a raised ridge on the side facing the folder.
Origami diagrams commonly show it with a dashed or dash-dot line and an open arrow pointing away.
The same physical crease can look like a mountain from one side and a valley from the other.
The most reliable beginner method is to turn the paper over and make a valley fold on the reverse side.
A basic straight mountain crease usually takes 5-15 seconds and costs no more than the paper itself.
Mountain folds appear in bases, pleats, flaps, reverse folds, sinks, boxes, animals, flowers, and tessellations.
What Is Mountain Fold in Origami?
A mountain fold is a paper crease whose ridge projects upward on the visible side of the model. In a conventional front view, the paper bends away from the folder along the crease, so the two adjacent surfaces form an inverted V rather than a V-shaped trough.
“Mountain” describes the crease’s appearance, not a permanent property of one side of the paper. Turn the model over and the same ridge becomes a valley. This viewpoint dependence explains why diagrams use arrows, line styles, and model orientation together rather than relying on the crease shape alone.
The term applies to both a temporary pre-crease and a final structural fold. A designer may pre-crease a mountain line, unfold it, and use the resulting memory later during a collapse. In another model, the paper remains folded along that line to form a wing, beak, box wall, or decorative ridge.
What is the difference between a mountain and valley fold?
A mountain fold raises the crease toward the viewer, while a valley fold lowers the crease toward the viewer. They are complementary descriptions of the same two-sided bending action, and neither term means that the paper must move in a particular compass direction.
| Feature | Mountain fold | Valley fold | Practical consequence |
|---|---|---|---|
| Visible shape | Inverted V ridge | V-shaped trough | Ridge or recess changes the model’s volume |
| Paper movement | Folded layers move away | Folded layers move toward | Determines which surface remains exposed |
| Common diagram line | Dashed or dash-dot | Solid line | Helps identify the intended action |
| Typical arrow direction | Open arrow away | Closed arrow toward | Confirms movement when orientation is unclear |
| Reverse-side appearance | Valley | Mountain | Turning the sheet over reverses the visual description |
A common beginner error is to treat “fold downward” as an absolute instruction. Downward can mean away from the viewer, toward the table, or toward the bottom edge of a page. Origami instructions use mountain and valley as geometric descriptions, so the model’s current front and back surfaces matter more than the page’s top and bottom.
How Does a Mountain Fold Look and Work?
A mountain fold works by rotating one region of paper around a crease line so the fold rises on the observed side. The crease divides the sheet or model into two regions, and the final dihedral angle between those regions determines whether the fold is flat, partially opened, or sharply closed.
A flat pre-crease has no visible height when the paper lies open. Once the adjoining regions rotate, the ridge becomes visible. In a finished model, the fold may remain near 180 degrees when measured as the included open angle, or it may close toward 0 degrees depending on the convention used by the diagram or engineering description.
The 0-degree and 180-degree labels therefore need care. In paper-folding geometry, a flat sheet is often described as a 180-degree fold angle, while a fully closed fold approaches 0 degrees. Some diagrams measure the exterior turning angle instead, producing the reverse interpretation. The crease itself does not have one universal numeric angle.
How do you read a mountain-fold symbol?
A mountain fold usually appears as a dashed, dash-dot, or alternating long-and-short line paired with an open arrowhead that points away from the viewer. Symbol standards are widely shared, but publishers vary in dash spacing, arrow shape, color, and whether a crease is shown before or after folding.
| Diagram feature | Typical mountain-fold meaning | What to check |
|---|---|---|
| Dash-dot line | Crease is intended as a mountain | Confirm the legend on the page |
| Open arrowhead | Move the paper away from the viewer | Follow arrow direction, not page direction |
| Solid line | Usually valley or existing edge | Check whether the line is a crease or boundary |
| Repeated short dashes | Hidden or rear fold in some diagrams | Compare with nearby steps |
| Colored crease | Mountain or valley by publisher convention | Read the model’s color key first |
Printed diagrams often display a mountain crease before the fold is made. After the action, the line may disappear beneath a layer, become an edge, or be represented by a shaded ridge. Digital tutorials can also animate the motion, which is more reliable than a static symbol when several layers overlap.
The British Origami Society’s instructional resources treat mountain and valley folds as paired basic actions, but individual books still deserve priority when their legend defines a different graphic convention. A local legend is authoritative for that diagram.
How Do You Make a Mountain Fold?
The most accurate beginner method takes about 10-30 seconds: mark the target line, turn the paper over, make a valley fold on the reverse side, sharpen the crease, and turn the paper back. Correct endpoint alignment matters more than speed because a one-millimeter error at a corner can distort several later folds.
Before you start
| Item | Typical specification | Beginner recommendation |
|---|---|---|
| Paper | 15 x 15 cm square | 70-90 gsm kami |
| Working surface | 20 x 20 cm or larger | Clean, hard, flat table |
| Crease tool | 10-15 cm smooth edge | Fingernail or plastic bone folder |
| Basic time | 10-30 seconds | 1 straight crease |
| Material cost | $0.05-$0.15 per sheet | Standard kami |
| Prerequisite | Two visible target points | Corner, edge, or intersection landmark |
Step 1: Locate the crease line
Place the model with the correct side facing you and identify every endpoint of the intended crease. Use a pencil only for practice paper, because visible marks can spoil a finished model and may not communicate whether the line is a mountain or valley.
Step 2: Anchor the landmarks
Pin the endpoints with your fingertips or use a light pinch at each target point. If the line runs between two intersections inside the model, identify those intersections before bending the paper.
You will know the alignment is ready when both endpoints remain directly above their intended landmarks. A common mistake is beginning at the middle and allowing one endpoint to drift.
Step 3: Turn the paper over
Flip the sheet or model completely so the reverse surface faces upward. Keep the crease endpoints mentally aligned during the turn, particularly when the model contains layers that can shift.
Step 4: Make a reverse-side valley fold
Bring the two relevant regions toward you along the same geometric line. Do not force the entire model flat if surrounding layers resist; first establish the ridge between the correct endpoints, then flatten only the intended section.
Step 5: Sharpen the crease
Press from the center toward each endpoint using a fingernail or a smooth bone folder. One firm pass is usually safer than repeated heavy scraping, which can polish, stretch, or split the fibers.
Step 6: Turn the model back
Return the model to its original orientation. The crease should now project toward you as a mountain ridge, with the intended layers behind or beneath the ridge.
The fold worked when the endpoints match, the ridge follows the drawn or implied line, and the paper does not twist beside the crease. If the model springs open, hold the folded shape for 5-10 seconds and inspect whether adjacent layers are fighting the fold.
Which Folding Method Is Most Accurate?
Flipping the model and making a reverse-side valley fold is usually the most accurate beginner method, while a direct air fold is faster for accessible edges and a scoring tool is appropriate only when thick material requires controlled pre-creasing.
| Method | Typical time | Suitable paper | Main accuracy factor | Primary risk |
|---|---|---|---|---|
| Flip and valley fold | 10-30 seconds | 60-100 gsm kami or Tant | Endpoint alignment | Layers shift during flipping |
| Direct air fold | 5-15 seconds | 60-90 gsm thin paper | Even pressure from both hands | Ridge drifts or twists |
| Bone-folder crease | 10-25 seconds | 90-180 gsm cardstock | Moderate pressure | Surface polish or fiber damage |
| Metal scoring tool | 15-40 seconds | 160-300 gsm cardstock | Ruler-guided placement | Cut or weakened fold line |
| Wet-fold shaping | 30-120 seconds | 100-200 gsm long-fiber paper | Moisture control | Warping and delayed drying |
Air folding means squeezing the paper along the intended ridge without turning the model over. It works well on an exposed flap, but it is difficult when the endpoints are hidden or the model has several loose layers. A ruler can guide a straight crease, but a ruler cannot decide which side should become the mountain.
Scoring is not a substitute for understanding the fold direction. A score creates a controlled hinge, but excessive pressure can sever fibers, especially in lightweight kami. Use a blunt tool and test on a scrap square before scoring a complex model.
What Types of Mountain Folds Exist?
The main types are straight, curved, pleated, and compound mountain folds. Sink folds and reverse folds use mountain creases as part of a larger movement, but they are techniques rather than simple mountain-fold varieties.
| Type | Typical geometry | Common paper range | Typical application |
|---|---|---|---|
| Straight mountain | Single line between edges or landmarks | 60-180 gsm | Box walls, flaps, bases |
| Curved mountain | Arc or freeform ridge | 100-220 gsm | Sculptural animals, flowers |
| Pleated mountain | Repeated alternating ridges | 50-120 gsm | Fans, tessellations, wings |
| Compound mountain | Several linked creases | 60-150 gsm | Complex bases, articulated forms |
| Wet-folded mountain | Damp, shaped curved ridge | 100-220 gsm | Rounded 3D surfaces |
Straight mountain folds
Straight creases are the dominant form in beginner diagrams and geometric models. They can run edge to edge, corner to edge, or between interior intersections such as an existing diagonal and a center crease.
Curved mountain folds
A curved mountain fold creates a ridge along an arc rather than a straight segment. Ordinary dry paper resists this action because a flat sheet cannot always conform cleanly to a compound curve without local buckling.
Wet-folding softens the sheet and allows the folder to shape a rounded ridge. Use minimal moisture, especially with thin paper, and let the model dry in its final position. Curved folds are poor candidates for a hard bone folder because the tool can flatten the intended three-dimensional transition.
Pleated mountain folds
A pleat alternates mountain and valley creases at regular intervals. Accordion pleats compress a broad sheet into a narrow stack, while box pleats produce a flatter, more structured surface.
The mountain lines cannot be interpreted independently. A single reversed crease changes the pleat’s direction and may prevent a tessellation or fan from collapsing.
Which Paper and Tools Should You Use?
Standard 15 x 15 cm kami is the best starting material because its 70-90 gsm thickness folds easily, holds a visible crease, and costs little enough for repeated practice. Heavy Tant, Elephant Hide, and washi provide stronger structure but require greater pressure control and more accurate pre-creasing.
| Paper type | Typical price per sheet | Typical thickness or weight | Best mountain-fold use |
|---|---|---|---|
| Kami | $0.05-$0.15 | 70-90 gsm | Beginner bases and practice |
| Tant | $0.20-$0.80 | 80-100 gsm | Colored geometric models |
| Elephant Hide | $0.50-$2.00 | 100-150 gsm | Complex animals and insects |
| Washi | $0.50-$5.00 | 60-200 gsm | Long-lasting sculptural work |
| Cardstock | $0.10-$0.50 | 160-300 gsm | Templates and paper engineering |
Paper cost varies by country, pack size, fiber content, and retailer. These are typical retail ranges rather than fixed market prices. A bone folder is optional for 70-90 gsm paper, but a smooth plastic tool becomes useful when a model contains many layers or repeated pre-creases.
Paper direction also matters. Long fibers generally produce cleaner, stronger creases than short, brittle fibers. If a fold cracks, rotate a test sheet 90 degrees and repeat the crease. A difference in grain direction can reveal whether the paper or the technique caused the failure.
Where Does a Mountain Fold Appear?
Mountain folds define shape, compress layers, and prepare paper for later collapses. A raised ridge can become an animal’s back, a bird’s wing edge, a flower petal, a box wall, or an internal reference line that disappears after a base collapses.
A mountain fold may be visible, hidden, or temporary. In a preliminary crease pattern, the line records future movement even when the sheet is unfolded. In a finished model, the same crease can form a structural edge that must remain sharp.
Mountain folds frequently appear in these operations:
- Pleats: alternating mountain and valley lines narrow or expand a section.
- Inside reverse folds: a flap changes direction through a sequence of existing creases.
- Outside reverse folds: a point projects outward while the crease orientation changes.
- Sinks: a point or region collapses inward along several surrounding creases.
- Squash folds: a flap opens and flattens, using mountain and valley lines together.
- Petal folds: layered regions spread through controlled crease orientation.
An inside reverse fold is not simply “a mountain fold pushed inside.” It depends on a prepared crease network and the correct interchange of surfaces. Forcing the peak inward without checking the surrounding valleys often tears the paper or produces an asymmetrical tip.
Why Do Mountain Folds Fail?
Mountain folds fail most often because endpoints drift, the wrong surface is folded, surrounding layers are ignored, or the paper is too dry or thick for the intended curvature. Repair depends on whether the error is positional, structural, or material-related.
| Failure | Typical symptom | Likely cause | Specific correction |
|---|---|---|---|
| Drifting crease | Endpoint misses by 1-3 mm | Middle-first folding | Pin both endpoints before flattening |
| Wrong direction | Ridge appears as a trough | Model not flipped correctly | Reverse the model and reassess the front |
| Soft ridge | Fold opens after release | Insufficient compression | Hold 5-10 seconds, then sharpen once |
| Cracked paper | White split along crease | Dry, thick, or short-fiber sheet | Change grain direction or use softer paper |
| Twisted model | One side rises higher | Uneven hand pressure | Fold center outward in matching passes |
| Layer capture | Extra flap trapped in ridge | Loose layer not isolated | Unfold, separate layers, and refold slowly |
Do not automatically wet cracked paper. Moisture can stain kami, distort printed paper, weaken sizing, and make a precise geometric crease less stable. Wet-folding is better for sculptural shaping than for rescuing a badly placed crease in a finished model.
A soft peak can also result from paper memory. Thick paper remembers previous folds and may spring back when neighboring layers pull against the new ridge. Pre-crease the line in the intended direction, flatten the model briefly, and then rebuild the three-dimensional shape.
How can you fix a misplaced mountain crease?
A misplaced mountain crease can usually be corrected once if the paper has not been sharply compressed. Open the model, align the intended landmarks, and make the correct crease with lighter pressure; repeated refolding weakens the fiber network and leaves competing ridges.
For a 1 mm error on thin kami, refolding is often acceptable. For a 3 mm error, a complex animal model may already have accumulated enough geometric distortion that replacing the sheet is faster and cleaner. Do not erase a deep crease with rubbing, because rubbing enlarges the damaged area without restoring the original surface.
How Long Does a Mountain Fold Take and Cost?
A basic straight mountain fold typically takes 5-30 seconds and costs $0.05-$0.15 in standard kami, while a curved or tessellation pre-crease can take 2-10 minutes and use paper costing $0.50-$5.00. The fold itself has no separate consumable cost unless scoring tools or specialty paper are involved.
| Task | Typical time | Typical paper cost | Typical total setup cost |
|---|---|---|---|
| One straight crease | 5-30 seconds | $0.05-$0.15 | $0.05-$0.15 |
| Small animal flap | 30-90 seconds | $0.05-$0.80 | $0.05-$0.80 |
| Curved wet fold | 2-10 minutes | $0.50-$5.00 | $0.50-$5.00 |
| Tessellation grid | 2-10 minutes | $0.20-$2.00 | $0.20-$2.00 |
| Heavy cardstock score | 30-120 seconds | $0.10-$0.50 | $5-$20 reusable tool cost |
Time depends on the number of landmarks, layers, and required symmetry. A simple corner-to-corner fold is quick; a crease that must pass through multiple interior intersections deserves slower alignment.
Acid-free paper stored away from sunlight and humidity can retain a crease for decades. Displayed models face different conditions: ultraviolet light fades color, high humidity softens ridges, and repeated handling rounds sharp edges. A permanent crease is not the same as a permanent model shape.
When Should You Use a Mountain Fold Instead of an Alternative?
Use a mountain fold when the design requires a raised ridge or when the diagram explicitly marks an away-from-viewer action. Use a valley fold for a recessed channel, a reverse fold for redirecting a flap, and a curved or wet fold when a straight crease cannot create the desired three-dimensional form.
| Requirement | Mountain fold | Valley fold | Reverse fold | Curved fold |
|---|---|---|---|---|
| Raised visible ridge | Primary choice | No | Sometimes combined | Possible |
| Recessed channel | No | Primary choice | Sometimes combined | Possible |
| Point redirection | Supporting crease | Supporting crease | Primary choice | Rare |
| Straight geometry | Excellent | Excellent | Depends on base | Poor |
| Rounded organic surface | Limited | Limited | Limited | Primary choice |
| Beginner suitability | High | High | Medium | Low |
A mountain fold is not automatically the strongest choice for every raised form. A squash fold may create a broader surface, while an outside reverse fold may produce a narrow point with less visible layering. Choose by the final geometry, not by the desire to use a named fold.
One practical rule is to pre-crease a mountain line only when the later collapse needs that memory. Excessive pre-creasing can clutter a model, weaken thin paper, and make a clean surface look worn. Finished presentation often requires fewer visible creases than structural construction.
FAQ
Is a mountain fold the same as folding paper down?
A mountain fold means the crease rises toward the viewer, while “fold down” depends on the model’s orientation and the speaker’s viewpoint. In many beginner instructions, folding down means moving the flap away from you, which produces a mountain ridge on the front. Always follow the diagram’s arrow and legend.
What line means mountain fold in origami?
A dashed or dash-dot line commonly means mountain fold, especially when paired with an open arrow pointing away from the viewer. The exact spacing and arrow design vary between books, websites, and designers, so the symbol key for the specific tutorial overrides general conventions.
Can a mountain fold become a valley fold?
Yes. Turning the paper or model over changes the visible ridge into a valley. The paper has not changed its crease; only the viewing side has changed. This is why origami instructions describe fold direction relative to the observer rather than assigning an irreversible label to the paper.
Should I use a bone folder for origami?
Use a bone folder for thick paper, layered models, cardstock, or repeated geometric pre-creases, but use light pressure on thin kami. A fingernail is often safer for delicate paper because a hard tool can polish the surface, stretch the fibers, or cut a sharp crease through the sheet.
How do I know whether my mountain fold is correct?
A correct mountain fold has a ridge on the intended visible side, connects the specified landmarks, and leaves no unintended layer trapped inside. Release the fold briefly: the model should retain the line without twisting, drifting, or springing open beyond the resistance expected from the paper.
The Bottom Line
A mountain fold in origami is a raised crease that projects toward the viewer and usually moves the folded paper away from the viewer. Read its dashed or dash-dot line with the open arrow, verify the tutorial’s symbol key, and use the flip-and-valley method when accuracy matters. With aligned endpoints, suitable paper, and controlled pressure, the basic fold takes seconds and supports nearly every level of origami design.
