


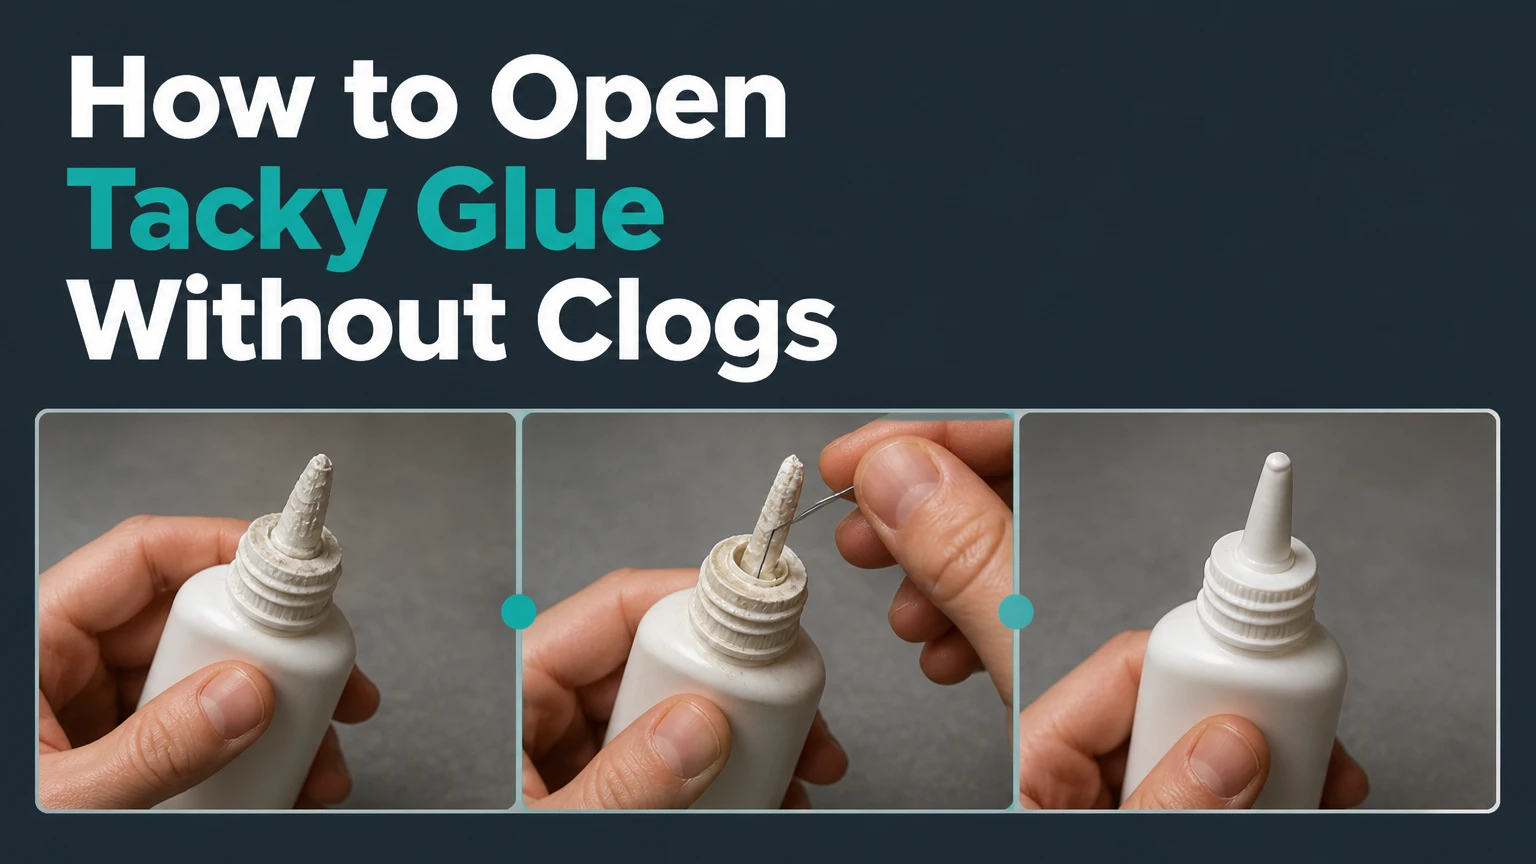
To open tacky glue, remove the outer cap assembly, peel away the internal foil seal, replace the cap, and snip the nozzle at its smallest marked ridge. For a stuck bottle, soften dried residue with warm tap water, improve grip, and twist gently before using pliers. Do not force a sealed nozzle toward your face.
Key Facts at a Glance
A new tacky glue bottle usually has an outer cap, a removable nozzle assembly, and a foil or paper safety seal.
The smallest nozzle cut gives the control needed for origami, quilling, and paper crafts.
Warm tap water can soften dried water-based PVA around a cap, but boiling water can deform plastic.
A sewing pin clears a shallow nozzle skin; a deep plug usually requires removing and cleaning the nozzle.
Tacky glue commonly sets in 30-45 minutes and reaches maximum bond strength after about 24 hours.
Tacky glue is generally suitable for paper, cardboard, wood, and many fabrics, but a cured PVA bond can soften again with water.
Before You Open Tacky Glue
Opening tacky glue takes about 2-5 minutes for a new bottle and 5-15 minutes for a clogged bottle. The task is low difficulty, but the cut determines whether the adhesive dispenses as a controllable line or floods a small project.
Prepare the bottle on a stable surface with the nozzle pointing away from your hands and face. For origami, use small scissors rather than a utility knife whenever possible. A knife can cut a rigid tip, but it also increases the chance of slipping through the plastic and into a finger.
| Preparation item | Typical amount or specification | Purpose |
|---|---|---|
| Small craft scissors | 1 pair, sharp and clean | Cuts a narrow plastic nozzle |
| Warm tap water | 1 cup, approximately 40-50°C | Softens dried glue around a cap |
| Rubber band or silicone gripper | 1 | Improves twisting leverage |
| Sewing pin | 1, 25-40 mm long | Opens a shallow nozzle blockage |
| Paper towel | 2-4 sheets | Removes softened residue |
| Disposable gloves | 1 pair | Protects hands during mechanical cleaning |
Avoid using a flame, heat gun, microwave, or boiling water. Tacky glue is water-based, and its plastic container can soften or distort before the dried adhesive releases.
How to Open a New Bottle
A new tacky glue bottle opens in five actions: remove packaging, expose the safety seal, remove the seal, reinstall the nozzle, and make a small opening. The bottle must be upright during assembly so foil fragments do not fall into the adhesive.
Step 1: Remove the outer packaging
Peel off shrink film, a plastic band, or any removable wrapper around the cap. Inspect the bottle shoulder and nozzle for cracks before applying force.
The outer film is separate from the inner seal. Removing the wrapper does not make the bottle ready to dispense.
Success checkpoint: The cap turns freely and the bottle mouth remains covered by a visible foil or paper barrier.
Common mistake: Cutting through the wrapper into the nozzle. Remove loose film by hand first, then trim only a remaining strip.
Step 2: Unscrew the complete nozzle assembly
Hold the bottle body with one hand and turn the cap or nozzle assembly counter-clockwise. Many craft adhesive bottles use a threaded nozzle that comes off as one piece.
Do not squeeze the bottle while removing the cap. Pressure can push glue against the safety seal and make the opening messier.
Success checkpoint: The entire cap assembly separates from the bottle neck, exposing the safety seal.
Common mistake: Trying to cut the nozzle before removing the cap. The internal seal may remain intact, so the nozzle will produce no glue.
Step 3: Remove the internal foil seal
Peel the silver foil, paper membrane, or plastic barrier from the bottle mouth. If the seal has a small pull tab, use it. If no tab exists, lift an edge with the blunt end of a clean tool, not the sharp point of a knife directed toward your palm.
Discard the seal after removal. A loose fragment inside the bottle can obstruct the nozzle later.
Success checkpoint: The bottle opening is fully visible, with no foil edge crossing the mouth.
Common mistake: Puncturing only the center of the seal. A partial puncture can leave a flap that blocks thick PVA adhesive.
Step 4: Reattach the nozzle
Thread the nozzle assembly back onto the bottle and tighten it by hand until the threads seat evenly. Hand-tight is sufficient; excessive force can damage plastic threads and make the next opening harder.
Wipe any adhesive from the threads before tightening. Dried glue on the threads can bond the cap to the bottle after storage.
Success checkpoint: The nozzle sits straight and does not wobble when lightly touched.
Common mistake: Cross-threading the cap. If resistance appears after one or two turns, reverse the cap and start again.
Step 5: Snip the nozzle
Use sharp scissors to cut across one marked ridge near the end of the tapered tip. Start with the smallest opening because widening a cut is possible, while reducing an oversized opening is not.
A perpendicular cut generally gives a predictable bead. An angled cut can help place glue into a corner, but it leaves a longer opening that may release adhesive unevenly.
Success checkpoint: A gentle squeeze produces a continuous line without spurting or requiring excessive pressure.
Common mistake: Cutting at the lowest ridge immediately. That opening may release more adhesive than thin paper can absorb.
Which Nozzle Opening Size Should You Choose?
Choose the smallest marked ridge for origami and detailed paper work, the middle ridge for general crafts, and the lowest ridge only when a wider adhesive bead is genuinely needed. Tacky glue becomes difficult to control when the opening is larger than the joint.
| Application | Recommended ridge | Typical bead width | Practical reason |
|---|---|---|---|
| Origami tabs and paper flaps | Topmost ridge | 0.5-1 mm | Limits wrinkling and squeeze-out |
| Scrapbook paper and cardstock | Upper or middle ridge | 1-2 mm | Covers a broader flat joint |
| Fabric trim and felt | Middle ridge | 2-3 mm | Compensates for absorbent fibers |
| Small wood pieces | Middle or lower ridge | 2-4 mm | Provides coverage across a rigid surface |
| Ceramic embellishments | Lower ridge | 3-5 mm | Supports a heavier, less porous piece |
| Large cardboard construction | Lower ridge | 4-6 mm | Spreads adhesive over a wide seam |
For origami, apply dots or a broken line rather than a continuous heavy bead. A 0.5-1 mm line is usually enough for a tab measuring 10-20 mm, while a larger bead can leave a visible glossy patch and soften thin paper.
What if the bottle has no marked ridges?
Cut only 1-2 mm from the closed tip, then test the flow on scrap paper. Enlarge the opening in 1 mm increments until the bead matches the joint.
Keep the cut end clean. A ragged, crushed opening causes sideways flow, which is especially troublesome when adhesive must stay inside a folded paper edge.
How to Open a Clogged Bottle
Open a clogged tacky glue bottle by removing the surface skin first, warming the capped tip in warm tap water, and improving grip before twisting. If dried glue still locks the cap, use pliers carefully on the cap and bottle neck, never by crushing the flexible bottle body.
Step 1: Test the cap without squeezing
Try turning the cap counter-clockwise with dry hands. If the cap moves slightly, stop and inspect the threads. A small movement may indicate dried glue breaking loose, while continued force can strip the plastic.
Place the bottle upright in a tray or sink before using water.
Step 2: Soak only the cap and nozzle
Stand the capped nozzle in warm tap water for 5-15 minutes. Keep the bottle body and label above the water when possible, because water entering a loose cap can dilute adhesive at the nozzle.
Warm water works because ordinary tacky glue is a water-based polyvinyl acetate adhesive. The dried residue absorbs water and becomes less rigid.
Success checkpoint: A fingernail or paper towel can remove softened residue from the cap seam.
Common mistake: Using boiling water. Temperatures near 100°C can warp a thin nozzle and may make the cap fit worse.
Step 3: Increase friction
Dry the cap, then wrap a thick rubber band around it or use a silicone jar opener. Turn counter-clockwise with steady pressure rather than short, violent jerks.
Hold the bottle low on the neck. Do not grip the soft center and squeeze it, because pressure can force glue into the threads.
Step 4: Use pliers only as a final measure
If the cap remains fixed, protect the plastic with a folded cloth and use one pair of pliers on the bottle neck and another on the cap. Apply small, controlled movements. Stop if the neck bends, cracks, or begins separating from the bottle.
A damaged bottle is not worth salvaging if adhesive can leak into the work area. Transfer the remaining glue only when the container is intact and the manufacturer permits it.
| Clog condition | First action | Maximum practical effort | Replace bottle when |
|---|---|---|---|
| Thin skin over tip | Lift skin with fingernail | 30 seconds | Tip is split |
| Pin-sized opening blocked | Insert a sewing pin | 1-2 minutes | Pin cannot enter safely |
| Cap threads glued | Warm-water soak | 5-15 minutes | Neck begins to deform |
| Heavy dried plug | Remove nozzle and soak | 10-20 minutes | Plug remains solid |
| Cracked or leaking neck | Stop handling | No force | Container is compromised |
How to Clear a Blocked Nozzle
Clear a tacky glue nozzle according to the blockage depth: peel a surface film, puncture a shallow opening with a pin, or remove the nozzle to clean a deep plug. Never push a long metal object forcefully into a narrow tip because it can enlarge the opening or eject glue unexpectedly.
Surface film
A clear or cloudy rubbery skin often forms when the nozzle remains exposed to air. Lift the edge with a fingernail and pull it away in one piece. Wipe the tip before testing the flow.
Shallow plug
Insert a clean sewing pin 2-5 mm into the opening. Twist gently, withdraw the pin, and squeeze a small amount of glue onto scrap paper. Repeat once if needed.
A paperclip can work for a wider nozzle, but its rough cut end may scratch or widen the plastic. A pin is more predictable.
Deep plug
Unscrew the nozzle assembly and rinse or soak the removable plastic part in warm water. Use a toothpick to loosen softened adhesive from the interior catch cavity, then allow the piece to dry before reinstalling it.
Do not return a wet nozzle to the bottle. Added water can thin the adhesive at the neck and change the consistency of the glue used for precise paper work.
Why Does Tacky Glue Dry?
Tacky glue dries as water leaves the adhesive and the PVA particles form a continuous flexible film. Porous paper and wood absorb some water, so they usually set faster than glass, coated cardstock, or plastic, which hold moisture at the bond line.
Tacky glue is thicker and higher in solids than ordinary school glue. That viscosity gives it more initial grab, but the same thickness makes a large bead dry slowly.
The opaque liquid usually becomes translucent or clear as it dries, although some formulas remain slightly cloudy on dark materials. Full cure is different from surface dryness: a thin paper tab can feel secure within minutes while a thick wood joint remains weaker for many hours.
| Bond situation | Typical initial set | Typical handling time | Typical full cure |
|---|---|---|---|
| 0.5 mm bead on porous paper | 5-15 minutes | 15-30 minutes | 12-24 hours |
| 1-2 mm bead on cardstock | 15-30 minutes | 30-60 minutes | 24 hours |
| 3 mm bead on fabric or felt | 30-60 minutes | 1-2 hours | 24-48 hours |
| 3-5 mm bead on wood | 45-90 minutes | 2-4 hours | 24-48 hours |
| Thin layer on coated plastic | 45-120 minutes | 2-4 hours | 24-72 hours |
These are typical craft-use ranges, not guaranteed product specifications. Aleene’s Original Tacky Glue product information commonly identifies a clear-drying, flexible PVA adhesive, while individual formulas and environmental conditions can change the timing.
Is Tacky Glue Good for Origami?
Tacky glue is useful for modular origami, paper sculpture, greeting-card construction, and decorative folds, but it is usually a poor choice for traditional single-sheet origami that depends on clean, reversible folds. The smallest nozzle cut and a tiny application amount matter more than maximum bond strength.
Apply tacky glue to the hidden tab, not across the visible crease. Press the joint with a bone folder, clean ruler edge, or fingertip protected by wax paper for 10-30 seconds.
Thin kami paper can wrinkle when exposed to excess water-based adhesive. Test the glue on the same paper first, especially when the paper has metallic coating, tissue layers, or printed ink.
| Origami use | Tacky glue result | Application amount | Better practice |
|---|---|---|---|
| Modular unit tabs | Strong flexible hold | 1 small dot, 1-2 mm | Press tab 20 seconds |
| Paper flowers | Good for layered petals | 0.5-1 mm line | Hide glue under overlap |
| Thick paper sculpture | Good gap filling | 1-2 mm line | Hold with clips |
| Thin wet-fold paper | Risk of distortion | Minimal dot | Use less water-based adhesive |
| Temporary crease placement | Poor choice | Not applicable | Use removable tape |
| Glossy coated paper | Slower set | 0.5-1 mm line | Roughen hidden area lightly |
A practitioner rule is simple: if glue squeezes out when the tab is pressed, the joint received too much adhesive. Remove the excess immediately with a barely damp cotton swab, then let the paper dry under light pressure.
Tacky Glue Versus Other Adhesives
Tacky glue is the balanced choice for porous paper and lightweight craft assemblies when you need more grab than school glue without the burn risk of hot glue. School glue spreads more easily and washes out more readily, while hot glue sets faster but creates a thicker, less precise joint.
| Adhesive | Typical set time | Best material | Main advantage | Main limitation |
|---|---|---|---|---|
| Tacky glue | 30-45 minutes | Paper, fabric, wood | High initial grab | Slow in thick layers |
| School white glue | 60-120 minutes | Paper, cardboard | Low cost and easy spreading | More run and paper warping |
| Hot-melt glue | 1-3 minutes | Wood, foam, décor | Rapid fixture | Burn risk and bulky bead |
| Glue stick | 1-5 minutes | Dry paper | Clean, low-moisture use | Lower bond strength |
| Double-sided tape | Immediate | Flat paper, card | No drying period | Weak on dusty or textured surfaces |
When should you choose school glue?
Choose school glue for large paper surfaces, washable classroom projects, or applications that need a thin spread. Choose tacky glue when a vertical tab must stay in place before the adhesive dries.
School glue can be easier to distribute with a brush, but its lower viscosity may soak into thin paper and produce wrinkles. Tacky glue reduces run-off because its thicker formulation stays closer to the application point.
When is hot glue better?
Use hot glue for bulky decorations, rapid temporary assembly, or joints where a visible raised bead is acceptable. Hot glue is unsuitable for delicate origami because its heat and thickness can deform paper and leave a hard ridge.
Hot glue also requires a heated tool and creates a burn hazard. Tacky glue is safer for supervised children, although scissors, pins, and pliers still require adult handling.
Which Tacky Glue Bottle Is Best?
For origami, a standard bottle with a narrow, cuttable nozzle is usually the best choice. An inverted “always ready” bottle reduces waiting for thick glue to reach the tip, while quick-dry and fast-grab formulas trade working time for faster positioning or heavier materials.
| Bottle or formula | Typical size | Best use | Main trade-off |
|---|---|---|---|
| Original tacky glue | 4-16 fl oz | General crafts and origami | Moderate set time |
| Quick-dry tacky glue | 4-8 fl oz | Fast card and paper assembly | Shorter repositioning window |
| Clear tacky glue | 4-8 fl oz | Transparent or light surfaces | May still show glossy residue |
| Fast-grab formula | 4-16 fl oz | Wood and heavy embellishments | Too thick for fine paper tabs |
| Inverted bottle | 4-16 fl oz | Frequent crafting | Can clog at the stored tip |
| Bulk refill jug | 32-128 fl oz | Classrooms and studios | Requires clean transfer equipment |
Product names vary by manufacturer, so read the label rather than assuming every “tacky” adhesive has identical drying, washability, or material compatibility. The Aleene’s FAQ and product pages describe several tacky adhesive variants, but the bottle instructions remain the controlling source for that specific formula.
What Materials Can Tacky Glue Bond?
Tacky glue generally bonds porous materials such as paper, cardboard, fabric, felt, unfinished wood, and some lightweight craft foam. Tacky glue is less dependable on polyethylene, polypropylene, oily surfaces, silicone, and smooth low-energy plastics because the adhesive cannot anchor effectively.
Clean and dry both surfaces. Remove dust, loose fibers, and oil from wood or plastic before testing a hidden area.
Tacky glue is often described as washable while wet, but that does not mean a cured bond is permanently washing-machine safe. Water can soften or release many PVA bonds, particularly on fabric, so use a fabric-specific adhesive for garments that will be laundered.
Common Mistakes and How to Fix Them
Most tacky glue problems come from excess adhesive, exposed nozzle air, or residue left on the cap threads. Correcting the storage and dispensing process usually prevents more failures than changing glue brands.
| Mistake | Visible symptom | Immediate fix | Prevention |
|---|---|---|---|
| Cutting the lowest ridge first | Glue floods the joint | Wipe tip and use less pressure | Start with top ridge |
| Leaving cap open | Hard skin on nozzle | Peel skin and clear tip | Close within minutes |
| Squeezing the bottle body | Sudden large blob | Stop pressure before moving tip | Use fingertip pressure |
| Storing on a dirty surface | Grit in glue bead | Wipe nozzle exterior | Keep cap and tip clean |
| Soaking the whole bottle | Watery neck adhesive | Dry exterior and inspect | Soak cap only |
| Using on washable clothing | Bond fails after washing | Remove residue while wet | Select fabric adhesive |
A counterintuitive practitioner insight is that a larger nozzle does not necessarily make thick glue easier to apply. A narrow opening uses pressure to meter the adhesive, while a large opening lets the bottle’s internal pressure release too quickly.
Another useful rule is to clean the cap threads every few uses. A thin ring of dried PVA on the threads can lock a bottle more firmly than residue inside the nozzle.
How Long Does Tacky Glue Take to Dry?
Tacky glue usually becomes touch-set in 30-45 minutes when applied as a thin layer at approximately room temperature, but a thick bead, low humidity, nonporous surface, or limited airflow can extend the time to several hours. Full cure commonly requires about 24 hours.
Do not judge a paper joint only by its surface. Pressing a thick assembly too early can shift the layers even when the outside feels dry.
| Condition | Expected effect on drying | Recommended adjustment |
|---|---|---|
| Thin 0.5-1 mm bead | Faster set | Use for paper tabs |
| Thick 3-5 mm bead | Slower center cure | Apply several thin lines |
| Porous paper or wood | Faster water loss | Check after 15-30 minutes |
| Plastic or coated card | Slower water loss | Extend holding time |
| High humidity | Slower evaporation | Add gentle room airflow |
| Direct high heat | Skin forms too quickly | Avoid heat guns and flames |
Use light clips, removable tape, or hand pressure for alignment. Heavy clamps can emboss thin paper and squeeze too much glue from the joint.
How Should You Store Tacky Glue?
Store tacky glue upright with the nozzle wiped clean and the cap fully closed, unless the manufacturer specifically designed the bottle for inverted storage. Keep the adhesive at moderate room temperature and protect it from freezing, excessive heat, and direct sunlight.
After every use, wipe the nozzle exterior and the cap threads with a damp paper towel. Let the tip dry briefly, then close the cap. For an inverted bottle, inspect the stored tip before squeezing because gravity keeps adhesive near the opening.
Do not insert a pin permanently into the nozzle unless the manufacturer recommends that practice. A pin can help during active crafting, but leaving metal in adhesive may enlarge the opening, contaminate the glue, or become difficult to remove after drying.
What Does Opening a Bottle Cost?
Opening a new tacky glue bottle normally costs nothing beyond the adhesive, while recovering a clogged bottle requires household items costing approximately $0-$5. Typical retail tacky glue prices range from $2-$4 for 2-4 fluid ounces, $5-$9 for 8-16 fluid ounces, and about $35-$48 for a gallon, depending on seller and region.
| Purchase or supply | Typical US price | Typical quantity | Cost-saving note |
|---|---|---|---|
| Small tacky glue bottle | $2-$4 | 2-4 fl oz | Suitable for occasional origami |
| Standard bottle | $5-$9 | 8-16 fl oz | Better for regular crafting |
| Bulk jug | $35-$48 | 128 fl oz | Useful for classrooms |
| Craft scissors | $3-$12 | 1 pair | Reusable for future bottles |
| Silicone gripper | $2-$8 | 1 | Reusable for stuck caps |
| Sewing pins | $1-$5 | Pack of 20-100 | Useful for nozzle maintenance |
Prices are typical retail ranges, not fixed manufacturer prices. A bulk jug only saves money when the adhesive is transferred into clean, compatible applicators without exposing the entire supply to air.
When Should You Replace the Bottle?
Replace tacky glue when the container is cracked, the neck leaks, the adhesive has separated permanently, or the nozzle remains blocked after safe cleaning. A damaged bottle can release glue unpredictably and is less useful than a new small applicator.
Separation is not always failure. Stir a small amount only if the product label permits it, and discard adhesive that has a sour odor, hard rubbery lumps throughout the bottle, or an irreversible watery layer.
Never mix tacky glue with solvents, acetone, bleach, or other adhesive formulas. Chemical additions can damage the container and create fumes without restoring a reliable bond.
Frequently Asked Questions
Can I open tacky glue with a knife?
A knife can cut a rigid plastic nozzle, but sharp scissors are safer for most craft bottles. If a knife is necessary, place the bottle on a stable surface, cut away from your body, and make the smallest possible cut. Never hold the nozzle in your palm while cutting.
Why is my new tacky glue bottle not dispensing?
A new bottle may still have an intact foil seal, an uncut nozzle, or a nozzle cut that is too small for the formula. Remove the complete cap assembly, verify that the seal is gone, reinstall the cap, and enlarge the tip by only 1 mm if the adhesive still does not flow.
Can I thin tacky glue with water?
Do not routinely thin tacky glue with water because dilution reduces solids, weakens the bond, and increases drying time. If a manufacturer provides a thinning instruction for a specific formula, follow that label. For fine origami work, use a smaller bead instead of changing the adhesive.
Is tacky glue toxic after it dries?
Many craft tacky glues are marketed as non-toxic, but safety classifications differ by product and country. Read the bottle’s Safety Data Sheet and label, keep wet adhesive away from eyes and mouths, and provide ventilation during use. “Non-toxic” does not mean edible or suitable for unsupervised toddlers.
Can tacky glue be removed from paper?
Wet tacky glue can often be lifted or wiped with a barely damp cloth, but water may wrinkle paper and spread the adhesive. Once cured, removal can tear paper fibers. Test a hidden area and use mechanical lifting only after the paper is fully dry.
The Bottom Line
To open tacky glue, remove the outer cap assembly, peel off the internal seal, replace the nozzle, and cut the smallest tip ridge first. For an old bottle, use 5-15 minutes of warm tap water, a rubber grip, and controlled mechanical cleaning. For origami, select a 0.5-1 mm opening and apply a tiny hidden dot or line, because precise dispensing matters more than maximum flow.
