


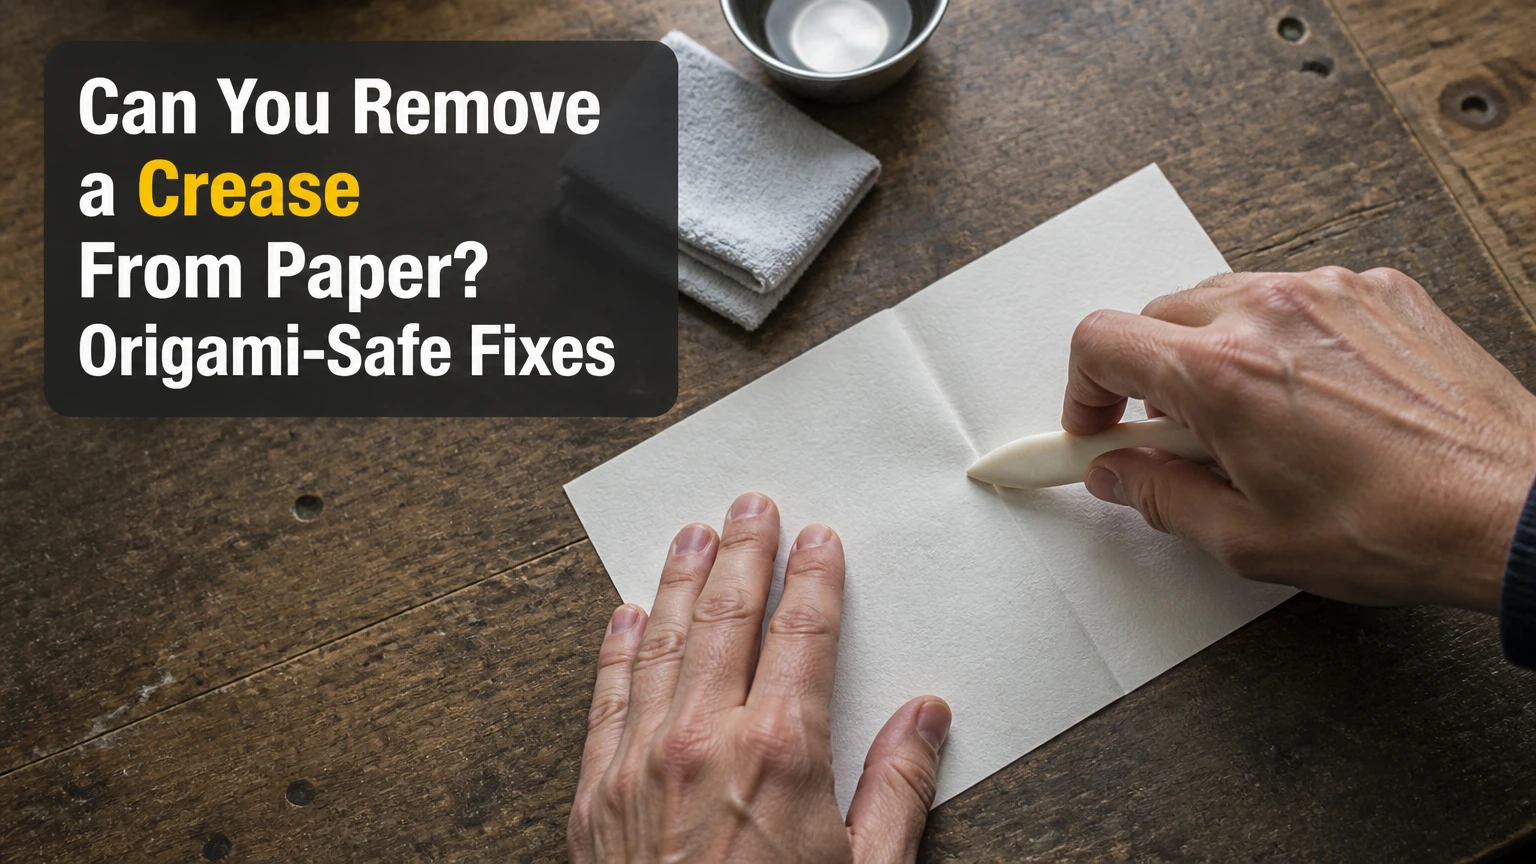
Yes, you can usually reduce or nearly remove a crease from paper, but a sharply folded line may remain because the cellulose fibers have been permanently compressed or fractured. For origami paper, use dry pressing first, protect intentional folds, and avoid heat or moisture unless the paper is ordinary, uncoated, and disposable.
Key facts
Dry pressing is the safest first method for ordinary origami paper and printed diagrams.
A deep fold can become a permanent structural change, so “removal” often means reducing visibility rather than restoring untouched paper.
Direct ironing can flatten paper quickly, but heat may shine, melt, smear, or discolor ink and coatings.
Water should never touch valuable, glossy, metallic, or water-sensitive paper without testing.
Typical dry pressing takes 24-48 hours, while a careful low-heat treatment takes about 5-10 minutes.
Finished origami models should be unfolded only as far as necessary because flattening can erase the model’s intended crease map.
Why Do Paper Creases Become Permanent?
A paper crease becomes persistent when folding compresses fibers on the inside of the fold and stretches fibers on the outside. The fold also changes the paper’s surface coating, sizing, and thickness, so pressing the sheet flat cannot always return every layer to its original condition.
Paper is a network of cellulose fibers bonded into a sheet. A gentle curve may fall within the sheet’s elastic range and disappear after flattening. A sharp origami fold creates a narrow zone of high compression. Repeated folding can break fibers, polish the surface, and weaken the fold line.
Origami paper creates a special problem because many folds are intentional. A sheet can contain mountain folds, valley folds, preliminary creases, and reverse folds that define the finished model. Removing one accidental crease without disturbing neighboring folds requires localized support rather than indiscriminate pressure.
Crease, wrinkle, dent, or tear?
The damage type determines the realistic result. A broad wrinkle is usually easier to reduce than a sharp valley fold, while a dent with broken fibers may remain visible even after professional flattening.
| Damage type | Typical appearance | Likely result | First treatment |
|---|---|---|---|
| Broad wrinkle | Several shallow ridges across 20-100 mm | Often greatly reduced | Dry pressing for 24-48 hours |
| Light bend | One soft curve without a sharp line | Frequently disappears | Press between smooth sheets |
| Sharp crease | Narrow line with a white or shiny ridge | Usually reduced, rarely erased | Dry pressing, then cautious heat only on ordinary paper |
| Fiber fracture | White line, split surface, or weak hinge | Permanent structural damage | Stop DIY treatment and assess value |
| Water wrinkle | Ripples, cockling, or tide line | May worsen during drying | Slow drying under blotters |
| Embossed fold | Raised or recessed line | Often remains | Professional conservation for valuable paper |
A useful practitioner rule is simple: if the crease changes the paper’s color, gloss, or thickness, treat it as structural damage rather than a surface wrinkle. More pressure may flatten the sheet while making the line wider or shinier.
Which Method Is Safest for Origami Paper?
Dry pressing is the safest method for most origami sheets because it adds no moisture, solvent, or heat. Humidification can relax stubborn paper, but it also changes dimensions and can distort the carefully measured geometry that origami depends on.
| Method | Best paper | Typical time | Main risk | Recommended use |
|---|---|---|---|---|
| Dry pressing | Plain kami, printer paper, uncoated diagrams | 24-48 hours | Incomplete flattening | First choice for most sheets |
| Low-heat ironing | Plain, uncoated paper without sensitive ink | 5-10 minutes | Shine, scorching, ink transfer | Disposable or replaceable paper |
| Controlled humidity | Thick, flexible, uncoated paper | 4-12 hours | Cockling, tide lines, mold | Experienced handling only |
| Professional conservation | Historic, signed, rare, or valuable paper | 2-6 weeks typical | Cost and treatment delay | High-value material |
For an origami model, place a smooth interleaving sheet over the paper before adding weight. Do not use a textured towel, embossed book cover, or rough blotter directly against the sheet because texture can transfer into softened fibers.
How Do You Press a Creased Origami Sheet Flat?
Pressing a creased origami sheet flat requires two smooth protective sheets, a rigid support, evenly distributed weight, and a slow drying period. The complete process usually takes 24-48 hours, and the most important factor is keeping the paper aligned without crushing intentional folds.
Before you start
| Requirement | Typical specification | Why it matters |
|---|---|---|
| Flat support | Rigid board, 5-10 mm thick | Prevents pressure points |
| Protective sheets | Two clean, unprinted sheets | Stops ink and texture transfer |
| Weight | 2-5 kg spread over the sheet | Applies even pressure |
| Dry time | 24-48 hours | Lets fibers settle gradually |
| Cost | $0-$15 at home | Uses common household materials |
Use a clean, dry table. Wash and dry your hands first, especially when handling white kami or thin washi, because skin oils can leave translucent marks.
Step 1: Photograph and map the origami folds
Photograph both sides before unfolding or flattening the model. Mark intentional mountain and valley folds on a temporary diagram rather than writing on the original paper.
This step protects the model’s geometry. A finished crane, box, or tessellation may look chaotic when unfolded, and flattening without a reference can make later reconstruction difficult.
Success checkpoint: You can identify which line is accidental and which lines belong to the model.
Common mistake: Treating every visible fold as damage. Origami creases are often the functional structure of the paper.
Step 2: Unfold only the damaged area
Open the model gradually until the accidental crease is accessible. Do not force layers that are locked inside a reverse fold or compressed point.
Place the sheet between two smooth protective papers. Keep curled corners aligned and avoid dragging the paper across the support, which can create new diagonal scratches.
Success checkpoint: The target area lies flat without resistance or popping sounds.
Common mistake: Flattening the entire model when only one corner needs correction.
Step 3: Apply dry, even pressure
Put the protected paper on the rigid board. Add a second flat board or thick book on top, then distribute 2-5 kg of weight across the full surface.
For thin origami paper, begin with 24 hours. For 120-180 gsm cardstock, extend pressing to 48 hours. Replace a protective sheet if it becomes damp or develops transferred ink.
Success checkpoint: The paper feels flatter after removal, with no new ridges around the original crease.
Common mistake: Using a small heavy object. A concentrated weight can create circular dents instead of flattening the sheet.
Step 4: Inspect before repeating
Remove the weight and inspect the crease under indirect light. Compare the surface with the photographs. If the line is paler, narrower, or less reflective, the process worked even if a faint mark remains.
Repeat one additional 24-hour cycle if the paper is dry and stable. Do not immediately add water or heat because the first pressing cycle may continue to relax the fibers after the weight is removed.
Success checkpoint: The sheet holds a flatter shape for at least 10 minutes outside the press.
Common mistake: Chasing a faint line until the paper develops a larger polished or fractured area.
Can You Use an Iron on Origami Paper?
You can use a dry iron on plain, uncoated origami paper, but ironing is a high-risk shortcut for finished models. Use the lowest setting, no steam, two protective sheets, and brief passes only; never iron foil-backed, glossy, photographic, laminated, inkjet-heavy, or historically important paper.
A typical household iron reaches much higher temperatures than paper needs. The goal is not to heat the paper thoroughly. The goal is to apply brief, indirect warmth while the protective layers prevent direct contact.
Test a corner or a spare sheet from the same pack first. Laser toner can soften or transfer, inkjet pigment may tolerate heat better than dye ink, and ballpoint ink may leave a glossy or smeared line under pressure.
Controlled ironing procedure
- Set the iron to its lowest dry setting, commonly labeled synthetic or silk.
- Turn off steam and empty the water reservoir if possible.
- Place the paper between two clean, unprinted sheets.
- Keep the iron moving in short passes of 1-2 seconds.
- Lift the iron frequently instead of sliding hard across the surface.
- Place the warm protected sheet under a flat weight for 20-30 minutes.
Stop immediately if the paper smells scorched, changes color, becomes glossy, sticks to the barrier, or transfers ink. Cooling under pressure matters because warm fibers can spring back when released.
| Paper or print | Ironing suitability | Heat concern | Better approach |
|---|---|---|---|
| Plain white printer paper | Moderate | Low scorching threshold | Dry press first, low heat second |
| Standard kami, 60-80 gsm | Moderate to low | Surface shine and tearing | Dry pressing with smooth sheets |
| Cardstock, 160-300 gsm | Moderate | Uneven heating and edge curl | Longer dry pressing |
| Inkjet print | Low to moderate | Dye migration and smearing | Dry pressing, test first |
| Laser print | Low to moderate | Toner softening or transfer | Barrier plus minimal heat |
| Foil-backed paper | Unsafe | Foil adhesive may soften | Dry pressing only |
| Glossy or laminated sheet | Unsafe | Coating may melt or stick | No heat, use specialist advice |
Ironing cannot repair a split fiber line. It can make the surrounding surface flatter while leaving the fracture visible. That result is normal, not evidence that the iron needs a higher setting.
Should You Add Moisture to Remove a Crease?
Moisture can make paper fibers more flexible, but direct spraying is rarely the safest choice for origami paper. Use controlled ambient humidity only for stable, uncoated paper, and avoid moisture entirely when the sheet contains soluble ink, metallic foil, photographic emulsion, adhesive, or historical material.
A humidification chamber uses vapor rather than liquid water. Place warm distilled water in a separate container inside a larger sealed bin, elevate the paper above the water, and inspect it frequently. The paper must never touch the water.
| Humidification variable | Conservative home range | Stop condition |
|---|---|---|
| Water type | Distilled water only | Any visible droplet on paper |
| Chamber exposure | 30 minutes to 3 hours | Paper becomes limp or wavy |
| Inspection interval | Every 30-45 minutes | Condensation forms on lid |
| Pressing afterward | 24-48 hours | Blotter becomes damp |
| Drying environment | 18-24°C, low light | Mold odor or surface spotting |
Remove the sheet when it becomes slightly more flexible, not wet. Place it between dry, smooth blotting sheets and press evenly. Replace damp interleaving materials after several hours.
Tap water is unsuitable because minerals can leave tide lines and alter the paper’s appearance. Spraying one side is also risky because uneven expansion makes cockling more likely.
What papers should never be humidified at home?
Avoid home humidification for photographs, watercolor paintings, documents with friable media, laminated sheets, foil origami, tissue paper, and paper with unknown adhesives. Fine art and archival documents require a conservator because treatment decisions depend on sizing, media solubility, acidity, and previous repairs.
What Changes for Glossy, Thin, or Handmade Paper?
Glossy, tissue, metallic, and handmade papers require different treatment because their coatings, thicknesses, and fiber structures respond unevenly to pressure. A method that works on ordinary 80 gsm printer paper can permanently mark a 35 gsm tissue sheet or detach a foil layer.
| Paper type | Typical thickness or feature | Main failure mode | Safer treatment |
|---|---|---|---|
| Tissue paper | 17-40 gsm | Tearing and edge distortion | Very light dry pressing |
| Kami | 60-80 gsm | Surface polishing | Smooth interleaving and moderate weight |
| Washi | 50-150 gsm, long fibers | Uneven expansion | Dry pressing, humidity only with experience |
| Cardstock | 180-350 gsm | Layer separation and curl | Rigid boards, 48-hour pressing |
| Glossy paper | Coated surface | Sticking or melted finish | No iron, dry press only |
| Foil paper | Paper plus metallic film | Adhesive failure | No water or heat |
| Handmade paper | Variable fiber and sizing | Local swelling | Conservative dry pressing |
Thin tissue paper should be pressed under a lightweight flat board rather than several heavy books. Handmade washi may have visible formation lines that resemble wrinkles, so inspect it under raking light before treating it.
For glossy magazine paper or photographic paper, place silicone-free release paper or a clean archival interleaf between surfaces, and do not assume a low iron setting is safe. Coatings can soften below the temperature that visibly scorches the paper.
How Long Does Paper Flattening Take?
Typical dry pressing takes 24-48 hours, low-heat ironing takes 5-10 minutes plus 20-30 minutes of cooling, and controlled humidification plus pressing takes 1-3 days. Thick cardstock, cold rooms, high humidity, and deep folds extend the time.
| Situation | Method | Active time | Total typical time |
|---|---|---|---|
| Light bend in printer paper | Dry pressing | 5 minutes | 24 hours |
| Sharp crease in plain paper | Press, then cautious iron | 15 minutes | 1 hour |
| Creased kami sheet | Dry pressing | 10 minutes | 24-48 hours |
| Thick cardstock | Board pressing | 15 minutes | 48 hours |
| Humidified uncoated paper | Chamber and press | 30-60 minutes | 24-72 hours |
| Valuable document | Conservator treatment | Consultation required | 2-6 weeks |
Temperature and humidity matter because paper exchanges moisture with the surrounding air. A damp sheet may look flat when pressed but curl again after acclimating, so judge the result only after several hours outside the press.
Common Mistakes and How to Fix Them
The most damaging mistakes are usually excessive moisture, direct heat, uneven weight, and confusing intentional origami folds with accidental damage. Recovery depends on the failure, but adding more force almost never fixes a chemically or structurally damaged surface.
| Mistake | Visible symptom | Immediate response | Recovery time |
|---|---|---|---|
| Too much water | Waves, ripples, cockling | Move between dry blotters | 24-48 hours |
| Direct ironing | Shine, scorch, transfer | Stop heat and cool flat | 1-2 days |
| Uneven weight | Circular dents or new ridges | Repress under a rigid board | 24 hours |
| Rough barrier | Texture imprinted | Replace interleaf | 24-48 hours |
| Closed damp chamber | Musty odor or spots | Remove, ventilate, dry slowly | Varies |
| Forced unfolding | Torn hinge or split fiber | Stop handling | Professional assessment |
If paper begins bubbling, separate the sheets while still safe to handle and let the paper dry between clean blotters. Do not place wet paper directly under a heavy book because trapped moisture can produce tide lines, adhesive transfer, or mold.
If a crease remains after two dry pressing cycles, accept the limit or seek professional advice. Repeated ironing and misting can enlarge the damaged zone even when the original line becomes slightly less visible.
When Should You Hire a Paper Conservator?
Hire a paper conservator when the document is rare, signed, historically significant, financially valuable, or printed with media that could dissolve or transfer. DIY pressing is reasonable for replaceable practice paper, but a certificate, original artwork, antique map, signed origami, or collectible should be assessed before treatment.
Typical conservation pricing varies by location and complexity. A basic consultation may cost $50-$150, while treatment for a single valuable sheet commonly ranges from $100 to $500 or more. Ask for a written condition assessment, treatment plan, handling limits, and estimate.
Look for a professional affiliated with the American Institute for Conservation or an equivalent regional conservation organization. A qualified conservator will examine paper fibers, surface coatings, media, previous repairs, and deformation before selecting pressure, humidity, or flattening equipment.
Paper conservators cannot guarantee invisible results. They can often improve flatness and stability, but a fractured fold, missing fiber, or discolored line may remain part of the object’s condition.
How Can You Prevent New Origami Creases?
Preventing unwanted origami creases is easier than removing them because the paper’s fold map remains under your control. Store unused sheets flat, handle models by supported areas, and separate finished pieces with smooth archival interleaving.
Use a portfolio or rigid box for flat sheets. Avoid overfilled folders, rubber bands, paper clips, and loose storage in bags because each can create localized pressure. Keep paper away from radiators, sunny windows, kitchens, and damp basements.
For finished origami, support the model inside a box with acid-free tissue or polyethylene foam. Do not stack heavy books directly on delicate points, wings, flaps, or raised tessellations.
| Prevention practice | Specific recommendation | Benefit |
|---|---|---|
| Flat storage | Portfolio at least 10 mm larger than sheets | Prevents edge curling |
| Humidity control | Stable indoor range around 35-55% RH | Limits expansion and contraction |
| Interleaving | Acid-free tissue between models | Reduces rubbing and transfer |
| Handling | Lift with two clean, dry hands | Avoids hinge stress |
| Transport | Rigid folder inside a padded case | Prevents point dents |
| Model display | Support internal cavities | Preserves geometry |
A small accidental crease in practice origami paper is often acceptable because paper folding is a subtractive process: once fibers have been compressed, the line may remain as part of the sheet’s history. For a finished model, preserving the surrounding structure is more important than achieving a visually perfect blank sheet.
FAQ
Can a crease disappear completely?
A light bend or broad wrinkle can disappear completely after dry pressing. A sharp fold usually leaves some evidence because compression, stretching, surface polishing, or fiber fracture has changed the sheet. If the line is white, shiny, split, or thinner than surrounding paper, complete removal is unlikely.
Does putting paper under a mattress remove a crease?
A mattress can provide broad pressure, but it does not provide a rigid, even pressing surface. Paper may pick up bedding texture, remain curved, or develop new dents. A clean board, two smooth interleaves, and evenly distributed books produce more predictable pressure over 24-48 hours.
Can a hair dryer flatten creased paper?
A hair dryer is a poor choice because moving hot air dries paper unevenly and can curl edges. The airflow may also disturb loose pigment, tissue paper, or lightweight origami sheets. If heat is appropriate, indirect low-temperature ironing with a barrier gives more controlled contact.
Can you remove a crease from a wet origami model?
Do not flatten a wet origami model immediately. Support the model, separate stuck surfaces without force, and allow it to dry slowly between suitable smooth interleaves if the paper is uncoated and replaceable. Valuable or painted models should go to a conservator because wet paper tears easily.
Is pressing better than ironing for origami?
Pressing is better for most origami because it avoids scorching, ink transfer, coating damage, and accidental erasure of fold detail. Ironing is faster on plain replaceable paper, but its benefit is mainly speed rather than a better final restoration.
Can you remove a crease from paper without unfolding it?
You can reduce a crease without fully unfolding the model by supporting adjacent layers and pressing only the accessible area. The result is less predictable because hidden folds continue to resist flattening. Photograph the model first and never force a locked fold open just to reach one damaged line.
The Bottom Line
You can remove or reduce a paper crease, but a deep fold may remain permanently visible. For origami paper, begin with smooth dry pressing for 24-48 hours, use low heat only on tested plain paper, avoid direct moisture on sensitive materials, and preserve the model’s intentional crease map. The safest treatment is the least aggressive one that produces a stable improvement.
