


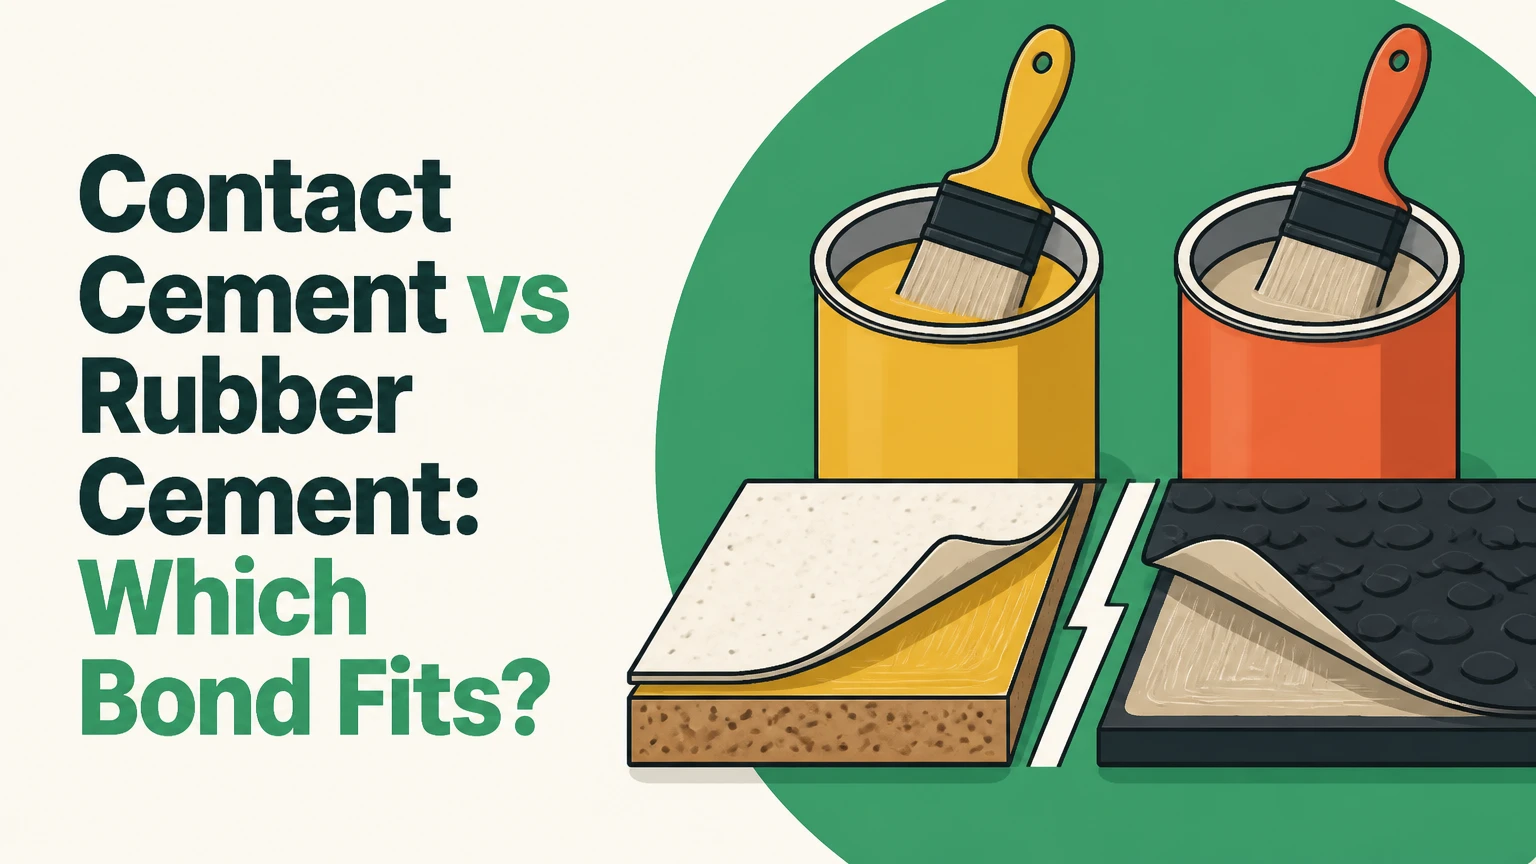
Contact cement is the better choice for permanent, high-strength bonds between laminate, wood, leather, metal, and other rigid or flexible substrates. Rubber cement is better for temporary, repositionable work on paper, photographs, lightweight crafts, and layout mockups. The decisive differences are bond strength, reversibility, heat resistance, solvent exposure, and surface compatibility.
Key Facts at a Glance
- Contact cement normally requires adhesive on both mating surfaces, followed by solvent evaporation and firm pressure.
- Rubber cement can bond one surface to another while wet and usually permits limited repositioning before final drying.
- Contact cement usually provides greater shear strength and water resistance than office or craft rubber cement.
- Rubber cement is easier to remove from many smooth surfaces, but residue, staining, yellowing, and aging depend on the formula and substrate.
- Solvent-based contact cement can ignite easily and may dissolve expanded polystyrene foam, while water-based versions have different drying requirements.
- Neither adhesive is automatically suitable for archival artwork, food-contact surfaces, structural repairs, or every plastic.
What Is the Difference Between Contact Cement and Rubber Cement?
Contact cement is a high-tack adhesive intended to create a strong bond after both surfaces receive adhesive and the solvent flashes off. Rubber cement is a rubber-based adhesive intended for flexible, low-load, often temporary attachment, especially on paper and lightweight materials.
The names are related because both products use rubbery polymers, but their practical behavior differs. Contact cement forms a continuous, aggressive adhesive film that resists sliding and peeling after pressure is applied. Rubber cement forms a less aggressive film that allows easier separation and cleanup.
“Rubber cement” is also a broad retail category. An office product, leather cement, and tire-patch vulcanizing fluid can have substantially different chemistry and performance. Always use the label and technical data sheet for the specific product rather than treating the category name as a complete specification.
| Attribute | Contact cement | Rubber cement | Practical consequence |
|---|---|---|---|
| Primary polymer family | Neoprene, polychloroprene, nitrile, or synthetic rubber | Natural rubber or synthetic rubber | Formula controls flexibility and durability |
| Typical application | Both surfaces | One or both surfaces | Contact cement demands more preparation |
| Bond character | Permanent, high tack | Temporary to semi-permanent | Rubber cement suits layouts and mockups |
| Main strength mode | Shear and peel resistance | Flexible peel and light holding | Contact cement handles higher loads |
| Common substrates | Laminate, wood, leather, metal | Paper, photos, cardstock, light leather | Wrong substrate can cause failure |
| Removal | Difficult after full bond | Often possible by peeling or rubbing | Rubber cement offers more correction time |
How Do the Adhesives Work?
Contact cement works through solvent evaporation and intimate contact between two dried adhesive films. Rubber cement works through a rubber-polymer film that grips the substrate mechanically and adheres without the same high-load contact-bond design.
Contact Cement Bond Formation
Apply contact cement evenly to both surfaces. The carrier solvent must evaporate until the coating is dry to the touch but still aggressively tacky. When the surfaces meet, pressure brings the polymer films into close contact and establishes the bond.
The process is not best described as instantaneous cross-linking. Many conventional contact cements do not chemically cross-link the moment the faces touch; the immediate strength comes mainly from pressure-sensitive polymer contact, solvent loss, and mechanical interlocking. Some specialty products cure further through chemical reactions, so the label remains authoritative.
Contact cement is strongest when the joint is tight, the surfaces are clean, and pressure is uniform. It is not a gap-filling adhesive. A warped laminate sheet or dusty particleboard core can produce voids that remain weak even when the surrounding bond feels strong.
Rubber Cement Film Formation
Rubber cement deposits rubber solids as its solvent evaporates. A wet application permits adjustment, while a thin dried film can provide a temporary dry mount. The resulting bond remains flexible, but it generally has lower resistance to sustained shear, heat, water, and aging than contact adhesive.
Rubber cement’s removability is a practical feature, not a guarantee. Smooth paper, glass, and coated stock may release cleanly, whereas porous paper, uncoated board, fabric, and old adhesive can retain oil or rubber residue.
Which Adhesive Is Stronger and More Durable?
Contact cement is typically stronger and more durable than rubber cement, particularly under shear, heat, moisture, and repeated handling. Rubber cement wins when reversibility, low paper distortion, and easy cleanup matter more than load-bearing capacity.
Published product specifications vary widely, so the figures below are typical working ranges, not universal standards. A contact cement designed for decorative laminate can outperform a general-purpose tube, while a specialty industrial rubber adhesive can exceed ordinary office rubber cement.
| Performance criterion | Contact cement, typical | Rubber cement, typical | Selection meaning |
|---|---|---|---|
| Tensile or shear range | 200-500+ psi for selected products | 5-20 psi for office-grade products | Use contact cement for load-bearing joints |
| Flash-off before joining | 15-30 minutes | 0-5 minutes | Contact cement needs a deliberate waiting stage |
| Functional cure | 24-72 hours | 1-24 hours | Avoid heavy stress before the label cure time |
| Heat tolerance | About 65-80°C for common grades | Often below 40-60°C | Rubber cement softens sooner |
| Water resistance | Moderate to high, product dependent | Low to moderate | Contact cement suits many kitchen and workshop uses |
| Repositionability | Nearly zero after contact | Limited before drying | Rubber cement is safer for evolving layouts |
| Gap filling | Poor | Poor | Neither replaces a gap-filling construction adhesive |
The highest practical strength also depends on joint design. A broad, tight laminate bond can perform well, while a narrow leather tab may fail because the substrate tears before the adhesive releases. Test the actual materials when the joint carries safety, weight, or repeated movement.
Which Adhesive Should You Choose for Your Materials?
Choose contact cement for laminate, veneer, countertops, shoe soles, heavy leather, and broad wood-to-plastic bonds. Choose rubber cement for paper layouts, temporary pattern placement, lightweight collage, and repositionable craft work.
| Project or material pair | Better starting choice | Typical reason | Main caution |
|---|---|---|---|
| Plastic laminate to plywood | Solvent-based contact cement | Broad, permanent surface bond | Align with dowels because sliding is impossible |
| Veneer to a stable panel | Contact cement or veneer adhesive | High tack over a wide area | Traditional veneer work may require a different adhesive |
| Leather outsole to leather midsole | Leather contact cement | Strong flexible bond under shear | Roughen and clean both leather surfaces |
| Paper template to cardstock | Acid-free rubber cement | Temporary placement | Test for oil staining and paper lift |
| Photograph to presentation board | Photo-safe rubber cement or archival alternative | Low wrinkle risk | Confirm archival claims on the exact label |
| Origami paper to a hidden support | Repositionable adhesive or tiny rubber-cement dots | Minimal visible distortion | Avoid saturating thin paper |
| Expanded polystyrene foam | Water-based compatible adhesive | Solvent safety | Many solvent cements dissolve EPS |
| Metal to wood under high load | Product-specific contact adhesive or epoxy | Higher load and moisture resistance | Degrease metal and test the coating |
Is Contact Cement Good for Leather?
Contact cement is usually the better adhesive for leather joints that must remain attached under flexing, shear, or repeated abrasion. Leatherworkers commonly apply a thin coat to both roughened surfaces, allow it to become tacky, then hammer or roll the joint firmly.
Rubber cement can temporarily hold pockets, straps, or lining pieces while a leatherworker marks, punches, or stitches. It is useful as a positioning aid, but ordinary office rubber cement is a poor substitute for a structural outsole adhesive. Heavy leather, oily finishes, and smooth corrected grain can also reduce adhesion.
Is Rubber Cement Suitable for Paper, Photos, and Origami?
Rubber cement is often suitable for temporary paper layouts because its flexible film creates less wet distortion than water-rich PVA glue. Photo-safe and acid-free claims improve suitability, but they do not prove long-term archival permanence unless the product documentation defines the standard and storage conditions.
Origami requires extra restraint. Thin kami or tissue paper can wrinkle, darken, curl, or show a glossy spot when exposed to solvent. For a clean model, apply a very small amount to a hidden flap with a fine applicator, test on a spare sheet, and keep the fold dry whenever the design can hold without adhesive.
Contact cement is generally unsuitable for ordinary origami. Its aggressive tack, solvent odor, irreversible placement, and potential paper staining make it difficult to control on small folds. Contact cement has a narrow role in heavy paper sculpture, bookboard, or mixed-media structures where broad permanent attachment matters more than fold reversibility.
How Long Do Contact Cement and Rubber Cement Take?
Contact cement commonly needs 15-30 minutes of flash-off before assembly and 24-72 hours for full performance. Rubber cement commonly joins within minutes and reaches practical handling strength in roughly 1-24 hours, although temperature, humidity, film thickness, and porosity change the timing.
The product label overrides generic timing. LePage’s contact-adhesive guidance and major manufacturer instructions emphasize waiting for the adhesive to become tacky rather than joining while visibly wet. Thick coats extend drying and trap solvent, which can weaken the joint.
| Timing stage | Contact cement | Rubber cement | Checkpoint |
|---|---|---|---|
| Application period | 2-10 minutes per surface | 1-5 minutes | Coating remains smooth and continuous |
| Wait before joining | 15-30 minutes typically | Immediate to 5 minutes | Film is tacky, not wet or stringy |
| Safe light handling | 30-120 minutes | 15-60 minutes | Joint is not being peeled or shifted |
| Full practical cure | 24-72 hours | 1-24 hours | Bond tolerates intended service |
| Longer delay risk | Excessive drying can reduce tack | Skin formation can reduce wet grip | Follow the specific product directions |
How Do You Apply Each Adhesive Correctly?
Contact cement requires precise two-sided application, a controlled flash-off, and firm pressure, while rubber cement requires a thin controlled film and gentle alignment before the adhesive dries. Surface preparation and coating thickness determine more outcomes than brand preference.
Contact Cement Application
- Prepare both surfaces. Remove dust, grease, wax, and loose fibers. Lightly abrade compatible surfaces with 80-120 grit abrasive, then remove sanding dust.
- Protect the work area. Use ventilation, chemical-resistant gloves, eye protection, and a solvent-resistant pad. Keep flames, pilot lights, sparks, and smoking materials away.
- Apply two thin coats if the substrate is porous. Coat both faces with a solvent-resistant brush or roller. Porous particleboard may absorb the first coat.
- Wait 15-30 minutes. Join only when the film feels dry and tacky. A wet, glossy layer is not ready.
- Create alignment guides. Place clean dowels, strips, or waxed spacers across the base. This prevents premature contact on large panels.
- Mate the surfaces once. Remove spacers progressively and lower the top piece without sliding it.
- Apply pressure. Use a J-roller from the center outward, or press with a rubber mallet through a protective board. Cover every region.
- Allow cure. Keep the assembly unloaded for 24-72 hours, according to the label.
You will know the bond is developing correctly when the surfaces meet without adhesive squeeze-out and the panel has no hollow areas under rolling pressure. The common mistake is joining while wet, which traps solvent and produces weak spots or bubbles.
Rubber Cement Application
- Test the material. Apply a small amount to a hidden edge or scrap of the same paper, photo, leather, or board.
- Use a thin coat. Apply to one surface for a temporary mount. Use two surfaces only when the instructions or project requires a stronger dry film.
- Join while wet or tacky. Place the second piece immediately, then adjust alignment with light fingertip pressure.
- Burnish carefully. Smooth from the center outward with a clean card, avoiding pressure that transfers adhesive through thin paper.
- Remove excess after drying. Roll or rub a narrow residue bead gently on compatible smooth stock. Stop if the paper pills, tears, or discolors.
- Close the container immediately. Solvent evaporation thickens rubber cement and shortens its usable life.
You will know the mount is suitable when the paper lies flat without glossy bleed-through or edge curl. The common mistake is applying a thick coat, which lengthens drying and increases staining.
What Are the Main Product Types?
Contact cement is sold mainly as solvent-based liquid, water-based liquid, and aerosol spray. Rubber cement is sold as office-grade, photo-safe, leather-oriented, and specialized vulcanizing fluid, and these categories should not be substituted casually.
| Product type | Typical package | Best-fit use | Important limitation |
|---|---|---|---|
| Solvent contact cement | 3 oz tube to gallon can | Laminate, veneer, leather | VOCs, flammability, foam attack |
| Water-based contact adhesive | 8 oz bottle to quart | Indoor craft and selected panels | Longer drying and moisture sensitivity during cure |
| Spray contact adhesive | 12-16 oz aerosol | Upholstery and broad lightweight panels | Overspray, ventilation, uneven coverage |
| Office rubber cement | 4-8 oz brush-cap jar | Paper layouts and collage | Low structural strength and possible aging |
| Leather rubber cement | 4-16 oz container | Temporary leather positioning | Not necessarily suitable for final assembly |
| Vulcanizing fluid | Small tire-repair tube | Rubber tube patching | Specialized chemistry, unsuitable for artwork |
Aerosol contact adhesive is not simply liquid contact cement in a more convenient container. Spray patterns, overspray, solids content, and open time differ. Mask adjacent surfaces and follow the can’s distance and ventilation instructions.
Tire vulcanizing fluid deserves special separation from craft rubber cement. Products marketed for tire or tube repair use specialized rubber-bonding chemistry and are not appropriate for photographs, origami, or archival paper.
Which Adhesive Costs More?
Contact cement typically costs more per fluid ounce and requires more adhesive because both surfaces receive a coating. Rubber cement usually costs less for small paper projects, but repeated replacement can erase the initial price advantage when the bond is exposed to heat, handling, or moisture.
Retail pricing changes by country, package size, brand, and retailer. The following ranges are typical United States consumer prices rather than fixed market prices.
| Purchase factor | Contact cement | Rubber cement | Budget implication |
|---|---|---|---|
| Small package | $4-$12 for 3-8 oz | $3-$9 for 4-8 oz | Rubber cement costs less for occasional paper work |
| Approximate price per fluid ounce | $1.25-$4.50 | $0.50-$2.25 | Contact cement often has the higher unit price |
| Coverage per 8 oz | About 12-30 sq ft of total coated surface | About 20-50 sq ft of single-sided paper | Contact cement coats two faces |
| Typical setup cost | $8-$35 including roller and abrasive | $3-$15 including applicator | Large laminate jobs need more tools |
| Waste concern | Solvent evaporation and contaminated rags | Dried jar residue | Close both containers promptly |
For a countertop or large laminate panel, the cost of failed alignment is much higher than the adhesive price. For a one-page mockup, paying for a small rubber-cement jar is usually more economical than opening a quart of contact adhesive.
What Safety Differences Matter?
Solvent-based contact cement usually presents the greater immediate hazard because volatile organic compounds can accumulate, ignite, irritate airways, and cause harmful exposure in poorly ventilated spaces. Rubber cement also contains volatile solvents in many formulas, so its lower bonding strength does not make it automatically safe indoors.
Use cross-ventilation, keep containers closed, wear the personal protective equipment specified by the safety data sheet, and avoid ignition sources. Do not assume a dust mask protects against solvent vapor. A respirator must be selected for organic vapors and used under an appropriate workplace respiratory-protection program.
| Hazard | Contact cement | Rubber cement | Safer practice |
|---|---|---|---|
| VOC odor | High for solvent grades | Moderate to high | Ventilate from the source outward |
| Flammability | Common solvent grades are flammable | Many formulas are flammable | Remove flames, sparks, and hot tools |
| Skin exposure | Can defat and irritate skin | Can irritate and dry skin | Wear compatible nitrile or label-specified gloves |
| Foam compatibility | Solvents may dissolve EPS | Solvents may also attack foam | Test scrap before full application |
| Indoor suitability | Water-based grade may be preferable | Small amounts with ventilation | Read the SDS and product label |
| Disposal | Solvent-contaminated waste can ignite | Solvent waste can ignite | Follow local hazardous-waste rules |
Do not pour adhesive, thinner, or contaminated solvent into a household drain. Store containers upright, sealed, and away from heat. Local regulations control disposal.
What Are the Best Alternatives?
PVA glue is usually the best low-cost alternative for porous paper and wood when some moisture and longer clamp time are acceptable. Double-sided tape is cleaner for temporary flat assembly, while epoxy is better for selected rigid, high-load joints that need gap filling.
| Alternative | Typical open time | Typical strength profile | Best use |
|---|---|---|---|
| PVA wood glue | 5-15 minutes | Strong on porous wood and paper | Wood joints and bookboard |
| Archival PVA | 5-20 minutes | Flexible paper bond | Book arts and conservation-style crafts |
| Double-sided tape | Immediate | Low to moderate peel resistance | Templates, cards, temporary layouts |
| Spray mount | 1-10 minutes | Broad, thin coating | Posters, stencils, presentation boards |
| Two-part epoxy | 5-60 minutes | High strength and gap tolerance | Metal, rigid plastics, selected repairs |
| Polyurethane adhesive | 20-60 minutes | Strong, moisture-reactive expansion | Outdoor or porous construction work |
PVA is usually a poor choice for thin origami because its water content can cockle paper and soften sharp creases. A dry adhesive film, tiny glue dot, or hidden mechanical tab may preserve the model more effectively.
Epoxy is usually excessive for laminate-to-panel work because it costs more, mixes in fixed quantities, and does not provide the broad, immediate tack that makes contact cement practical. Adhesive selection should follow joint geometry, not strength marketing alone.
What Mistakes Cause Bond Failure?
The most common contact-cement failure is joining wet surfaces, while the most common rubber-cement failure is applying too much adhesive to a porous or delicate substrate. Both products also fail when the surface contains wax, oil, dust, loose fibers, or incompatible coatings.
| Failure mode | Likely cause | Corrective action | Prevention |
|---|---|---|---|
| Contact bond slides | Surfaces joined before flash-off | Separate if possible, remove residue, restart | Use the label timing and tack test |
| Contact panel has bubbles | Uneven pressure or trapped solvent | Re-roll edges; replace if cured voids remain | Roll center outward |
| Rubber cement wrinkles paper | Thick wet coat or solvent swelling | Lift carefully and allow evaporation | Use a thin test coat |
| Adhesive peels from metal | Oil, oxide, or smooth coating | Degrease and abrade compatible metal | Wipe with approved cleaner |
| Rubber cement turns lumpy | Jar left open | Replace or use only label-approved thinner | Close cap after every use |
| Bond fails in heat | Adhesive softening | Rebond with a heat-rated product | Check service-temperature data |
A failed contact-cement joint should not be repaired by brushing fresh adhesive over a contaminated, partly cured film. Remove loose material, clean the surfaces according to the manufacturer’s instructions, and test a fresh bond on scrap.
A practitioner rule is simple: if a joint must carry load, test both the adhesive and the substrate. Adhesive failure, substrate tear-out, laminate delamination, and paper fiber failure are different failure modes.
Which Should You Choose?
Choose Contact Cement for Laminate and Permanent Panels
Choose solvent-based or compatible water-based contact cement when a laminate sheet must bond permanently to plywood, MDF, or particleboard across a broad area. Contact cement provides immediate positioning strength after flash-off and avoids long clamping, but placement must be accurate on the first attempt.
Choose Rubber Cement for Temporary Paper Layouts
Choose acid-free, photo-safe rubber cement for temporary layouts, pattern positioning, collage mockups, and removable paper assembly. Rubber cement is easier to adjust and clean than contact cement, but it is a poor choice for a load-bearing or heat-exposed joint.
Choose a Leather Contact Adhesive for Structural Leather
Choose leather-grade contact cement for soles, reinforcement patches, broad strap joins, and other leather areas exposed to flexing and shear. Use rubber cement only for temporary alignment before stitching or for a project whose specification explicitly calls for a removable bond.
Choose a Tested Dry Method for Origami
Choose no adhesive when the origami design can hold through folds, tabs, or interlocking construction. When adhesive is necessary, test a tiny hidden application on the exact paper because solvent, coating, colorant, and paper weight determine whether the result remains flat and clean.
Frequently Asked Questions
Can You Use Contact Cement on Paper?
Contact cement can adhere paper to board or another stable surface, but it is usually a poor choice for delicate paper because solvent can stain, curl, or distort the sheet. Contact cement also creates an irreversible bond, making alignment and later conservation difficult. Use a compatible archival adhesive or dry mounting method when reversibility matters.
Can Rubber Cement Bond Wood?
Rubber cement can temporarily hold lightweight wood, veneer patterns, or templates, but ordinary office rubber cement is not a dependable structural wood adhesive. Wood movement, moisture, heat, and sustained shear can break the bond. Use PVA, contact adhesive, or a product specifically rated for the wood joint.
Can You Paint Over Contact Cement?
Painting over contact cement is unreliable unless the adhesive manufacturer approves the coating system. The surface may remain flexible, solvent-sensitive, or too nonporous for good paint adhesion. Allow full cure, test the primer and paint on scrap, and avoid coating an uncured or glossy adhesive film.
Is Rubber Cement Waterproof?
Most office-grade rubber cement should not be assumed waterproof. Moisture can weaken the rubber film or penetrate the paper substrate, and prolonged wet exposure can produce peeling. Select a product with an explicit water-resistance claim if the project will encounter humidity, splashes, or outdoor conditions.
Does Contact Cement Expire?
Contact cement can thicken, skin over, separate, or lose performance as solvents evaporate and polymers age. A sealed container stored under the label’s temperature conditions may last longer than an opened jar. Do not thin it with an unapproved solvent, and discard material with unexplained gel, separation, or poor tack.
Can You Remove Contact Cement?
Fully cured contact cement is difficult to remove without damaging the substrate. Mechanical scraping, controlled heat, or a manufacturer-approved solvent may work on some surfaces, but each method can soften plastics, strip finishes, or spread residue. Test an inconspicuous area and treat removal as a restoration task, not routine cleanup.
The Bottom Line
Contact cement vs rubber cement is fundamentally a choice between permanent performance and controlled reversibility. Select contact cement for strong, broad, moisture-resistant bonds on laminate, wood, leather, and compatible materials; select rubber cement for temporary paper layouts, photos, lightweight crafts, and carefully tested origami applications. Always verify the exact product label, substrate compatibility, cure time, and ventilation requirements before bonding the finished piece.
