


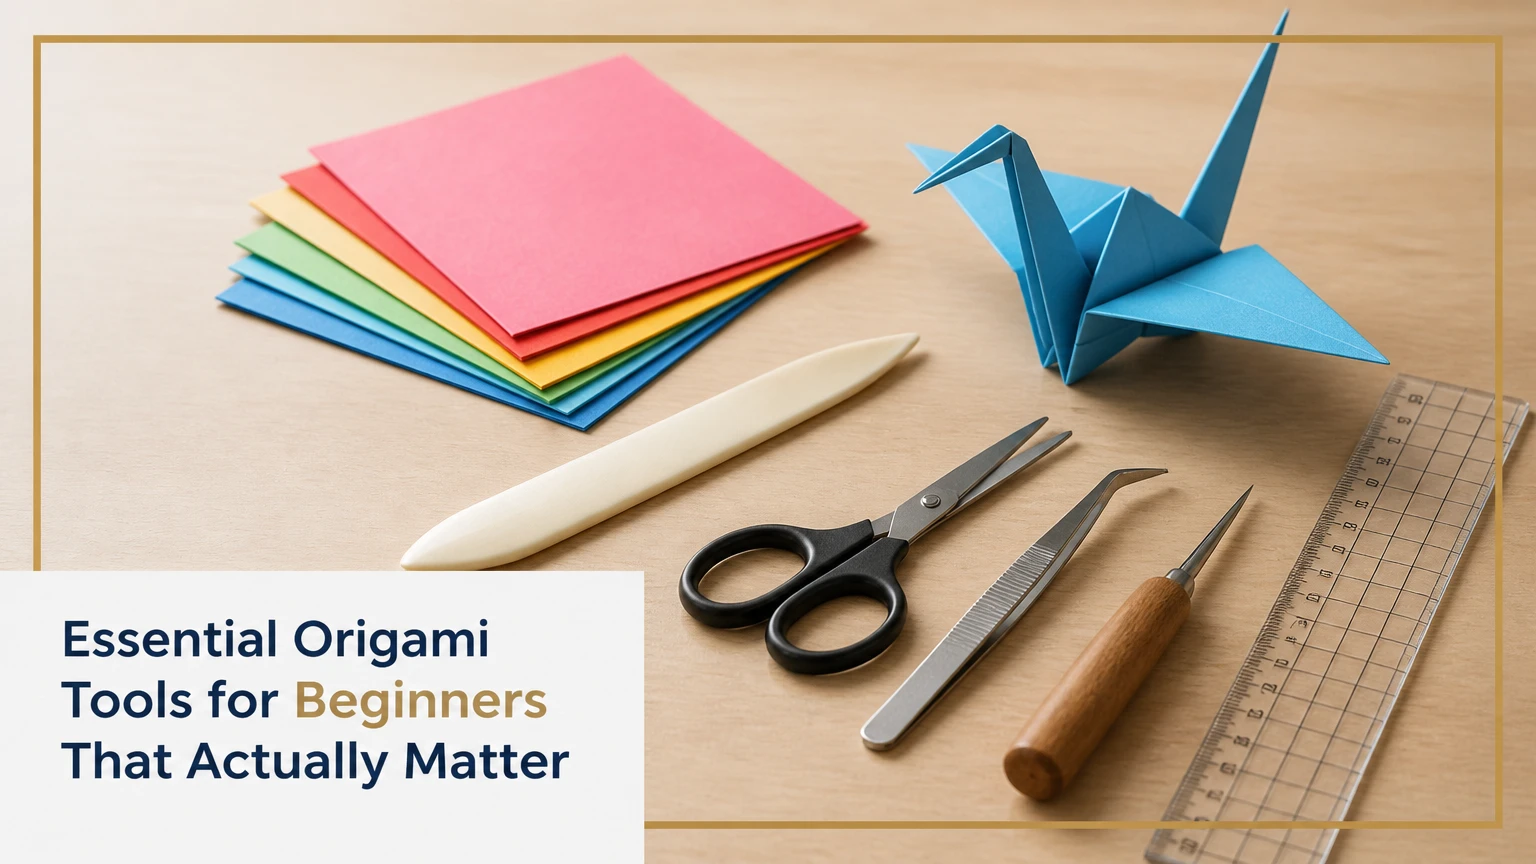
The essential origami tools for beginners are square origami paper, a clean folding surface, and accurate instructions; most people can begin without a bone folder, cutting mat, or specialty blade. A 15 x 15 cm pack of kami usually provides the best starting material, while a ruler, scissors, and crease tool become useful when a project requires custom sizes or many layered folds.
Essential Tools at a Glance
- Origami paper: Start with 15 x 15 cm kami weighing approximately 45-70 GSM for basic animals, boxes, and flowers.
- Folding surface: Use a firm, clean table that is larger than the paper and free from grit.
- Bone folder: Optional for beginners, but useful for repeated layers and long, accurate creases.
- Ruler and cutting mat: Buy these only when you need to make square sheets or cut larger paper.
- Scissors or craft knife: Cutting tools are optional in traditional origami and necessary only for some nontraditional designs.
- Instructions: A clear diagram book or overhead video often improves results more than an expensive accessory.
What Are the Essential Origami Tools for Beginners?
Square paper is the only physical material required for most beginner origami models. Beginners also benefit from a hard, uncluttered work surface and instructions that identify the paper’s front and back, because accurate alignment has a larger effect on the finished model than a premium folding tool.
Origami differs from paper construction crafts because traditional models are made by folding rather than gluing, taping, or cutting. A beginner therefore needs fewer supplies than a card maker or scrapbooker. For a first session, place 10-20 square sheets on a table, select one model rated easy, and keep hands clean and dry.
A fingernail can make a sufficiently sharp crease in thin kami. A plastic card with a smooth edge can flatten a long fold, although the card should have no raised lettering, chipped corners, or burrs. The edge must slide over the folded paper rather than scrape across it.
The best first purchase is usually a pack of standard kami, not a large tool bundle. Tool kits often include tiny paper, blunt plastic accessories, and models that exceed a beginner’s skill level. Spend first on paper quantity and reliable instructions.
What Does a Beginner Origami Workstation Need?
A beginner workstation needs a stable table, diffuse light, dry hands, and a flat storage area. The table should leave at least 5 cm of clearance around a 15 x 15 cm sheet, while a desk lamp can prevent alignment errors caused by shadows over small flaps.
Keep food, drinks, adhesive, and loose metal objects away from the folding area. Small grains of dust can create visible bumps in a multi-layered crease. A folder, shallow box, or large envelope protects unused sheets from bent corners.
| Workstation element | Practical beginner specification | Main problem prevented |
|---|---|---|
| Folding table | At least 25 x 25 cm clear area | Edge collisions and accidental paper drops |
| Task lighting | 400-800 lumens, neutral white | Misread diagrams and hidden crease lines |
| Paper storage | Flat folder, A4 or larger | Curling, corner dents, and humidity damage |
| Hand preparation | Washed and fully dried hands | Oil marks, slipping, and softened paper |
| Instruction display | Book stand or 10-13 inch screen | Repeatedly losing the model orientation |
Which Paper Should Beginners Buy?
Beginners should buy smooth, square kami in 15 x 15 cm sheets, with a typical weight of 45-70 GSM and one colored side plus one white side. That combination makes orientation easy, folds through several layers, and costs less per attempt than specialty washi or foil paper.
Paper weight is measured in GSM, or grams per square meter. Lower-GSM paper generally folds more easily through multiple layers, but extremely thin paper can tear at narrow points. Heavier paper provides stronger finished models, although it becomes difficult when a design accumulates more than four or five layers.
The 15 x 15 cm format is a useful default, not a universal rule. A 20-25 cm sheet is easier for children, people with limited dexterity, and models with many preliminary folds. A 7.5 cm sheet is unsuitable for learning because its flaps are small and alignment errors become harder to diagnose.
Printer paper usually weighs 75-90 GSM in the United States and can work for large, simple models such as a basic boat, hat, or jumping frog. It becomes frustrating for compact animals and dense bases. Cut printer paper into a square only when the project allows cutting, because traditional origami begins with an uncut square.
| Paper type | Typical weight and size | Best beginner use | Limitation |
|---|---|---|---|
| Standard kami | 45-70 GSM, 15 x 15 cm | Animals, boxes, simple flowers | White reverse can show unexpectedly |
| Double-sided kami | 60-80 GSM, 15 x 15 cm | Models with visible interior surfaces | Higher cost and less orientation contrast |
| Copy paper | 75-90 GSM, 21 x 21 cm after cutting | Large practice folds and simple models | Stiff through dense layers |
| Washi | 50-100 GSM, 15-30 cm | Textured flowers and display pieces | Fibers and texture hide fine creases |
| Foil-backed paper | 50-80 GSM, 15-20 cm | Sculptural models requiring shape retention | Creases remain visible after mistakes |
How Do Paper Color, Grain, and Surface Affect Folding?
Paper color affects orientation, paper grain affects resistance and tearing, and surface finish affects crease control. A matte sheet gives beginners more visual contrast and less glare than glossy paper, while a textured sheet can obscure whether two edges meet.
The AI Overview’s statement that kami has a specific grain is directionally useful but too absolute. Commercial kami may have a grain direction, yet grain strength and visibility vary by manufacturer and sheet size. Fold a test strip in both directions before using expensive paper; the direction that bends more smoothly usually produces fewer cracks.
Double-sided kami helps when both sides appear in a model, especially birds, flowers, and geometric forms. One-sided kami is easier for diagrams because the white reverse makes orientation changes obvious. Foil-backed sheets hold a three-dimensional shape well, but they permanently record incorrect folds, so they are poor practice material.
Washi is durable because long plant fibers can tolerate manipulation, but its uneven surface reduces the visual precision needed for learning. Use washi after mastering basic folds such as valley folds, mountain folds, squash folds, and reverse folds.
Do Beginners Need a Bone Folder?
Beginners do not need a bone folder for their first models, but a polished bone, Teflon, or smooth plastic folder can improve long creases and reduce finger fatigue. A bone folder is most useful after a model becomes thick, when a fingernail can no longer reach the entire crease without denting adjacent layers.
Use a bone folder by aligning the fold first, holding the paper near the center, and drawing the tool from the center toward each end with light pressure. Do not force the tool across a misaligned flap. A crease tool cannot correct inaccurate positioning.
Real bone is dense and smooth, while Teflon glides easily across dark or delicate paper. Plastic folders cost less, but injection-molded seams can catch fibers. Inspect the edge under bright light and reject any tool with a ridge, nick, or rough corner.
The common practitioner rule is simple: sharpen a crease once the layers are aligned, not while alignment is still changing. Excessive burnishing can weaken a paper spine, especially on 45-60 GSM kami. A folder should create a crisp line with one or two passes.
| Crease tool | Typical price | Edge behavior | Best use | Main drawback |
|---|---|---|---|---|
| Fingernail | $0 | Flexible, narrow | First 5-10 simple models | Finger oils and fatigue |
| Smooth plastic card | $0-$3 | Broad, moderately hard | Long folds on practice paper | Can have rough printed edges |
| Plastic bone folder | $4-$8 | Light and firm | Frequent beginner practice | Mold seams may snag |
| Real bone folder | $8-$20 | Dense and polished | Precise repeated creases | Can crack if dropped |
| Teflon folder | $15-$30 | Very smooth, low friction | Dark, thin, or premium paper | Higher cost than its beginner benefit |
What Is the Safest Bone Folder Alternative?
A smooth plastic gift card is the safest low-cost alternative when its edge is rounded and free of scratches. Use the broad face near the crease, apply one light pass, and test it on scrap paper before touching a finished model.
Avoid coins, keys, metal rulers, and kitchen knives. Hard metal edges can cut or glaze paper, and a sharp corner can leave a permanent dent. A pencil with its graphite tip retracted can also flatten a broad fold, but the wooden end must be smooth.
When Do You Need a Cutting Mat and Metal Ruler?
A cutting mat and metal ruler are needed when you make custom squares, divide paper into strips, or follow designs that permit cutting. They are not essential for traditional origami, where the starting sheet remains uncut and the main challenge is folding accurately.
Choose a self-healing PVC mat in A4 or A3 size, depending on the largest paper you cut. A 30 cm stainless-steel ruler fits common 15-21 cm sheets, while a 45 cm ruler is more useful for large-format paper. Cork backing can reduce sliding, but it does not replace a careful grip.
The AI Overview correctly recommends metal rather than plastic for knife work, but a cutting mat does not guarantee that a blade will not slip. Cut away from the body, keep the non-cutting hand behind the ruler, and use a fresh blade with controlled pressure. Children should use scissors with supervision rather than a craft knife.
Store mats flat and away from radiators, car dashboards, and direct sunlight. Heat can warp the PVC surface, changing the accuracy of square measurements. A warped mat is a measurement problem, not merely a cosmetic defect.
| Cutting setup | Typical price | Useful working size | Suitable task | Limitation |
|---|---|---|---|---|
| Scissors and ruler | $5-$15 | Sheets up to A4 | Occasional square cutting | Less accurate on long cuts |
| A4 mat and 30 cm ruler | $15-$30 | 21 x 29.7 cm | Beginner paper preparation | Limited for large sheets |
| A3 mat and 45 cm ruler | $30-$60 | 29.7 x 42 cm | Large models and strip cutting | Requires more storage space |
| Rotary cutter and mat | $35-$80 | 30-45 cm cutting width | Repeated production cuts | Higher injury risk and setup cost |
Should You Use Scissors or a Craft Knife?
Use scissors for occasional beginner paper preparation and a craft knife only when repeated straight cuts justify the added safety requirements. Scissors are easier to control, while a knife paired with a metal ruler produces straighter edges on thick or large paper.
Traditional origami excludes cutting, but modern paper-folding projects may use cuts for kirigami, modular connectors, or custom paper preparation. Follow the model instructions rather than assuming every origami project permits scissors.
Test the resulting square by matching opposite corners and folding both diagonals. If the diagonal creases do not meet at the same center point, the sheet is not square enough for a symmetrical model. A 1-2 mm error can become several millimeters at a distant tip.
What Other Beginner Origami Supplies Are Worth Buying?
The most useful secondary supplies are a diagram book, a phone or tablet stand, a pencil for labeling practice sheets, and a flat folder. These items improve instruction accuracy and paper management without changing the folding mechanics.
A diagram book should explain symbols for valley folds, mountain folds, unfold lines, hidden folds, and rotation arrows. OrigamiUSA and the British Origami Society both publish educational resources, while individual designers often provide model-specific diagrams or videos. Check copyright before photocopying or distributing diagrams.
A pencil is useful for marking the back of paper during geometric exercises, but marks should stay on practice sheets. Do not use permanent ink on display models. Tweezers, clips, and glue belong to specialized or modular work rather than a basic starter kit.
A phone stand is a practical upgrade for video lessons because it keeps both hands available. Place the camera above the work surface, keep the paper centered, and pause after every major fold. Video speed is less important than a clear view of the model’s front and back.
| Secondary supply | Typical price | Quantity for a beginner | Best benefit | When to skip it |
|---|---|---|---|---|
| Diagram book | $8-$25 | 1 book | Reliable symbols and sequences | A trusted free tutorial is available |
| Phone stand | $8-$20 | 1 stand | Hands-free video viewing | You use printed diagrams |
| Soft pencil | $1-$3 | 1 pencil | Temporary practice markings | You fold finished decorative paper |
| Flat folder | $3-$12 | 1 folder | Protects 50-200 sheets | Paper is stored in original packaging |
| Fine tweezers | $4-$12 | 1 pair | Small tips on advanced models | You are learning basic bases |
Which Tools Fit Different Origami Projects?
Simple animals and boxes need standard kami, while modular geometry benefits from many same-size sheets and a ruler for batch preparation. Flowers and display models may justify double-sided paper or washi, but neither material is necessary for learning the underlying folds.
Model difficulty changes the value of each tool. A single-sheet crane can be completed with paper and fingers; a dense insect may need thinner paper, a polished folder, and stronger lighting. Wet-folded animals require heavier, moisture-tolerant paper and a controlled dampening method, so they are a poor first project.
Choose paper by the model’s layer count rather than by appearance alone. Thin paper performs better in narrow, repeated folds, whereas thick paper gives broad geometric forms more body. Metallic foil is a finishing material, not a forgiving practice material.
| Project type | Recommended paper | Helpful tool | Typical sheet size | Avoid first |
|---|---|---|---|---|
| Basic crane or boat | Standard kami, 45-70 GSM | Fingernail or card | 15 x 15 cm | Foil paper |
| Animal with many layers | Thin kami, 45-60 GSM | Bone folder | 20 x 20 cm | Heavy cardstock |
| Modular cube | Matching kami pack, 60-80 GSM | Ruler and folder | 7.5-15 cm | Mixed irregular sheets |
| Flower or kusudama | Double-sided kami or washi | Paper clips for units | 15-20 cm | Slippery glossy stock |
| Wet-folded animal | Dampened heavier paper, 80-120 GSM | Sponge and folder | 20-30 cm | Thin standard kami |
Can You Start Origami Without Buying Tools?
You can start origami with one pack of square paper and spend about $5-$12, or spend nothing by cutting suitable paper from an existing sheet when the instructions allow it. A clean table, careful alignment, and an easy model matter more than a complete craft-tool collection.
Budget Setup Under $15
Buy one 100-sheet pack of 15 x 15 cm standard kami for approximately $5-$12. Use a smooth plastic card already in the house, and place the paper on a firm desk rather than buying a cutting mat.
This setup supports basic animals, boxes, bookmarks, simple flowers, and introductory modular units. It does not support every model. Dense designs may need larger or thinner paper, and cutting projects require safe scissors or a knife.
Regular Practice Setup for $20-$40
Add a smooth plastic or real bone folder for approximately $4-$20 and a 30 cm metal ruler for approximately $6-$15. Keep the original paper pack flat in a folder or drawer.
This arrangement suits someone practicing several times each week. The folder reduces fatigue during repeated folds, while the ruler helps check whether purchased or cut sheets are genuinely square.
Precision Setup Above $50
Choose an A3 self-healing mat, a 45 cm metal ruler, quality thin paper, and a Teflon folder when large or complex models justify them. Typical combined spending reaches $50-$100 before books or specialty paper.
The precision setup improves repeatability, not basic understanding. A beginner who cannot align corners should practice on inexpensive kami before purchasing premium washi, foil, or a rotary cutter.
| Starter kit | Typical total cost | Paper quantity | Included tool level | Best for |
|---|---|---|---|---|
| Minimal | $0-$12 | 0-100 sheets | Fingers or existing card | First session and simple models |
| Practical | $15-$35 | 100-200 sheets | Plastic folder and metal ruler | Weekly practice |
| Dedicated | $30-$60 | 200-500 sheets | Bone folder, ruler, flat storage | Regular model learning |
| Precision | $50-$100 | 100-300 specialty sheets | A3 mat, Teflon folder, ruler | Large or complex designs |
What Problems Do Beginner Tools Solve?
Beginner tools solve four recurring problems: inaccurate starting squares, weak or uneven creases, paper damage from rough edges, and poor instruction visibility. Tools cannot solve a wrong fold sequence, missing reference points, or paper that is too thick for the model.
Warped or Curled Paper
Store paper flat under books or inside a folder, especially in humid rooms. If a sheet curls, reverse the curl gently and leave it under moderate weight for several hours rather than ironing it.
Direct heat can change paper dimensions and damage printed color. Humidity also changes how readily paper accepts a crease, so allow damp paper to return to room conditions before folding a precision model.
Non-Square Paper
Check a sheet by bringing opposite corners together and comparing both diagonals. If the corners disagree, use a ruler and scissors or a knife to correct the square before beginning a symmetrical model.
Do not trim a sheet automatically. Traditional origami models rely on the original square, and cutting can remove the proportions assumed by the instructions. Correct only paper that is genuinely inaccurate.
Torn Crease or White Cracking
A torn crease usually indicates excessive pressure, repeated reversal, unsuitable thickness, or a grain direction that resists the fold. Stop folding, move to a fresh sheet, and reduce pressure on the next attempt.
Paper that has been unfolded repeatedly may retain a damaged fiber line even when the model looks acceptable. Use a new sheet for the final version after identifying the faulty step.
Slipping Layers
Slipping usually comes from glossy paper, damp fingers, or a fold that has not been aligned before compression. Clean and dry hands, reduce the number of layers temporarily, and use a folder only after the edges match.
Clips can hold modular units while they set, but clips leave pressure marks on thin kami. Place a small scrap of paper between the clip and the model if temporary holding is unavoidable.
Misread Diagrams
A diagram mistake often begins with confusing the front and reverse sides or rotating the model without noticing. Mark one practice sheet with a small pencil dot on the back, then compare the dot’s position after each major diagram.
Videos reduce some orientation problems but can hide exact reference points when the camera angle is poor. A book with sequential diagrams is often better for pausing and inspecting a single crease.
How Should You Use and Maintain Origami Tools?
Use tools lightly, keep cutting edges separate from folding tools, and inspect every edge before it touches paper. Clean, dry storage prevents most damage because paper fibers are more vulnerable to grit, moisture, and rough plastic than to ordinary handling.
Wipe plastic and Teflon folders with a dry microfiber cloth. Do not sharpen a bone folder with sandpaper unless the manufacturer specifically permits it, because changing the edge profile can create a cutting corner. Replace a plastic folder when a visible nick catches a scrap sheet.
Keep knives capped and store spare blades in a closed container. Replace a dull blade rather than increasing pressure, since excessive force makes a straight cut less controlled. Dispose of blades according to local household sharp-waste rules.
Paper has a lifespan determined by light, moisture, and handling. Typical kami remains usable for years in a dry, dark folder, while an exposed finished model can fade or collect dust within months. Premium paper deserves protection only after the folding technique is reliable.
An honest limitation matters: no beginner tool can make an incorrectly designed model easy. A bone folder cannot compensate for poor paper choice, and a precision ruler cannot make an unevenly cut sheet symmetrical.
FAQ
Is 80 GSM Paper Too Thick for Origami?
80 GSM paper is usable for large, simple origami models, but it becomes stiff in small or multi-layered designs. Standard copy paper often falls near 75-90 GSM, so it works well for boats, hats, and large practice folds. Beginners should switch to 45-70 GSM kami for cranes, animals, and dense bases.
What Size Origami Paper Is Easiest for Adults?
A 15 x 15 cm square is the standard beginner size, while 20 x 20 cm is easier for adults learning complex folds or working with limited hand dexterity. Small 7.5 cm sheets make reference points difficult to see and should be reserved for miniature models after the sequence is familiar.
Is a Bone Folder Better Than a Credit Card?
A polished bone or Teflon folder gives more control and less friction than most credit cards, but a smooth credit card is adequate for early practice. The deciding factor is edge quality: a scratched, raised, or chipped card can snag paper, whereas a finished folder should glide over the crease.
Can I Use A4 Paper for Origami?
A4 paper can be used for origami after cutting it into a square, provided the model permits starting with a cut sheet. A4 measures 21 x 29.7 cm, so cutting a 21 x 21 cm square leaves a strip. Traditional origami models generally assume a square sheet from the beginning.
Should Children Use a Craft Knife for Origami?
Children should use supervised scissors rather than a craft knife for beginner origami. A craft knife requires a cutting mat, metal ruler, controlled hand position, and safe blade storage. Most introductory origami needs no cutting, so square paper and a simple model are the safer starting combination.
What Is the Best First Origami Model?
A simple boat, balloon, masu box, jumping frog, or basic bird is a better first model than a dense insect or realistic animal. Select a design with fewer than 20 major steps, use 15-20 cm kami, and repeat it twice before changing paper or adding a crease tool.
The Bottom Line
The essential origami tools for beginners are square kami, a clean flat surface, and dependable instructions. Start with 100 sheets of 15 x 15 cm paper, add a smooth card if desired, and delay the bone folder, cutting mat, and craft knife until a project gives you a specific reason to use them.
