

Ever wondered how to transform ordinary gum wrappers into adorable hearts? You’re about to discover the magic of paper folding right in your pocket.
This simple origami technique turns trash into treasure with just a few folds. Get ready for a delightful journey that’ll have you creating charming keepsakes from everyday items.
What Are Origami Gum Wrapper Hearts?
I love talking about these tiny masterpieces because they’re honestly one of the most accessible forms of origami art out there. Gum wrapper hearts are exactly what they sound like – small, adorable heart shapes folded from the foil or paper wrappers that come with your favorite chewing gum.
The beauty of this craft lies in its simplicity and availability. Think about it – how many gum wrappers do you throw away each week? Now imagine turning each one into a little symbol of love or friendship. That’s the magic we’re working with here.
These miniature hearts have been passed down through generations, often shared between friends, lovers, and family members as tokens of affection. I’ve seen people collect them in jars, use them as bookmarks, or even create elaborate displays. The possibilities are endless when you start seeing potential art in everyday waste.
Key Terms and Definitions
Origami : The traditional Japanese art of paper folding that transforms flat sheets into dimensional sculptures without cuts or glue
Gum Wrapper : The thin foil, paper, or composite material that encases individual pieces of chewing gum
Valley Fold : A basic origami technique where you fold the paper toward yourself, creating a “valley” or depression
Mountain Fold : The opposite of a valley fold, where you fold the paper away from yourself, creating a raised “mountain” ridge
Crease : A permanent fold line in the paper that serves as a guide for subsequent folds
Materials Needed
Here’s where I get excited because the material list is refreshingly short! You probably have everything you need already sitting in your pocket or purse.
| Item | Description | Quantity | Cost | Where to Find |
|---|---|---|---|---|
| Gum Wrapper | Any brand, foil or paper | 1 per heart | Free with gum purchase | Convenience stores, grocery stores |
| Clean Hands | Essential for precise folding | 2 hands | Free | Your body |
| Flat Surface | Table, desk, or book | 1 surface | Free | Your home or office |
| Good Lighting | Natural or artificial light | Adequate brightness | Free | Any well-lit area |
| Patience | Most important ingredient | Unlimited supply | Free | Your mindset |
The wonderful thing about this project is its accessibility. I remember being in middle school and making these during lunch breaks with nothing but the wrapper from my after-meal gum. No special tools, no expensive materials – just creativity and a few minutes of focused attention.
Step-by-Step Origami Gum Wrapper Hearts Instructions
Now we’re getting to the good stuff! I’m going to walk you through the how to make Origami Gum Wrapper Heart process that’s worked for me countless times. These steps are designed to be foolproof, even if you’re completely new to paper folding.
Step 1: Prepare Your Gum Wrapper
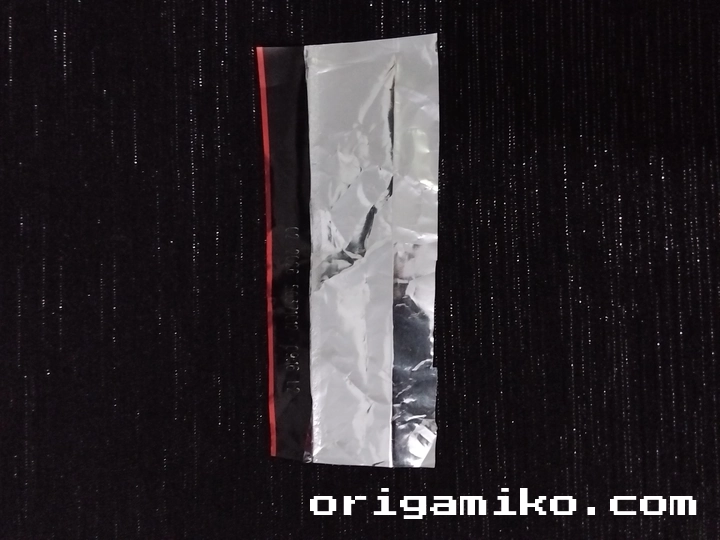
Take a paper – in this case, your gum wrapper. Make sure it’s clean and relatively unwrinkled. I like to gently smooth out any major creases with my fingernail, but don’t worry about making it perfect. Part of the charm comes from the slightly imperfect nature of repurposed materials.
Hold the wrapper with the printed or colored side facing down. This way, when we complete our heart, the prettier side will be visible on the outside.
Step 2: Create the Initial Folds
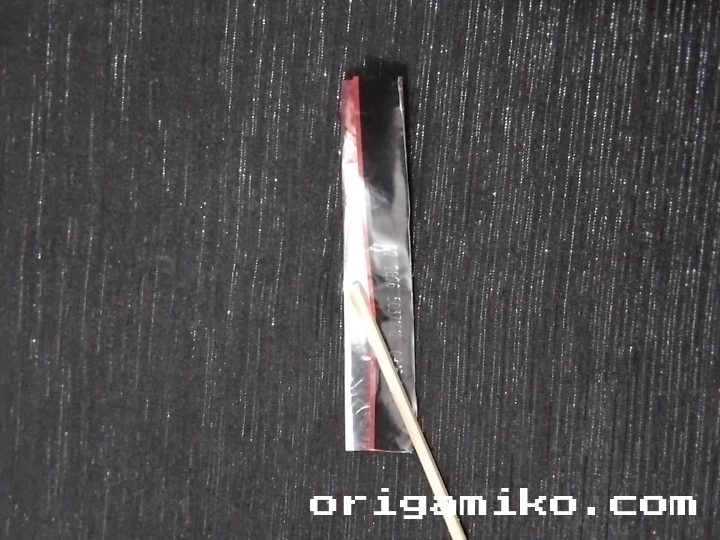
Fold it from two sides, bringing the left edge to meet the right edge. Make a sharp crease down the middle, then unfold. Now do the same thing horizontally – fold the top edge to meet the bottom edge, crease well, and unfold.
You should now have two perpendicular crease lines that intersect in the center of your wrapper, creating four equal rectangles. These guide lines are crucial for the symmetry of your final heart.
Step 3: Form the Heart’s Top Curves
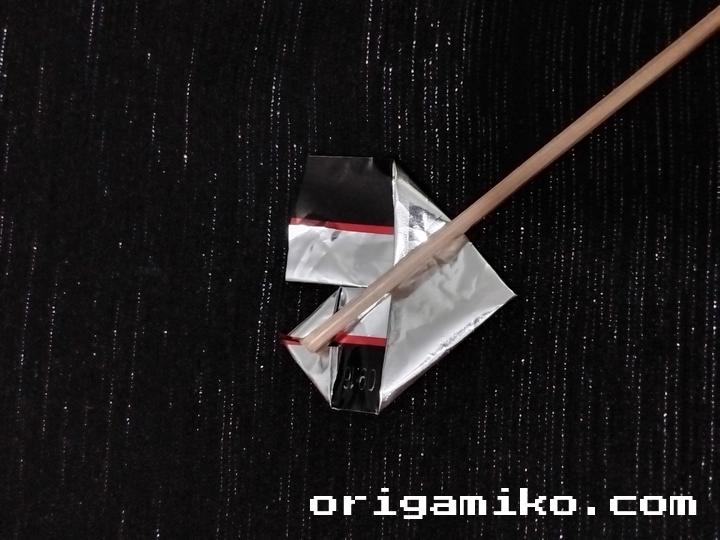
Fold two side’s corners – specifically, the top two corners. Take the top-left corner and fold it down diagonally toward the center horizontal line. Repeat with the top-right corner. These folds create the curved appearance at the top of your heart.
The key here is making sure both corners are folded at the same angle. I usually eyeball it, but if you’re a perfectionist, you can measure to ensure symmetry.
Step 4: Complete the Heart Shape
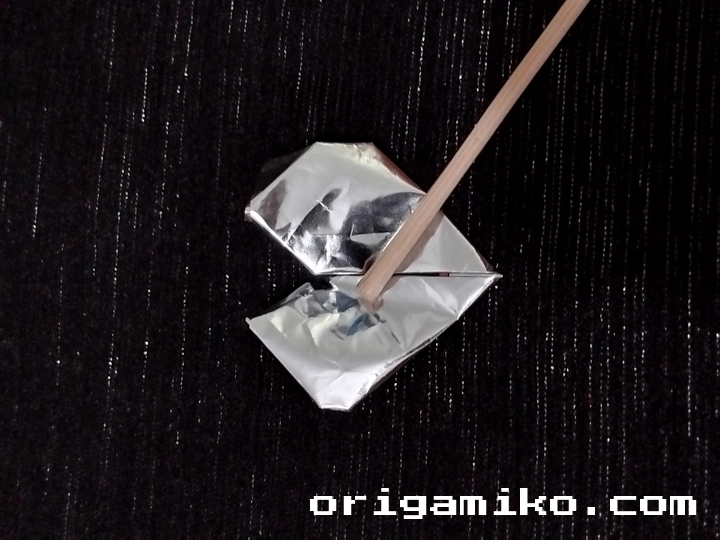
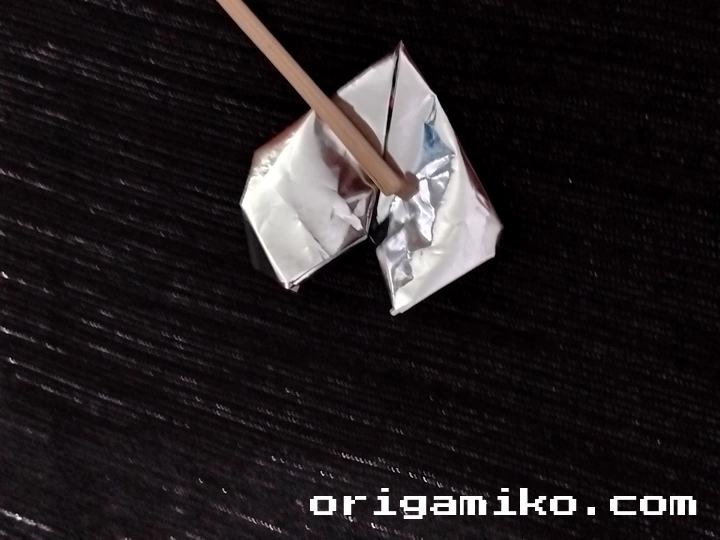
Then fold from the middle – take the bottom point of your wrapper and fold it up toward the center of the piece. This creates the pointed bottom of your heart while securing all the previous folds in place.
Press all creases firmly with your fingernail or the edge of a ruler. The more defined your creases, the longer your heart will hold its shape.
Step 5: Final Touches
Now the Gum Wrapper Hearts Origami is ready! Give it a final inspection and adjust any loose corners. If everything looks good, you’ve just completed your first Simple Origami Gum Wrapper Hearts Step by step project.
I like to give my finished hearts a gentle squeeze to set all the folds permanently. Some people prefer to keep them flat in books, while others enjoy the slightly three-dimensional quality they develop when handled.
Tips for Success
After making hundreds of these little hearts, I’ve learned some tricks that make the process smoother and the results more satisfying.
Start with fresh wrappers. Old, crumpled wrappers from the bottom of your purse are harder to work with. The paper fibers become weakened, and the foil can tear easily.
Work on a hard surface. Your kitchen table or a hardcover book works perfectly. Soft surfaces like couches or beds make it difficult to create sharp, clean creases.
Take your time with the first few. Speed comes with practice. I can now fold a heart in under 30 seconds, but my first attempts took several minutes each.
Practice the motion. Before committing to folds, I often “rehearse” the movement to make sure I understand where the paper needs to go.
Use both hands effectively. While one hand positions the paper, the other should be actively creating and reinforcing creases.
Common Mistakes and How to Avoid Them
Let me share some pitfalls I’ve encountered and how to navigate around them.
Uneven corner folds are probably the most common issue I see. When you fold those top two corners, it’s easy to make one steeper than the other. The result is a lopsided heart that looks more like a wonky diamond.
To avoid this, I always fold one corner, then use it as a template for the second corner. Hold them up to a light source if needed to check symmetry.
Weak creases will cause your heart to unfold over time. Many beginners are too gentle with their folding. Don’t be afraid to press firmly – gum wrappers are tougher than they look.
Rushing the process leads to sloppy results. I get it – once you understand the steps, you want to make a dozen hearts quickly. But each fold builds on the previous one, so accuracy matters more than speed.
Ignoring the wrapper’s grain can make folding harder. Most gum wrappers have a slight directional grain, similar to paper. Folding against this grain requires more pressure and may result in jagged edges.
Similar Variations That Can Be Made
Once you’ve mastered the basic heart, the world of gum wrapper origami opens up beautifully. I’ve experimented with dozens of variations over the years.
Double hearts use two wrappers interlinked to create a chain of hearts. Perfect for friendship bracelets or romantic gestures.
Miniature roses follow a similar folding principle but with a spiral technique that creates layered petals. These take more practice but look stunning.
Lucky stars are another classic gum wrapper project. They’re three-dimensional and have a satisfying “pop” when you press the center.
Butterfly variations use the same initial folds but develop the wings differently, creating delicate flying creatures.
Message holders are hearts with a small pocket that can hold tiny notes or wishes. I love making these for special occasions.
The techniques you learn making hearts translate to many other origami projects. It’s like learning a visual language – once you understand the basic vocabulary of folds, you can start creating your own sentences and stories.
Creative Uses for Your Gum Wrapper Hearts
I’ve seen people get incredibly creative with their finished hearts, and it always inspires me to think outside the box.
Decoration projects are probably the most popular use. String them together for garlands, glue them onto greeting cards, or scatter them on dinner tables for romantic occasions.
Gift embellishments add a personal touch that store-bought items can’t match. I tape small hearts to wrapped presents or tuck them inside card envelopes.
Memory keeping turns each heart into a tiny time capsule. Write dates on them, use wrappers from special occasions, or create them during meaningful moments.
Educational tools work great for teaching kids about recycling, fine motor skills, and following directions. Teachers love projects that cost nothing but deliver real learning.
Stress relief might sound silly, but the repetitive motions and focus required for folding can be genuinely meditative. I keep gum in my desk drawer specifically for stressful workdays.
Troubleshooting Common Issues
Even with the best instructions, sometimes things go wrong. Here’s how I handle the most frequent problems.
Torn wrappers happen, especially with older or thinner materials. If you catch a small tear early, you can often work around it by adjusting your fold lines slightly. For major tears, it’s usually better to start fresh.
Stubborn creases from previous folds can interfere with your heart shape. Gently work them out with your fingers, or embrace them as part of the wrapper’s character.
Size inconsistencies between different gum brands mean your technique might need slight adjustments. Shorter wrappers require tighter folds, while longer ones give you more room for error.
Humidity effects on paper wrappers can make them either too stiff or too limp. Store your wrappers in a dry place, and if they seem too flexible, let them sit in air conditioning for a few minutes.
Advanced Techniques for Experienced Folders
Once you’ve mastered the basic Easy Gum Wrapper Hearts Origami, you might want to challenge yourself with more sophisticated approaches.
Wet-folding involves slightly dampening paper wrappers (not foil ones) to create smoother curves and more organic shapes. The paper holds its form better as it dries.
Modular construction combines multiple hearts into larger geometric patterns. I’ve created stunning wall art using this technique with dozens of coordinated hearts.
Mixed media incorporation adds beads, threads, or small decorations to your hearts during the folding process. This requires planning but creates unique, personalized pieces.
Precision tools like bone folders or small rulers can help create extremely sharp creases and perfect angles. While not necessary, they can elevate your work to display-quality levels.
The Science Behind Paper Folding
Understanding why origami works can actually improve your technique. Paper has memory – it wants to return to its original flat state. Each fold fights against this tendency, and the final shape represents a balance between all the competing forces.
Grain direction affects how easily paper bends. Most gum wrappers have their grain running lengthwise, which is why horizontal folds often feel different from vertical ones.
Stress concentration occurs at fold intersections. This is why hearts sometimes tear at the center point where multiple creases meet. Gentle handling at these stress points prevents damage.
Geometric principles govern why certain fold patterns work while others don’t. The heart shape succeeds because it distributes tension evenly across the wrapper’s surface.
Cultural Significance and History
Origami heart-making might seem like a modern invention, but it actually connects us to centuries of paper-folding tradition. While traditional origami used purpose-made paper, the spirit of transforming everyday materials into art has always been part of the craft.
In many cultures, handmade gifts carry special significance because they represent invested time and care. A gum wrapper heart might take only minutes to create, but it carries the same emotional weight as more elaborate crafts.
I find it fascinating that this simple technique has spread globally without any formal instruction system. People learn it from friends, who learned it from other friends, creating an unbroken chain of shared knowledge.
Environmental Impact and Sustainability
Every gum wrapper heart represents a small victory against waste. Instead of adding to landfills, these materials get a second life as art objects or gifts.
The environmental message is subtle but powerful – beauty can be found in the most mundane objects if we look carefully enough. Teaching kids to make these hearts also teaches them to see potential rather than garbage.
Biodegradable options are becoming more common as gum manufacturers respond to environmental concerns. Paper-based wrappers break down naturally, while foil versions can be collected and recycled properly after their artistic service.
Frequently Asked Questions
Q: Can I use any type of gum wrapper? A: Absolutely! I’ve successfully used everything from traditional stick gum wrappers to the square pieces from cube gum. Each type brings its own character to the finished heart.
Q: How long do gum wrapper hearts last? A: With gentle handling, they can last for years. I have some in my memory box from high school that still look great. The key is avoiding excessive moisture and rough handling.
Q: Is this safe for young children? A: Yes, with supervision. The folding process uses no dangerous tools or materials. It’s actually great for developing fine motor skills and following sequential instructions.
Q: Can I make hearts from other materials? A: The technique works with any thin, flexible material of similar size. I’ve used candy wrappers, foil from tea bags, and even small pieces of tissue paper.
Q: What if my heart doesn’t look perfect? A: Imperfection is part of the charm! Some of my favorite hearts have slight asymmetries that give them personality. Don’t aim for machine-like precision – aim for heartfelt effort.
Q: How can I make my hearts more durable? A: Avoid handling them excessively once folded. If you want to display them, consider placing them under glass or in a shadow box to protect from dust and accidental damage.
Summary
Creating Simple Origami Gum Wrapper Hearts Step by step transforms ordinary waste into extraordinary keepsakes through the magic of paper folding. This accessible craft requires no special tools or expensive materials – just creativity, patience, and the willingness to see potential in everyday objects.
From the basic five-step process to advanced variations and creative applications, gum wrapper hearts offer endless possibilities for personal expression and gift-giving. Whether you’re looking for a meditative activity, a way to reduce waste, or a heartfelt gesture for someone special, this timeless technique delivers satisfaction that far exceeds its humble materials. So next time you unwrap a piece of gum, remember – you’re holding the raw materials for a tiny masterpiece that could brighten someone’s entire day.