


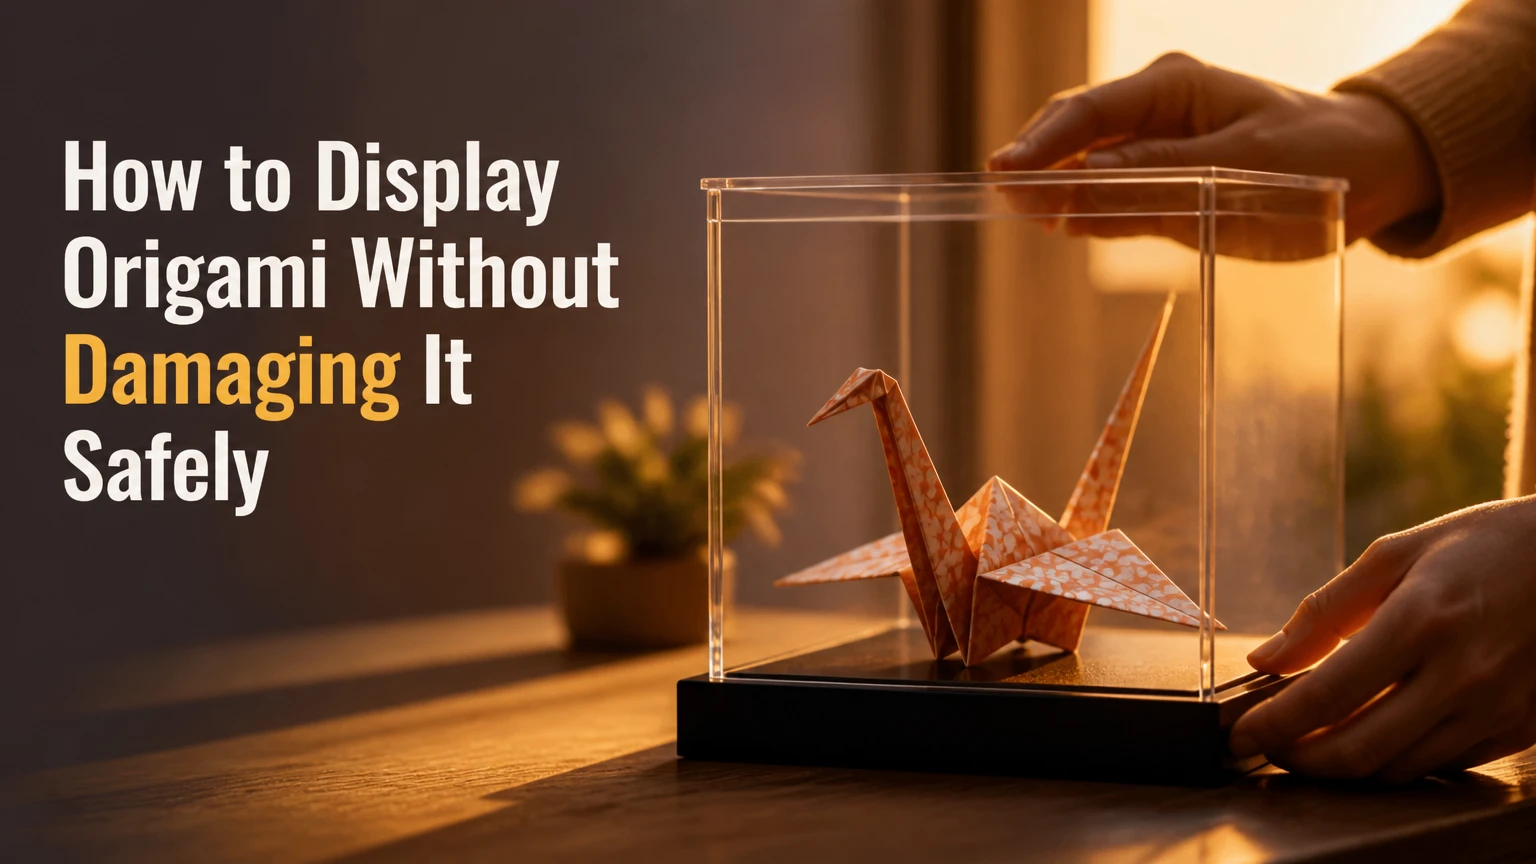
To display origami without damaging it, place the model in a clean enclosure or frame that blocks dust, filters ultraviolet light, limits humidity changes, and supports the folds without compression. Keep origami away from direct sunlight, radiators, vents, and damp rooms, and use reversible, acid-free mounting methods that can be removed without tearing paper.
Key facts at a glance
Keep display-room relative humidity near 40-55%, with minimal daily fluctuation.
Leave at least 3-5 cm of air clearance between a three-dimensional model and its case walls.
Use UV-filtering acrylic or glass, but never treat direct sunlight as safe behind glazing.
Choose acid-free mat board and inert supports instead of ordinary cardboard, wood, tape, or hot glue.
Support heavy or wet-folded origami from existing folds, not from a newly pierced point.
Inspect displayed origami every 3-6 months for fading, sagging, dust, insects, and condensation.
How to Display Origami Without Damaging It
The safest general method is a UV-filtering acrylic case for a three-dimensional model and a deep shadow box with spacers for a flat or low-relief piece. Origami paper responds to light, moisture, pressure, and gravity, so protection must address the model’s shape and the room around it rather than relying on a single adhesive or coating.
Paper is hygroscopic, meaning it exchanges moisture with surrounding air. The Canadian Conservation Institute describes light damage as cumulative and irreversible, which matters even when fading is too gradual to notice from week to week. A display case reduces dust and handling, but it cannot reverse chemical change or make a sunny windowsill suitable.
Choose the enclosure before choosing the mount
A case should prevent contact, not merely make contact less likely. Measure the model at its widest and tallest points after it has rested for 24 hours, then add clearance for folds that may relax seasonally.
| Origami model | Recommended display | Typical clearance | Main limitation |
|---|---|---|---|
| Single crane or animal, 5-20 cm tall | Acrylic case | 3-5 cm per side | Static attracts exterior dust |
| Tessellation or flattened design, 20-60 cm wide | Deep shadow box | 1-2 cm above surface | Limited three-dimensional depth |
| Flower, insect, or vertical figure, 10-30 cm tall | Glass cloche | 3-6 cm around form | Condensation can develop |
| 50-1,000 lightweight cranes | Mobile or enclosed ceiling case | 10-20 cm between pieces | Tangling and weak suspension points |
A case that is too small can bend a wing, compress a modular unit, or transfer pressure to a single fold. A case that is excessively large increases cost and makes a small model visually difficult to inspect, while also allowing more internal air movement.
What damages displayed origami?
Displayed origami usually deteriorates through light exposure, unstable humidity, dust, physical stress, or chemically unsuitable materials. The visible symptom often identifies the cause: fading suggests light, waviness suggests moisture, collapsed folds suggest gravity, and yellow adhesive marks suggest an unsuitable mount.
Light and ultraviolet radiation
Visible light and UV radiation fade dyes and weaken cellulose fibers. The Library of Congress recommends limiting light exposure for works on paper, and conservation practice commonly uses low-intensity display lighting with UV-filtering glazing for sensitive objects.
Keep origami at least 1 m from a sunny window and preferably on a wall that receives no direct beam. UV-filtering glazing reduces a damaging portion of radiation, but it does not stop visible-light fading or heat buildup. Rotate highly colored models every 3-6 months if the display is decorative rather than permanent.
Humidity and temperature
A practical home target is 40-55% relative humidity, while a tightly controlled conservation environment may use a narrower range based on the paper and media. The Northeast Document Conservation Center commonly discusses approximately 30-50% RH for paper collections, but stability is usually more important than chasing one exact number.
| Environment condition | Likely paper response | Risk timeframe | Corrective action |
|---|---|---|---|
| 20-30% RH near a heater | Brittle edges and cracked folds | 1-3 heating seasons | Move away from heat; stabilize room RH |
| 40-55% RH, stable | Lowest routine household risk | Ongoing | Monitor monthly |
| 60-70% RH in a closed case | Waviness, soft folds, mold risk | Days to weeks | Open case and reduce room moisture |
| Condensation on glazing | Local wetting and possible staining | Hours to days | Open enclosure immediately |
Do not place a small humidifier inside a display case. Localized moisture can wet one side of a model while the rest remains dry, producing uneven expansion and permanent distortion.
Gravity, dust, and handling
Gravity gradually relaxes unsupported paper, especially in large animals, open flowers, broad wings, and wet-folded sculptures. Dust also holds moisture and abrades delicate ridges when someone wipes the surface, so the safest cleaning method is air movement followed by a soft brush only when necessary.
Handle origami with clean, dry hands, supporting the base and the widest stable area. Nitrile gloves can reduce skin oils, but gloves also reduce tactile grip; for small household models, clean hands are often safer than slippery gloves. Never lift a model by a wing, tail, petal, thread, or single modular point.
Which display type should you choose?
A sealed acrylic case is the strongest all-purpose choice for valuable three-dimensional origami, while a spacer-mounted shadow box suits flat work and a mobile suits numerous lightweight pieces. A cloche offers attractive presentation for one small sculpture, but it needs careful humidity monitoring and should not be assumed to be archival because it has glass.
| Display type | Typical price | Setup time | Protection level | Suitable model |
|---|---|---|---|---|
| UV acrylic case, 20-40 cm | $35-$180 | 20-45 minutes | Dust and contact protection; UV reduction | Complex 3D sculpture |
| Deep shadow box, 30-60 cm | $25-$120 | 30-60 minutes | UV and dust protection if glazed | Tessellation or low relief |
| Borosilicate cloche, 15-30 cm | $20-$80 | 15-30 minutes | Dust protection; variable humidity control | Flower or single animal |
| DIY mobile, 5-30 pieces | $8-$40 | 2-5 hours | Minimal UV and dust protection | Lightweight cranes or stars |
Acrylic cases
Museum acrylic offers lower breakage risk than glass and weighs less for large enclosures. Products such as Optium Museum Acrylic and conservation-grade Plexiglas provide UV-filtering options, although product specifications differ, so verify the manufacturer’s transmission data rather than trusting “museum” as a label.
Leave 3-5 cm between the model and every wall. Clean acrylic with a manufacturer-approved plastic cleaner and a microfiber cloth; ammonia-based glass cleaner can damage acrylic surfaces and contribute to crazing. Reduce static by cleaning the outside before placing the model inside, then avoid rubbing the interior near fragile paper.
Deep shadow boxes
A shadow box is appropriate when the model has a stable back plane or can be attached at several existing folds. Replace ordinary cardboard backing with 2-3 mm acid-free, lignin-free mat board, preferably cotton rag or buffered alpha-cellulose board when the paper is not visibly acidic or highly sensitive to alkaline materials.
Use spacers so glazing remains at least 6-12 mm from the highest fold. Contact between glass and paper can trap moisture, transfer abrasion, and flatten relief. For a flat sheet with no relief, a standard frame may work, but the paper should still be separated from ordinary wood and acidic backing.
Glass cloches
A cloche works for one upright model that has a broad, stable base. Seal or isolate wooden bases with a fully cured, low-off-gassing coating, or line the contact surface with archival paper; unfinished wood can release acidic compounds and absorb or release moisture.
Do not permanently seal a cloche in a damp room. Check the interior after temperature changes, especially when a cool glass enclosure moves into a warm room. Fogging is a warning, not a cosmetic inconvenience.
Mobiles and suspended displays
Mobiles are suitable for lightweight paper but provide little preservation protection. Use smooth polyester monofilament or acid-free cotton thread, and suspend the model through an existing opening or a reinforced fold rather than piercing a visible surface.
A short section of archival paper straw or a small polyester tube can distribute thread pressure around an existing hole. Avoid tight knots, metal hooks, and heavy beads. A mobile belongs in a dim, stable room and should be kept away from ceiling vents, fans, doors, children, and pets.
Before you mount origami
Prepare the enclosure, backing, supports, and model before applying any attachment. Typical preparation takes 30-90 minutes, costs $10-$45 for a simple display, and requires a dust-free work surface larger than the model.
| Material or tool | Typical quantity | Purpose | Acceptable specification |
|---|---|---|---|
| Acid-free mat board | 1 sheet, 30 x 40 cm | Backing or riser | Cotton rag or lignin-free alpha-cellulose |
| Acrylic or glass cleaner | 5-15 ml | Glazing preparation | Plastic-safe, ammonia-free formula |
| Microfiber cloth | 1-2 pieces | Exterior cleaning | Clean, lint-free, unused for chemicals |
| Museum wax or gel | 1-3 g | Temporary base stabilization | Removable, tested on display base |
| Cotton thread or polyester line | 30-150 cm | Suspension or hidden loop | Smooth, colorfast, low-friction |
| Camera blower and soft brush | 1 each | Dust removal | Rubber blower, very soft natural or synthetic bristles |
Do not spray fixative automatically. Archival coatings may alter gloss, darken paper, stiffen folds, or become difficult to remove. Test any coating on a sacrificial piece of the same paper, and use a conservator for valuable, historic, signed, or irreplaceable origami.
Step 1: Inspect and stabilize the model
Inspect every fold, flap, module connection, and base before moving origami into a case. Photograph the model from four sides, record its height and width, and note existing stains, loose modules, crushed points, or uneven color.
Let a newly folded model rest for 24-72 hours before final mounting. Wet-folded origami may require several days to finish drying, and sealing it too soon can trap residual moisture. You will know the model is ready when its shape remains stable overnight and no cool or damp areas remain.
The common mistake is mounting a piece while it is still changing shape. Correct that mistake by removing the mount, allowing the model to acclimatize in stable room conditions, and remounting only after the folds settle.
Step 2: Prepare the enclosure and base
Clean the inside of acrylic or glass before introducing the paper. Use a plastic-safe cleaner for acrylic, distilled water and a clean cloth for compatible glass, and allow every surface to dry completely for at least 15 minutes.
Install the acid-free backing or sealed base, then test the model’s position without adhesive. Check the viewing angle, clearance, shadow pattern, and stability from at least three sides. You will know the layout works when no fold touches the glazing and the model can be removed without first bending a major structure.
The common mistake is cleaning after installation. Aerosol droplets and cloth pressure can contaminate or crush the model, so complete all wet cleaning before the origami enters the enclosure.
Step 3: Choose a reversible mount
Select a mount that supports the model at existing structural points and can be removed with little or no paper loss. For a solid-bottomed model, use a very small amount of removable museum wax or gel on an inert base; for a hollow model, use a hidden support through an existing opening.
| Mounting method | Suitable load | Reversibility | Best application | Main warning |
|---|---|---|---|---|
| Museum wax or gel | Up to 100-200 g typical | Usually removable by twisting | Stable base on acrylic or sealed board | Residue and staining need testing |
| Archival cotton loop | Up to 50-150 g per loop | High when loosely tied | Back folds and shadow boxes | Tight loops crease paper |
| Japanese tissue hinge | Up to 20-80 g per hinge | High with skilled removal | Flat or low-relief pieces | Paste requires conservation technique |
| Coated support wire | Up to 100-300 g typical | Moderate | Existing bottom opening | Never force wire through a fold |
| Polyester monofilament | Up to 10-50 g per line | High if untied carefully | Lightweight mobiles | Concentrated tension can tear holes |
For a shadow box, a loose loop of archival cotton thread can pass around a back fold and attach behind the mat board. Japanese tissue and wheat-starch paste can provide a conservation-quality hinge for appropriate paper, but the method is best performed by someone trained in paper mounting.
The common mistake is using the strongest adhesive available. Strength is irrelevant if removal tears the paper; a mount should fail safely before the fold does.
Step 4: Add internal support when needed
Support broad or top-heavy forms from inside with inert acrylic rod, archival foam, or folded acid-free cardstock. Supports should touch broad, low-pressure areas and should carry weight without pushing the model outward into the glazing.
A support skeleton is appropriate for a large wet-folded animal, a flower with heavy petals, or a modular sculpture whose upper units pull on one lower connection. It is unnecessary for a small dry-folded crane with a stable base. You will know the support is correct when the model holds its shape after a 30-minute trial without new creases or contact marks.
The common mistake is adding a rigid rod that creates a pressure point. Replace narrow contacts with a broader cradle, and cover the support with inert polyester film or archival paper if direct contact is unavoidable.
Step 5: Close and place the display
Close the enclosure only after the model, base, and glazing have reached the same room temperature. Place the display on a level shelf or securely anchored wall, at least 1 m from heaters, vents, humidifiers, exterior doors, and plumbing.
Choose a room with stable conditions rather than the most visually dramatic location. A north-facing interior wall generally presents less direct-sunlight risk than a bright south-facing window, but local architecture and seasonal sun angles still matter.
The common mistake is treating UV-filtering glazing as permission to use direct sunlight. Direct sun adds heat and visible light, so relocate the display even when the glazing blocks most UV radiation.
How should you maintain displayed origami?
Inspect displayed origami every 3-6 months and clean only the enclosure unless loose dust is clearly visible on the model. Use a camera blower first, then a very soft brush held near the surface without pressing into folds; never wipe paper with a cloth.
| Maintenance task | Interval | Tool | Stop condition |
|---|---|---|---|
| Check fading and color shift | Every 3 months | Natural-light photos | Color changes between reference images |
| Check sagging and loose modules | Every 3 months | Side-view inspection | New tilt, gap, or collapsed fold |
| Check condensation | After major weather shifts | Visual inspection | Any fogging or droplets |
| Clean exterior glazing | Every 1-2 months | Plastic-safe cleaner, microfiber | Static or visible dust returns |
| Inspect mounts and thread | Every 6 months | Hand and visual check | Fraying, residue, or new creases |
| Replace desiccant outside paper contact | As indicated by product | Rechargeable silica gel | Saturated indicator or recurring fog |
Silica gel can buffer a small enclosure, but it cannot correct a persistently damp room. Never place loose desiccant packets against origami, and do not use them to force an overly dry microclimate.
What common display mistakes damage origami?
The most damaging mistakes are permanent adhesives, direct sunlight, pressure from glazing, unstable suspension, and cleaning methods that abrade paper. Each error has a safer replacement.
- Hot glue or superglue: These create hard, permanent bonds and can stain or tear paper. Use a tested removable wax, loose thread loop, or conservation hinge.
- Ordinary double-sided tape: Pressure-sensitive adhesive can yellow, migrate, and fail after months or years. Use acid-free mounting materials with a reversible attachment.
- Unfinished wood: Wood can release acidic vapors and exchange moisture with the model. Seal the wood fully or isolate it with archival board.
- Tight thread knots: A small thread can concentrate the full weight of a model at one fold. Use a loose loop, spread the load, and reinforce an existing opening.
- Ammonia cleaner on acrylic: Ammonia and unsuitable solvents can cause clouding or crazing. Use a cleaner specified for acrylic.
- Sprayed fixative without testing: A coating can change color, surface sheen, and flexibility. Omit it unless its preservation benefit outweighs its irreversible alteration.
How do you handle difficult display situations?
Difficult origami requires changing the display environment or mounting strategy, not adding more adhesive. Metallic foil, very large models, damp rooms, classroom displays, and valuable works each present a distinct risk.
Large or heavy modular origami
Use two or more support points and a broad base rather than one central blob of wax. Measure the model after assembly, allow 5-8 cm of internal clearance, and use a custom acrylic case if the sculpture exceeds roughly 30 cm in height or width.
Metallic, foil, or dyed paper
Foil-backed paper may crease sharply and can delaminate at folds, while saturated dyes can fade quickly. Keep such pieces in lower light, avoid liquid cleaners near the paper, and do not attach tape to foil because adhesive removal can lift the metallic layer.
Classroom or children’s display
A sealed PET or acrylic case is safer than an exposed mobile when handling is likely. If a mobile is necessary, suspend it above adult shoulder height, use lightweight models under 15 g each, and keep it at least 1.5 m from fans and doorways.
Valuable, historic, or irreplaceable origami
Do not spray, wash, flatten, pierce, or reglue valuable origami at home. A paper conservator can assess fiber strength, media solubility, previous repairs, and suitable mounting materials before display.
What should you do if origami begins to sag or mold?
If origami sags, remove the cause of stress and add broad internal support; if mold or active condensation appears, isolate the model from the enclosure and consult a paper conservator. Do not dry wet origami with a hair dryer, press it under books, or brush visible mold across the folds.
For mild sagging, photograph the model, open the case, and check whether humidity, a failing mount, or a softened fold caused the change. Stabilize room humidity, allow the piece to rest, and rebuild the mount with broader supports. Do not reshape a distorted model while it is damp.
Mold requires greater caution. Keep the object away from other paper, avoid inhaling spores, and do not seal the enclosure again until the source of moisture is resolved. Surface cleaning and treatment depend on the paper and media, so professional assessment is safer than household disinfectant.
| Visible problem | Probable cause | Immediate response | Do not do |
|---|---|---|---|
| Drooping wing or petal | Gravity or high RH | Reduce stress and support broadly | Pull the fold into shape |
| Fogged glazing | Temperature or moisture shift | Open enclosure and stabilize room | Reseal immediately |
| Yellow mark | Tape, wood, or adhesive migration | Stop contact and document | Scrub the stain |
| Faded side | Light exposure | Move to lower light | Increase coating layers |
| Loose module | Failed attachment or dry paper | Support before moving | Lift by the loose unit |
How much does safe origami display cost?
A basic protected display typically costs $25-$80, while a custom conservation-quality enclosure commonly costs $150-$600 or more. The price depends on model size, glazing, UV performance, custom fabrication, mounting labor, and whether the display must be sealed or wall-mounted.
| Display budget | Typical components | Total cost | Setup duration | Suitable use |
|---|---|---|---|---|
| $10-$25 | DIY box, archival board, thread | $10-$25 | 1-2 hours | Small low-value model |
| $25-$80 | Ready-made shadow box or cloche | $25-$80 | 30-90 minutes | Home display |
| $80-$200 | UV acrylic case and tested mount | $80-$200 | 1-3 hours | Complex 3D model |
| $200-$600+ | Custom archival enclosure and fabrication | $200-$600+ | 1-4 weeks | Large or valuable work |
A cheaper case with stable placement is safer than an expensive case placed in direct sun. Spend first on correct clearance, inert backing, stable humidity, and secure mounting; decorative finishes come afterward.
Frequently Asked Questions
Can origami be displayed without a frame?
Yes, but unframed origami is suitable mainly for short-term displays in clean, dim, stable rooms. Keep the model on an inert stand, handle it minimally, and expect greater exposure to dust, accidental contact, insects, and humidity changes than with a closed acrylic case.
Is glass or acrylic better for origami?
Acrylic is usually better for large or household displays because it weighs less and resists impact, while glass offers a harder, more scratch-resistant surface. Choose UV-filtering glazing in either material, and verify the product specification because ordinary glass and inexpensive plastic provide limited conservation protection.
Should I hang origami from the ceiling?
Hang origami only when each model is lightweight and the suspension point distributes stress through an existing opening or reinforced fold. Ceiling suspension does not protect against UV, dust, or humidity, so use it for decorative mobiles rather than irreplaceable pieces unless the entire mobile is enclosed.
How do I keep origami from getting dusty?
Use a closed acrylic case, cloche, or shadow box, and clean the enclosure exterior regularly. For exposed origami, use a camera blower and a soft brush held near the surface; wiping across folds can crush points, spread oils, and detach small modules.
Can I laminate origami to preserve it?
Laminating origami is generally unsuitable for preservation because heat, pressure, and plastic film permanently alter the paper and prevent future treatment. Lamination may be acceptable for a disposable classroom craft, but it is not an appropriate method for valuable, complex, or historically significant origami.
How long can displayed origami last?
The lifespan varies from months in direct sun or damp air to decades in low light with stable humidity and suitable materials. Paper quality, dye stability, fold stress, enclosure design, and handling frequency determine longevity, so inspect the model rather than relying on a fixed expiration date.
The Bottom Line
To display origami without damaging it, match the enclosure to the model, keep the paper in stable 40-55% RH conditions, block direct sunlight, leave 3-5 cm of clearance, and use reversible supports instead of permanent glue or tape. A UV-filtering acrylic case is the safest general choice for three-dimensional origami, while a spacer-mounted shadow box is better for flat work and a mobile is appropriate only for lightweight decorative pieces. Inspect every 3-6 months and treat condensation, sagging, fading, or mold as an immediate preservation warning.
Title tag: How to Display Origami Without Damage: Safe Methods
Meta description: Protect cranes, flowers, and modular models with 40-55% humidity, UV-filtering cases, safe mounts, and fixes for sagging or mold.
