


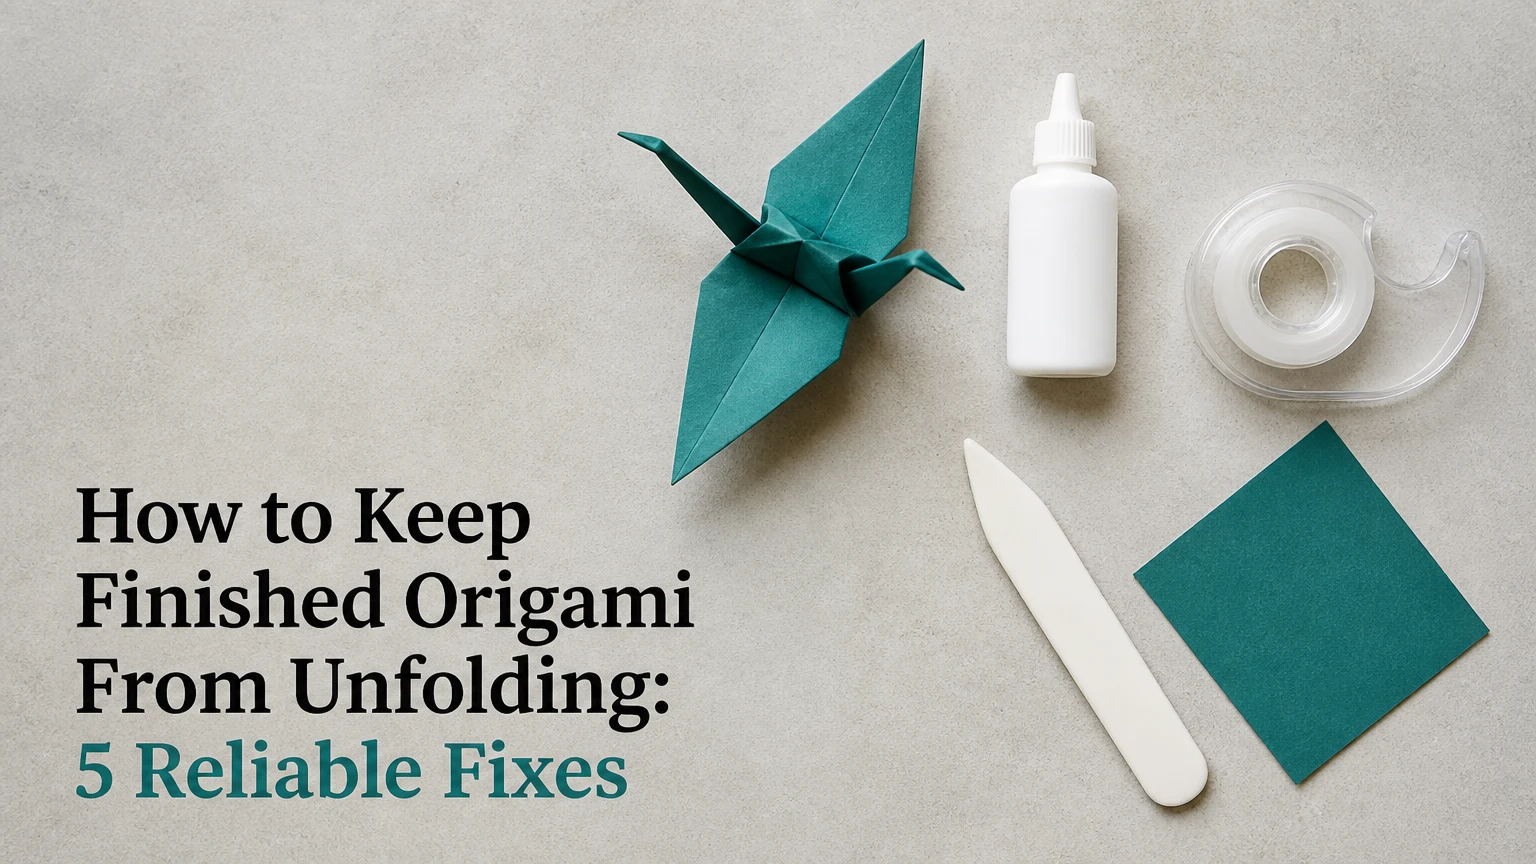
To keep finished origami from unfolding, reshape the model, secure the stressed folds, and apply the least amount of suitable stabilizer. Methyl cellulose is the most reversible choice for complex paper sculpture, while tiny hidden PVA dots suit modular models and a pre-folded tissue-foil sheet provides the strongest built-in shape retention.
Key Facts at a Glance
- Finished origami usually opens because paper fibers relax, interlocking layers slip, or the model carries stress at a narrow joint.
- Methyl cellulose offers a matte, relatively reversible way to stiffen complex origami without creating a hard plastic surface.
- Diluted PVA creates a stronger and more permanent bond, but excess moisture can warp, stain, or tear thin paper.
- Clear acrylic spray stabilizes the outer surface, but it does not make every paper model completely waterproof.
- Tissue foil prevents many unfolding problems when prepared before folding; it cannot be added neatly to an already completed model.
- A test on a folded scrap is safer than applying adhesive, water, or spray directly to a valuable finished model.
How to Keep Finished Origami From Unfolding?
The safest general method is to reshape finished origami, apply a tiny amount of methyl cellulose or diluted PVA inside the opening joint, and hold the form until completely dry. Use methyl cellulose for complex or display-quality models, PVA for concealed structural bonds, and no liquid treatment when the paper is valuable, metallic, inkjet-printed, or very thin.
Paper does not simply “forget” a fold because hydrogen bonds were broken. Folding permanently changes the sheet through compression, tension, fiber deformation, and sometimes local cracking. Humidity softens paper and reduces the resistance of folded layers, while gravity gradually pulls unsupported wings, legs, petals, or long tails out of alignment.
The most reliable preservation sequence is therefore mechanical first and chemical second. Correct the geometry, support the model, and stabilize only the areas that reopen. Flooding the entire surface often produces a worse object than the original loose fold.
What should you do before applying anything?
Inspect the model under bright, indirect light and identify the exact failure point. Check whether the problem is an open pocket, a slipping layer, a weak reverse fold, a torn crease, or a heavy part sagging under gravity.
| Preparation item | Typical specification | Why it matters | Safe checkpoint |
|---|---|---|---|
| Work surface | 30 x 45 cm, clean and dry | Prevents dust and adhesive transfer | No grit under the model |
| Fine brush | 1-3 mm synthetic tip | Controls liquid volume | Bristles do not shed |
| Blunt tool | 1-2 mm rounded tip | Reaches concealed layers | Tip cannot puncture paper |
| Clips or pins | 5-15 mm jaw opening | Holds shape during drying | Pressure does not crease paper |
| Support material | Acid-free tissue, foam, or silicone sheet | Distributes contact pressure | Support matches the contour |
| Test paper | Same paper, 5-10 cm square | Reveals bleeding and warping | Test dries without discoloration |
Wash and dry your hands before handling light-colored paper. Remove rings and bracelets, because a small snag can enlarge a crease tear while the model is being opened for repair.
Which Preservation Method Fits Your Origami?
Methyl cellulose is the best default for complex animals, insects, flowers, and curved wet-folded forms. Diluted PVA is better for a concealed permanent bond, acrylic spray is useful for a surface finish on robust paper, and tissue foil is the strongest option only when you can prepare the sheet before folding.
| Method | Application stage | Typical cost | Working time | Dry or cure time |
|---|---|---|---|---|
| Methyl cellulose powder | Finished model or pre-treatment | $8-$15 per 100 g | 5-15 minutes | 3-6 hours, sometimes overnight |
| Sodium CMC | Finished model or pre-treatment | $8-$20 per 100 g | 5-15 minutes | 3-8 hours |
| PVA or white glue | Finished model, hidden joints | $3-$10 per bottle | 2-5 minutes | 30-60 minutes, full strength later |
| Mod Podge Matte | Finished model, surface or joints | $5-$12 per bottle | 5-15 minutes | 1-3 hours |
| Clear acrylic spray | Finished model, exterior | $7-$15 per can | About 1 minute per coat | 15 minutes between coats, 24 hours to cure |
| Tissue foil | Before folding | $5-$12 in materials | About 15 minutes to laminate | 20-60 minutes before folding |
When is methyl cellulose the best choice?
Methyl cellulose is the preferred stabilizer when you need controlled shaping, a matte appearance, and some possibility of later reversal. A typical starting mixture is about 1 part powder to 16-20 parts water by weight, although product instructions vary and a thin brushable gel is safer than a thick paste.
Mix the powder gradually into room-temperature or slightly warm water. Let the mixture hydrate for at least 1-2 hours, then remove lumps before use. Apply it to the inside of a joint or to a stressed area rather than coating every visible surface.
Methyl cellulose temporarily re-wets the paper, so thin tissue, heavily sized paper, and saturated colors need special care. The model must remain supported until the fibers dry and the desired curve becomes stable.
When should you use PVA or Mod Podge?
Use diluted PVA when a concealed joint must remain closed and reversibility is less important than bond strength. A practical starting range is one part PVA to one or two parts water, adjusted downward in water content for thick paper and upward only after testing.
PVA belongs inside pockets, under flaps, or at modular connection points. Apply it with a toothpick or a 1 mm brush, then wipe away any bead that reaches a visible surface. Mod Podge Matte can work for sturdier paper, but its thicker film may obscure fine texture and can remain visibly coated.
PVA contracts as it dries. That contraction can pull a thin wing, petal, or pointed tip out of alignment, especially when glue has soaked across a broad area. Use less than seems necessary.
Is acrylic spray suitable for finished origami?
Acrylic spray is suitable for robust paper models that need a uniform exterior coating, but it is not the first choice for delicate, valuable, or highly flexible origami. Spray outdoors or in a spray booth, wear the protection specified on the product label, and test printed colors because solvents can dissolve or alter some inks.
Hold the can about 20-30 cm, or 8-12 inches, from the model. Apply two or three very thin coats, with roughly 15 minutes between coats, instead of one wet coat that pools in valleys and pockets.
Acrylic coating adds surface stiffness and may reduce sensitivity to incidental moisture. It does not prevent water from entering exposed edges, and it may make later repairs difficult. UV claims also depend on the particular product, coating thickness, light intensity, and exposure duration.
Why does tissue foil hold complex shapes so well?
Tissue foil combines a thin paper layer with aluminum foil, so the metal core resists elastic spring-back after folding. The laminate is prepared before folding by bonding tissue to foil with methyl cellulose or a suitable adhesive, smoothing the sheet, and allowing it to dry flat.
| Paper construction | Typical thickness | Shape retention | Best use | Main limitation |
|---|---|---|---|---|
| Kami | 60-75 gsm | Moderate | Cranes, simple flowers | Opens at stressed pockets |
| Tant | 70-100 gsm | Moderate to high | Geometric and color-accurate models | Creases can resist tight curves |
| Tissue paper | 17-35 gsm | Low without treatment | Large, lightweight sculpture | Tears and wrinkles easily |
| Copy paper | 75-90 gsm | Moderate | Practice and modular units | Visible cracking in tight folds |
| Tissue foil | About 50-100 gsm total | High | Dragons, insects, articulated details | Metal core exposes accidental creases |
| Foil-backed gift paper | Varies by product | High but inconsistent | Decorative display models | Surface may crack or delaminate |
Tissue foil is unforgiving because an accidental crease in the aluminum core is difficult to remove. It also changes the tactile and folding behavior of the paper. The construction solves future unfolding problems, but it is not a repair for a completed paper model.
How Do You Stabilize Finished Origami Step by Step?
The process takes about 10-20 minutes of hands-on work, followed by 30 minutes to overnight of supported drying. The decisive factor is liquid control: the correct stabilizer applied only to the stressed joint is safer than a stronger product spread over the whole model.
Before You Start
| Requirement | Typical value |
|---|---|
| Difficulty | Beginner to intermediate |
| Hands-on time | 10-20 minutes |
| Total time | 1-24 hours |
| Budget | $0 for dry support, $3-$20 with adhesive |
| Minimum tools | Fine brush, toothpick, tissue, clips |
| Adhesive quantity | 1-3 drops per small joint |
| Drying environment | 18-24°C, 40-55% relative humidity |
| Prerequisite | Clean test scrap and stable work surface |
Step 1: Diagnose the opening fold
Open only the minimum number of layers needed to see the failure. Photograph the original shape first, especially if the model has asymmetrical wings, legs, or facial details.
Separate a structural failure from ordinary paper memory. If one pocket repeatedly opens, it needs a concealed bond or support. If the whole model relaxes in damp air, environmental control may solve much of the problem without adhesive.
You will know the diagnosis is useful when the model can be returned to its intended position without forcing a new crease. A common mistake is to flatten the entire model before repairing one loose flap, which destroys useful shaping.
Step 2: Re-form and support the model
Return the model to its final geometry using a blunt tool, clean fingers, and soft supports. Place acid-free tissue or thin silicone sheet between clips and paper so wet surfaces do not stick to the hardware.
Use foam blocks, rolled tissue, bamboo skewers, or pins inserted into existing openings. Avoid rubber bands around narrow paper parts because concentrated tension can emboss or tear the sheet.
You will know the support is correct when the model remains in shape without clip pressure. The common mistake is clamping tightly enough to create a new permanent dent.
Step 3: Apply the least liquid needed
Choose methyl cellulose for a curved, complex form or diluted PVA for a concealed permanent joint. Touch the brush to a tissue scrap first, then place a film or one small drop inside the opening rather than saturating the flap.
For a small crane wing, 0.02-0.05 mL is often enough for a hidden contact area. Larger sculptures may need several applications, but each area should dry before another layer is added.
You will know the dosage is controlled when the paper darkens slightly but does not become translucent or floppy. The common mistake is brushing repeatedly over the same wet area, which breaks surface fibers and spreads color.
Step 4: Hold the final geometry while drying
Secure the model with protected clips, pins, or shaped foam. Methyl cellulose usually needs 3-6 hours for a small model and may need overnight drying in thick layers; diluted PVA often feels dry in 30-60 minutes but should not be stressed immediately.
Keep the model away from direct heat, hair dryers, radiators, and strong sunlight. Rapid drying creates uneven contraction, while heat can curl thin paper and soften some printed coatings.
You will know the joint has set when the paper returns to its normal color and the shape stays put after support is removed for several seconds. The common mistake is testing the fold repeatedly while the adhesive is still rubbery.
Step 5: Inspect and add a finish only if necessary
Remove supports slowly and check the model from several angles. Add a second tiny adhesive application only when the first layer failed to close the joint after full drying.
Use acrylic spray only when the surface needs a consistent protective coating and the paper passes a solvent test. Spray two or three thin coats at 20-30 cm, wait about 15 minutes between coats, and allow 24 hours for final curing.
You will know the finish is even when no droplets, white crust, tackiness, or gloss patches appear in the valleys. The common mistake is adding varnish to hide an adhesive spot, which can make the repair more visible.
Which Method Is Strongest, Reversible, or Safest?
No single treatment wins every category. Methyl cellulose offers the best balance for artistic paper sculpture, PVA gives the strongest concealed bond, and tissue foil delivers the highest shape retention when the model has not yet been folded.
| Decision criterion | Methyl cellulose | Diluted PVA | Acrylic spray | Tissue foil |
|---|---|---|---|---|
| Reversibility | Relatively high with controlled moisture | Low after full cure | Low to moderate | Not applicable after folding |
| Visible finish | Matte, paper-like | Matte to slightly glossy | Matte, satin, or gloss | Paper, foil, or tissue surface |
| Small-joint strength | Moderate | High | Low at internal joints | High through metal core |
| Humidity resistance | Low to moderate | Moderate | Moderate to high surface resistance | High shape retention |
| Best paper range | Tant, tissue, copy paper | Kami, copy paper, modular units | Robust coated or printed paper | Tissue and thin paper |
| Typical drying or cure | 3-6 hours | 30-60 minutes initially | 24 hours fully cured | 20-60 minutes before folding |
| Main risk | Over-wetting | Warping and permanence | Solvent or pooling damage | Irreversible wrong creases |
How does humidity affect a finished model?
Humidity is often the hidden cause of unfolding, especially for thin paper and interlocking modular units. Relative humidity around 40-55% is a practical home range for display, while rapid changes are more damaging than a brief moderate excursion.
The Library of Congress recommends a stable environment and commonly gives 30-50% relative humidity as a target range for many paper collections. That guidance is for collections rather than every origami object, but it supports the practical rule of avoiding damp bathrooms, kitchens, windowsills, and unconditioned garages.
Use a closed display case with a small silica-gel packet for transport or short-term storage, but do not place desiccant against the model. A case reduces dust and air movement; it does not compensate for a persistently wet room.
What Common Mistakes Make Origami Worse?
The most damaging mistake is applying a large amount of water-based adhesive before identifying the failure point. Excess liquid relaxes the entire sheet, expands some fibers unevenly, and can leave a model permanently distorted even when the original opening is fixed.
| Mistake | Visible symptom | Likely cause | Recovery |
|---|---|---|---|
| Saturating one flap | Wrinkles or translucent paper | Excess water or glue | Blot, reshape, dry supported |
| Bare metal clipping | Dents or rust marks | Direct clip pressure | Re-wet lightly, support broadly |
| Spraying too close | Pools and white spots | Nozzle under 20 cm | Let cure, then test gentle cleaning |
| Gluing visible edges | Shiny ridges | Adhesive migration | Remove wet excess immediately |
| Drying with heat | Curled or brittle tips | Uneven contraction | Reactivate locally and reshape |
| Skipping a test patch | Bleeding or color shift | Ink or coating incompatibility | Stop treatment; use dry support |
| Sealing moving parts | Stiff hinges | Coating entered pivot | Trim only after full cure |
An expert rule of thumb is to treat a finished model like a conservation object, even when it is a casual craft. Every added coating reduces future options, so hidden spot bonding is usually preferable to full-surface sealing.
Gloss products also change how viewers read paper texture. Matte Mod Podge or matte acrylic may reduce reflections, but neither is invisible at close range when applied heavily.
How Do You Fix Warped, Torn, or Still-Opening Origami?
Warped origami can often be corrected by controlled local reactivation, while torn paper requires an internal patch or a decision to accept a visible repair. A model that still opens after two careful applications usually has a design or load problem, not an adhesive shortage.
Repair a warped section
Use a barely damp fine brush on the concave or distorted area, not a spray bottle over the whole model. Wait 30-60 seconds for the fibers to relax, return the section to shape, and support it with foam or tissue until dry.
For a large model, work in sections under 10 cm at a time. If the paper starts to buckle, stop adding moisture and let it dry partially before continuing.
Repair a small tear
Place a narrow strip of matching thin paper inside the tear with a minute amount of diluted PVA or methyl cellulose. Press through release paper or silicone sheet, then leave the patch supported until dry.
A tear at a load-bearing point may continue spreading because the original crease has lost strength. In that case, reinforce a larger hidden area or redesign the support rather than relying on a surface dab.
Fix a shiny adhesive spot
Remove excess PVA while it is still wet with a barely damp swab. After curing, aggressive sanding can cut through colored paper, so test any 800-grit abrasive on a scrap before touching the model.
A matte coating can reduce the contrast of a small shiny spot, but it cannot restore the original paper surface. On valuable work, a visible but stable repair is safer than repeated solvent or abrasion experiments.
How Should You Preserve Different Origami Situations?
The right treatment depends on the model’s material, handling, and display conditions. A small crane in a dry room may need only a hidden dab, while a wearable piece or a large animal sculpture needs layered support and a realistic assessment of water exposure.
| Situation | Recommended first choice | Avoid first | Typical adjustment |
|---|---|---|---|
| Simple crane or flower | Dry shaping, then 1 hidden PVA dot | Full spray coating | Use 1-2 drops at the opening |
| Modular kusudama | PVA inside interlocking pockets | Wetting the whole ball | Bond 2-4 key modules |
| Complex animal | Methyl cellulose and shaped supports | Thick white glue on curves | Dry overnight if layers are dense |
| Thin tissue sculpture | Methyl cellulose, very dilute | Clips on unsupported tips | Use foam and tissue cradles |
| Inkjet-printed paper | Dry support and test patch | Un tested aerosol | Allow 24 hours for ink test |
| Earrings or jewelry | Internal PVA, then tested matte coat | Water-only stabilization | Add sealed findings separately |
| Valuable or archival model | Reversible dry support or conservation advice | Permanent varnish | Record every treatment |
| Humid-room display | Case, stable climate, selective bonding | Bathroom or windowsill display | Keep near 40-55% RH |
For jewelry, no paper coating makes an origami piece genuinely equivalent to waterproof plastic. Sweat, flexing, skin oils, and rain attack exposed edges and hinge points. Use a robust paper, seal tested surfaces, and expect eventual maintenance.
For archival work, avoid casually adding PVA, Mod Podge, or aerosol finishes. Conservation decisions depend on paper composition, pigments, adhesives, and the object’s future value. A professional paper conservator can test and document a treatment before irreversible changes occur.
How Can You Store and Transport Finished Origami?
Store finished origami upright or in a shaped cradle, inside a clean enclosure that limits dust and rapid humidity changes. Transport the model in a rigid box with soft, non-abrasive supports that hold the base and major masses without pressing delicate points.
| Storage factor | Recommended range or material | Risk outside recommendation |
|---|---|---|
| Relative humidity | 40-55% for home display | Curling, softening, or embrittlement |
| Temperature | 18-24°C | Faster adhesive aging or condensation |
| Light | Indirect, low exposure | Fading and paper yellowing |
| Clearance | 2-5 cm around fragile tips | Snagging against enclosure walls |
| Cushion | Acid-free tissue or inert foam | Abrasion and pressure dents |
| Transport box | Rigid box, 5 cm larger than model | Collapse and impact damage |
| Desiccant placement | Separate packet in enclosure | Localized overdrying or contact damage |
Do not wrap a shaped model tightly in plastic film. Trapped moisture can condense against the paper, and pressure from the wrap can flatten sculpted surfaces.
Large models also need base support. Adhesive alone cannot overcome a long paper lever, so strengthen the stand, shorten the unsupported span, or add an internal armature during construction.
Frequently Asked Questions
Can I use hairspray to stop origami from unfolding?
Hairspray is an unreliable origami fix because formulas vary, many remain tacky, and some contain solvents or plasticizers that discolor paper. Hairspray may stiffen a light surface temporarily, but a tested methyl cellulose spot treatment or hidden PVA bond gives more predictable control.
Does ironing finished origami make it stay folded?
Ironing usually damages finished origami because heat flattens sculpted volume and can fuse coatings or transfer ink. A bone folder or blunt tool can reinforce an existing crease before stabilization, but heat should not replace controlled shaping and supported drying.
Can finished origami be preserved without glue?
Finished origami can often be preserved without glue by correcting the shape, using internal paper tabs, inserting a removable support, and controlling humidity. Dry mechanical support is the safest choice for valuable models, although it may not stop a stressed pocket from reopening during handling.
How long does preserved origami last?
Preserved origami can last for years or decades when kept away from direct sunlight, moisture swings, abrasion, and excessive handling. Longevity depends more on paper quality, adhesive aging, light exposure, and storage conditions than on the label of the finishing product.
Should I laminate an origami model?
Laminating an origami model is usually a poor choice because flat film changes the form, traps moisture, adds glare, and prevents later repair. Lamination belongs before folding in the form of tissue foil, not as a clear plastic sheet applied after a sculptural model is complete.
Why does my modular origami keep coming apart?
Modular origami keeps coming apart when pockets are shallow, units are misaligned, paper is too smooth, or humidity reduces friction. Assemble the model accurately first, then place tiny PVA dots inside selected hidden pockets instead of gluing every visible seam.
The Bottom Line
The best way to keep finished origami from unfolding is to identify the stressed joint, reshape the model, support it broadly, and apply a minimal stabilizer. Choose methyl cellulose for complex reversible shaping, diluted PVA for concealed permanent bonds, and acrylic spray only after testing the paper and accepting reduced repairability. Tissue foil is the strongest solution, but it must be prepared before folding. Store the finished origami at stable humidity, protect it from pressure and sunlight, and never use more liquid than the specific failure requires.
