


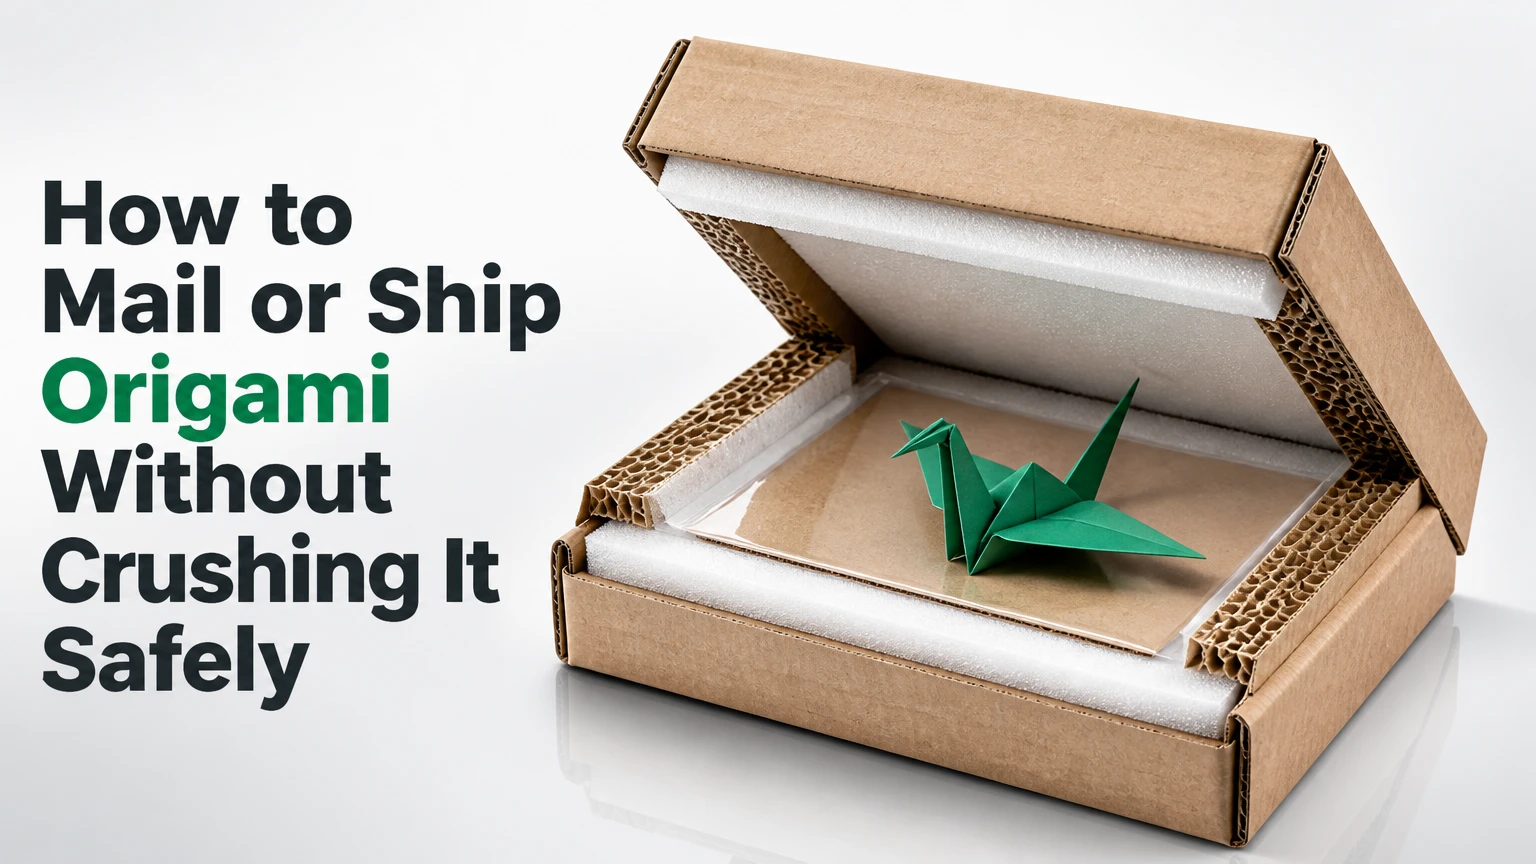
To mail or ship origami without crushing it, wrap the model loosely in acid-free tissue or glassine, secure it to a rigid base without pressing its folds, place that base inside a roomy inner container, and suspend the container inside a stronger outer box. The package must prevent movement while keeping every paper point free from compression.
Key Facts at a Glance
- Three-dimensional origami needs an inner container plus an outer shipping box.
- Glassine or acid-free tissue should separate archival paper from adhesive, plastic, and rough cardboard.
- Void fill should stop movement without touching delicate wings, points, or curved surfaces under pressure.
- A typical outer-box clearance is 1-2 inches on every side, with more space for large or weak models.
- Fragile labels provide handling information, but packaging must survive drops, stacking, and conveyor movement.
- Flat origami can use a rigid stay-flat mailer when the finished package remains flat and cannot bend.
How to Mail or Ship Origami Without Crushing It
Origami shipping protects a folded paper sculpture by controlling movement, surface pressure, impact, and moisture in that order. A loose tissue wrap alone protects the paper surface but cannot stop a crane or modular sculpture from sliding into a box wall, while tight bubble wrap can deform pointed folds.
The safest general architecture is a rigid base, a protective inner enclosure, and a cushioned outer carton. For a small crane, that may mean a card-backed inner box inside a 6 x 6 x 6 inch shipping box; for a large exhibition model, it may require a custom plastic tub and double-wall carton.
USPS Publication 52 warns that special markings do not replace compliant packaging: “The use of such markings does not relieve the mailer from fully complying with all mailing standards.” That principle applies directly to origami. A FRAGILE label cannot prevent a paper wing from folding when the model has empty space around it.
What Materials Do You Need?
Use clean, low-shed, nonabrasive materials that keep the sculpture dry and immobilized. Avoid recycled newspaper against light-colored paper because ink transfer and acidic paper can stain the model.
| Material | Typical quantity | Purpose | Suitable specification |
|---|---|---|---|
| Acid-free tissue or glassine | 1-3 sheets | Surface and moisture barrier | 1 sheet larger than model |
| Foam board or corrugated plastic | 1 base | Prevents flexing | 3-6 mm thick |
| Small inner box or lidded bin | 1 unit | Protects model from void fill | 10-20% larger than model |
| Kraft paper or large-cell bubble wrap | 2-4 lb | Cushions inner container | 1-2 in outer clearance |
| Low-tack artist tape | 4-8 pieces | Secures base or removable supports | 0.5-1 in strips |
| Corrugated outer box | 1 unit | Resists impact and stacking | 1-2 in clearance per side |
| Packing tape | 3-6 m | Seals carton seams | 2 in wide, pressure-sensitive |
| Humidity indicator card | 1 card | Monitors moisture-sensitive shipments | Optional for valuable work |
Do not use ordinary transparent tape on the origami itself. Adhesive residue, torn fibers, and peeling varnish can permanently alter paper.
Before You Start
Prepare the package before touching the model so the sculpture spends less time exposed to handling. A typical small origami shipment takes 15-30 minutes to pack, excluding carrier time.
| Preparation factor | Typical small model | Large or valuable model |
|---|---|---|
| Packing time | 15-30 minutes | 45-120 minutes |
| Difficulty | Moderate | High |
| Typical material cost | $5-$15 | $20-$75 |
| Outer box clearance | 1-2 in per side | 2-4 in per side |
| Recommended service | Tracked ground | Insured, tracked service |
| Drying prerequisite | 24-48 hours after wet folding | 48-72 hours after wet folding |
You need the model’s height, width, length, longest point, and any movable or unsupported parts. Measure the sculpture in its intended display position, not while flattening or compressing it.
How Should You Prepare Origami Before Packing?
Inspect the model under bright, indirect light and photograph every side before packaging. Confirm that wet-folded paper, paint, glue, or protective coating has fully cured, because trapped moisture can soften creases and encourage mold during a multi-day shipment.
Record the paper type and any fragile elements. Kami paper, tissue foil, hand-dyed paper, and heavyweight watercolor paper respond differently to humidity and pressure. Remove loose dust with a clean air blower, never with a damp cloth.
Step 1: Photograph and Measure the Model
Create a visual record, then measure the model’s maximum dimensions without pushing down points or wings. Measure length, width, height, and the largest diagonal span, and add 1-2 inches of free space around the model inside its inner container.
Photographs help with insurance claims and reveal whether a fold changed during transit. A ruler in one image provides scale, while close photographs of thin appendages document their original position.
You will know it worked when: every dimension is written down and the model can be described without handling it again.
Common mistake: measuring only the central body. A crane’s wingtip or a dragon’s tail often determines the required container size.
Step 2: Add a Loose Paper Barrier
Lay one sheet of glassine or acid-free tissue on a clean surface and place the model in the center. Fold the paper around the sculpture loosely, leaving visible air space around raised folds and securing the wrapper to itself rather than to the artwork.
Glassine limits friction and provides a cleaner archival barrier than ordinary tissue. It does not provide impact protection, waterproofing, or structural support, so it must be followed by a rigid enclosure.
For museum-quality paper, use unbuffered archival tissue when the artist or conservator specifies it. Buffered paper is alkaline-treated and can be unsuitable for some photographic, dyed, or chemically sensitive materials.
You will know it worked when: the wrapper touches broad, stable areas lightly but does not flatten a ridge, wing, or pointed fold.
Common mistake: pulling the paper tight like gift wrap. Tight wrapping transfers tension directly to the creases.
Step 3: Secure the Model to a Rigid Base
Place the wrapped origami on a foam-board, corrugated-plastic, or heavy-cardboard base that is at least 1 inch wider than the model on every side. Secure only a stable underside or removable support with short strips of low-tack artist tape.
Never tape a visible fold, painted surface, delicate point, or irreplaceable paper edge. For a valuable sculpture, avoid taping the origami entirely and build a removable cradle from polyethylene foam, acid-free board, or shaped inert foam.
The rigid base prevents the model from tipping when the inner container moves. It also gives the recipient a safe surface for lifting the sculpture from the package.
You will know it worked when: the base can be lifted and tilted slightly without the model sliding, while no tape presses against the sculpture.
Common mistake: anchoring the artwork to the box lid. A lid can transmit impact directly to the model.
Step 4: Build a Pressure-Free Inner Enclosure
Choose an inner box or rigid lidded plastic container that leaves at least 1 inch between the model and each wall. Place a thin, soft support under the base, then use small supports at stable locations to stop lateral movement without touching delicate surfaces.
The inner enclosure should resist bending when lifted. A thin mailing carton is inadequate if the lid can bow inward onto the sculpture.
Do not create a sealed airtight environment for damp paper. A dry, clean container with a small amount of breathable archival material is safer than trapping residual humidity.
You will know it worked when: the inner container can be closed without the lid contacting the highest point of the origami.
Common mistake: choosing a container based on footprint alone. Height and diagonal clearance matter just as much.
Step 5: Fill Negative Space Without Applying Pressure
Add small pieces of loosely crumpled archival tissue or soft, clean kraft paper around the base and container walls, not directly against unsupported wings or sharp points. The fill should limit travel to less than about 1 inch while allowing the origami to retain its shape.
For very delicate work, use shaped supports that touch only strong areas, such as the base or a broad folded body. Loose-fill packing peanuts can migrate into folds and create static, and cornstarch peanuts can soften or break down if exposed to moisture.
Avoid popcorn, hay, shredded paper, and household foam for valuable work. Food particles, oil, dust, pests, and odor create risks that outweigh their low cost.
You will know it worked when: the inner container moves only slightly during a gentle tilt, and no filler shifts onto the model.
Common mistake: filling every cavity tightly. A cavity is not automatically a void that needs packing material.
Step 6: Place the Inner Enclosure in the Outer Box
Select an outer corrugated box that leaves 1-2 inches of cushioning space around the inner container. For a large, tall, or weak sculpture, increase the clearance to 2-4 inches and use a double-wall carton when available.
Center the inner container on a bed of crumpled kraft paper or large-cell bubble wrap. Add cushioning around all four sides, then cover the top with enough material to prevent lid contact without forcing the inner container downward.
Large-cell bubble wrap works better around the inner container than small-cell wrap, which compresses quickly under stacked weight. Kraft paper is easier to shape around corners and usually creates less static.
You will know it worked when: the inner container remains centered and the outer lid closes without resistance.
Common mistake: using one oversized box with loose fill but no inner container. The model can still move through the entire void.
Which Shipping Architecture Fits Your Origami?
The best method depends on the model’s geometry, value, and tolerance for compression. Flat tessellations need bend resistance, while three-dimensional cranes and modular stars need clearance around protruding folds.
| Method | Model type | Typical package size | Typical material cost | Main limitation |
|---|---|---|---|---|
| Rigid stay-flat mailer | Flat tessellation or diagram | 9 x 12 x 1 in | $3-$10 | Cannot protect raised sculpture |
| Single box with rigid base | Small, robust crane | 6 x 6 x 6 in | $5-$15 | Lower stacking protection |
| Inner box plus outer box | Most 3D models | 8 x 8 x 8 in or larger | $10-$30 | Higher dimensional weight |
| Plastic bin plus outer carton | Valuable exhibition sculpture | 12 x 12 x 12 in or larger | $25-$75 | Added weight and cost |
| Custom foam cradle and carton | Oversized or irregular model | Model-specific | $50-$200 | Requires fabrication time |
A plastic bin is not automatically waterproof once placed in a carton. The lid, seams, and condensation still need evaluation, especially during temperature changes.
Step 7: Perform Movement and Compression Tests
Close the outer box and gently tilt it through each axis, then rotate it once without violent shaking. Listen for sliding, feel for impact, and inspect whether the inner container remains centered after opening the carton.
A useful practitioner rule is that the model should not be able to build enough momentum to contact a wall. “No movement” is the ideal, but a small amount of cushioning compression is acceptable when it does not transfer force to the artwork.
Press lightly on the outside of the closed carton. The lid and panels should resist inward movement, and the inner enclosure should not be detectable immediately beneath the cardboard.
You will know it worked when: tilting produces no audible impact and the model’s position remains unchanged after inspection.
Common mistake: shaking harder to simulate careless handling. Violent testing can damage a package that was already correctly packed.
Step 8: Seal, Label, and Document the Parcel
Seal every outer-box seam with 2-inch packing tape using an H-pattern: one strip along the center seam and one across each end seam. Add the recipient address, return address, tracking label, and an optional FRAGILE or DO NOT CRUSH marking on multiple visible faces.
Labels can support human handling, but they cannot control automated sorting or stacking. The Practical Art World’s artwork-packing guidance similarly emphasizes structural protection rather than relying on external warnings.
Place a packing slip and unpacking instructions inside a plastic sleeve within the outer box. Photograph the sealed package, label, and scale before handing it to the carrier.
You will know it worked when: every seam is bonded, the label is flat and scannable, and the package has a complete photo record.
Common mistake: covering a barcode with tape glare or a second label. Scanning failures can delay a fragile shipment.
Flat Origami, Cranes, and Modular Models
Different origami forms fail in different ways, so one packing recipe cannot fit every model. Flat work bends, cranes lose thin appendages, and modular constructions can separate when lateral force reaches a joint.
| Origami form | Primary risk | Recommended support | Extra precaution |
|---|---|---|---|
| Flat tessellation | Bending and corner curl | Foam board in stay-flat mailer | Keep package under 1 in thick |
| Traditional crane | Wing and tail compression | Rigid base with open inner box | Leave 1-2 in around wings |
| Modular star | Module separation | Base tray and side supports | Inspect joints before sealing |
| Wet-folded animal | Moisture and soft creases | Breathable tissue and rigid cradle | Dry 24-72 hours first |
| Large dragon | Tip and tail impact | Custom cradle in plastic bin | Use 2-4 in outer clearance |
| Kusudama ball | Rolling and seam stress | Form-fitted lower support | Block rotation without squeezing |
Can You Mail Origami in a Flat Envelope?
You can mail flat origami in a rigid stay-flat mailer when the piece is already flat, the envelope cannot bend, and no raised fold can be crushed by the mailer. A standard paper envelope is unsuitable because sorting pressure can crease the artwork.
Use two sheets of archival board or one 3-6 mm foam-board panel around the piece. Secure the boards together, not the origami, and choose a tracked service when replacement would be difficult.
Do not flatten a three-dimensional model to qualify for a flat mailer. Compression changes the sculpture permanently.
Cost, Weight, and Transit Choices
Shipping cost depends on packed dimensions, weight, destination, service speed, and dimensional-weight rules. Typical United States material and postage ranges vary widely, so carrier checkout should use the final sealed dimensions rather than an estimate based on the artwork alone.
| Shipment profile | Packed weight | Typical postage range | Typical transit | Recommended service |
|---|---|---|---|---|
| Flat mailer, domestic USA | 8-16 oz | $5-$12 | 2-5 business days | Tracked ground |
| Small boxed crane, domestic USA | 1-3 lb | $10-$25 | 2-5 business days | Ground service |
| Double-boxed modular model | 3-8 lb | $18-$45 | 2-5 business days | Tracked ground or priority |
| Exhibition sculpture, domestic USA | 8-25 lb | $45-$150 | 1-5 business days | Insured specialty service |
| International small model | 1-4 lb | $30-$100 | 1-4 weeks | Tracked international |
USPS Ground Advantage and Priority Mail pricing changes with zone, dimensions, and annual rate updates. UPS and FedEx may apply dimensional weight when the carton is large relative to its scale weight, so adding clearance can increase the bill even when the origami weighs very little.
Should You Insure an Origami Shipment?
Insure a unique, commissioned, or exhibition origami piece for its documented replacement or declared value, subject to the carrier’s artwork exclusions and claim requirements. Keep photographs, sales records, appraisal evidence, and the original packing sequence.
Insurance does not restore an irreplaceable fold or compensate for sentimental value. For an inexpensive gift, tracking may provide more practical value than a high declared amount.
Common Mistakes and How to Fix Them
| Failure mode | What caused it | Immediate fix | Prevention |
|---|---|---|---|
| Flattened wings | Tight wrap or lid pressure | Rebuild with open clearance | Measure the highest point |
| Broken points | Model hit a box wall | Add a rigid inner enclosure | Eliminate travel before sealing |
| Stained paper | Newspaper or food filler | Isolate with archival materials | Use clean, acid-free barriers |
| Damp, soft folds | Wet model or condensation | Open and air-dry safely | Confirm full curing first |
| Crushed carton | Weak outer box | Transfer to a new carton | Use double-wall board for large work |
| Separated modules | Lateral movement | Reassemble and support base | Block rotation and inspect joints |
A counterintuitive packing truth is that softer material is not always safer. A thick pillow of loose foam can allow a lightweight sculpture to accelerate inside the void, while a carefully shaped rigid support can stop movement with less contact.
Another practitioner rule is to protect the model from the package interior before protecting the package from impacts. Rough cardboard, adhesive, plastic static, and loose particles can damage paper even when the carton never falls.
How Should the Recipient Unpack Origami?
The recipient should open the outer box on a clear table, remove cushioning from the top and sides, lift the inner container by its base, and inspect the sculpture before removing any tape or support. Origami should never be pulled by a wing, point, tail, or modular section.
Include these instructions on a small card:
- Photograph the unopened package if damage is visible.
- Cut tape away from the carton, keeping the blade shallow.
- Remove the inner container before touching the model.
- Lift the rigid base or support, not the paper sculpture.
- Remove tissue by unfolding it away from points.
- Let a cold package reach room temperature before opening if condensation is present.
For valuable work, the recipient should retain all packaging until condition has been confirmed. Reusable supports also simplify future exhibition transport.
FAQ
Is bubble wrap safe for origami?
Bubble wrap is safe around an inner box or rigid base when it does not press directly against the folded paper. Large-cell bubble wrap provides outer cushioning, but direct tight wrapping can bend wings, points, and layered folds.
How much empty space should an origami box have?
A typical small model needs 1-2 inches between the sculpture’s furthest point and the inner container walls. Large, fragile, or irregular models may need 2-4 inches in the outer carton, provided supports stop momentum without compressing the paper.
Can packing peanuts go inside an origami box?
Packing peanuts can fill space around a rigid inner enclosure, but loose peanuts directly around origami can create static, migration, and pressure problems. Archival tissue, shaped supports, and a separate inner box provide better control for delicate work.
How do you ship an origami crane safely?
Wrap the crane loosely in glassine or acid-free tissue, support its body on a rigid base, leave at least 1 inch around each wingtip, and place the base in an inner container. Double-box the container when the crane is valuable or has thin wings.
Should origami be shipped flat?
Origami should be shipped flat only when the artwork is designed to remain flat. A three-dimensional crane, dragon, star, or kusudama should stay in its display geometry because flattening can permanently alter its creases.
How long can origami remain packed?
A fully dry paper model can usually remain packed for several days during normal transit, but long-term storage inside plastic can trap humidity and cause distortion. Open valuable shipments promptly, inspect the paper, and store the model in a stable, dry environment.
The Bottom Line
To mail or ship origami without crushing it, create a rigid base, use a loose archival barrier, stop movement inside an inner enclosure, and cushion that enclosure inside a properly sized outer box. Flat pieces need bend-resistant mailers, while three-dimensional origami needs clearance around every protruding fold. The package, not the FRAGILE label, must carry the protection.
