

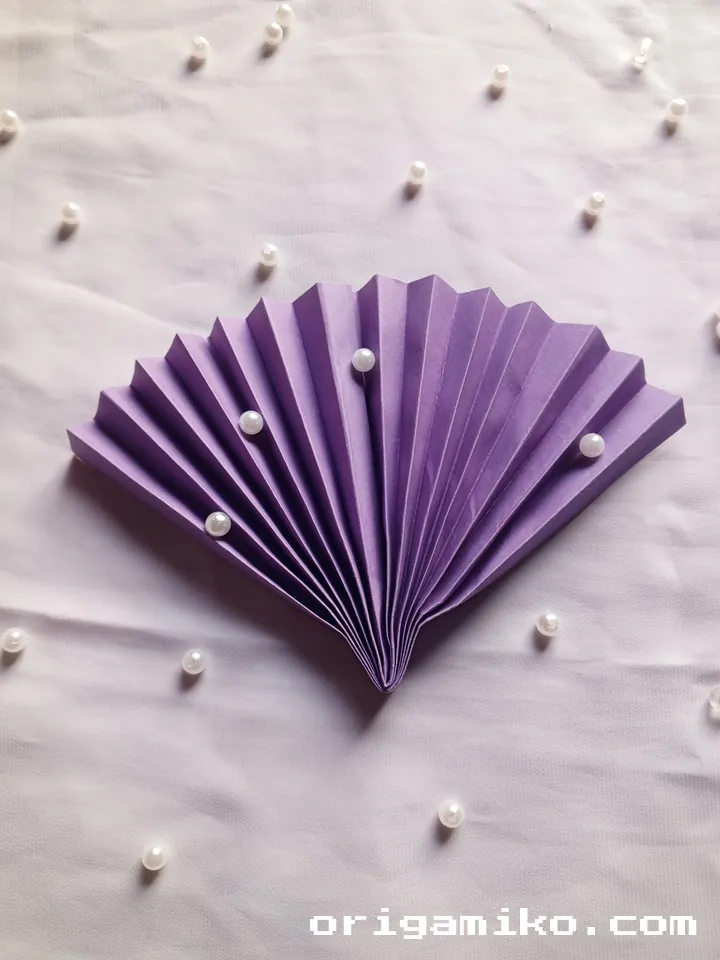
Have you ever tried making an easy Origami fan? The simple folds of paper that turn into a beautiful, functional piece are surprisingly satisfying. Origami fan instructions can transform plain paper into something remarkable, even for beginners.
If you’ve been wondering how to make a fan, this guide will show you exactly what to do, step by step. I’ll walk you through the process and share some cool tips along the way to make sure your first fan turns out beautifully.
This paper folding project is not only fun, but it’s also a great way to dive into the world of origami. Ready to get started?
What is an Origami Fan?
An Origami fan is a traditional paper folding project that turns a simple rectangular sheet of paper into a functional, decorative object. It’s popular for its clean, neat folds and versatility, from adding charm to gift wrapping to being used in arts, crafts, and cultural displays.
The beauty of an Origami fan lies in its simplicity. It’s a great project for anyone from complete beginners to experienced origami artists. Plus, with a few easy folds, you’ll have a unique piece to display or use.
Materials Needed
| Item | Size/Quantity | Notes |
|---|---|---|
| Rectangular Paper | 15″ × 10″ | Any paper will work, but thicker paper holds shape better. |
| Flat Surface | – | A table or desk works best. |
| Patience | – | Don’t rush, enjoy the process. |
Key Terms to Know
- Origami: The Japanese art of paper folding.
- Fan: A folding paper structure that opens and closes like a traditional hand-held fan.
- Crease: A fold made by pressing the paper firmly.
Simple Fan Step by Step: The Process
Ready to fold? Let’s dive into the simple fan step by step! Don’t worry if you’re new to this; I’ll guide you through the entire process, from start to finish.
Step 1: Prepare Your Paper
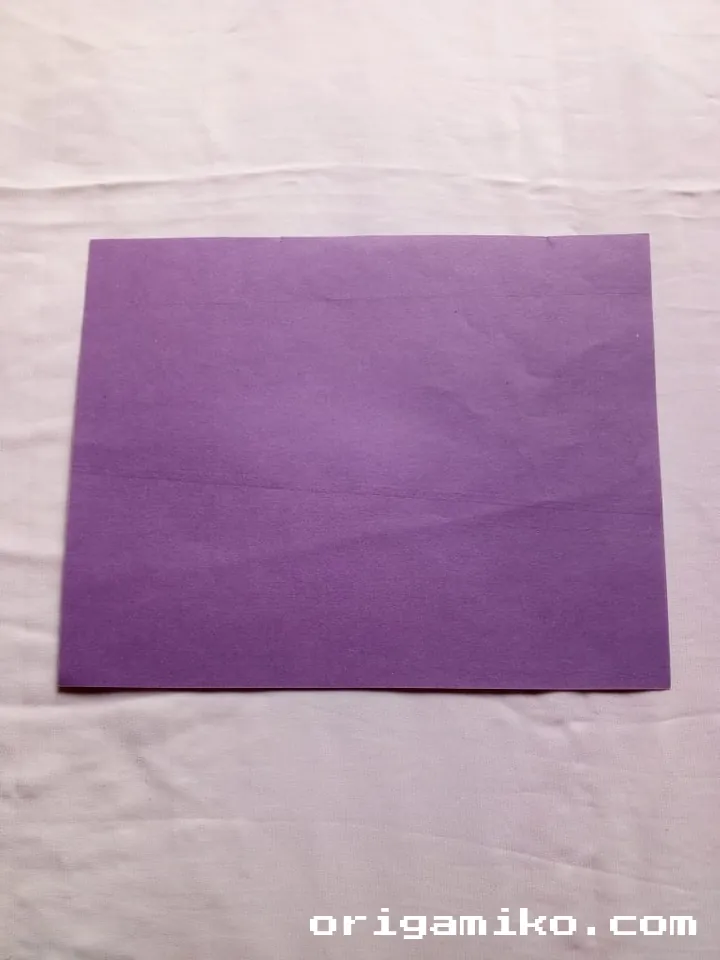
Start with a rectangular piece of paper. The dimensions should be 15″ × 10″, but you can use any size that fits your preference. I find this size works best for a fan that’s large enough to be functional but not too bulky.
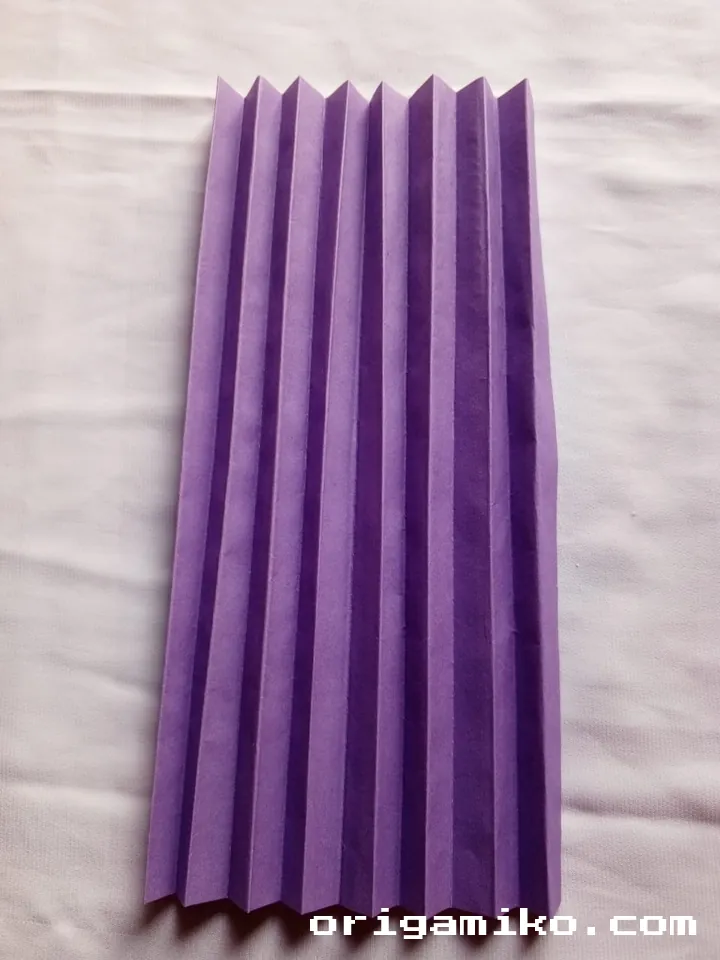
Step 2: Fold Along the Middle
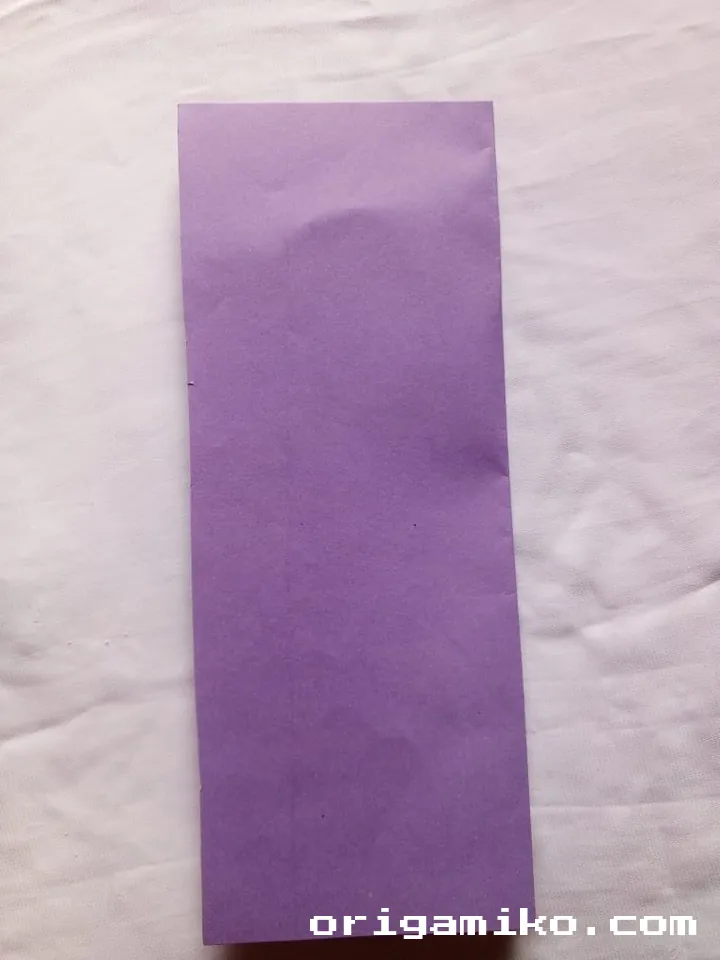
Next, fold your paper in half lengthwise, lining up the two longer edges. Crease well, then unfold it to reveal the crease in the middle. This fold will serve as your guideline for later folds.
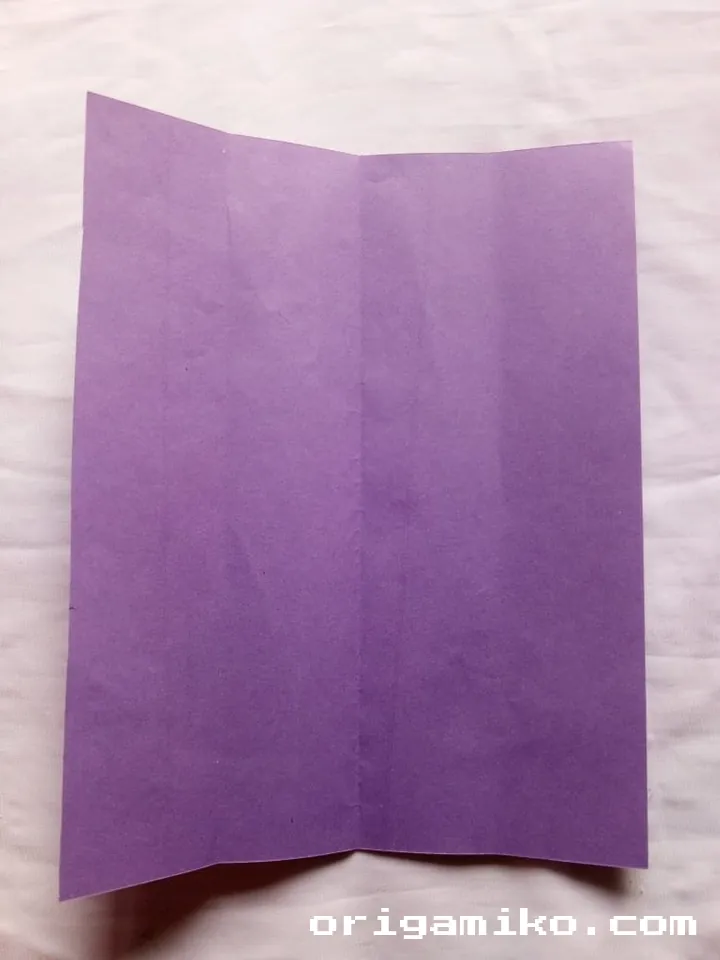
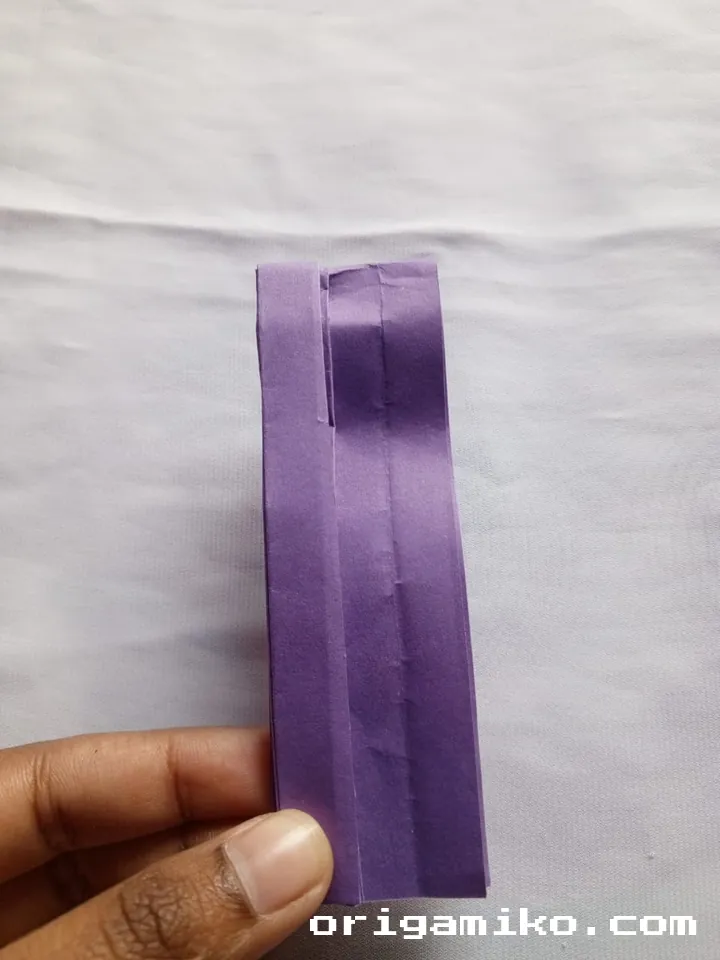
Step 3: The Housefold

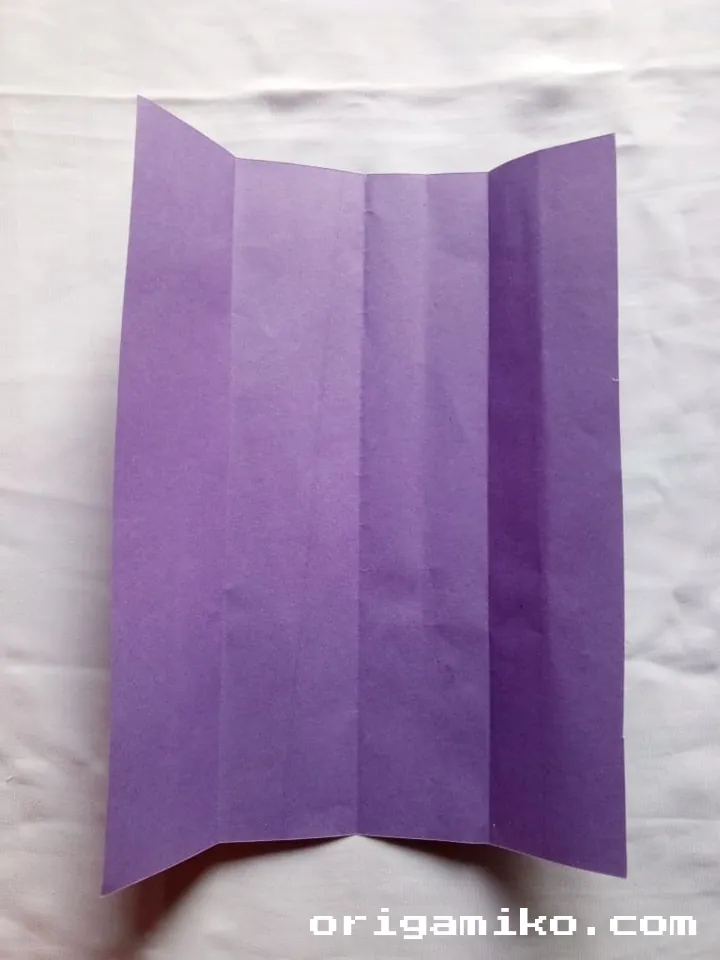
Now, let’s make the housefold. Fold both long sides of your paper to meet at the center crease, like folding a letter. Once done, unfold both sides. Do this fold two times (one for each side), and be sure to unfold each after completing the fold. This will create a guide for the next steps.
Step 4: Final Folds
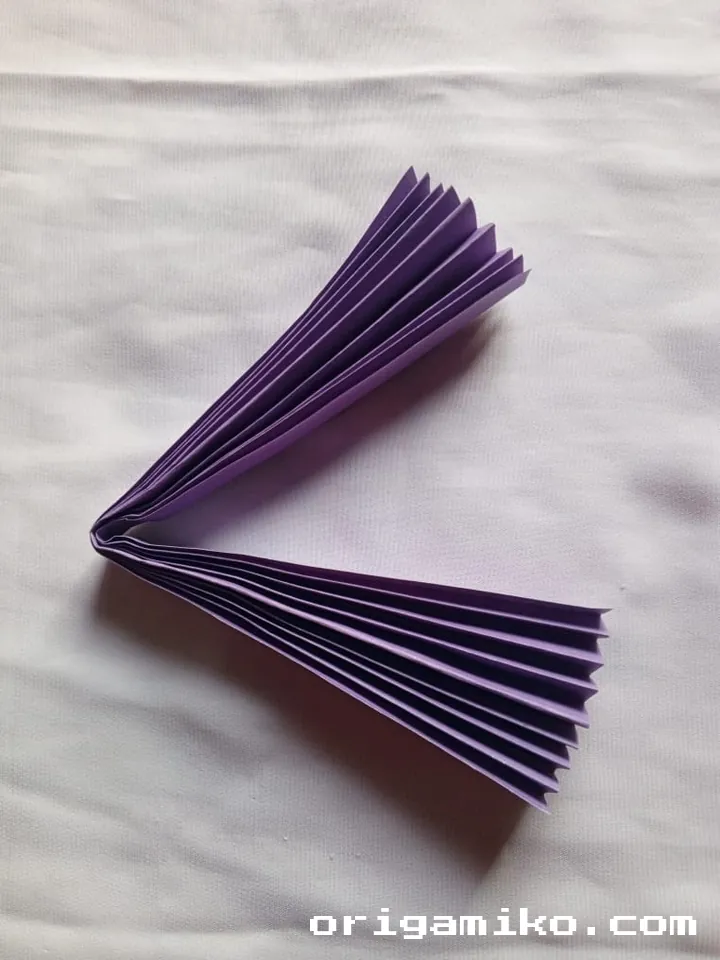
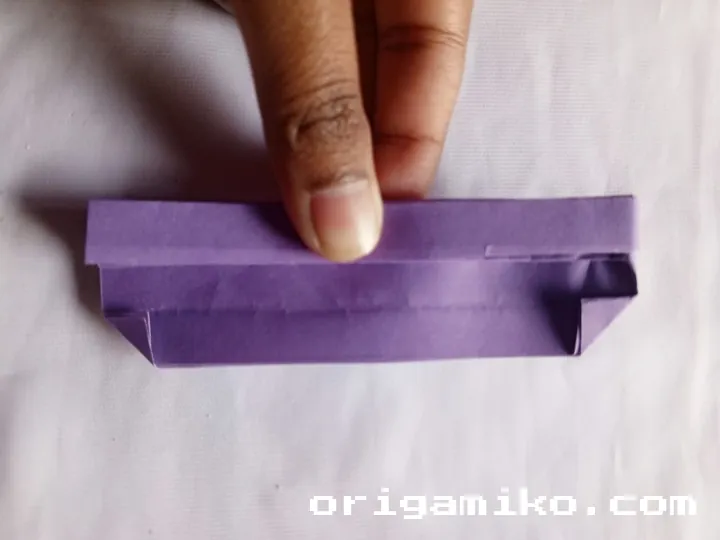
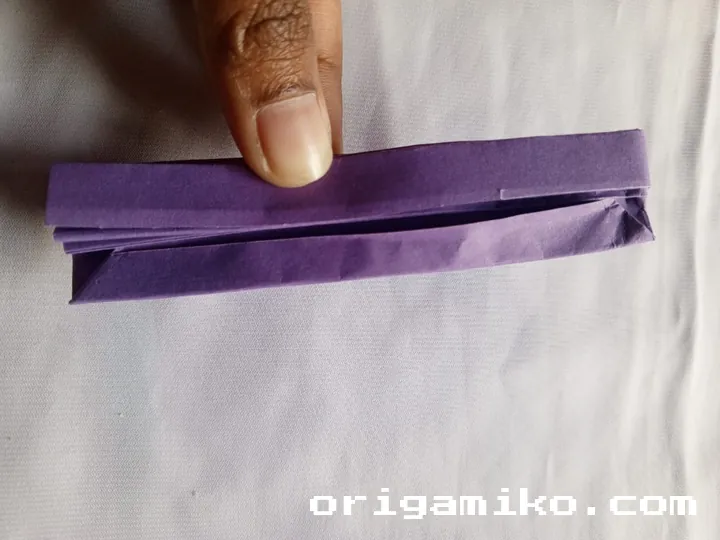
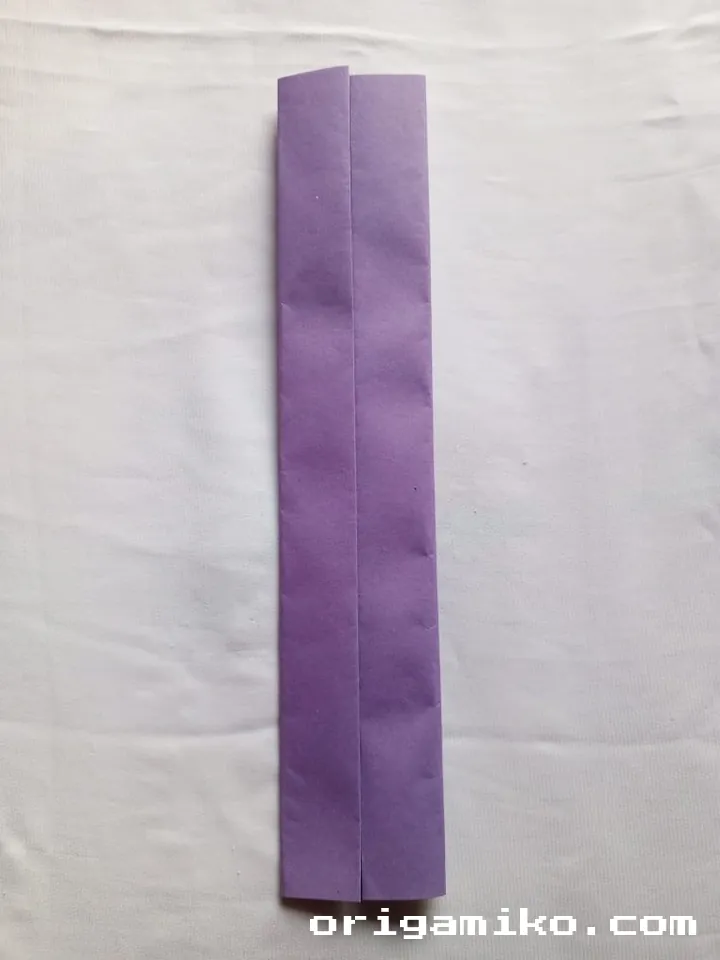
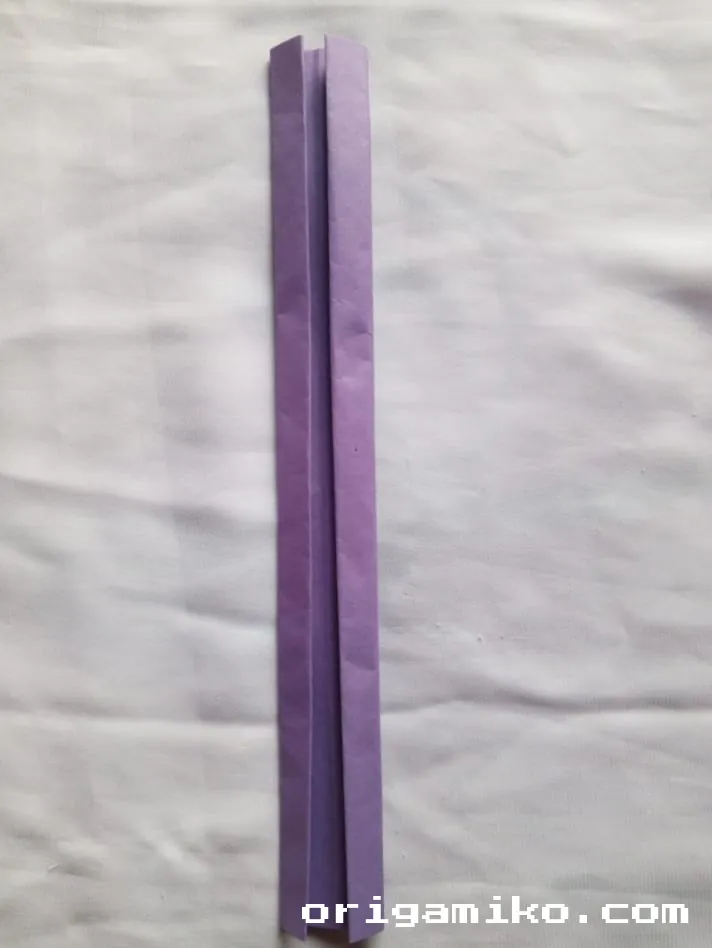
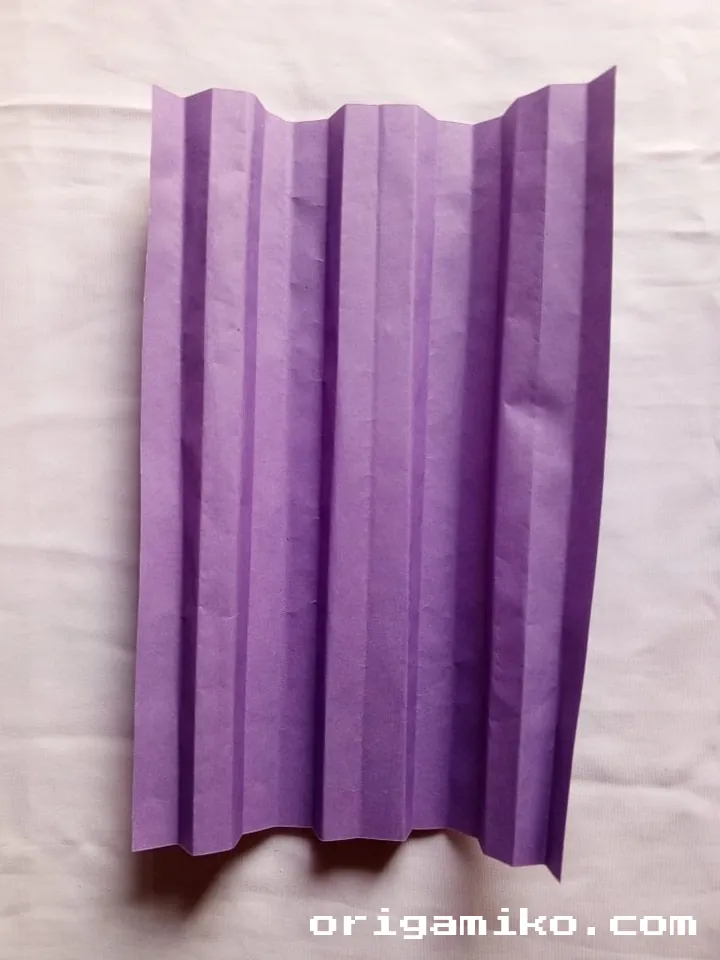
Take one side of the paper and fold it toward the middle. Now fold the two corners inward to create sharp points. This is where the origami fan starts to take shape. Once you’ve done this, you’re almost done!
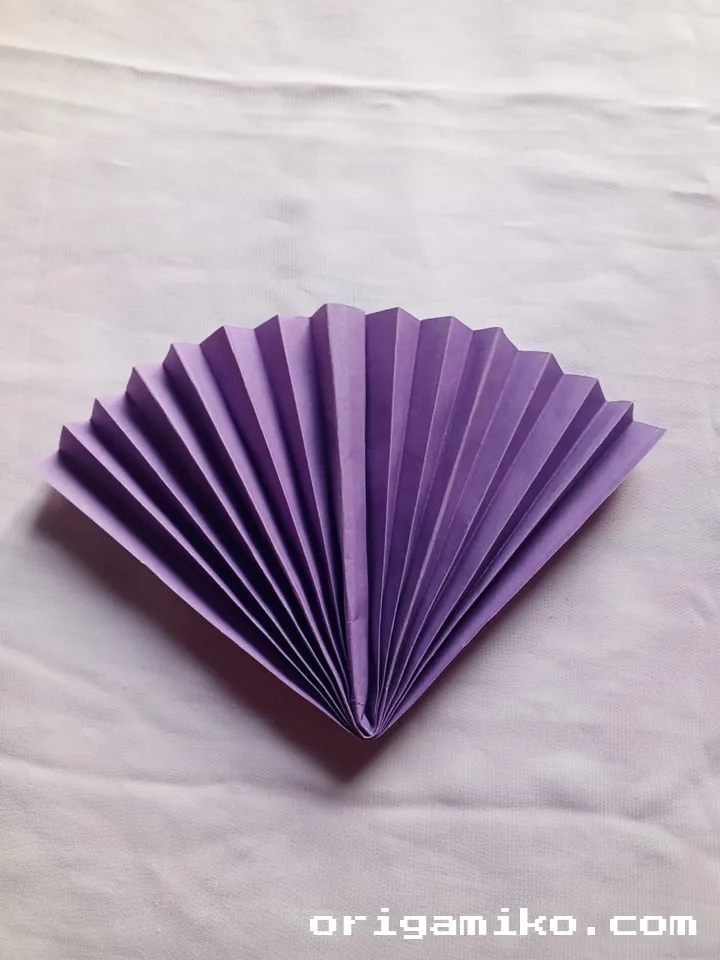
Now fold the paper in half lengthwise again. You’ll have a beautiful origami fan ready to display!
Tips for Success
- Use thicker paper: Thicker paper helps keep the fan’s shape.
- Press your creases: The sharper your folds, the better your fan will look.
- Take your time: Don’t rush! Folding origami is about patience, not speed.
Common Mistakes and How to Avoid Them

- Creasing too lightly: A light crease can result in folds that don’t hold up. Press firmly for crisp lines.
- Incorrect folding order: Follow the steps carefully. If you miss a fold, the fan may not work as expected.
- Uneven folds: Be sure to align your paper accurately before making any folds for a symmetrical fan.
Similar Variations You Can Try
- Miniature Origami Fan: Use smaller paper to create a cute, compact fan.
- Double Fan: Fold two fans and attach them to make a larger, more impressive display piece.
- Colored Paper Fans: Experiment with colorful paper for a more vibrant, decorative effect.
FAQs
What size paper should I use for an origami fan?
I recommend starting with 15″ × 10″ paper for a perfect balance of size and ease.
Can I use other materials besides paper?
Yes, you can! Just make sure whatever material you use can hold the crease well. Thin cardstock, for example, works great.
Is this origami project beginner-friendly?
Definitely! It’s one of the easiest origami fan instructions for newcomers, and even seasoned paper artists enjoy it!
Conclusion
There you have it, friends! With these easy origami fan steps, you can create a beautiful, functional fan in no time. Whether you’re looking to add a handmade touch to a gift or simply enjoy the calming art of paper folding, I hope this guide has inspired you to get started.
Remember, origami is all about patience and practice. Keep folding, and soon you’ll be making fans and more with ease. Enjoy your folding journey!