


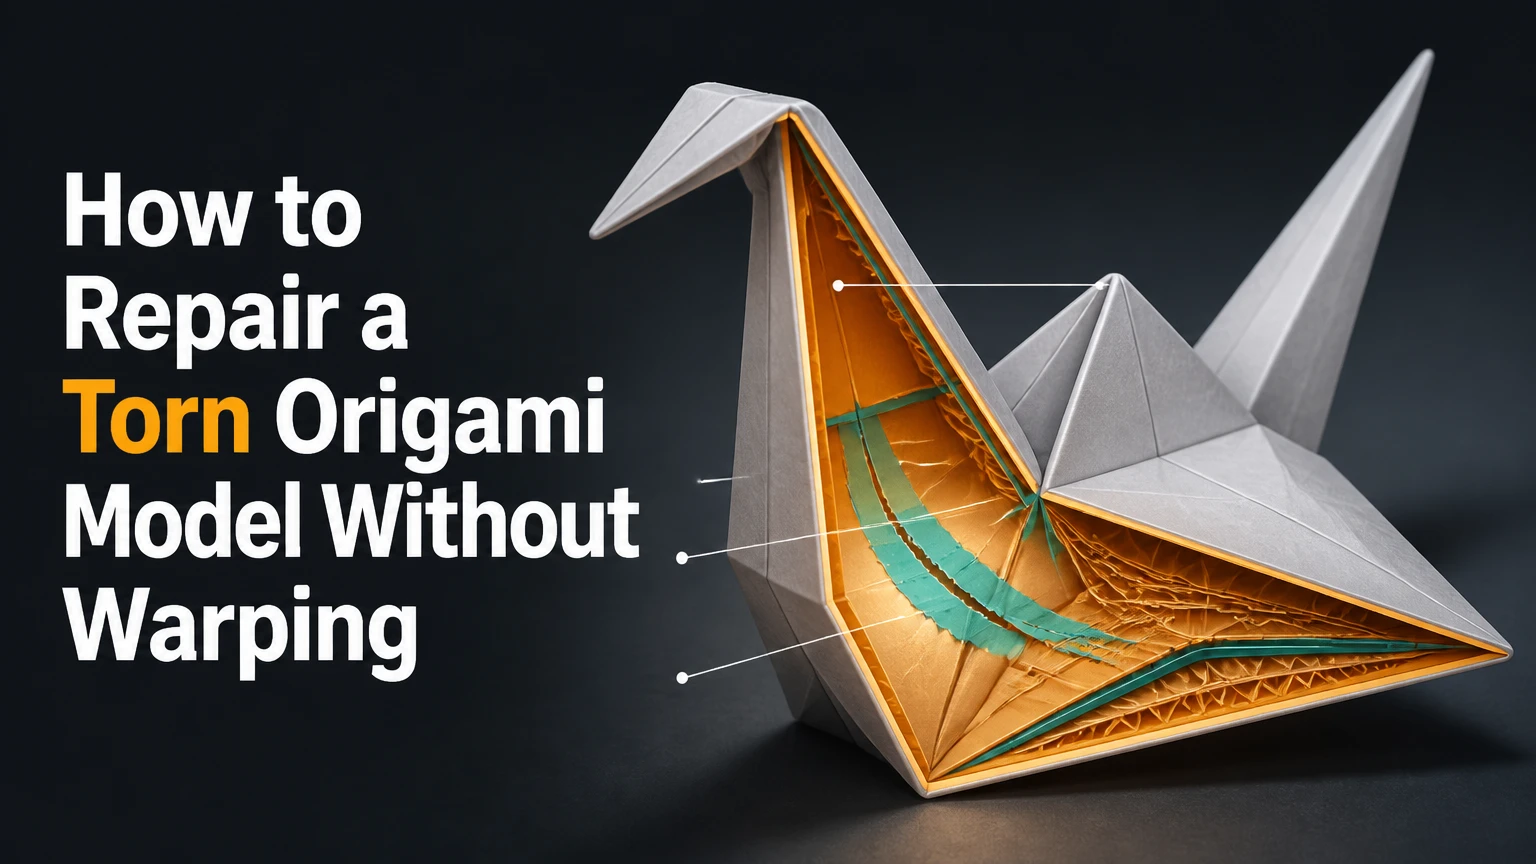
To repair a torn origami model, align the paper fibers, apply a microscopic amount of archival adhesive, press the tear flat, and reinforce the inside when the joint carries stress. The best method depends on paper thickness, tear shape, crease direction, surface finish, and whether the model has historical or monetary value.
Key Facts at a Glance
A clean tear in medium-weight paper usually needs less than 0.1 mL of acid-free PVA glue.
Thin Japanese tissue and methyl cellulose create a lighter, less visible interior reinforcement than ordinary tape.
A repaired model usually needs 20-30 minutes before gentle handling and 12-24 hours before repeated folding.
Glue applied to the outside of a patterned model can create gloss, staining, or a permanent ridge.
A missing section cannot be restored invisibly without matching paper, color, grain, thickness, and surface texture.
Valuable, historic, signed, or wet-folded models should be assessed by a paper conservator before repair.
What Should You Check Before Repairing Origami?
Inspect the tear under bright, indirect light before applying adhesive. Origami paper has a memory of its folds, so a repair that is strong but misaligned can permanently distort the model’s geometry.
Open the model only as far as necessary. Photograph the intact shape from several angles, then identify whether the damage is a split along a crease, a tear across a flat panel, a detached flap, or a missing fragment. Check both sides for loose fibers, glue residue, pencil marks, paint, foil, or moisture sensitivity.
| Damage type | Typical size | Structural risk | Preferred repair |
|---|---|---|---|
| Clean edge tear | 2-10 mm | Low to medium | Archival PVA, less than 0.1 mL |
| Tear along a crease | 5-25 mm | High | Interior tissue patch, 5-15 mm wide |
| Long split in thin paper | 20-60 mm | High | Tengujo tissue and methyl cellulose |
| Missing paper section | 3-15 mm gap | High | Matching-paper infill plus interior patch |
| Crushed or wet-folded panel | 10-40 mm distortion | Very high | Stabilization before adhesive |
A useful practitioner test is to identify the forces acting on the tear. If the damaged flap moves whenever another part of the model is shaped, adhesive alone may fail. The joint needs a flexible reinforcement that distributes tension across a larger area.
Do not begin with a visible surface. Start on a hidden interior edge or a scrap of the same paper. Conservation guidance from the Library of Congress and the Canadian Conservation Institute consistently favors reversible, stable materials over household pressure-sensitive tape for paper objects, because aged tape can stain paper and become difficult to remove.
What Materials and Tools Do You Need?
A basic repair kit costs about $10-$30 and can repair several small models. Use a fine-point tool, stable lighting, clean hands, and a support surface that does not transfer texture to the paper.
Before You Start
| Requirement | Typical specification | Quantity or range |
|---|---|---|
| Working time | Small tear, excluding full cure | 10-20 minutes |
| Full drying time | Interior tissue or PVA joint | 12-24 hours |
| Adhesive quantity | Per 5-10 mm tear | 0.03-0.10 mL |
| Working surface | Smooth silicone release sheet or glass | 1 sheet |
| Direct material cost | Small home repair kit | $10-$30 |
| Difficulty | Clean tear with visible alignment | Intermediate |
Use acid-free PVA for a clean tear in medium or heavyweight paper. Use methyl cellulose paste for thin, delicate, absorbent, or valuable paper when adjustability and lower moisture are more important than maximum bond strength.
| Tool or material | Useful specification | Main purpose |
|---|---|---|
| Archival PVA | Neutral pH, conservation grade | Strong clean-edge bond |
| Methyl cellulose | Powder mixed into low-strength paste | Reversible tissue repair |
| Japanese tissue | Tengujo, 5-12 gsm | Lightweight interior reinforcement |
| Fine tweezers | Blunt, polished tips | Fiber and tissue placement |
| Bamboo skewer or toothpick | Rounded tip | Metering tiny adhesive amounts |
| Bone folder | Smooth polished edge | Re-establishing a dry crease |
| Silicone release sheet | Nonstick, smooth surface | Preventing paper attachment |
| Small weights | 50-250 g, flat base | Holding repaired panels flat |
Avoid rubber cement, cyanoacrylate instant glue, hot glue, ordinary transparent tape, and heavily scented school glue. Cyanoacrylate cures rigidly and can frost nearby surfaces, while hot glue adds bulk that changes a fold’s proportions.
A glue stick is acceptable for a temporary display model with a tiny, nonstructural flap, but it is a poor choice for a stressed joint. Most glue sticks have lower wetting and bond penetration than liquid conservation adhesive.
Which Adhesive Is Best for a Torn Origami Model?
Archival PVA is usually best for a clean tear in thick or medium-weight origami paper, while methyl cellulose with Japanese tissue is better for thin, delicate, or valuable models. Neither adhesive is universally safe because moisture, stiffness, reversibility, and surface appearance matter as much as bond strength.
| Repair option | Drying behavior | Bond or patch profile | Best paper situation |
|---|---|---|---|
| Archival PVA | Surface set in 15-30 minutes; cure in 12-24 hours | Strong, slightly rigid line | 90-200 gsm paper |
| Methyl cellulose | Usually 30-60 minutes; cure in 12-24 hours | Flexible, more adjustable | 30-90 gsm paper |
| Tengujo tissue patch | Depends on paste, usually 30-60 minutes | Low bulk, translucent | Thin or fragile sheets |
| Archival repair tape | Immediate handling; adhesive ages over years | Fast, potentially visible | Hidden temporary support |
| Acid-free glue stick | 5-15 minutes surface set | Moderate, often brittle | Low-stress display repairs |
The strongest adhesive is not automatically the best repair. A rigid PVA line may hold a thick sheet but split again when a thin flap bends, whereas a tissue bridge spreads the force over several millimeters of sound paper.
How Much Glue Should You Apply?
Apply a film that barely wets the torn edge, not a bead that fills the entire gap. For a 5 mm tear, a typical starting amount is one small droplet transferred from a toothpick, approximately 0.03-0.05 mL.
The adhesive should not pool, shine, or squeeze onto the patterned face. If the edge curls immediately, the paper has received too much moisture. Blot the excess from the tool onto scrap paper, then use the nearly dry tool to lift residue.
How to Repair a Torn Origami Model Step by Step
A clean origami tear can usually be repaired in seven steps over 10-20 minutes, followed by 12-24 hours of undisturbed curing. Edge alignment determines the appearance, while interior reinforcement determines whether the model survives future shaping.
Step 1: Photograph and Support the Model
Place the origami model on a smooth, clean surface and photograph its correct shape before opening the damaged area. Support nearby layers with rolled acid-free tissue or small pieces of soft polyethylene foam so the model does not flatten under its own weight.
Work in a room between roughly 18-24°C with moderate humidity. Very dry paper can become brittle, while high humidity slows drying and makes thin sheets more prone to cockling.
You’ll know it worked when: the model rests in its original geometry without pressure on the torn panel.
Common mistake: unfolding every layer. Excessive unfolding creates new crease damage before the original tear is repaired.
Step 2: Clean and Align the Torn Fibers
Use blunt tweezers or a rounded toothpick to move loose fibers toward their original positions. Do not trim frayed fibers unless they prevent the two edges from meeting, because those fibers can help conceal a small repair.
Close the tear without glue and inspect the pattern, color, and crease alignment. For a patterned sheet, match printed lines and fold intersections before matching the outer contour. A 0.5 mm ridge may be less visible than a misaligned printed line.
You’ll know it worked when: the two edges meet continuously, with no overlap and no visible step under magnification.
Common mistake: pulling the paper tight. Tension makes the joint contract after drying and creates a permanent wrinkle.
Step 3: Test the Adhesive on Scrap Paper
Apply the planned adhesive to a scrap from the same sheet, or to a paper with the same weight and finish. Observe the test after 30 minutes and again after 24 hours for darkening, gloss, curl, stiffness, or color migration.
If no scrap exists, test inside a hidden fold rather than on the damaged face. A repair that looks clear while wet may dry glossy or leave a tide mark.
You’ll know it worked when: the test area dries flat, remains close to its original color, and bends without a brittle halo.
Common mistake: testing on unrelated printer paper. Different sizing and fiber density can produce misleading results.
Step 4: Apply a Microscopic Adhesive Film
Open the tear only enough to expose one edge. Load a toothpick with a tiny amount of adhesive, wipe most of it away, and touch the remaining film to the inside-facing torn edge.
For PVA, use one application on a 5-10 mm clean tear. For methyl cellulose, brush paste onto the tissue patch instead of saturating the origami sheet. Keep adhesive at least 1-2 mm from an exposed patterned edge whenever the tear can close without wetting that face.
You’ll know it worked when: the edge looks lightly damp but not swollen, and no liquid bead forms beside the tear.
Common mistake: spreading glue across the whole flap. Broad wetting causes uneven shrinkage and can erase a sharp origami crease.
Step 5: Close the Tear and Match the Creases
Bring the torn edges together from one end to the other, using tweezers or a rounded tool. Match the original crease first, then the outer edge, then any printed or painted detail.
Hold the joint with light fingertip pressure through release paper for 30-60 seconds. Do not rub back and forth, because rubbing pushes adhesive onto the face and stretches damp fibers.
You’ll know it worked when: the repair line is level, the crease continues without a kink, and the model returns to its photographed shape.
Common mistake: closing the center first. A center-first closure can trap a crescent-shaped gap at one end.
Step 6: Remove Excess Adhesive
Lift excess PVA with the clean tip of a toothpick before the adhesive skins over. If a wet spot reaches the outside, touch it with the corner of dry, lint-free blotter paper without dragging across the surface.
Do not use water to wipe a finished surface. Water can dissolve sizing, move dyes, and enlarge a tear in thin washi or tissue paper.
You’ll know it worked when: no glossy bead remains beside the joint and the paper surface still has its original texture.
Common mistake: scraping after the glue has cured. Cured adhesive can pull fibers from the paper.
Step 7: Add an Interior Reinforcement Patch
Reinforce the inside when the tear lies on a load-bearing crease, a narrow limb, a point, or a flap that will be folded repeatedly. Cut Tengujo tissue 5-15 mm longer than the tear and 4-8 mm wider than the damaged zone, tapering the ends where possible.
Brush a thin layer of methyl cellulose onto the tissue, position it across sound paper on both sides, and press it through release paper. A patch should bridge intact paper, not merely cover the torn line.
You’ll know it worked when: the model holds its shape after gentle handling and the patch remains flat without lifting corners.
Common mistake: using a large rectangular patch. Oversized patches add stiffness and may create a new hinge beside the repair.
How Do You Repair a Long Tear or Thin Origami Paper?
Repair thin origami paper from the inside with lightweight Japanese tissue and a low-moisture methyl cellulose paste. Thin sheets absorb liquid quickly, so a broad, flexible bridge usually produces less distortion than applying PVA directly to the torn edges.
Tengujo tissue in the 5-12 gsm range is often thin enough to disappear visually inside a shaded model. Tear the tissue by hand instead of cutting it when a feathered edge is useful, because a feathered edge reduces the abrupt stiffness change at the patch boundary.
Use a narrow patch for a narrow tear. Apply paste to the tissue, allow it to relax for a few seconds, then place it with tweezers. Press from the center outward through release paper to remove air pockets.
| Paper condition | Patch width beyond tear | Paste approach | Handling limit |
|---|---|---|---|
| 30-50 gsm tissue | 2-4 mm each side | Very thin methyl cellulose | No folding for 24 hours |
| 50-90 gsm kami | 3-5 mm each side | Thin methyl cellulose | Gentle handling after 30 minutes |
| 90-160 gsm kami | 4-8 mm each side | PVA edge bond or tissue patch | Shape after 12-24 hours |
| Foil-backed paper | 2-5 mm each side | Test adhesive first | Avoid bending repaired foil |
Metallic foil, painted paper, and handmade washi can reject adhesive or show tide marks. Test first, and place the reinforcement where it cannot contact a reflective or painted exterior.
Can You Repair a Damaged Origami Crease Without Glue?
A damaged but unbroken crease can often be restored without adhesive by supporting the paper and retracing the original fold with a polished bone folder. Glue is unnecessary when the fibers remain connected and the problem is loss of sharpness rather than separation.
Set the model on a smooth surface, align both sides of the existing crease, and press from the center toward the ends with light, repeated passes. Use three or four passes rather than one forceful stroke, since excessive pressure can polish or bruise the paper.
If the crease has white stress lines but no opening, stop folding it repeatedly. A tiny interior tissue strip may stabilize the fibers, but adding moisture can enlarge the whitening. Spray adhesive is unsuitable for precision crease repair because its broad mist is difficult to control and can stiffen adjacent folds.
How Do You Repair a Missing Piece?
A missing origami section requires an infill, not a simple adhesive joint. Match the replacement paper’s thickness, fiber direction, color, surface finish, and fold behavior, then reinforce the infill from the inside.
For a gap smaller than 3 mm, a shaped sliver may be toned with dry colored pencil after the adhesive cures. For a 3-15 mm gap, trace the missing contour from a symmetrical part of the model or an earlier photograph, then cut the replacement slightly oversized and trim it after a dry fit.
Do not guess the original geometry if the missing section affects a complex lock or multi-layer junction. The model may appear repaired while its proportions and fold sequence become permanently altered.
Which Repair Method Should You Choose?
Choose the least invasive method that restores strength, preserves the visible surface, and remains compatible with later folding. Archival PVA favors clean, strong joints; methyl cellulose and Japanese tissue favor thin paper, flexibility, and future adjustment.
| Situation | Recommended method | Typical time | Main limitation |
|---|---|---|---|
| 5 mm tear on 120 gsm kami | Tiny archival PVA bond | 10-20 minutes | Permanent moisture-related risk |
| 40 mm split on 45 gsm paper | Tengujo and methyl cellulose | 30-60 minutes | Requires controlled placement |
| Detached thick flap | PVA plus 5-8 mm tissue patch | 20-40 minutes | Adds local stiffness |
| Historic or signed model | Conservator assessment | 1-4 weeks typical queue | Higher professional cost |
| Temporary display model | Acid-free glue stick | 5-15 minutes | Weak under repeated folding |
Archival repair tape is fast, but it is not automatically archival simply because the package uses that word. Pressure-sensitive adhesive can remain visible, add stiffness, and become difficult to remove. Use tape only on a hidden interior area when the model’s value and future handling justify the trade-off.
What Are the Typical Repair Costs and Drying Times?
A small home repair usually costs $10-$30 in materials and takes 10-20 minutes of active work, while a complex structural repair may take 30-60 minutes and require overnight curing. Professional conservation costs vary widely, with assessment fees and hourly labor often exceeding the value of an ordinary display model.
| Repair level | Active work | Safe handling | Typical material cost |
|---|---|---|---|
| Small clean tear | 5-10 minutes | 20-30 minutes | $0.10-$1 |
| Crease stabilization | 5-15 minutes | 15-30 minutes | $0-$2 |
| Long tissue-backed tear | 30-45 minutes | 1-2 hours | $1-$5 |
| Missing-piece infill | 45-90 minutes | 24 hours | $2-$10 |
| Professional conservation | 1-4 hours | Project-specific | $100-$500+ |
The 15-30 minute figure often reported for glue drying means surface setting, not complete curing. Avoid refolding a PVA or tissue repair for at least 12 hours, and use 24 hours for a heavily stressed joint or a humid room.
Why Did the Repair Warp, Shine, or Open Again?
Warping usually comes from uneven moisture, excess adhesive, or pressure applied to only one side of the paper. A visible ridge usually comes from misalignment, a thick adhesive layer, or a reinforcement patch that ends abruptly near the tear.
If the paper is merely curled after drying, place it between release sheets under a flat 50-100 g weight for 2-6 hours. Do not flatten a three-dimensional model under a book, because the weight can erase volume and crush locks.
| Failure | Likely cause | Recovery |
|---|---|---|
| Tear reopens | No interior bridge or insufficient overlap | Add 5-15 mm Tengujo patch inside |
| Paper curls | Uneven wetting or excess PVA | Dry flat under 50-100 g weight |
| Glossy mark | PVA reached the visible face | Do not sand; consult a conservator for valuable paper |
| Crease shifts | Edges closed under tension | Reopen only if adhesive remains soft |
| Patch lifts | Tissue did not overlap sound paper | Reattach with thinner paste |
| Color darkens | Adhesive or water moved dye | Stop treatment and let it dry naturally |
A repaired tear that repeatedly opens indicates a structural mismatch, not necessarily bad glue. The joint may be located where the model’s folds concentrate force, so a larger but thinner interior bridge is often safer than adding more adhesive to the original line.
What Mistakes Damage Origami During Repair?
The most damaging mistakes are excess liquid, rigid adhesive, premature folding, and repairs applied to the visible face. Each mistake changes paper geometry or surface appearance before the restorer can correct it.
- Using a bead of glue: A bead adds moisture and thickness. Meter adhesive with a nearly dry toothpick instead.
- Pulling edges into alignment: Tension creates a shrunken, puckered joint. Let the original fibers meet naturally.
- Pressing with a hard tool: A sharp tool can emboss a new line. Use release paper and a rounded implement.
- Reinforcing only the tear line: Stress travels beyond the damaged fibers. Bridge onto sound paper on both sides.
- Folding before full cure: Early movement breaks the bond while the adhesive is still soft.
- Using ordinary tape: Household tape can yellow, creep, and leave adhesive residue that attracts dust.
One counterintuitive rule matters: a repair that is almost invisible but stiff can be worse than a visible interior patch that preserves movement. Origami depends on controlled flexibility, so local strength must not destroy the fold sequence around it.
How Can You Prevent Another Origami Tear?
Prevent recurrence by reducing repeated stress at the damaged fold, supporting the model during display, and storing paper away from heat, direct sunlight, and large humidity swings. Handle a finished model by its strongest broad surfaces rather than its points, wings, antennae, or narrow flaps.
Keep models in an acid-free box with tissue separators, leaving enough room that delicate projections do not press against the lid. Avoid sealed plastic bags in damp conditions, where trapped humidity can soften paper and encourage distortion.
Use heavier paper for models that will be repeatedly shaped, but do not assume heavier always means stronger. A dense 80 gsm sheet may resist tearing better than a loose 120 gsm sheet, while foil-backed paper can split sharply when folded against the foil layer.
When Should You Use a Professional Conservator?
Use a paper conservator when the origami model is historic, signed, museum-quality, wet-folded, painted, foil-backed, irreplaceable, or made from unstable handmade paper. Professional treatment is also appropriate when the tear crosses several interlocking layers or the visible surface already has staining.
A conservator can examine fibers, coatings, pigments, adhesives, and previous repairs before introducing moisture. The American Institute for Conservation recommends consulting a professional for objects whose treatment may reduce value or cause irreversible change.
Do not attempt to remove cured tape or instant glue from a valuable model. Solvents, peeling forces, and localized heat can remove original fibers along with the repair material.
FAQ
Can white school glue repair origami?
White school glue can bond a low-value, medium-weight display model, but its formulation, acidity, water content, and long-term aging vary by brand. Archival PVA is safer for a permanent repair because it is designed for paper stability. Test any adhesive on matching scrap before applying it to the model.
Can I use super glue on a paper origami model?
Super glue, or cyanoacrylate, is a poor choice for origami because it cures into a rigid plastic-like joint and may create white frosting on nearby surfaces. The rigid spot can crack when the model bends. Use archival PVA for clean thick-paper tears or methyl cellulose with tissue for thin paper.
How do you fix origami that ripped at a point?
Repair a ripped point from the inside with a narrow Japanese tissue bridge that extends 5-10 mm onto sound paper. Align the point before applying adhesive, because a strong repair in the wrong position permanently changes the model’s silhouette. Keep the patch narrow enough to preserve the point’s flexibility.
Can a torn origami model be folded again?
A torn origami model can sometimes be folded again after repair, but repeated movement should wait at least 12-24 hours after adhesive application. Reinforce the inside of any joint located on a major crease or load-bearing flap. A repaired area will usually tolerate fewer folding cycles than undamaged paper.
How do you hide an origami repair?
Hide an origami repair by placing adhesive and Japanese tissue on the interior, matching the paper edges precisely, and touching up only after the joint has fully cured. Use dry colored pencil sparingly on a visible white edge. Do not paint over a repair with wet pigment, which can reactivate moisture damage.
The Bottom Line
To repair a torn origami model, first stabilize its shape, align the original fibers without tension, apply a microscopic adhesive film, and let the joint cure before refolding. Use archival PVA for clean tears in thicker paper and methyl cellulose with lightweight Japanese tissue for thin or valuable paper. The safest repair is the smallest one that restores strength without changing the model’s flexibility, color, or crease geometry.
