


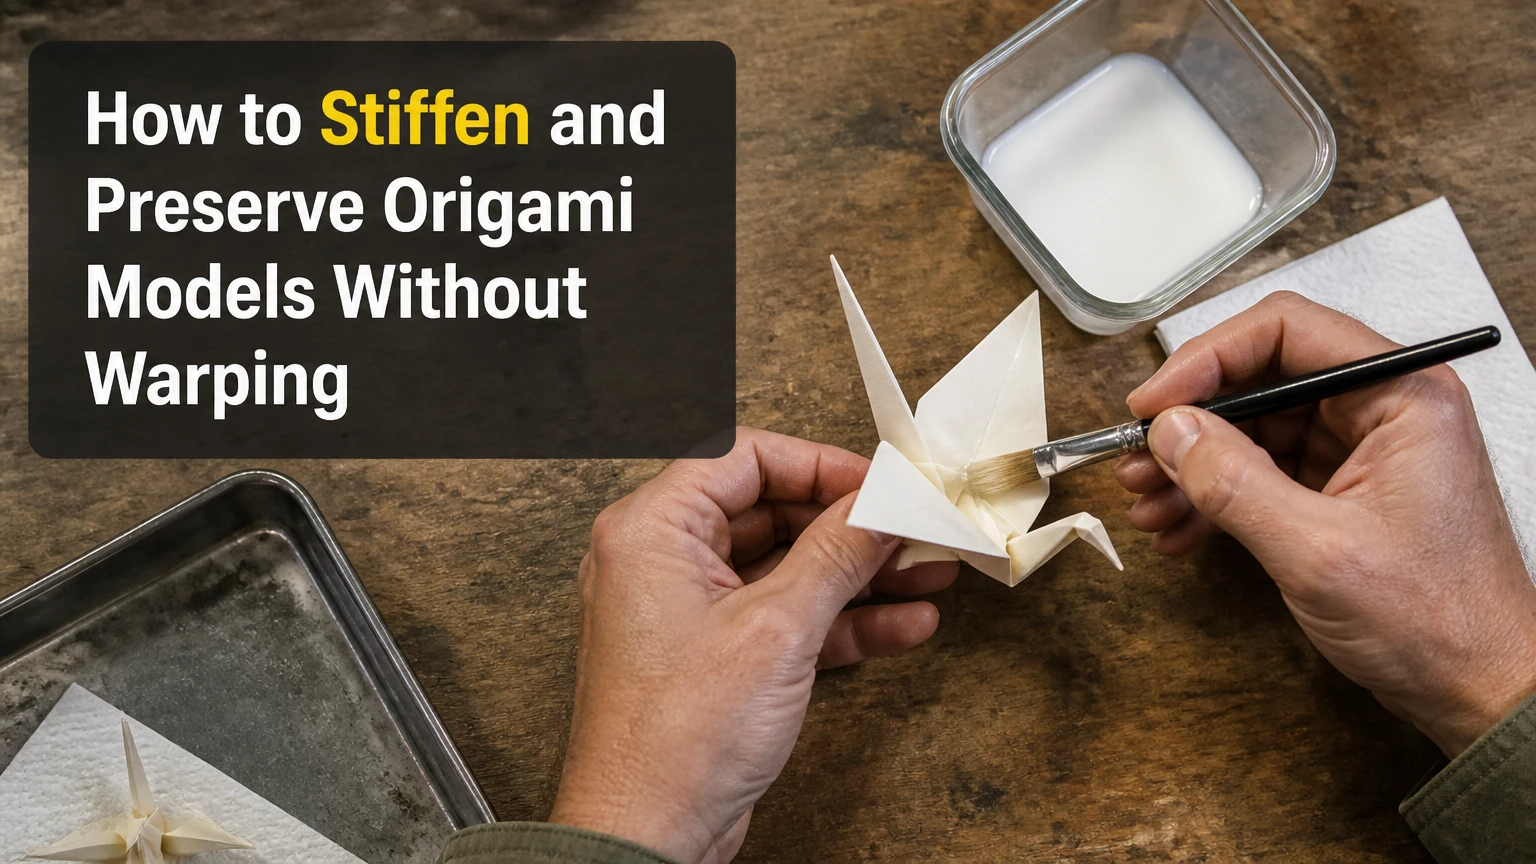
To stiffen and preserve origami models, first choose a treatment that matches the paper and intended use, then apply several thin coats while mechanically supporting the folds. Methylcellulose suits shapeable tissue and complex sculptures, acrylic spray protects delicate finished models, and resin creates a hard shell for jewelry. Drying control prevents most warping.
Key Facts at a Glance
Methylcellulose strengthens and shapes paper while remaining matte and comparatively reversible.
A finished origami model usually needs support during wet coating because moisture temporarily weakens paper fibers.
Several thin acrylic or glaze coats produce more even results than one heavy coat.
Epoxy and UV resin add the most rigidity and water resistance, but also add weight, gloss, and irreversible plastic.
Clear spray is a barrier coat, not a guarantee against flooding, soaking, or long-term humidity.
Store preserved origami away from direct sunlight, condensation, and sustained relative humidity above approximately 60%.
What Does Stiffening Do to an Origami Model?
Origami stiffening changes the mechanical behavior of folded paper by adding a sizing agent, adhesive film, or polymer coating to cellulose fibers. The treatment increases resistance to crease relaxation, sagging, abrasion, and short-term moisture, but every coating also changes weight, flexibility, color, or reversibility.
Paper contains a network of cellulose fibers. Humid air allows those fibers to absorb moisture, and absorbed water reduces friction and weakens some hydrogen bonding between fibers. A long, narrow wing, leg, or tail can then droop even when the main body remains rigid.
Stiffening does not make paper permanently dimensionally stable. Paper still expands and contracts with changes in moisture, while resin and acrylic films can become brittle, yellow, or separate from poorly prepared surfaces. The safest preservation strategy combines a moderate coating with stable display conditions.
The American Institute for Conservation treats original paper objects as materials that require controlled light, handling, pollutants, and climate rather than a universal waterproof coating. That distinction matters: a display craft can be sealed aggressively, while a valuable or historically significant model should usually remain uncoated and receive professional conservation advice.
How Do You Choose the Right Treatment?
Choose methylcellulose for tissue-based shaping, acrylic spray for a lightweight finished display model, a water-based glaze for moderate surface strength, and resin only when a heavy, glossy, permanent shell is acceptable. Paper weight, model geometry, touch frequency, and water exposure should determine the method.
| Treatment | Typical rigidity | Appearance | Typical drying or curing | Best application |
|---|---|---|---|---|
| Methylcellulose gel | Medium, shapeable | Matte, transparent | 4-12 hours per treated sheet | Tissue, wet-folding, organic models |
| Archival PVA size | Medium to high | Matte to satin | 2-8 hours per coat | Internal flaps, cardstock, modular units |
| Acrylic spray sealer | Low to medium | Matte, satin, or gloss | 15-30 minutes between coats | Delicate finished models |
| Acrylic glaze or decoupage medium | Medium to high | Matte to gloss | 1-3 hours per thin coat | Medium-weight decor |
| Two-part epoxy resin | Very high | Glossy, glass-like | 24-72 hours | Jewelry, robust ornaments |
| UV resin | Very high on exposed surfaces | Glossy, glass-like | 2-10 minutes under suitable lamp | Small jewelry and isolated details |
The table gives typical craft ranges, not universal specifications. Product formulas differ, and a varnish sold as “water resistant” may tolerate splashes without tolerating immersion. A coating can also protect the surface while leaving an unsealed underside, open seam, or absorbent paper edge vulnerable.
When Should You Use Methylcellulose?
Use methylcellulose before or during folding when the model depends on sculpted curves, thin tissue, or controlled wet-folding. Methylcellulose temporarily plasticizes the sheet while damp, then leaves a light sizing film as the water evaporates, so the folder can shape the model without creating a thick plastic surface.
A practical starting mixture is approximately 1 level teaspoon of methylcellulose powder per 100 milliliters of water, but powder concentration varies. Conservation and bookbinding practice commonly begins with a weaker solution and increases concentration after testing. Mix gradually, allow the gel to hydrate for several hours or overnight, and remove undissolved lumps before brushing.
Methylcellulose is not a strong waterproofing layer. Water can reactivate or weaken the sizing, and a highly saturated tissue sheet can still tear during shaping. Its major advantage is control, not maximum hardness.
When Is Acrylic Spray Better?
Acrylic spray is better when a finished model is too delicate to tolerate brush pressure or a wet liquid coating. Three to five light mist coats, applied from the product’s stated distance, usually add surface protection without delivering enough water to saturate thin folds.
Spray outdoors or in a spray booth with appropriate respiratory and eye protection. Solvent-based aerosols can damage marker ink, printed color, metallic foil, or adhesive seams, so test a hidden area first. Water-based acrylic spray can be gentler, but “water based” does not mean harmless to paper.
Acrylic spray also has a structural limit. It forms a thin film around the model, but it cannot support a long unsupported paper span in the same way as an internal armature or resin shell.
Before You Start
Use the following preparation checklist before treating any model. The most important prerequisite is a fully dry, dust-free model with a documented test sample or inconspicuous test area.
| Requirement | Typical amount or range | Why it matters |
|---|---|---|
| Work time | 30-90 minutes | Covers setup, testing, and coating |
| Drying time | 4-24 hours | Depends on paper, humidity, and coat thickness |
| Budget | US$5-US$30 | Covers spray, glaze, MC, or starter resin |
| Soft synthetic brush | 10-25 millimeters wide | Spreads gel or glaze without snagging |
| Support materials | 4-12 clips, pins, or foam blocks | Maintains geometry during drying |
| Ventilation | Outdoor or mechanically ventilated area | Required for aerosol and resin safety |
| Test paper | 1-3 matching scraps | Reveals staining, ink bleed, and curl |
Use a silicone mat, polyethylene sheet, or smooth polypropylene board as the drying surface. Avoid absorbent cardboard because a wet model can bond to it, and avoid textured plastic that can imprint a damp face.
Photograph the model before treatment. Record the paper brand, color medium, coating, and fold orientation. This simple record helps identify whether later yellowing, bleeding, or warping came from the treatment or the original paper.
How to Stiffen and Preserve Origami Models
The safest general workflow has four stages: secure the geometry, test the coating, apply thin layers, and dry the model under controlled support. A small display model usually requires 2-5 hours of active work spread across 1-3 days, while methylcellulose preparation adds an overnight hydration period.
Step 1: Inspect, Clean, and Lock the Folds
Inspect the model for loose flaps, crushed corners, fingerprints, dust, and unstable assemblies. Remove surface dust with a clean, soft brush, then secure loose internal layers with tiny amounts of neutral-pH PVA or a conservation-grade paper adhesive.
Do not flood a seam with glue. Excess adhesive creates a hard lump, stains porous paper, and can pull a flat surface into a curl as it dries.
Use clips, soft clamps, pins, or temporary thread to hold the exact final shape. Place a small piece of silicone-release paper between a clamp and the model when pressure could mark the surface.
Success checkpoint: the model keeps its intended silhouette when you release one temporary support.
Common mistake: coating a model that still needs structural refolding. Wet treatment can freeze an incorrect angle permanently.
Step 2: Test the Treatment on Matching Paper
Apply the planned treatment to a scrap made from the same sheet, using the same ink, paint, foil, or printed design. Test both sides if the model has a visible front and back.
Check the scrap after the coating dries for darkening, translucency, tackiness, gloss change, color bleed, curl, and brittleness. A coating that looks clear when wet may dry darker on absorbent fibers.
Wait at least 24 hours before rejecting or approving the test. Some acrylic films become less tacky as they finish drying, while resin can remain chemically active well after its surface feels hard.
Success checkpoint: the test retains its color and lies flat after drying.
Common mistake: testing only the coating’s appearance, not its flex. Bend the sample gently and inspect whether the film cracks or delaminates.
Step 3: Apply the First Thin Coat
Apply the first coat according to the material. Brush methylcellulose or glaze in one controlled direction, while aerosol sealer should be misted across the model in overlapping passes rather than sprayed until shiny.
For a glaze, use a small amount on a soft synthetic brush and spread the film before it pools. Dilution may improve penetration, but follow the manufacturer’s instructions because adding water can reduce binder strength or prolong drying. Do not assume a 2:1 water dilution is suitable for every product.
For aerosol, keep the can moving and coat from approximately 20-30 centimeters away unless the label specifies otherwise. Rotate the model between passes so internal surfaces receive mist without a wet puddle.
Success checkpoint: the model looks evenly damp or lightly filmed, with no beads collecting in valleys.
Common mistake: chasing complete coverage with one wet pass. The added liquid softens folds before the polymer has formed a supporting film.
Step 4: Support and Dry Completely
Support the model in its final geometry while the first coat dries. Use foam blocks for broad surfaces, clips for modular units, and a wire suspension point for ornaments that have a strong central axis.
Allow at least 1-3 hours for a thin water-based coat and 15-30 minutes between aerosol coats. High humidity, dense folds, and cool temperatures can extend those times substantially. Resin requires the product’s full cure window, often 24-72 hours for epoxy.
Apply additional coats only when the prior coat is dry to the touch and no longer cool or tacky. Two or three thin glaze coats are generally safer than one thick coat; aerosol applications often use three to five light passes.
Success checkpoint: the model holds its shape without clips and the deepest folds are dry, not rubbery.
Common mistake: removing supports when the surface feels dry but the inner paper remains damp. Deep pockets can collapse several hours later.
Step 5: Add a Specialized Topcoat Only If Needed
Use a topcoat only when the model’s intended use justifies the extra mass or finish change. A shelf sculpture may need no resin, while a pendant that touches skin and clothing may need a sealed surface and reinforced attachment point.
Seal porous paper before applying epoxy or UV resin. Brush a very thin acrylic barrier coat, let it dry fully, and inspect the surface before adding resin. The barrier reduces, but does not eliminate, darkening and capillary absorption.
Cure resin in thin layers. UV resin may cure at the exposed surface while remaining soft in a shadowed fold, and epoxy can generate heat while curing in a thick mass. Keep resin away from unprotected skin and follow the product safety data sheet.
Success checkpoint: the topcoat is hard or fully dry throughout, with no sticky valleys, sharp drips, or trapped bubbles.
Common mistake: treating resin as a universal preservation solution. Resin is often the wrong choice for large, thin, flexible, or historically valuable origami.
Which Material Works Best for Each Model?
The best material depends on whether the model needs reshaping, light protection, moderate handling strength, or a waterproof-looking shell. A complex tissue insect and a cardstock modular ball have different failure points, so using the same coating on both can produce avoidable distortion.
| Model situation | Recommended first choice | Coat or mixture | Typical result | Avoid |
|---|---|---|---|---|
| Tissue-paper insect | Methylcellulose | 0.5-1 teaspoon per 100 ml water, adjusted by test | Matte, sculptable structure | Heavy resin before shaping |
| Kami display crane | Acrylic spray | 3-5 mist coats | Lightweight surface protection | Saturating brush glaze |
| Cardstock modular ball | Thin acrylic glaze or PVA | 2-3 thin coats | Stiffer joints and surfaces | Thick liquid in valleys |
| Foil-backed model | Test acrylic spray first | 1 test coat, then 2-4 light coats | Preserves metallic face with low added weight | Solvent that attacks adhesive |
| Paper ornament | Acrylic spray plus selective glaze | 3 spray coats, glaze on seams | Balanced rigidity and weight | Full resin shell on thin points |
| Origami pendant | Barrier coat plus UV or epoxy resin | 1-2 thin barrier coats, then resin | Hard glossy surface | Resin without ventilation |
| Valuable original | No DIY coating | Stable enclosure and professional advice | Maximum reversibility | PVA, spray, or resin application |
How Do You Treat Paper Before Folding?
Treat tissue or thin paper before folding by brushing a diluted methylcellulose gel across a flat sheet, drying the sheet fully, and then using moisture selectively during wet-folding. The sheet must dry flat on a non-absorbent surface, or the treatment can lock in wrinkles and edge curl.
Place the paper on clean glass or polypropylene and smooth the gel from the center toward the edges. Use enough gel to wet the sheet evenly, not enough to create visible ridges. Dry the sheet under clean, flat conditions for 4-12 hours, then peel it slowly from one corner.
For a complex animal or insect, dampen only the area being shaped. A slightly damp cloth or fine brush gives more control than spraying the entire model. Let each shaped section settle before adding moisture elsewhere.
Methylcellulose can improve handling, but it does not correct paper with weak grain direction, poor fiber formation, or incompatible surface sizing. Test the sheet first.
How Do You Preserve an Already Folded Model?
Preserve an already folded model by fixing loose layers, applying a compatible barrier or sealer, and supporting the model until every internal cavity is dry. Finished models usually benefit from low-moisture spray more than from a heavily diluted brush coating.
Work from the model’s center toward delicate extremities. Apply less material inside narrow pockets, where surface tension can pull folds together. Turn the model frequently rather than allowing a wet film to collect on one side.
For modular origami, inspect every connection before sealing. A spray can protect the exterior while leaving modules mechanically loose, whereas small internal adhesive points can stabilize joints without covering the visible faces.
Do not place a newly coated model in a closed box. Trapped moisture slows drying and can produce odor, tackiness, mold growth, or uneven gloss.
What Are the Costs and Drying Times?
Typical craft costs range from US$5 for a small acrylic sealer to US$30 or more for a starter resin kit, excluding the paper and ventilation equipment. Total elapsed time usually ranges from one day for spray sealing to three days for fully cured epoxy.
| Product category | Typical purchase price | Active application time | Total elapsed time |
|---|---|---|---|
| Methylcellulose powder | US$8-US$20 per 100 g | 30-45 minutes | 12-36 hours including hydration |
| Acrylic spray | US$7-US$18 per can | 10-25 minutes | 2-5 hours for several coats |
| Acrylic glaze | US$5-US$15 per bottle | 20-45 minutes | 4-12 hours for 2-3 coats |
| Neutral-PH PVA | US$6-US$15 per bottle | 10-30 minutes | 2-8 hours for seam setting |
| UV resin | US$12-US$30 per starter kit | 20-60 minutes | 1-3 hours, depending on layers |
| Two-part epoxy | US$15-US$35 per kit | 30-90 minutes | 24-72 hours for full cure |
Prices are typical small-quantity retail ranges and vary by country, brand, shipping, and package size. In Bangladesh, imported specialty materials can cost substantially more than local acrylic mediums or PVA because of availability and shipping.
How Do You Preserve Origami Against Humidity and Light?
Preserve origami from humidity by keeping the model in a stable indoor environment, reducing direct sunlight, and preventing contact with condensation or damp walls. A coating helps, but stable storage usually protects paper more effectively than adding a thicker film.
Aim for a stable relative humidity near 40-55% when practical, with fewer rapid changes rather than repeated swings. Do not place paper models above radiators, beside kitchens, in bathrooms, or against exterior walls that develop condensation.
Use UV-filtering glazing for valuable displays, but remember that ordinary window glass does not block all damaging ultraviolet radiation. Rotate highly colored models periodically and keep uncoated paper in an archival box made from acid-free, lignin-free materials.
Dust with a soft brush instead of wiping raised folds. Store models with enough clearance that a lid, tissue sheet, or neighboring object cannot crush points and wings.
What Should You Not Coat?
Do not coat a valuable, signed, historically significant, or irreplaceable origami model without consulting a paper conservator. Do not use resin on paper that must remain flexible, lightweight, matte, reversible, or suitable for later conservation treatment.
Avoid untested coatings on inkjet prints, felt-tip drawings, metallic foil, handmade papers with loose fibers, and papers containing pressure-sensitive adhesive. Solvents can dissolve colorants, acrylics can become tacky, and water can cause tidelines.
A preservation coating also cannot repair insect damage, acidic embrittlement, severe foxing, or a structural design that lacks adequate support. When the objective is long-term conservation, an archival display case and controlled environment are safer than DIY encapsulation.
This limitation is important. The hardest finish is not automatically the best preservation finish.
Common Mistakes and How Do You Fix Them?
Most coating failures come from excess liquid, incomplete testing, poor support, or incompatible chemistry. Recovery is possible when the coating remains water soluble, but cured acrylic and resin usually cannot be removed safely from delicate paper at home.
| Failure | Likely cause | Immediate response | Prevention |
|---|---|---|---|
| Dark translucent spots | Resin or glaze absorbed into fibers | Stop coating, wick excess from edges | Use a fully dry barrier coat and test scrap |
| Sagging wings or legs | Wet film softened thin paper | Reposition and support before drying | Use mist coats or pre-size tissue |
| Pooling in valleys | Excess material and gravity | Touch pooled liquid with a dry brush | Rotate model and apply smaller loads |
| White haze | Moisture, incompatible layers, or cool drying | Stop and allow 24 hours of drying | Test compatibility and improve ventilation |
| Cracked resin | Thick layer, flexing paper, or heat | Remove loose sharp fragments only | Use thin layers and rigid substrate |
| Sticky surface | Uncured resin, humidity, or excess plasticizer | Isolate from dust and follow cure guidance | Measure epoxy accurately and cure fully |
| Warped flat faces | Uneven wetting or asymmetric drying | Flatten only if paper remains pliable | Coat both sides lightly or support evenly |
How Do You Fix a Warped Model?
Fix a warped origami model by rehumidifying or lightly dampening only when the original treatment remains reversible, then reshaping the model on a support until it dries. Do not add water to cured resin, solvent-sensitive ink, or a valuable original without professional guidance.
For a water-based glaze, controlled humidity in a temporary chamber can relax paper more evenly than direct spraying. Support the corrected shape with foam, clips, or inert tissue and allow at least overnight drying.
A warped model with a fully cured acrylic or resin shell is difficult to repair without cutting, stripping, or replacing paper. Prevention is more reliable than correction.
How Do You Prevent Resin Dark Spots?
Prevent resin dark spots by sealing the completely dry model with one or two compatible, thin acrylic barrier coats and testing the exact paper first. Resin darkens absorbent fibers because liquid polymer travels through capillaries and changes how light scatters inside the sheet.
The barrier must dry fully before resin touches the paper. A partially dry film can trap solvent or water and create clouding, adhesion failure, or uneven gloss.
Use a small brush for controlled application and remove excess from corners immediately. Do not pour resin over a folded model unless its structure has been designed to carry the added weight.
Which Method Should You Use for Common Situations?
Choose a method by prioritizing the model’s weakest feature. Thin paper needs low moisture, a loose modular model needs seam stabilization, and a wearable pendant needs abrasion resistance at attachment points.
| User situation | First recommendation | Secondary option | Main trade-off |
|---|---|---|---|
| Beginner shelf display | Three acrylic spray coats | Thin matte glaze | Lightweight but not fully waterproof |
| Complex insect folder | Methylcellulose before shaping | Selective acrylic spray after drying | Shape control rather than maximum hardness |
| Modular decoration | PVA at joints, then spray | Thin acrylic glaze | Better seams, more visible coating risk |
| Paper jewelry maker | Barrier coat and thin UV resin | Two-part epoxy | Durable finish with added gloss and weight |
| Matte minimalist display | Methylcellulose or matte spray | Matte acrylic medium | Lower shine, lower water resistance |
| Humid-room display | Acrylic spray plus enclosed case | Resin on robust pieces | Climate control remains necessary |
| Archival or valuable model | No coating, archival enclosure | Conservator-approved treatment | Highest reversibility |
Expert Rules of Thumb
Treat the joints before the faces. In modular origami, failure usually begins where modules separate, not at the center of a broad panel. Stabilizing hidden seams with minute adhesive points often adds more useful strength than covering the entire object.
Weight is a structural load. A resin film on a long paper wing can make the wing sag even while the coating increases material hardness. Test the complete assembly, not only a flat paper sample.
Drying geometry matters as much as chemistry. A perfect medium can still create a distorted model if one side dries against a table while the opposite side remains exposed. Rotate, suspend, or support the model symmetrically.
Frequently Asked Questions
Can hairspray stiffen origami?
Hairspray can temporarily stiffen light paper because it leaves a thin polymer film, but it is a poor long-term preservation choice. Fragrance, alcohol, plasticizers, and variable resins may yellow, remain tacky, attract dust, or react with printed color. Use a tested acrylic paper sealer when a removable household experiment is not sufficient.
Is Mod Podge waterproof on origami?
Mod Podge products are generally water resistant to different degrees, but ordinary Mod Podge should not be treated as immersion-proof or permanently waterproof. A thin cured film can resist light splashes, while exposed edges, seams, and pinholes still absorb water. Select the exact product finish and follow its cure instructions.
Can you preserve origami without making it shiny?
Yes. Methylcellulose, matte acrylic spray, and selected matte acrylic mediums can preserve origami with little visible gloss. Test under the intended lighting because matte coatings can create a pale haze on dark paper, while some “matte” products still appear satin on metallic or smooth sheets.
How long will a preserved origami model last?
A coated origami model can remain presentable for many years indoors when it avoids strong sunlight, dust, crushing, and large humidity swings. No universal lifespan applies because paper quality, colorants, coating chemistry, and display climate differ. Acid-free paper and UV-filtered display conditions usually matter more than adding another coat.
Can you use PVA glue to harden origami?
PVA can strengthen seams and add a stiff film when diluted and applied thinly, but it can also curl paper, dry glossy, and become difficult to reverse after penetrating the fibers. Use neutral-pH PVA sparingly at hidden joints or test a diluted sizing on matching paper before coating visible surfaces.
Is resin safe for paper origami?
Resin is suitable for small, robust craft pieces when the model can carry extra weight and the maker follows ventilation, glove, eye, and curing precautions. Resin is unsuitable for many delicate, flexible, valuable, or large paper models because it can stain, distort, embrittle, and permanently alter the original.
The Bottom Line
To stiffen and preserve origami models, match the treatment to the paper and the model’s job, then use thin coats, full drying, and physical support. Methylcellulose is the most controllable option for tissue and wet-folding, acrylic spray is the safest general display sealer, and resin belongs mainly on small, durable jewelry or functional craft pieces. Stable humidity and low light complete the preservation plan.
