

Ever wondered how paper can transform into something sweet-looking? Paper folding magic happens when you create adorable candy shapes. Today I’ll show you exactly how to make origami candy that’ll brighten anyone’s day.
What You’re Creating: The Charming Origami Candy
Let me tell you about this delightful little project. The origami candy isn’t just a simple fold – it’s a miniature masterpiece that captures the essence of wrapped sweets.
When I first discovered this design, I was amazed at how something so simple could look so realistic. The finished piece resembles a twisted candy wrapper, complete with gathered ends that mimic real confectionery packaging. It’s the kind of project that makes people do a double-take.
What makes this particular origami candy special is its versatility. You can create them in different colors to represent various candy flavors. Imagine a bowl filled with these paper treats – they’re perfect for decorative displays, gift embellishments, or even as cute little tokens of appreciation.
The beauty lies in its simplicity. Unlike complex origami models that require dozens of intricate folds, this candy design achieves maximum impact with minimal steps. That’s why it’s become one of my go-to projects when I want quick satisfaction.
Materials Needed
Here’s everything you’ll need for your origami candy adventure:
| Item | Specification | Purpose | Alternative Options |
|---|---|---|---|
| Paper | 10.5 × 15 cm rectangle | Main folding material | Gift wrapping paper, magazine pages, decorative paper |
| Work Surface | Flat, clean table or desk | Provides stable folding base | Hardcover book, clipboard, cutting mat |
| Fingers | Clean, dry hands | Primary folding tools | None – essential for precise creases |
| Optional: Bone folder | Plastic or wooden tool | Creates sharp, professional creases | Credit card edge, ruler edge |
| Optional: Ruler | Standard measuring tool | Ensures accurate paper size | Pre-cut paper eliminates need |
Paper Selection Tips
Choose paper that’s sturdy enough to hold creases but flexible enough to fold easily. I’ve found that standard origami paper works beautifully, but don’t limit yourself. Wrapping paper scraps create festive-looking candies, while magazine pages give an interesting textured appearance.
The paper thickness matters more than you might think. Too thin, and your candy won’t hold its shape. Too thick, and the final steps become challenging. Medium-weight paper strikes the perfect balance.
Simple Origami Candy Step by Step Instructions
Now comes the fun part – the actual folding! I’ll walk you through each step with clear explanations that make this process foolproof.
Step 1: Prepare Your Paper Foundation
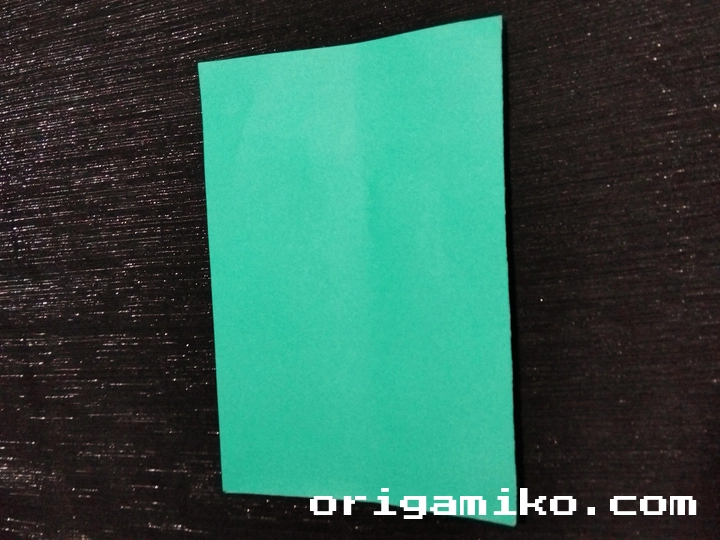
Take your 10.5 × 15 cm paper and place it horizontally in front of you. This rectangular shape is crucial for achieving the proper candy proportions.
Make sure your work surface is clean and flat. Any bumps or debris will interfere with clean folds. I learned this the hard way when my first attempt came out lopsided because of a crumb under my paper!
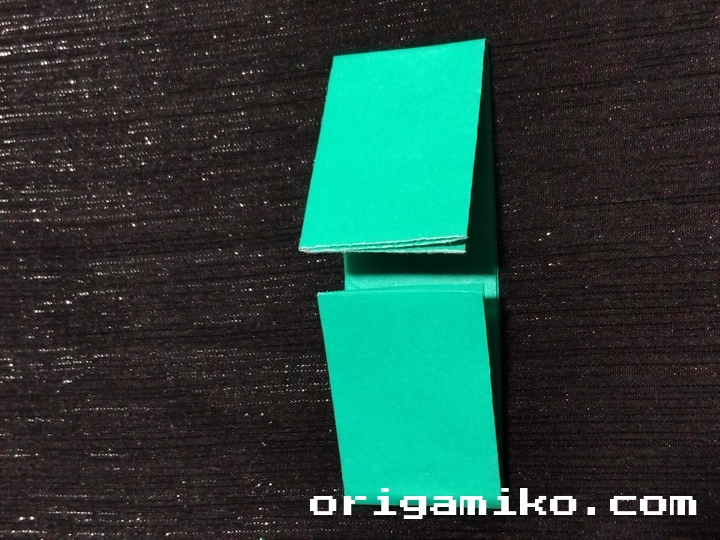
Step 2: Create the Initial Center Folds
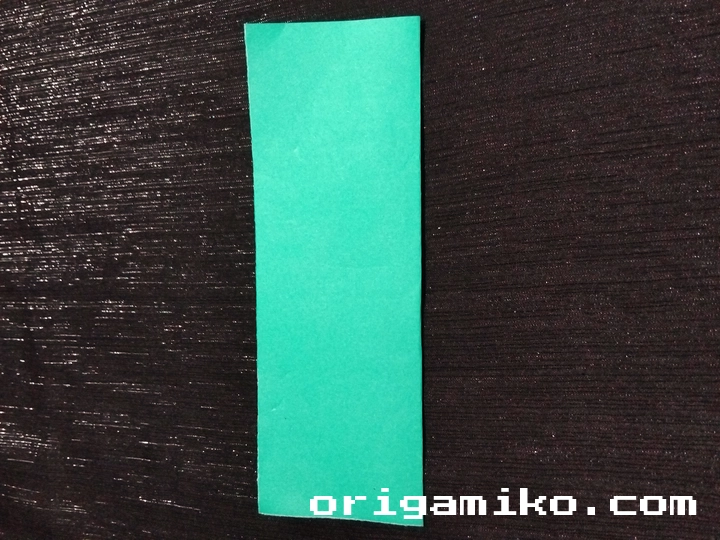

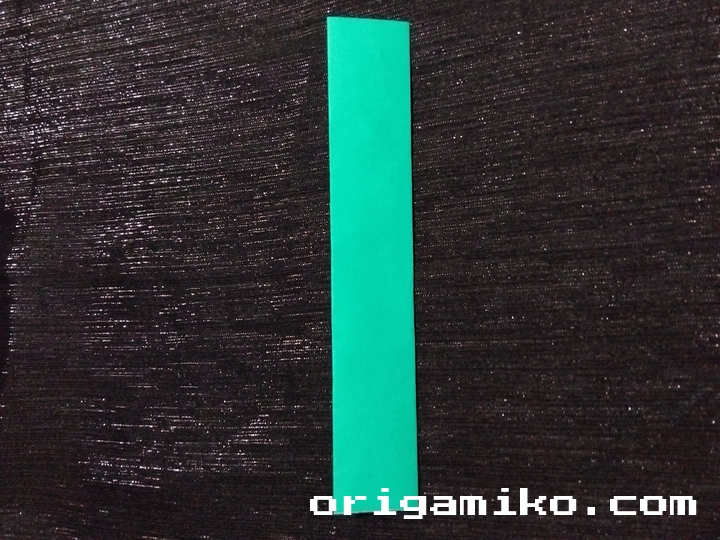
Fold the paper in half along its length, bringing the long edges together. Press down firmly to create a sharp crease – this will be your guide for everything that follows.
Open the paper back up, then fold it in half again, this time bringing the short edges together. You’re essentially finding the center point of your paper through these preparatory folds.
These initial folds aren’t just busy work. They create reference lines that ensure your candy will be symmetrical and professional-looking.
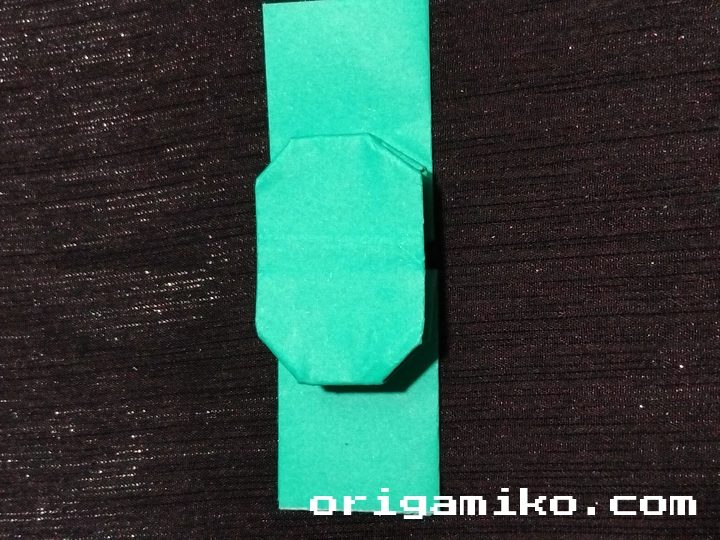
Step 3: Form the Candy Body Structure
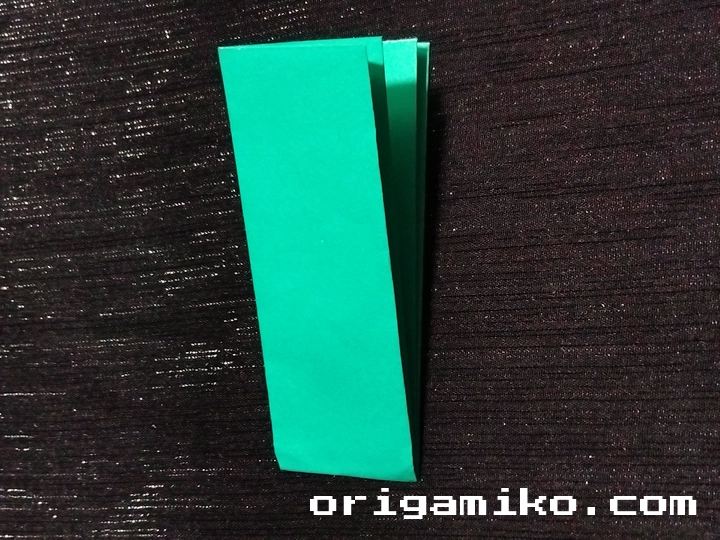
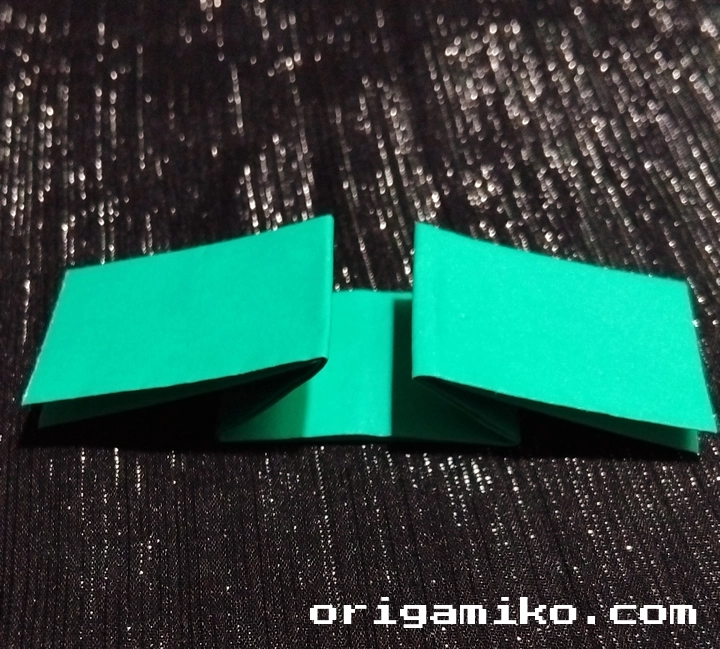
Now fold the paper from the middle again, creating the main body of your candy. This fold should align with the crease lines you made in the previous step.
Create additional folds following the natural lines your paper wants to take. The paper will guide you here – don’t fight against its natural tendencies. Work with the grain, not against it.
This step transforms your flat rectangle into something that’s starting to look three-dimensional. You should begin to see the candy shape emerging.
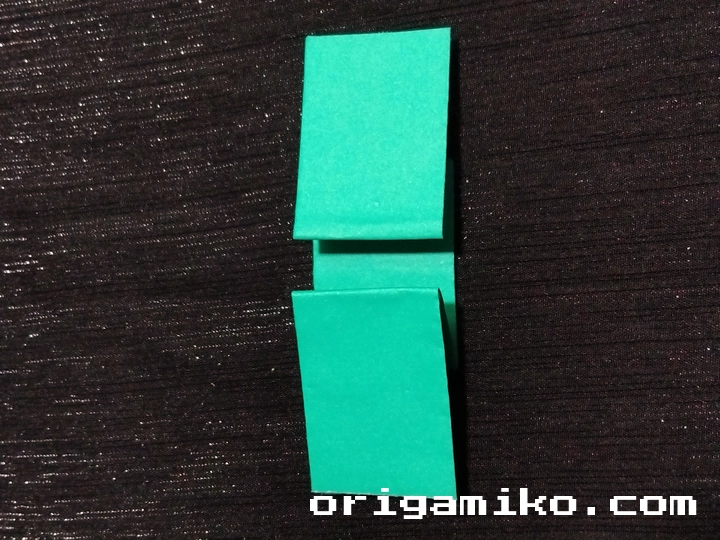
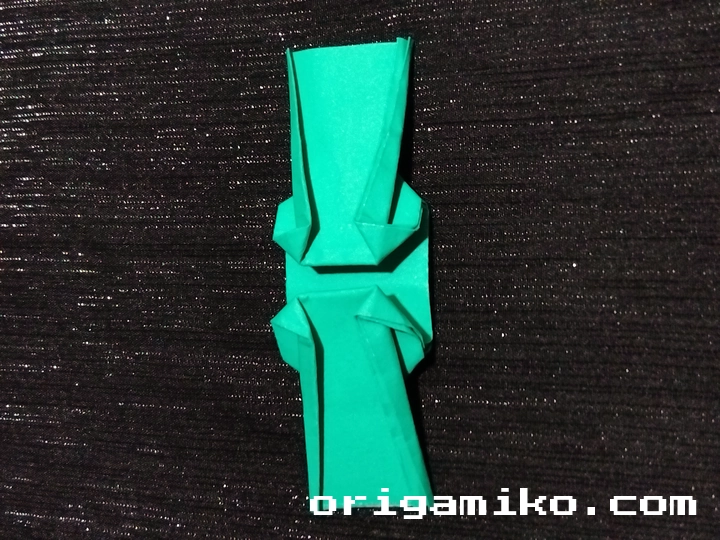
Step 4: Shape the Corner Details
Fold the four corners slightly inward. These small folds add important details that make your candy look authentic rather than just folded paper.
Each corner fold should be gentle and subtle. We’re not creating sharp points here – instead, we’re softening the edges to mimic how real candy wrappers gather and bunch.
Pay attention to symmetry during this step. Uneven corner folds will make your finished candy look lopsided. Take your time and adjust as needed.
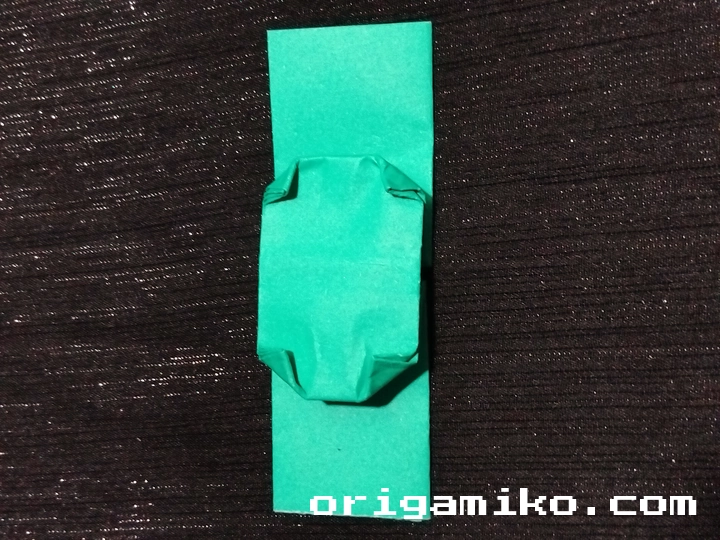
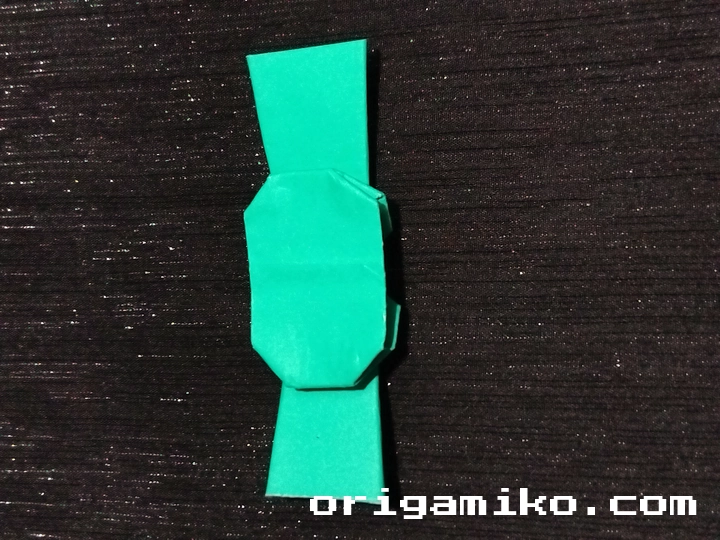
Step 5: Secure the Excess Paper
Fold any extra paper inward to create clean, finished edges. This step is where your origami candy really comes together and starts looking polished.
The excess paper tucks should be smooth and lie flat against the main body. If you find any bumps or awkward bulges, unfold slightly and redistribute the paper more evenly.
This is also when you can make final adjustments to the overall shape. A little tweaking here and there can make the difference between “okay” and “wow!”
Step 6: Final Assembly and Finishing
Your origami candy is now complete! Take a moment to admire your handiwork and make any final adjustments to ensure everything looks just right.
Gently shape the candy with your fingers, encouraging it to hold its three-dimensional form. The paper should maintain its shape without any additional support.
If any creases have softened during the folding process, now’s the time to reinforce them with gentle pressure.
Tips for Success
Here are the insights I wish someone had shared with me when I started making origami candy:
Start with practice paper first. Don’t use your best decorative paper for your first attempt. Regular printer paper works fine for learning the technique.
Work slowly and deliberately. Rushing leads to uneven folds and crooked results. Each step builds on the previous one, so accuracy matters.
Keep your hands clean and dry. Oils from your skin can leave marks on lighter-colored papers, and moisture makes precise folding nearly impossible.
Make sharp, confident creases. Wishy-washy folds result in a wishy-washy finished product. Use your fingernail or a bone folder to really press those creases home.
Practice the “mountain and valley” concept. Some folds push up (mountains) while others fold down (valleys). Understanding this relationship makes complex steps much clearer.
Common Mistakes and How to Avoid Them
Let me save you from the frustrations I experienced as a beginner:
Mistake #1: Using the Wrong Paper Size
The Problem: Your finished candy looks disproportionate or won’t fold properly in the final steps.
The Solution: Stick to the 10.5 × 15 cm dimensions. This ratio has been tested and refined specifically for this design. Other sizes require adjustments to the folding sequence.
Mistake #2: Skipping the Preliminary Folds
The Problem: Your candy ends up crooked or asymmetrical.
The Solution: Those early reference folds aren’t optional. They create the guidelines that keep everything aligned. Take time with steps 1 and 2.
Mistake #3: Forcing Difficult Folds
The Problem: You end up with torn paper or ugly creases.
The Solution: If a fold feels impossibly difficult, you’ve likely made an error in a previous step. Backtrack and check your work rather than forcing it.
Mistake #4: Inconsistent Pressure
The Problem: Some creases are sharp while others are barely visible.
The Solution: Develop a consistent technique for making creases. Use the same pressure and method throughout the entire folding process.
Mistake #5: Ignoring Paper Grain
The Problem: Your paper fights back during folding, resulting in rough or uneven results.
The Solution: Pay attention to how your paper wants to fold. Work with its natural tendencies rather than against them.
Similar Variations You Can Make
Once you’ve mastered the basic origami candy, try these exciting variations:
Twisted Candy Wrapper
Create a candy that looks like it has twisted ends by adding additional small folds to the corners before the final step. This gives a more realistic wrapped-candy appearance.
Double-Wrapped Candy
Use two different colored papers – one slightly smaller than the other. Fold them together to create the illusion of a candy with both wrapper and inner foil.
Miniature Candy Collection
Make your candies using smaller paper sizes (try 7 × 10.5 cm) to create adorable mini versions. These work wonderfully as embellishments for greeting cards or gift packages.
Seasonal Candy Themes
Use holiday-themed papers to create seasonal candy collections. Halloween candies in orange and black, Christmas candies in red and green, or Valentine’s candies in pink and white.
Textured Paper Candies
Experiment with different paper textures – metallic papers, handmade papers with visible fibers, or even newspaper for a vintage look.
Troubleshooting Your Origami Candy
Sometimes things don’t go according to plan. Here’s how to handle common issues:
Paper keeps unfolding: Your creases aren’t sharp enough. Go back and reinforce them with more pressure or a bone folder.
Candy won’t hold its shape: The paper might be too thin or too thick for this design. Try standard origami paper if you’re using something unusual.
Uneven appearance: Check that your initial reference folds were accurate. Small errors in early steps become magnified in the final result.
Torn paper: You’re likely forcing folds that shouldn’t be forced. Slow down and let the paper guide you.
How to Make Origami Candy: Advanced Techniques
Ready to take your candy-making to the next level? Try these advanced approaches:
Wet-Folding Method
Slightly dampen your paper before folding to achieve smoother, more organic curves. This technique requires practice but produces incredibly realistic results.
Duo-Tone Effects
Use paper that’s different colors on each side to create candies with contrasting wrapper and twist colors.
Precision Folding
Use a ruler and bone folder for every single crease to achieve machine-like precision in your finished candies.
Display Ideas for Your Origami Candy Collection
Your beautiful paper candies deserve proper presentation:
Fill a glass bowl with an assortment of different colored candies for a permanent centerpiece that never spoils. Add some to gift boxes as decorative elements that recipients can keep long after the real treats are gone.
Create candy “necklaces” by threading fishing line through the center of multiple candies. These make charming decorations for parties or special events.
Mount individual candies on greeting cards or scrapbook pages for a three-dimensional accent that adds visual interest.
FAQs
Q: Can I use regular printer paper for origami candy? A: Absolutely! Printer paper works well for practice, though origami paper or lightweight decorative paper gives better results.
Q: How long does it take to make one candy? A: Once you know the steps, each candy takes about 3-5 minutes to complete.
Q: Can children make this project? A: Yes! Kids around 8 years and older can usually handle this project with minimal adult guidance.
Q: Will my paper candies last a long time? A: With proper paper and good creases, your origami candies should maintain their shape indefinitely when stored carefully.
Q: Can I make these candies larger or smaller? A: You can scale the size up or down, but maintain the same length-to-width ratio for best results.
Q: What’s the best paper for beginners? A: Standard origami paper (kami) is ideal – it’s the right thickness and holds creases well.
Summary
Making easy origami candy is one of those perfect projects that delivers big visual impact with relatively simple techniques. I’ve walked you through every step, from choosing the right paper to troubleshooting common problems.
The key to success lies in taking your time with each fold and building good habits from the start. Remember, every expert was once a beginner, and every mistake is a learning opportunity. Soon you’ll be creating origami candy instructions of your own to share with friends and family!