
")
Ever wonder how to make a canoe out of paper—one that actually looks like a canoe and sits beautifully on your desk?
You’re in the right place. This simple origami canoe project is perfect for beginners, kids, or anyone who just needs a calming, creative moment.
And the best part? You only need a rectangular piece of paper and about five minutes of focus.
The Magic of the Origami Canoe
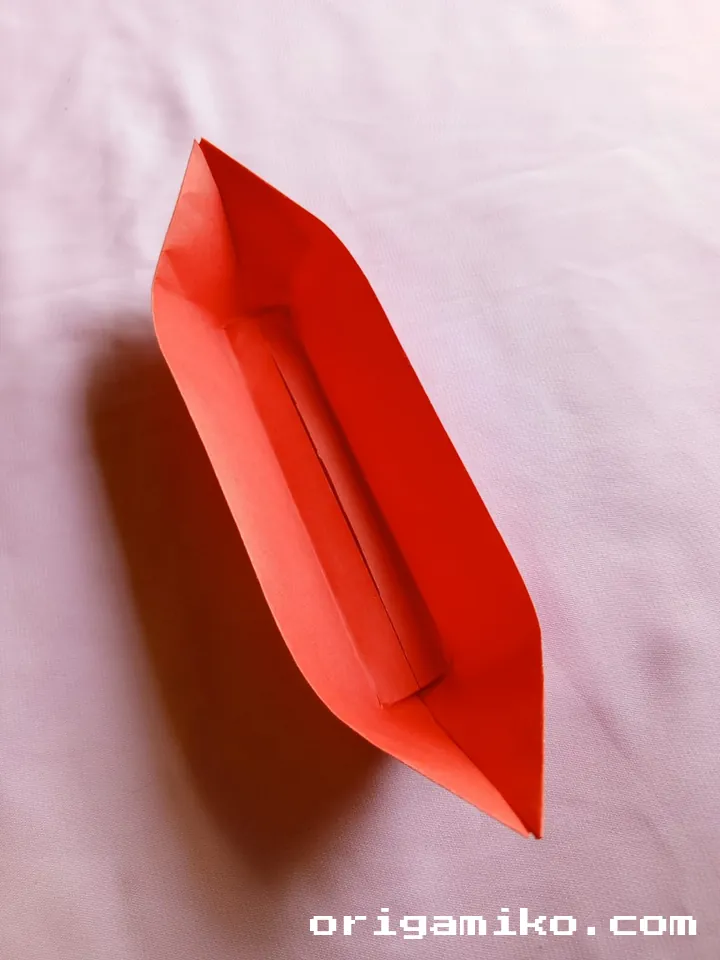
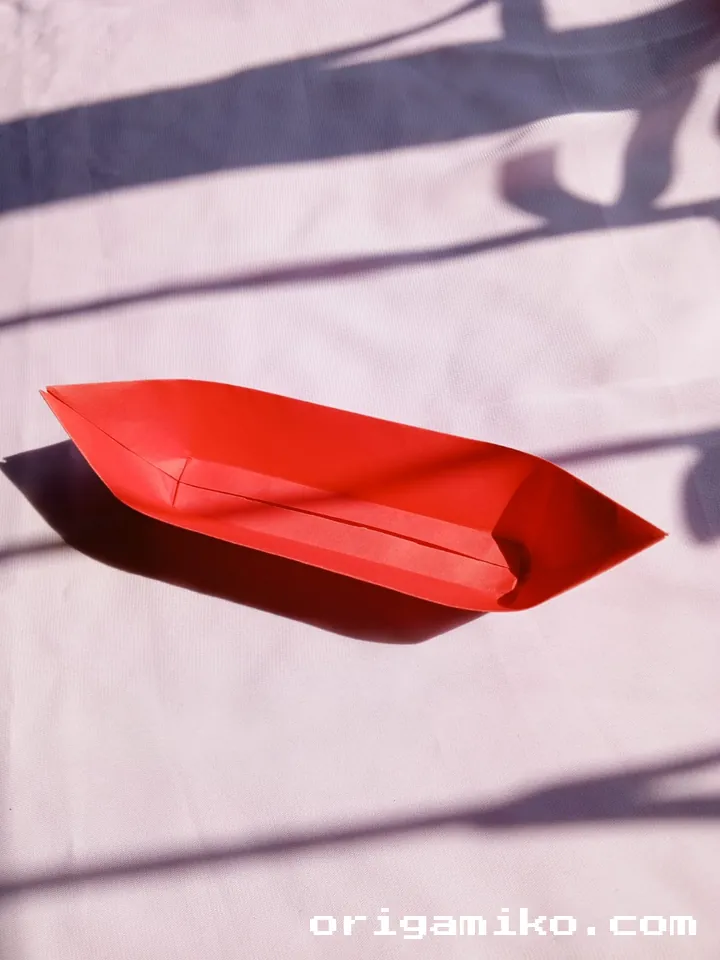
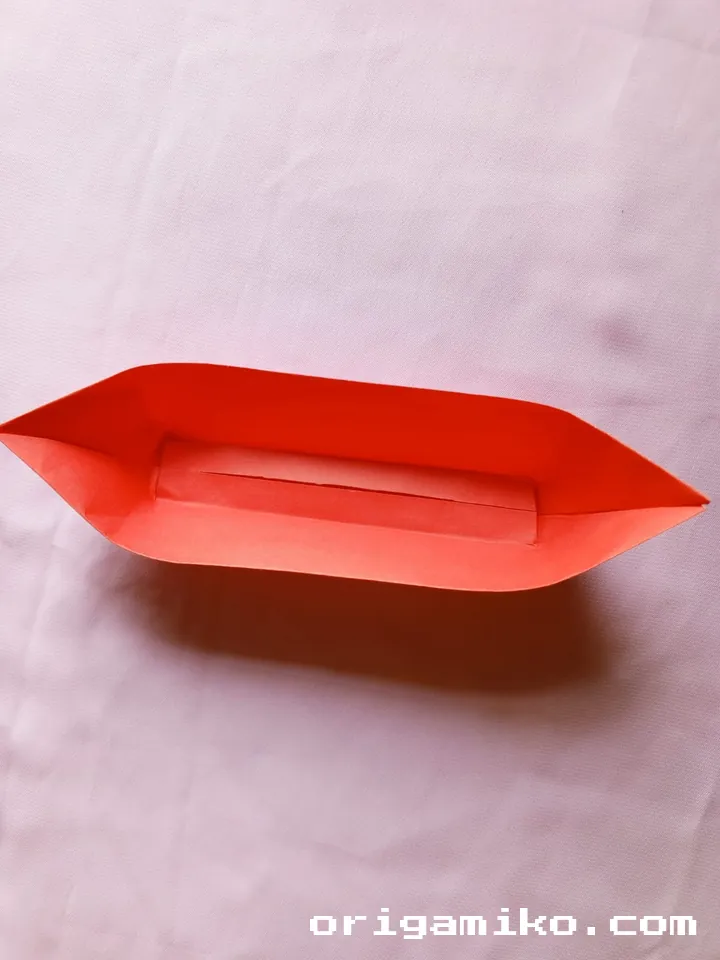
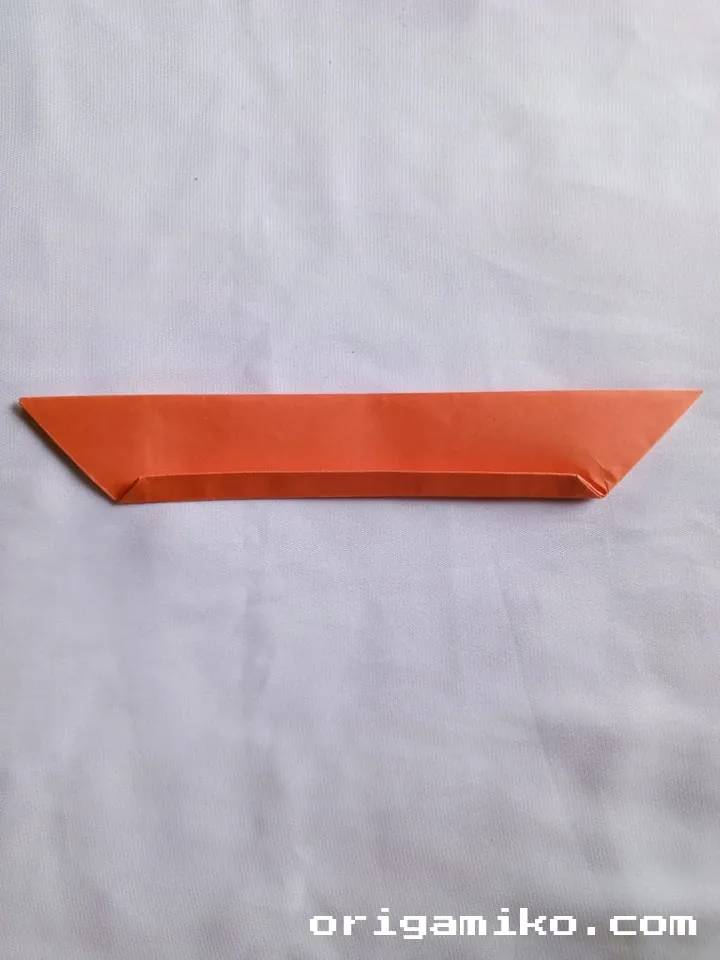
Let’s talk about this clever little fold: the Origami Canoe. It’s small, slick, and satisfying. This project is a reminder that even simple things—like folding paper—can bring big joy. The structure has a neat “boat-like” shape with angular edges and a curved dip in the center, just like a real canoe. It’s great for dioramas, tabletop displays, or even just showing off your paper-folding skills.
What I love most? It’s easy enough for beginners but still rewarding for seasoned paper folders. With just a few precise creases, you can transform a flat rectangle into a cool 3D canoe.
What We’re Creating
Before we dive into the folds, here’s a quick rundown of what we’re making:
- A simple origami canoe using a single rectangular sheet of paper.
- Compact, symmetrical, and surprisingly elegant.
- Great as a beginner craft or classroom activity.
- No scissors, glue, or fancy origami paper required—just your hands and a good attitude.
Key Terms You’ll See
Origami
The Japanese art of folding paper into decorative shapes and figures.
House Fold
A fold where the corners are brought in to create a shape that looks like a house.
Crease Line
A visible line created by folding and pressing paper flat.
Unfold
To open a fold back up so you can use the crease as a guide.
Materials Needed
Here’s everything you need to make this easy origami canoe:
| Item | Description | Notes |
|---|---|---|
| Paper | Rectangular, 8” × 4” | Any color works; not too thick or glossy. |
| Flat Surface | Clean, smooth workspace | Avoid soft or uneven surfaces. |
| Fingernail Tool | Optional, for sharpening creases | You can also use the edge of a ruler. |
| Patience | Just a little! | Good folds take focus. |
Simple Canoe Step-by-Step Instructions
Let’s go step by step so no one gets lost. You can re-read or re-fold any time. That’s part of the fun.
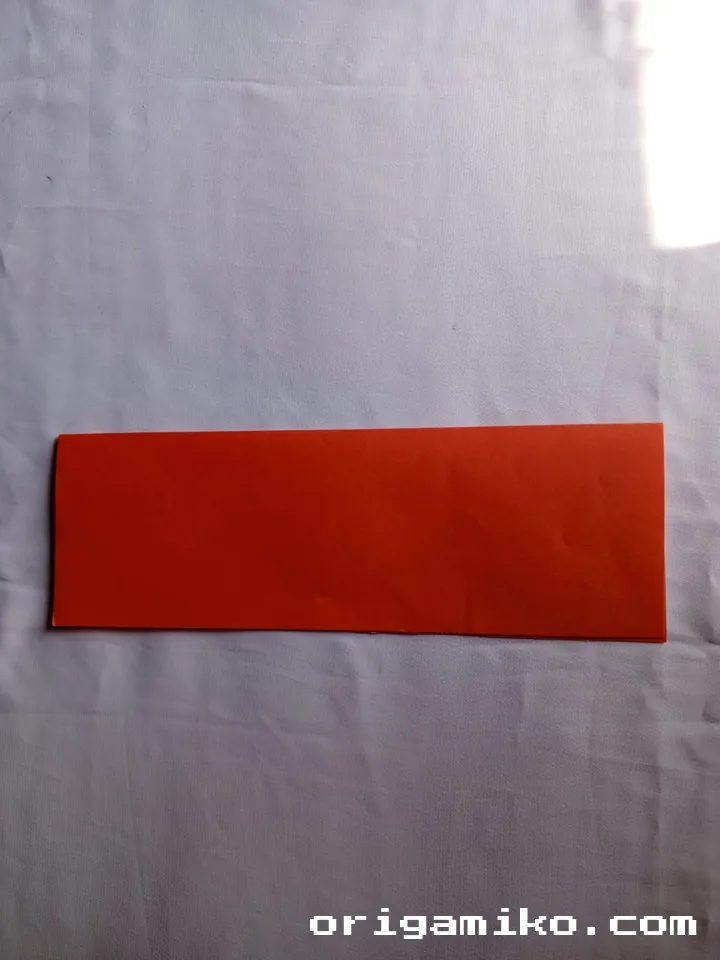
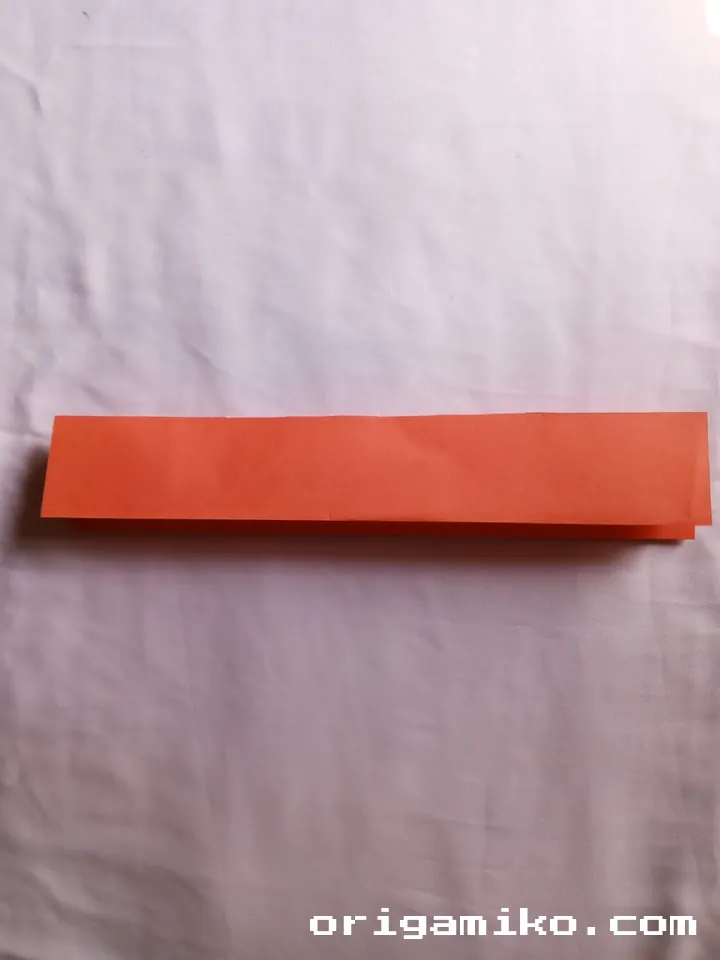
Step 1: Start with a Rectangular Sheet
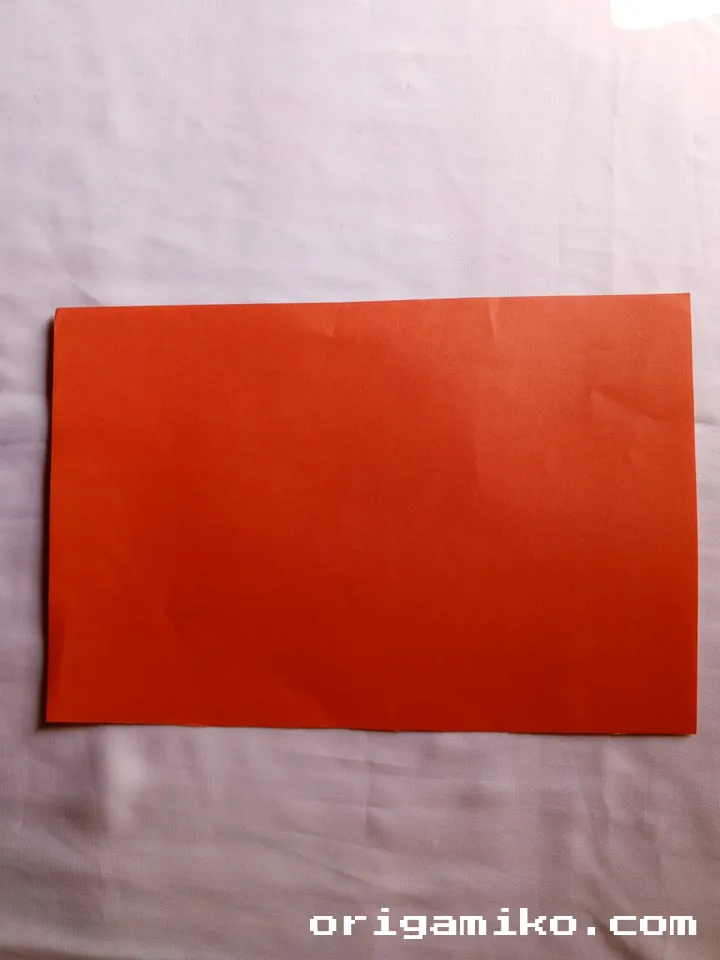
Grab your 8” × 4” paper.
Doesn’t need to be fancy—printer paper works just fine.
Make sure it’s clean and uncreased.
Step 2: Fold in the Middle
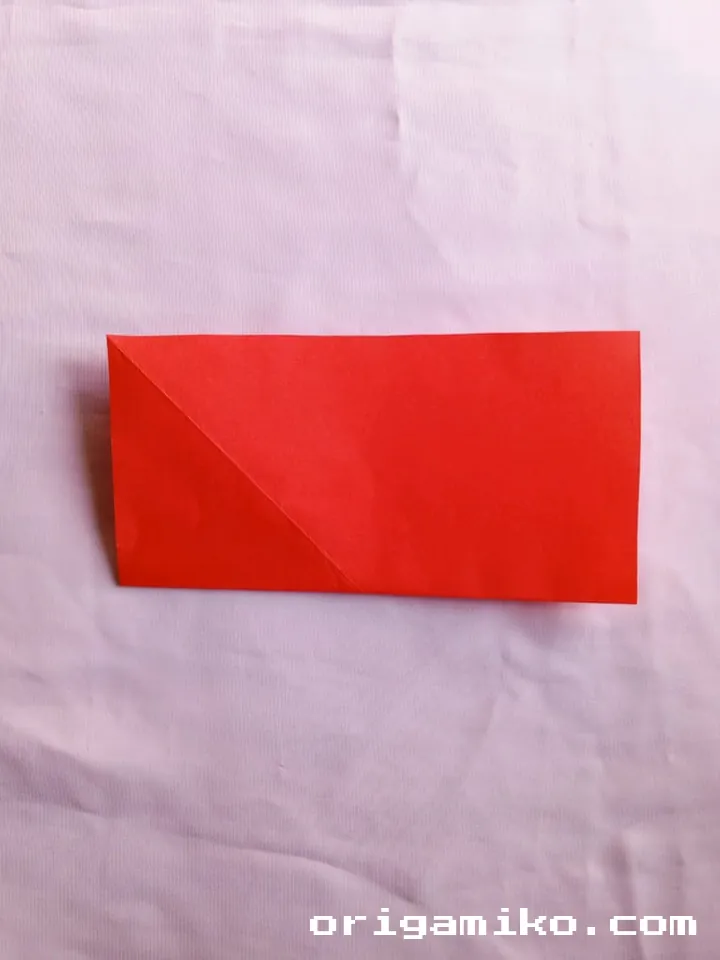
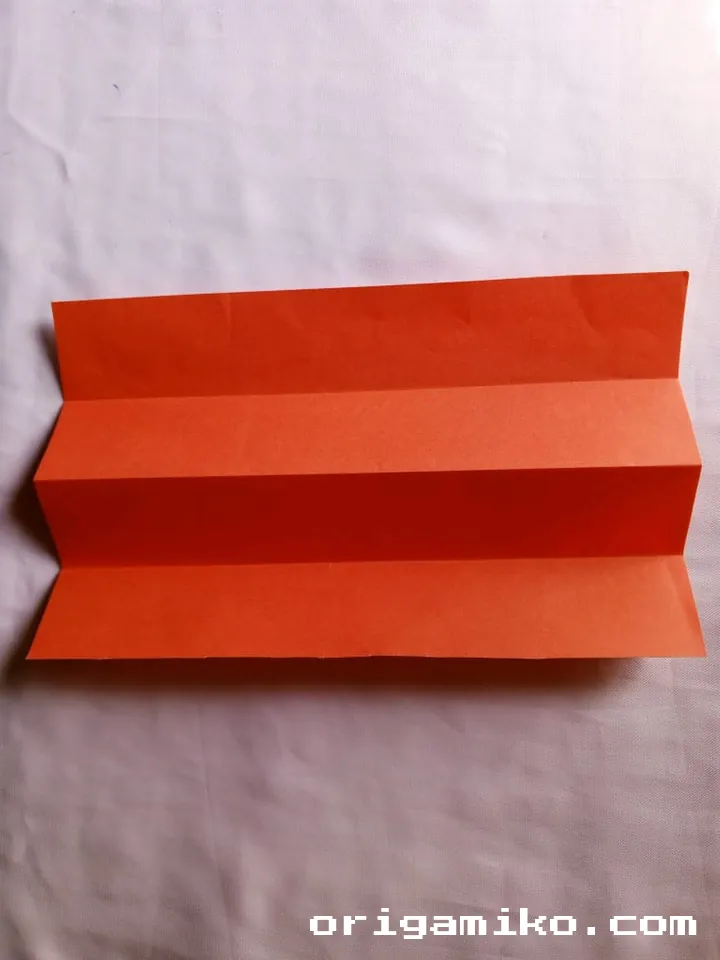
Fold the rectangle lengthwise from top to bottom.
Line up the edges and press down.
Now, unfold it—this crease is our reference line.
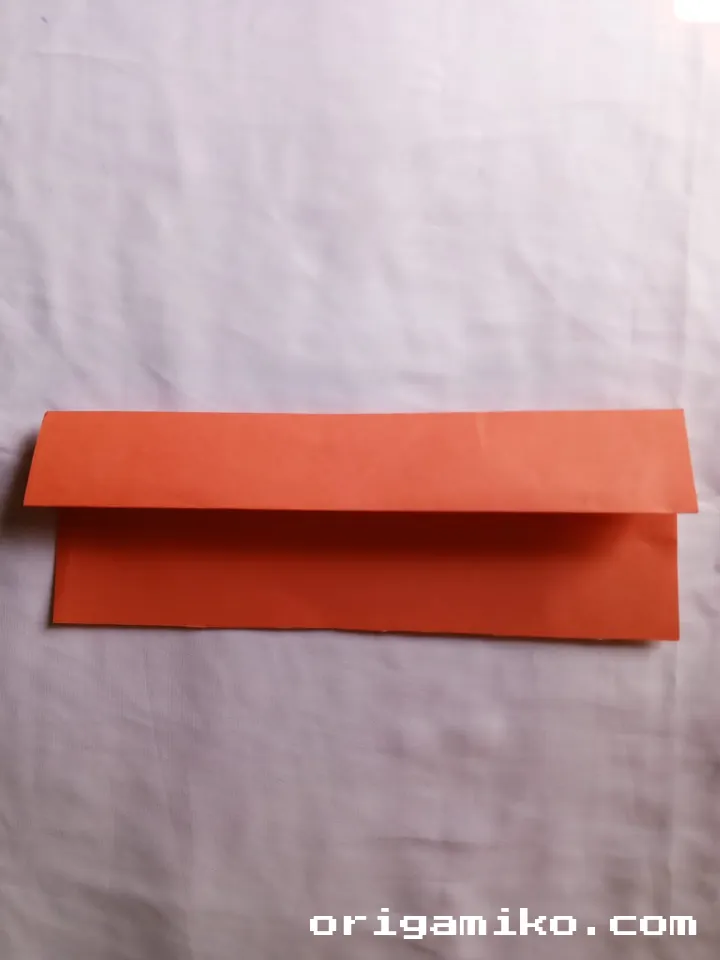
Step 3: Fold Bottom to Top, Then Unfold
Take the bottom edge and fold it up to the center crease.
Press and hold, then unfold it again.
You should now have two crease lines—perfect guides.
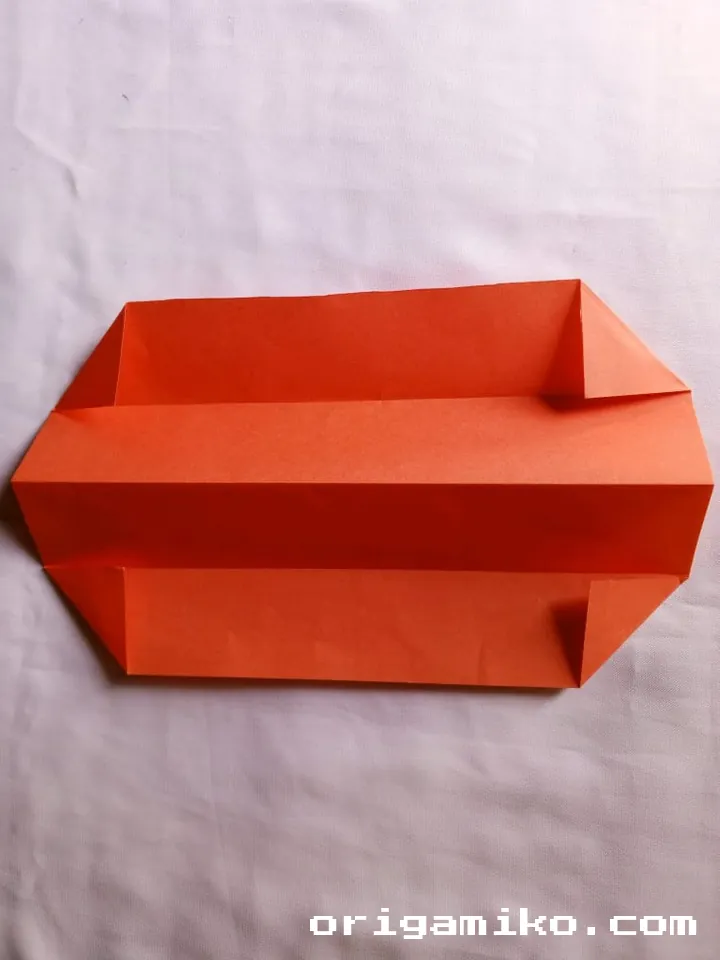
Step 4: Fold All Four Corners into a House Fold

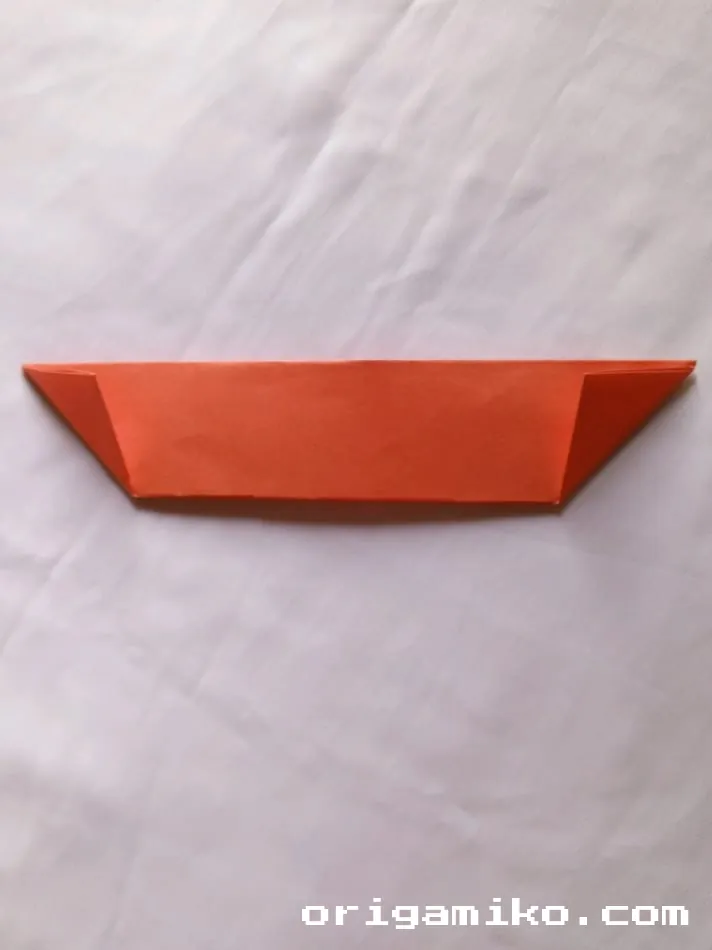
Fold all four corners inward so they meet the crease lines.
You’re aiming for a shape that looks like a house with a peaked roof.
Nice and symmetrical—this creates the pointed ends of the canoe.
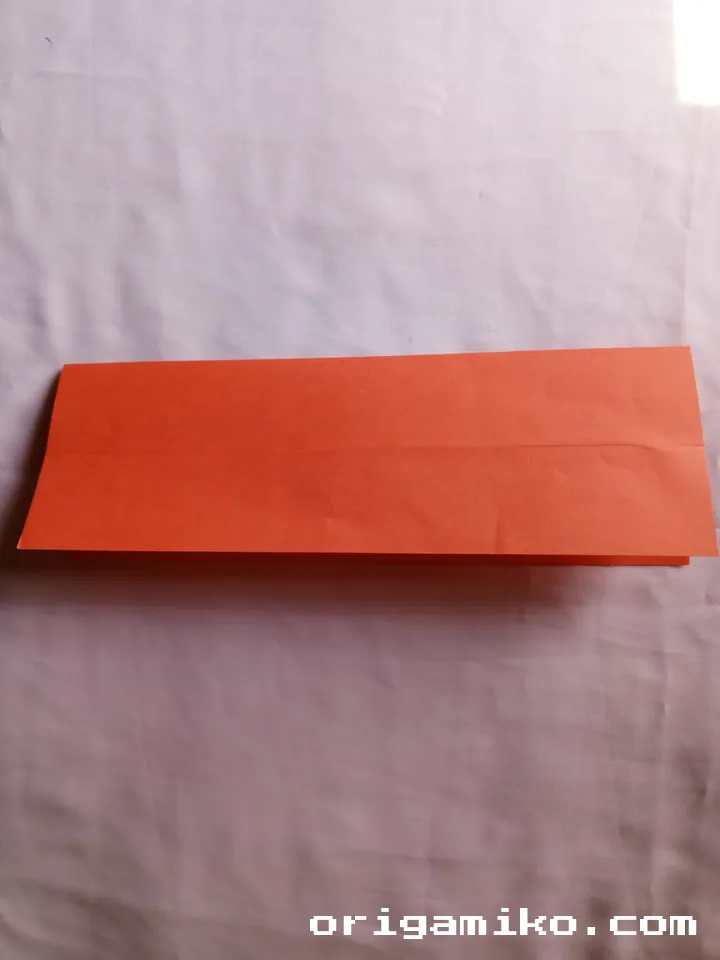
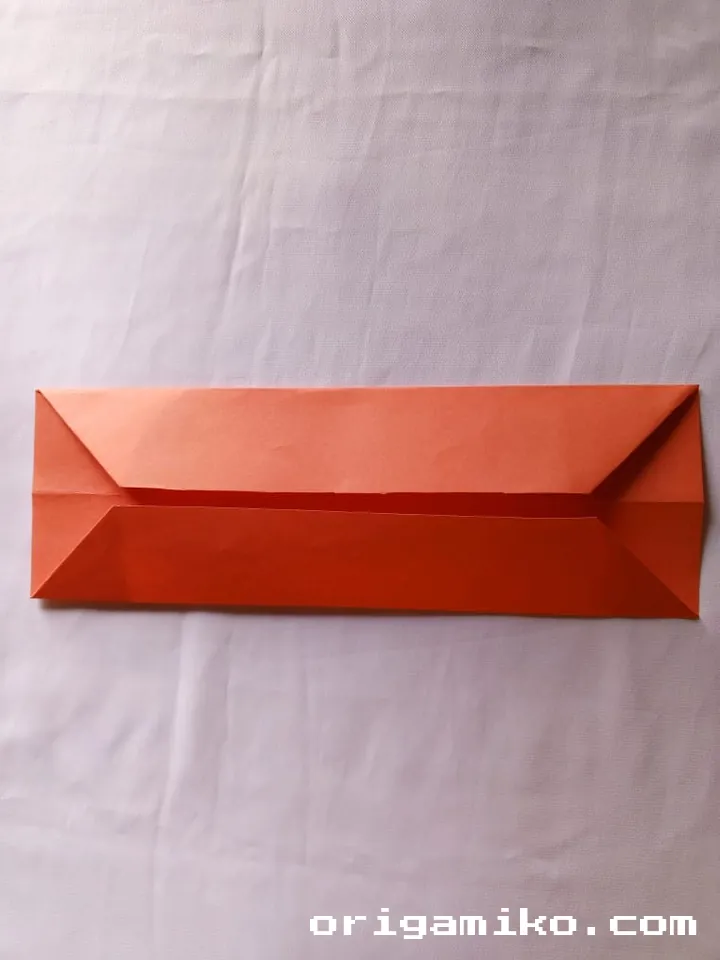
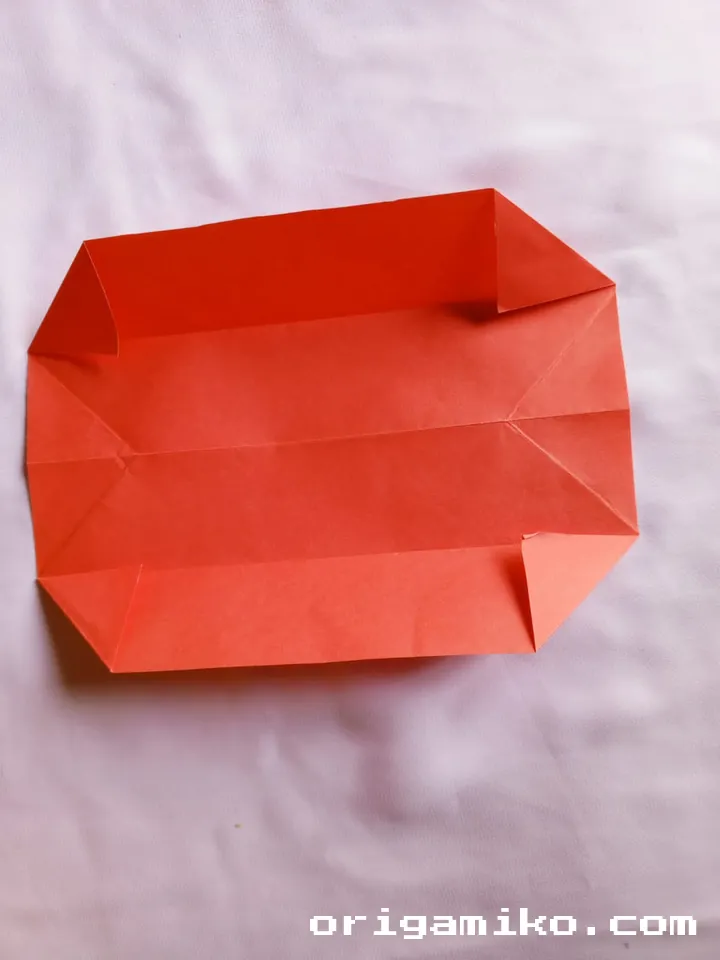
Step 5: Fold Back Along the Middle
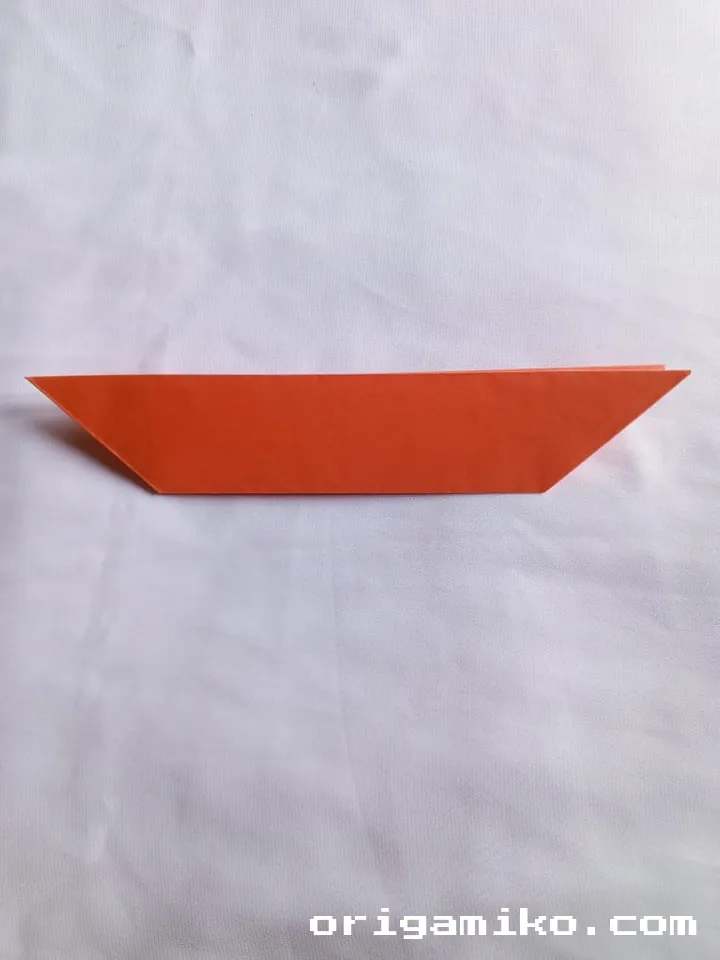
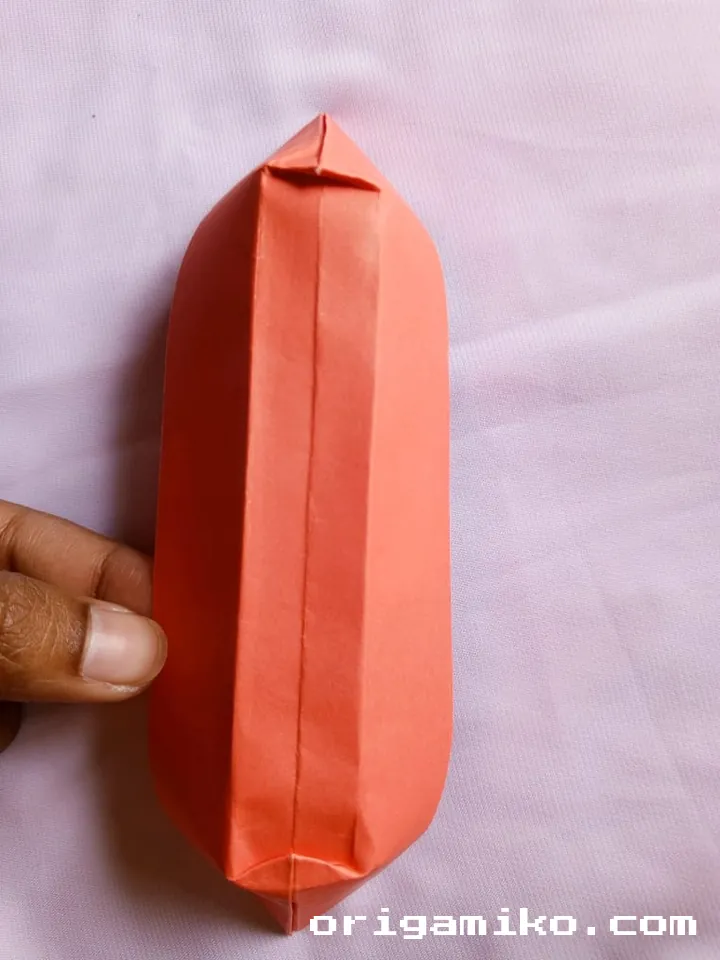
Refold the entire sheet along the center line again.
You’ve got the folded corners hidden inside now.
Now, fold the two outer corners inward toward the center again—then unfold.
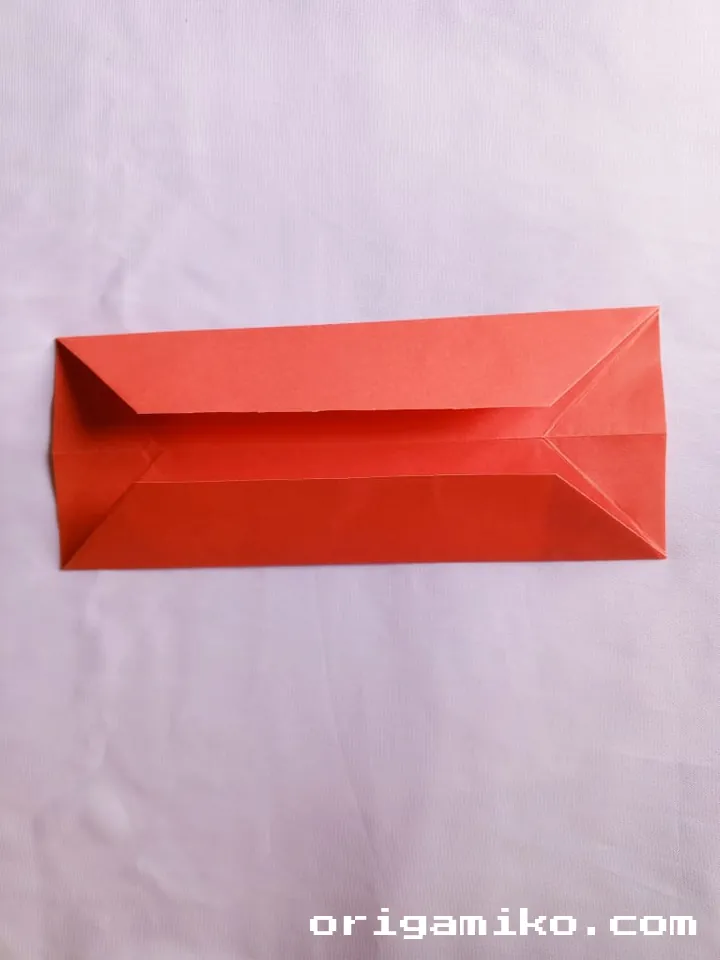
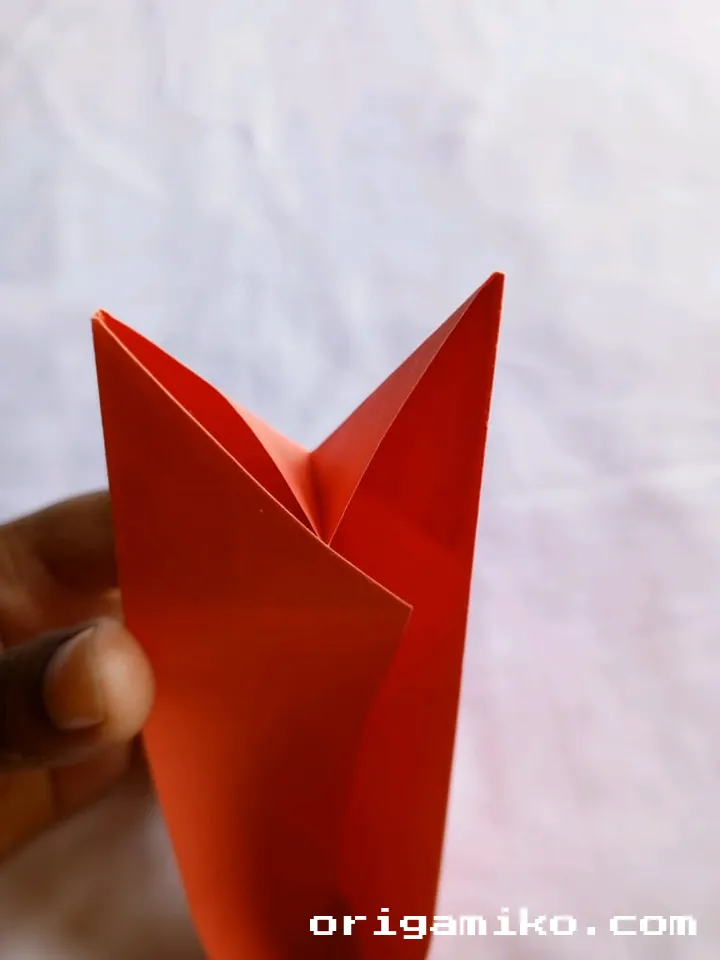
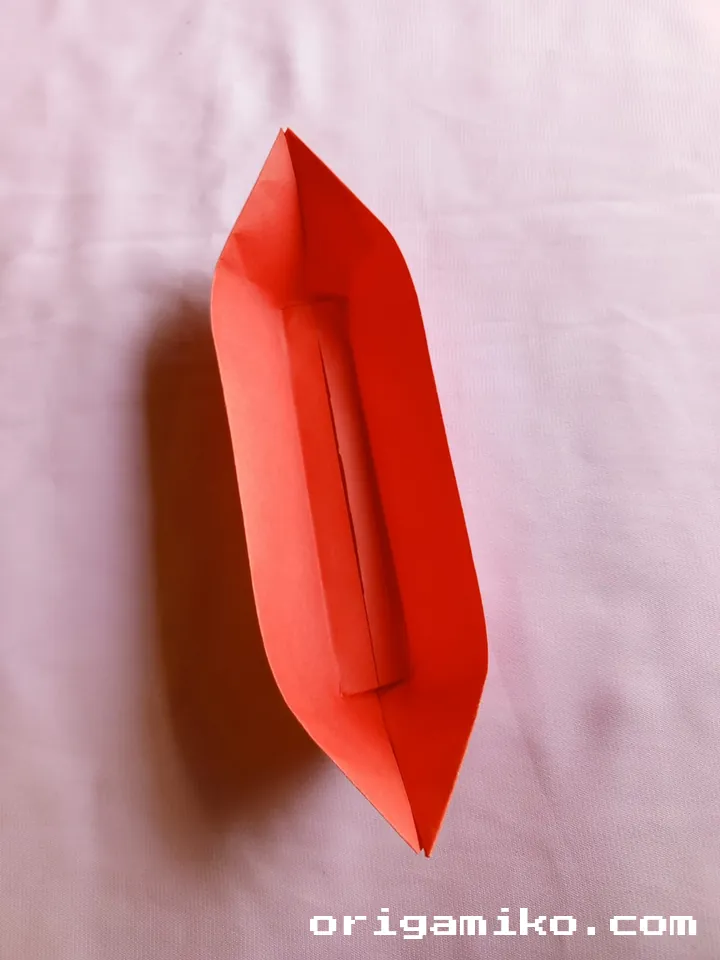
Step 6: Fold as Shown (Bottom Unfold + Extra Fold)

Here’s the fun part:
Start unfolding from the bottom edge, but this time, fold in a way that the paper locks into the final canoe shape.
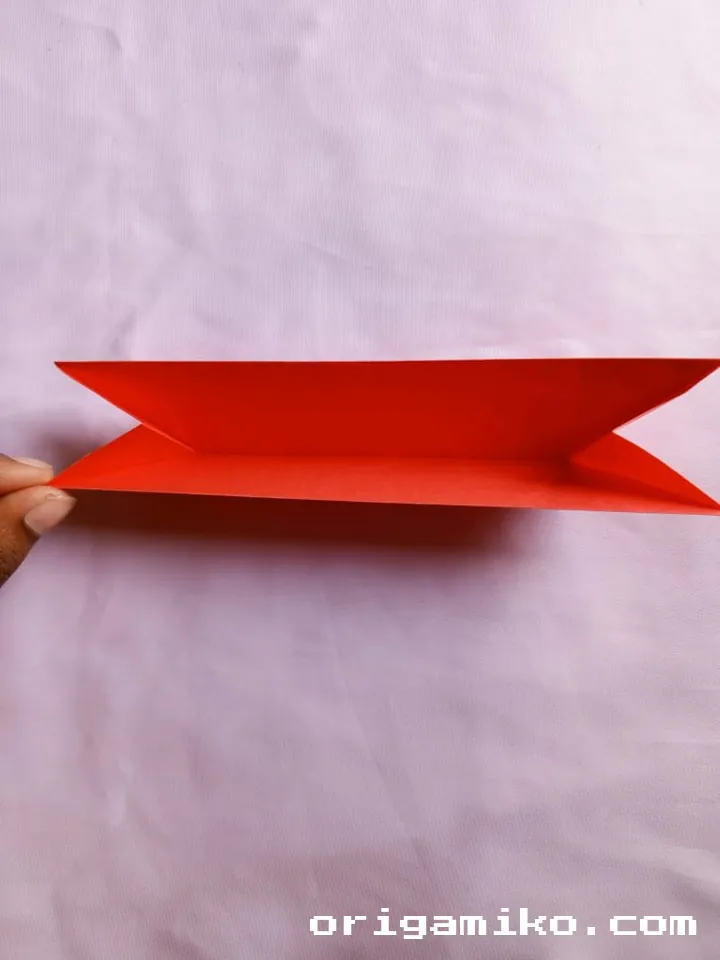
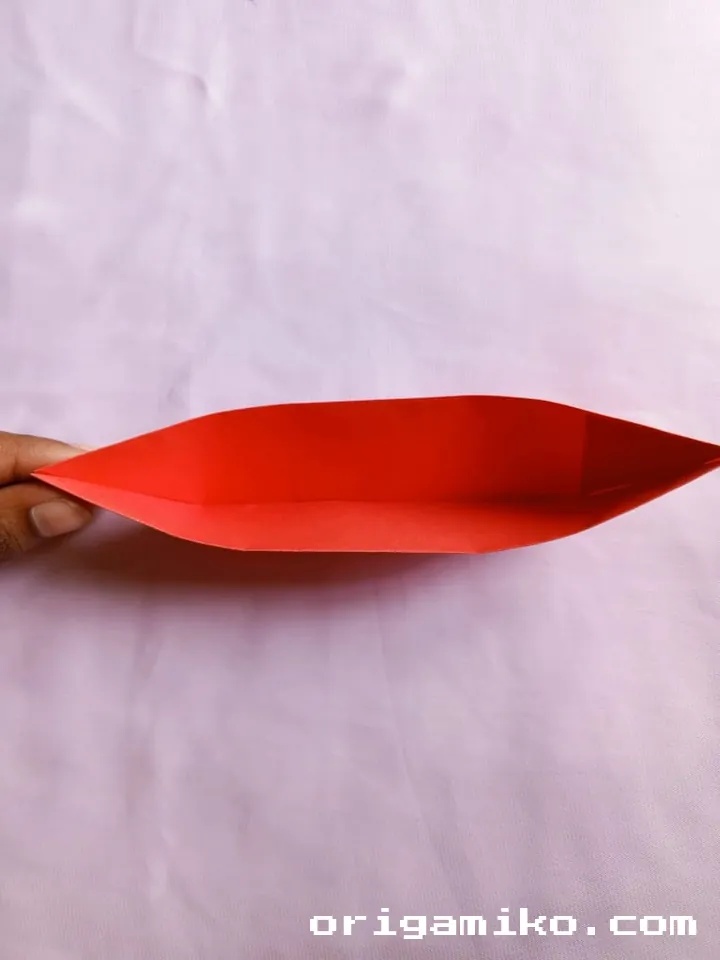
This one feels like origami magic—everything comes together neatly.
And just like that, you’ve made an origami canoe!
Tips for Success
Here are a few tricks I’ve picked up that make folding smoother:
- Align edges carefully – A tiny misalignment early on throws off the whole model.
- Press creases firmly – Use your fingernail or a flat object.
- Take your time – Rushing = crumpled canoe.
- Use thin paper – Too thick and folds won’t hold.
Common Mistakes and How to Avoid Them
Let’s save you from some rookie errors.
- Mistake: Using square paper
Solution: This model needs a rectangle (8″ × 4″). - Mistake: Weak creases
Solution: Press down firmly, especially at corners. - Mistake: Skipping unfold steps
Solution: Each unfold sets up the next fold—don’t skip. - Mistake: Misaligned folds
Solution: Line up each fold edge-to-edge.
Similar Variations to Try
Already loving this canoe? Try these spin-offs:
- Mini Origami Canoe – Use a smaller paper like 4″ × 2″
- Paper Boat with Sails – Add an upright sail by folding in a triangle.
- Double Hull Canoe – Fold two and tape them side-by-side for a catamaran style.
- Colored Canoe – Use dual-colored paper for a stylish look.
Each one brings a slightly different feel. That’s what makes origami so fun—small tweaks, big results.
FAQs
Q: Can I use any paper for this canoe?
A: Yes! Printer paper, notebook paper, even wrapping paper—just make sure it’s rectangular.
Q: Is this safe for kids?
A: Definitely. No scissors or sharp tools needed. It’s a great origami project for students.
Q: How long does it take?
A: Your first time might take 5–10 minutes. Once you get it down, it’s under 2 minutes.
Q: Why isn’t my canoe holding shape?
A: Try using thinner paper or redoing the last folds with sharper creases.
Final Thoughts
So that’s how to make canoe out of a plain rectangular paper—an easy origami canoe that looks great and feels super satisfying to build. Whether you’re a total beginner or have folded cranes in your sleep, this is one of those projects that hits the sweet spot.
Give it a try, fold a fleet, and maybe even float one (briefly) in water. If you enjoyed this guide, stick around—I’ve got plenty more origami adventures to share. Want to try a paper card holder or a 4-point star next?
Let me know how your canoe turned out!