Close Menu
    Facebook X (Twitter) Instagram
    Facebook X (Twitter) Instagram
    Origamik
    Subscribe
    • Easy Origami

      30+ Dollar Bill Origami You Need to Try

      July 30, 2025

      45+ Fall Origami Ideas You Need to Try

      July 30, 2025

      15+ Origami Bookmarks You Need to Try

      July 29, 2025

      15+ Useful Origami You Need to Try

      July 29, 2025

      15+ Sticky Note Origami You Need to Try

      July 29, 2025
    • Functional Origami

      55+ Functional Origami You Need to Try

      July 28, 2025

      Easy Origami Gloves: Your Gateway to Magical Paper Folding

      July 23, 2025

      The Complete Guide to Making an Easy Origami Diamond

      July 23, 2025

      The Complete Guide to Creating an Easy Origami Combined Cube

      July 23, 2025

      How to Make an Easy Origami Samurai Hat (Simple Samurai Hat Step by Step)

      May 14, 2025
    • Gum Wrapper Origami

      8 Easy Gum Wrapper Origami

      July 28, 2025

      Easy Gum Wrapper Hearts Origami

      July 23, 2025

      Easy Gum Wrapper Crane Origami: Turn Trash Into Treasure

      July 23, 2025

      How to Make an Easy Gum Wrapper Star Origami: Your Complete Guide

      July 23, 2025

      The Ultimate Guide to Creating Beautiful Gum Wrapper Origami Butterflies

      July 23, 2025
    • Origami Flower

      18 Origami Leaves You Need to Try

      July 23, 2025

      The Complete Guide to Creating Your First Easy Origami Cherry

      July 23, 2025

      The Complete Guide to Creating a Beautiful Easy Origami Lily

      July 23, 2025

      11 Origami Roses You Need to Try

      July 22, 2025

      25+ Origami Flowers You Need to Try

      July 16, 2025
    • Origami For Beginners
      1. Origami Box
      2. Origami Heart
      3. Origami Star
      4. View All

      29+ Origami Boxes You Need to Try

      July 26, 2025

      How to Make an Easy Origami Divider Box (Simple Divider Box Step by Step)

      April 25, 2025

      Origami Magic Box Instructions: A Fun and Simple Paper Folding Project

      February 8, 2025

      How to Make an Easy Origami Star Box (Step by Step Guide)

      February 8, 2025

      35+ Origami Heart Ideas

      July 27, 2025

      How to Make an Origami Heart Box with Lid: Step-by-Step Guide

      February 8, 2025

      Easy Origami Heart with Blossom: A Step-by-Step Guide

      February 8, 2025

      How to Make an Origami Secret Heart Box

      January 23, 2025

      10 Origami Star Ideas You Need to Try

      July 22, 2025

      How to Make an Easy Origami 5 Pointed Star

      February 8, 2025

      Origami 6 Pointed Star: Step-by-Step Guide for Beginners & Experts

      February 8, 2025

      How to Make an Easy Origami Diamond Star: Step-by-Step Guide

      February 8, 2025

      30+ Dollar Bill Origami You Need to Try

      July 30, 2025

      17+ Origami Vehicles You Need to Try

      July 29, 2025

      15+ Useful Origami You Need to Try

      July 29, 2025

      35+ Cool Origami Ideas You Need to Try

      July 29, 2025
    • Sticky Note Origami

      15+ Sticky Note Origami You Need to Try

      July 29, 2025

      How to Make an Easy Origami Sticky Note Bookmark: A Step-by-Step Guide

      April 25, 2025

      How to Make Easy Origami Sticky Note Claws – Simple, Fierce, and Fun

      April 25, 2025

      How to Make an Easy Origami Sticky Note Fidget Toy

      April 25, 2025

      How to Make an Easy Origami Sticky Note Gown: Step-by-Step for Beginners

      April 25, 2025
    Origamik
    Home » How to Make an Origami Chopstick Wrapper
    Functional Origami

    How to Make an Origami Chopstick Wrapper

    Orig AmiBy Orig AmiJanuary 23, 2025Updated:October 22, 2025No Comments4 Mins Read
    Facebook Twitter Pinterest LinkedIn Tumblr Email
    Featured image for How to Make an Origami Chopstick Wrapper
    Featured image for How to Make an Origami Chopstick Wrapper
    Share
    Facebook Twitter LinkedIn Pinterest Email

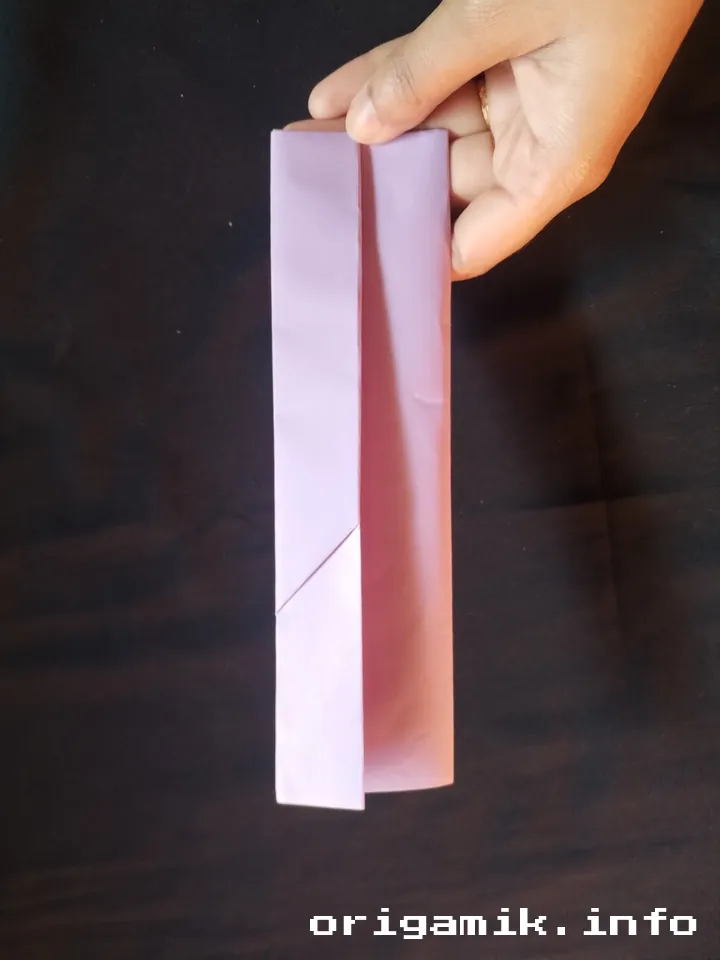
    Want to add a touch of charm to your dining setup? Crafting an Origami chopstick wrapper is both fun and practical. This small project transforms paper into functional art.

    With step-by-step guidance, even beginners can create this easy design. Plus, it’s a great way to impress guests with your creativity. Let me guide you through the process.

    By the end, you’ll have a beautiful, handmade wrapper ready for any occasion. Let’s get started!


    What is an Origami Chopstick Wrapper?

    An Origami chopstick wrapper is a simple, elegant way to hold chopsticks while adding personality to your table. It’s crafted from a single piece of paper folded into a neat, functional design.

    This project combines practicality with creativity. It’s perfect for casual dinners, special gatherings, or even as a unique gift idea. The best part? You don’t need advanced skills to make it.


    Materials Needed

    Let’s gather everything required for this project:

    MaterialDetails
    Paper15″ × 15″, square, patterned or plain
    Flat SurfaceClean and stable area for folding
    Time and PatienceEssential for perfecting those crisp folds

    Step-by-Step Guide to Making an Origami Chopstick Wrapper

    Step 1: Start with a Square Paper
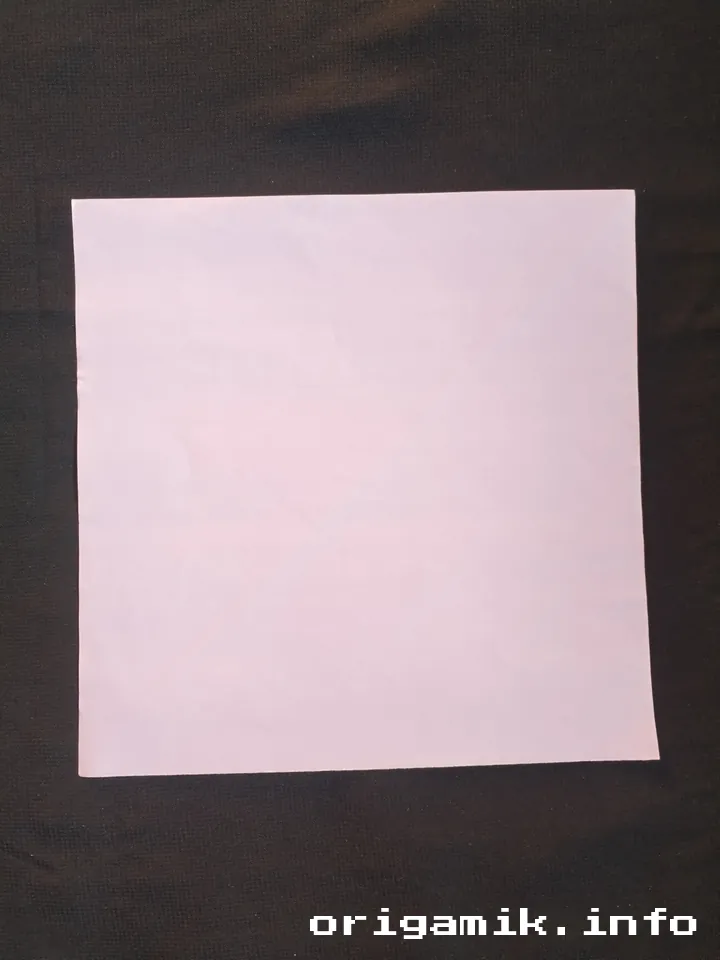
    Origami chopstick wrapper step 1

    Use a square sheet of paper measuring 15″ × 15″. This size works best for standard chopsticks.

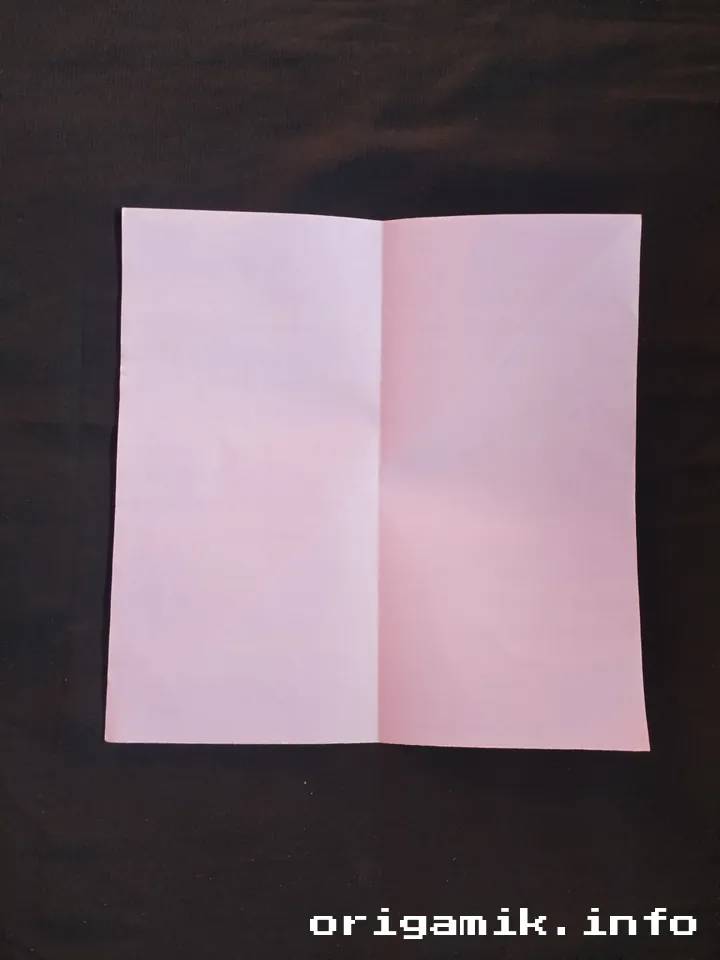
    Step 2: Fold in Half and Unfold
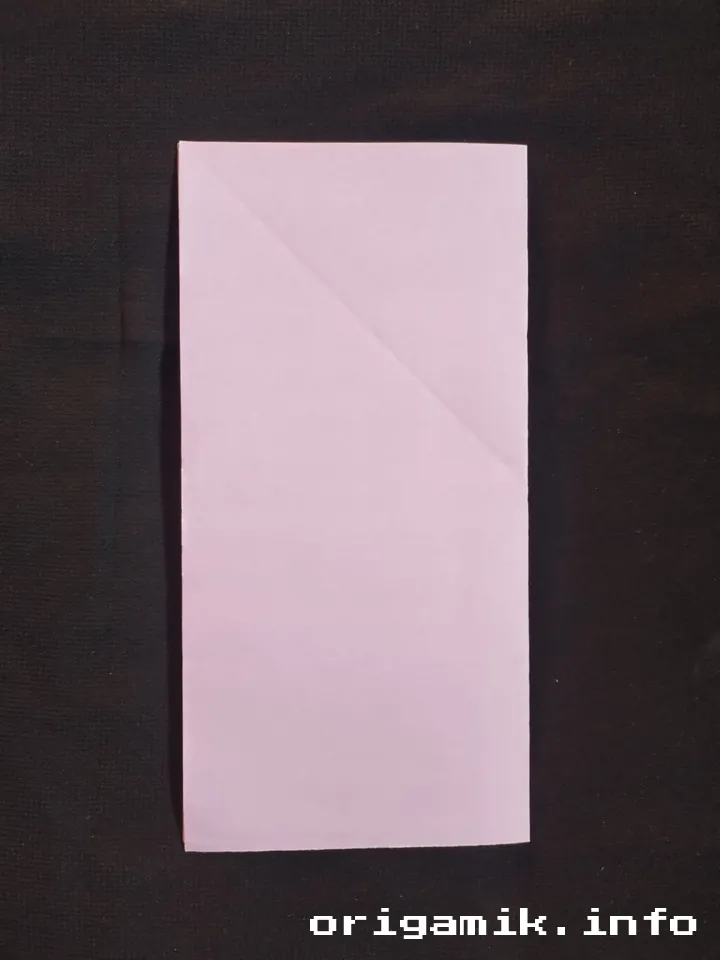
    Origami chopstick wrapper step 2 a
    Origami chopstick wrapper step 2 b

    Fold the paper horizontally to create a crease. Then unfold it to return to its original shape.

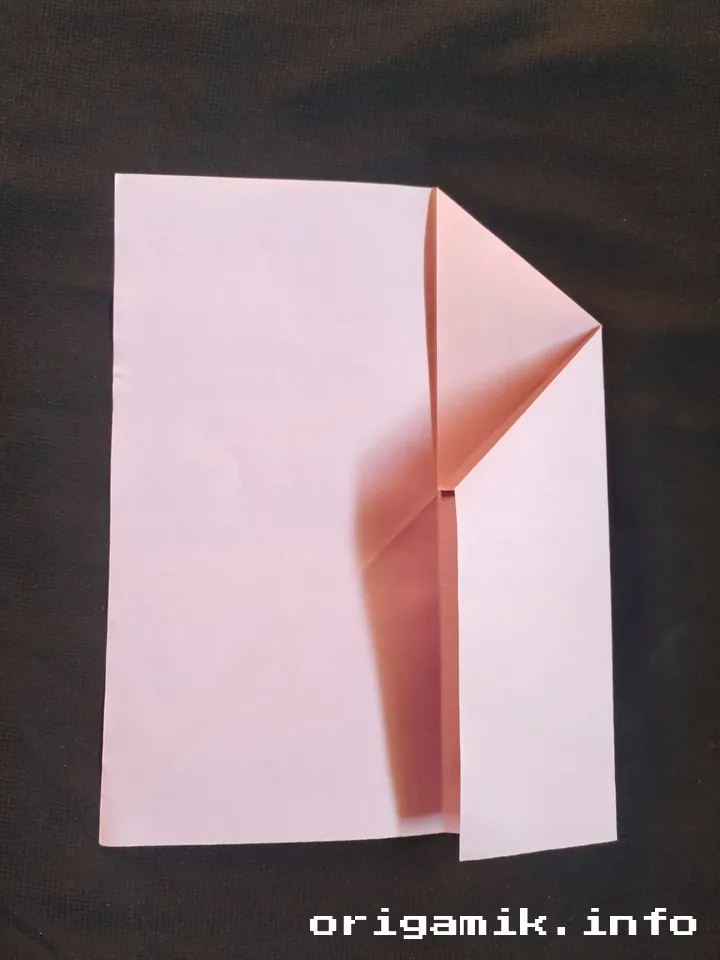
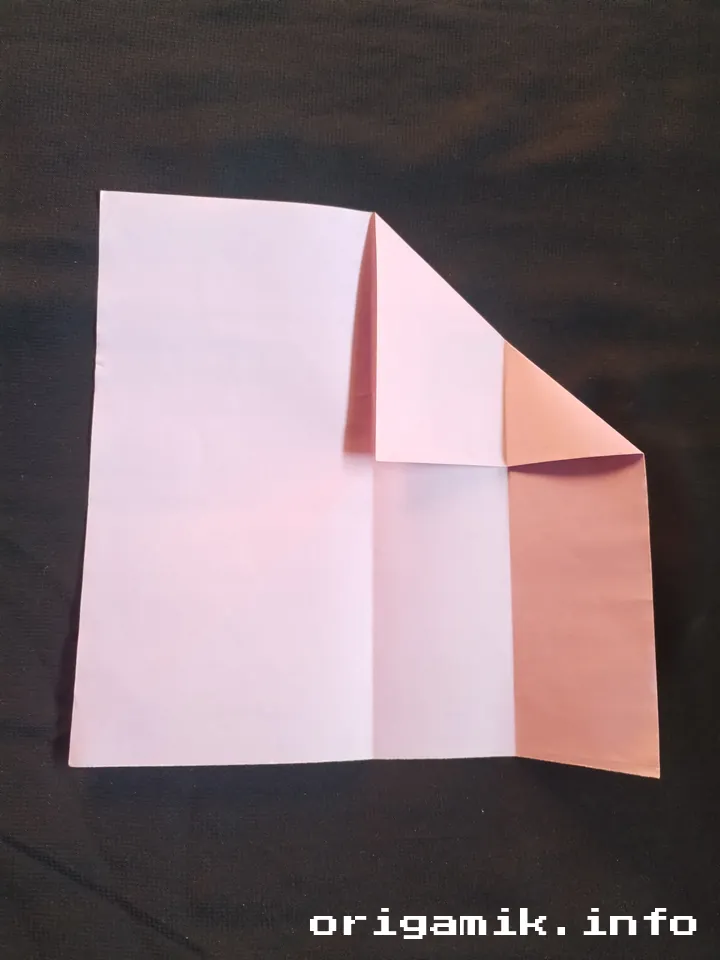
    Step 3: Fold a Corner and Side to the Middle
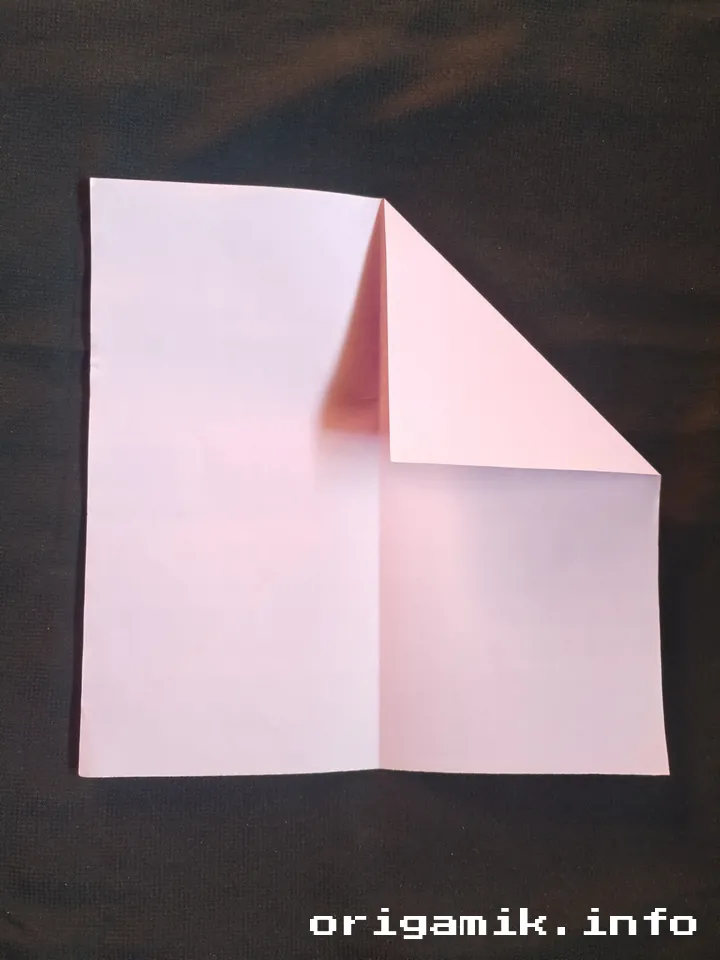
    Origami chopstick wrapper step 3 a
    Origami chopstick wrapper step 3 b
    Origami chopstick wrapper step 3 c

    Bring one corner of the paper to the center. Next, fold one side to meet the middle crease, and then unfold both folds.

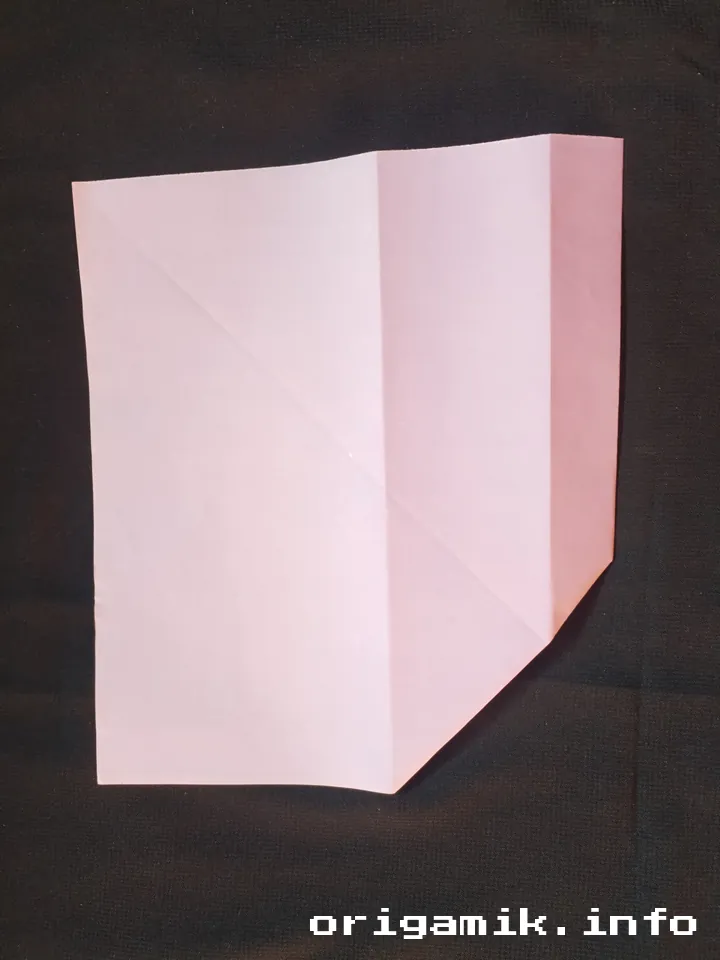
    Step 4: Create a Middle Fold and Flip
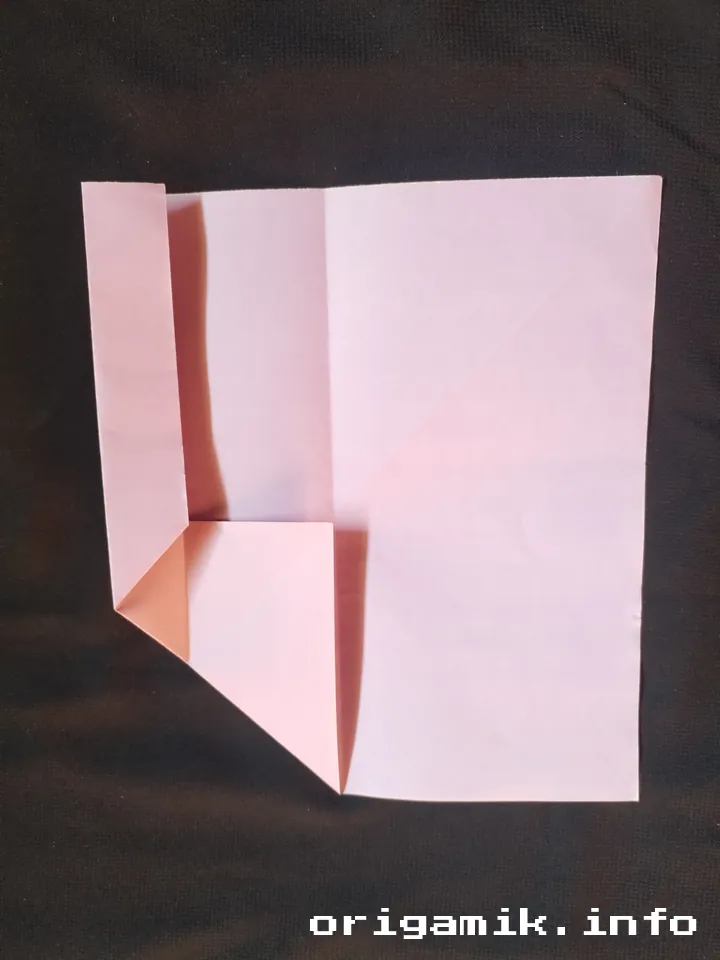
    Origami chopstick wrapper step 4 a
    Origami chopstick wrapper step 4 b
    Origami chopstick wrapper step 4 c

    Fold the entire paper in half, aligning the edges perfectly. Flip it upside down for the next step.

    Step 5: Fold Again and Flip
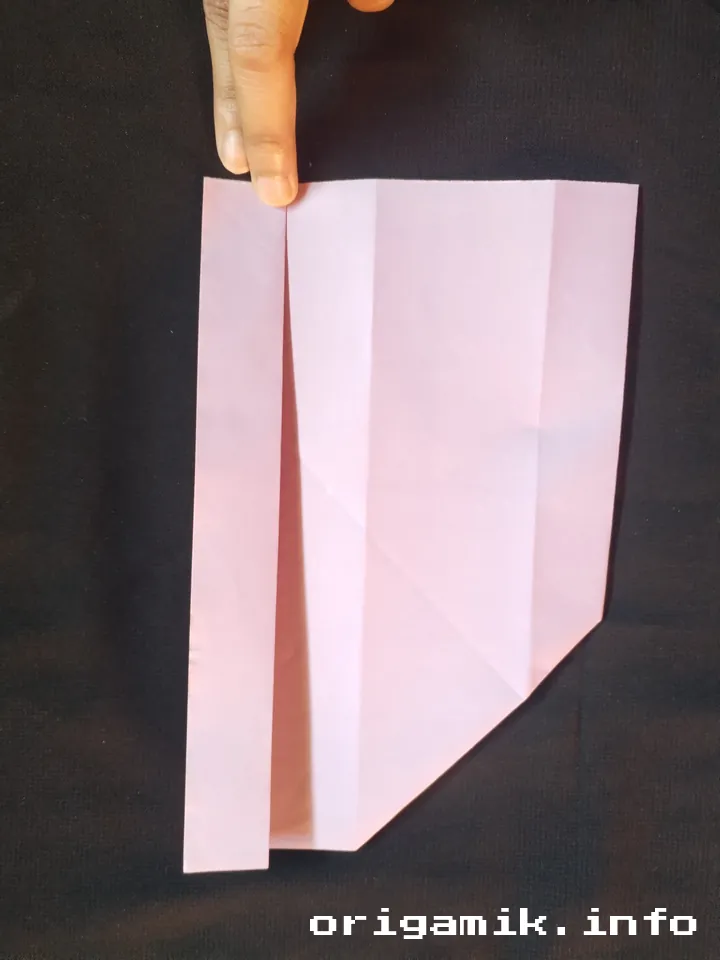
    Origami chopstick wrapper step 5 a
    Origami chopstick wrapper step 5 b

    Fold the paper at the center again, and flip it to the other side for the next folds.

    Step 6: Fold the Bottom Edge

    Origami chopstick wrapper step 6 a
    Origami chopstick wrapper step 6 b
    Origami chopstick wrapper step 6 c

    Fold about half an inch from the bottom edge to create a base for your wrapper.

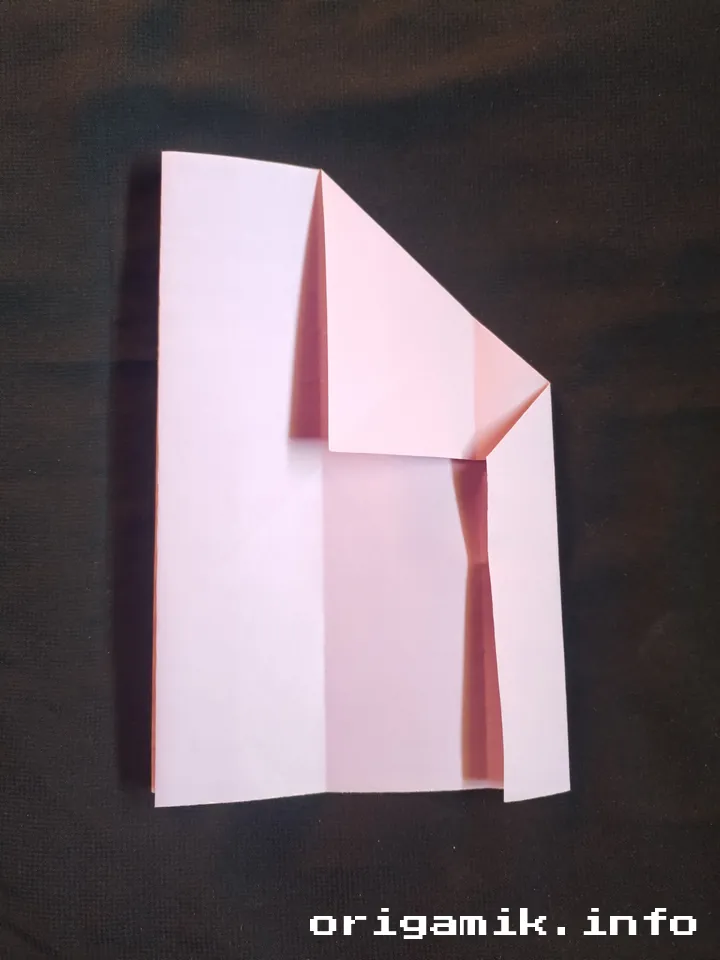
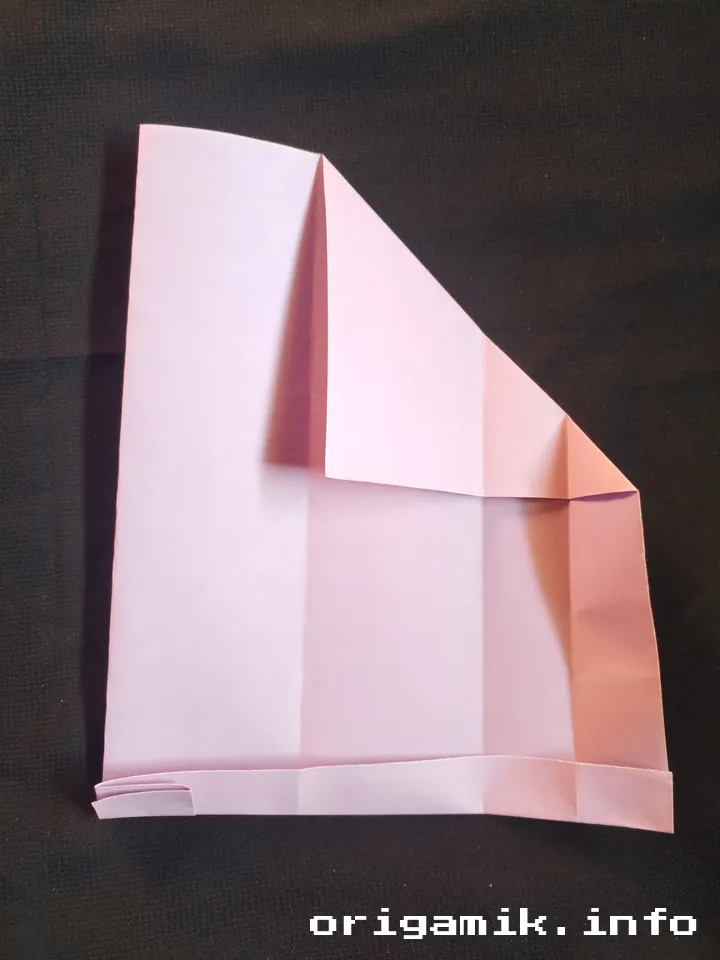
    Step 7: Fold the Right and Left Sides
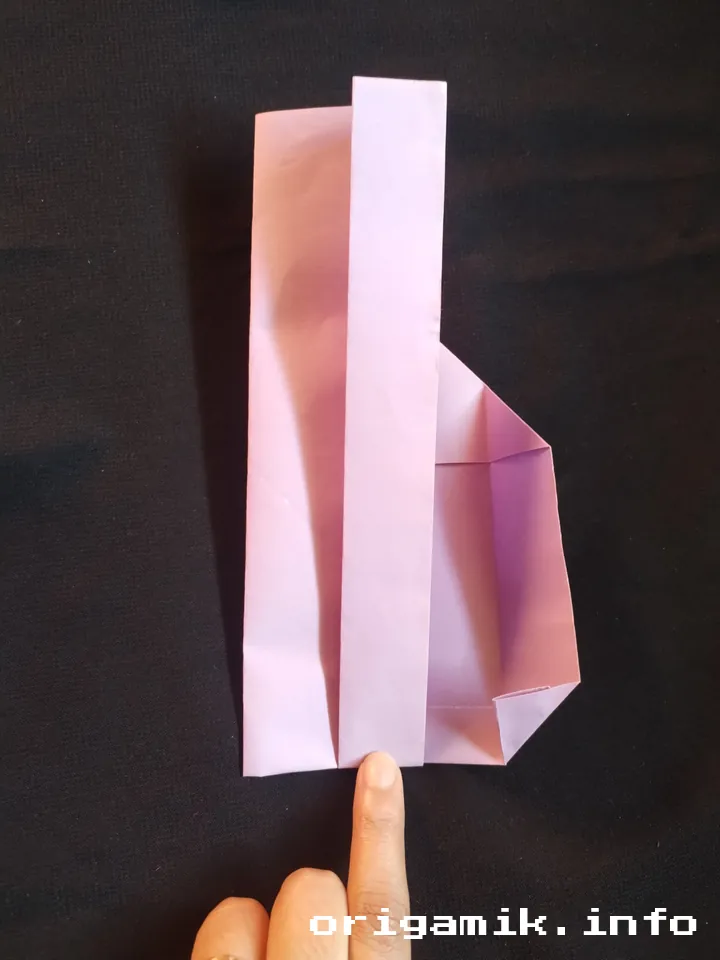
    Origami chopstick wrapper step 7 a
    Origami chopstick wrapper step 7 b

    Neatly fold the right side toward the center, then repeat with the left side to form a compact structure.

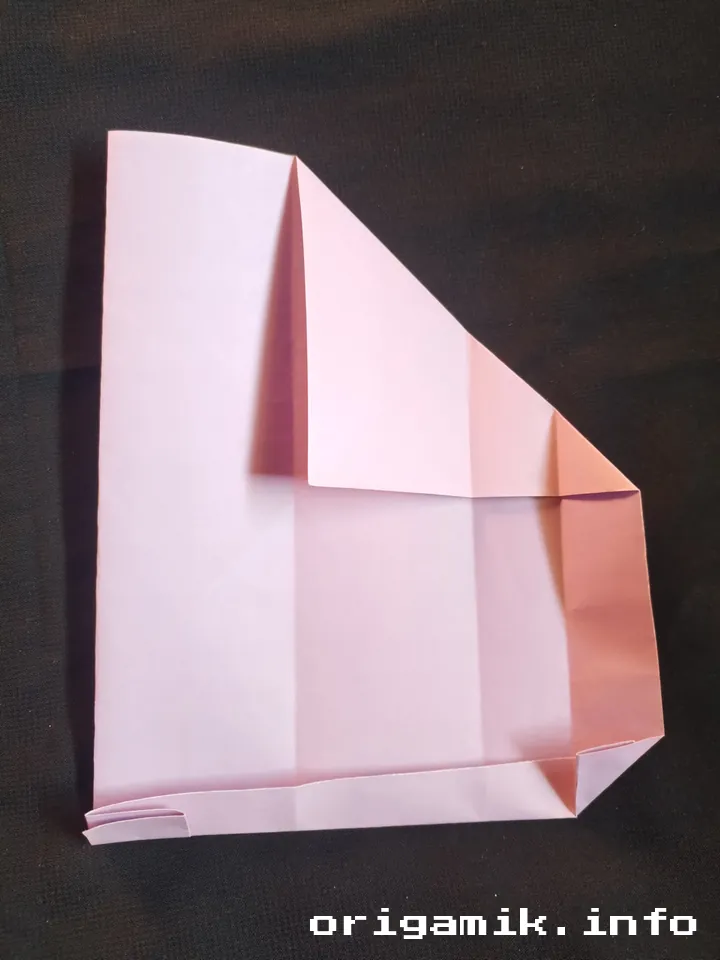
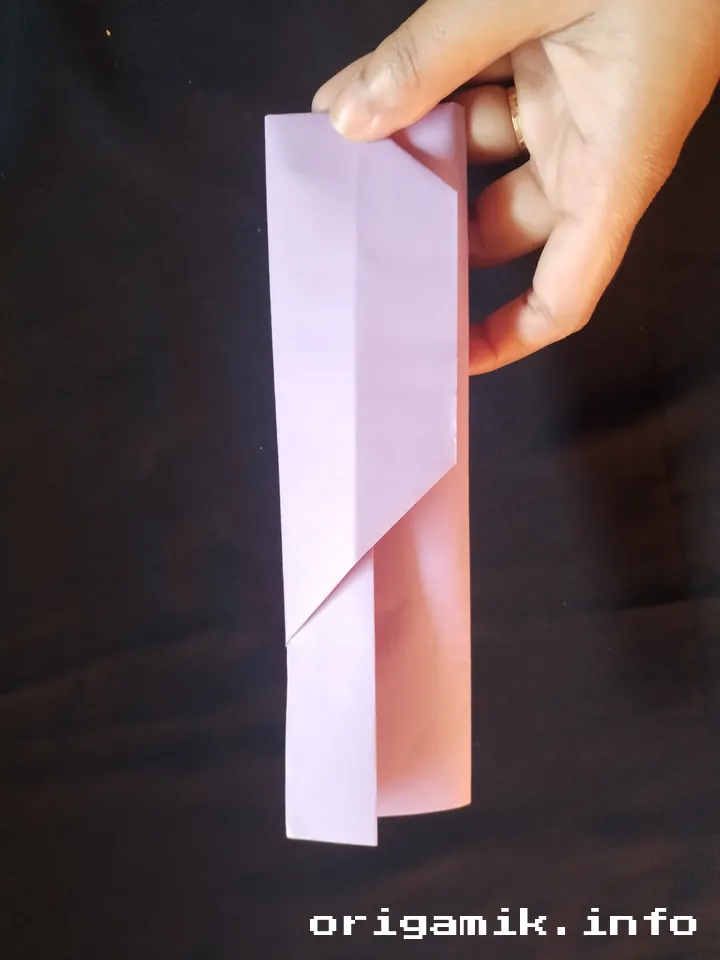
    Step 8: Tuck the Extra Paper Inside

    Origami chopstick wrapper step 8a
    Origami chopstick wrapper step 8 b

    Secure the extra paper by tucking it into the folds. Adjust if needed for a snug fit.

    Step 9: Finished Product
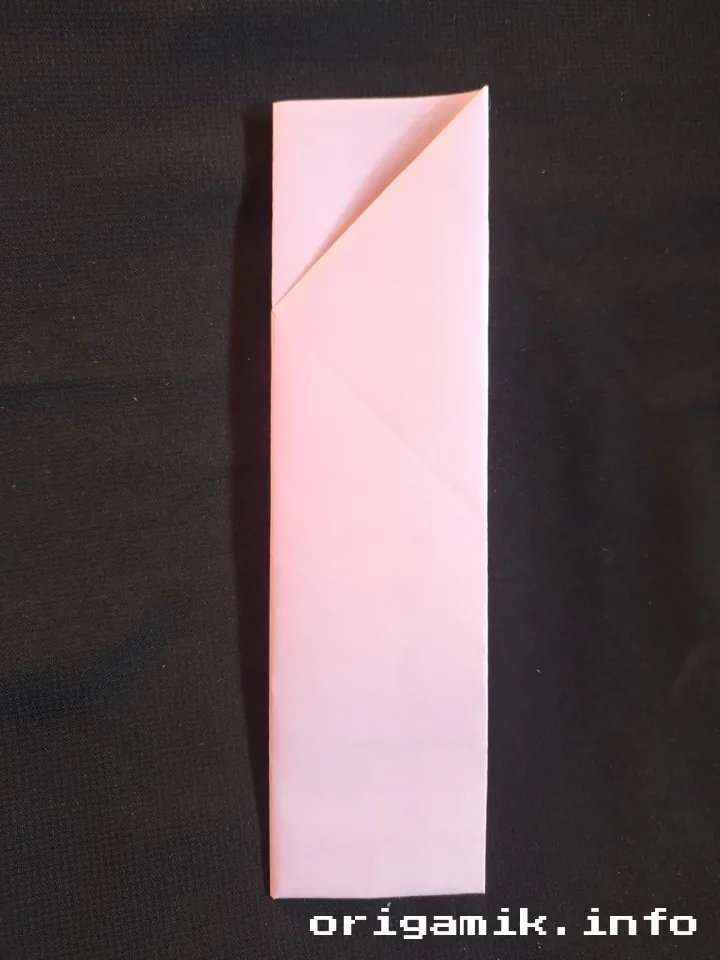
    Origami chopstick wrapper step 9

    Your Origami chopstick wrapper is now complete and ready to impress your guests!


    Tips for Success

    • Practice Creases: Make light creases before committing to each fold.
    • Choose Quality Paper: Thicker paper holds its shape better but ensure it’s not too stiff.
    • Stay Patient: If a fold doesn’t look right, gently unfold and try again.

    Common Mistakes and How to Avoid Them

    • Paper Tears: Avoid using too much force when folding. Work gently and precisely.
    • Uneven Folds: Take your time aligning edges before creasing. Precision is key.
    • Incorrect Size: Always start with a 15″ × 15″ square to ensure proper dimensions.

    Similar Variations

    Want to explore more? Try these:

    • Origami Fork Wrapper: Perfect for Western-style cutlery.
    • Napkin Origami: Use fabric napkins to create intricate designs.
    • Themed Wrappers: Use patterned paper for seasonal or festive occasions.

    FAQs

    Q: Can I use any size of paper?
    A: It’s best to use a 15″ × 15″ square for the correct proportions.

    Q: What type of paper works best?
    A: Lightweight yet sturdy paper, like origami paper or gift wrap, is ideal.


    Conclusion

    Making an Origami chopstick wrapper is a delightful way to combine art and practicality. This step-by-step guide ensures you can craft a stylish, functional piece with ease.

    Why not give it a try? You’ll impress yourself and your guests with this charming addition to any table setting. Happy folding!

    Share. Facebook Twitter Pinterest LinkedIn Tumblr Email
    Orig Ami
    • Website

    Related Posts

    55+ Functional Origami You Need to Try

    July 28, 2025

    Easy Origami Gloves: Your Gateway to Magical Paper Folding

    July 23, 2025

    The Complete Guide to Making an Easy Origami Diamond

    July 23, 2025

    Comments are closed.

    Latest Posts

    30+ Dollar Bill Origami You Need to Try

    July 30, 2025

    45+ Fall Origami Ideas You Need to Try

    July 30, 2025

    17+ Origami Vehicles You Need to Try

    July 29, 2025

    15+ Origami Bookmarks You Need to Try

    July 29, 2025

    15+ Useful Origami You Need to Try

    July 29, 2025

    35+ Cool Origami Ideas You Need to Try

    July 29, 2025

    15+ Sticky Note Origami You Need to Try

    July 29, 2025

    20+ Easy Origami Airplanes You Need to Try

    July 29, 2025

    8 Easy Gum Wrapper Origami

    July 28, 2025

    75+ Origami Toys You Need to Try

    July 28, 2025

    About Origamiko

    Orig Ami shares carefully-crafted origami tutorials, models, and ideas to help you explore the art of paper folding. From simple beginner projects to intricate display pieces, we provide clear instructions and inspiration so you can enjoy the process and improve with confidence.

    Questions or feedback? Reach out anytime.

    📧 [email protected]
    📞 +1 714-801-8105

    Subscribe to Updates

    Get tutorials, paper-folding tips, and updates from Orig Ami.

    Footer Menu

    • About Us
    • Contact Us
    • Disclaimer
    • Privacy Policy