

Ever wondered how a simple piece of paper transforms into something magical? Today I’ll show you the enchanting world of the Easy Origami Combined Cube. This incredible paper folding project promises a rewarding journey that’ll leave you amazed.
The beauty lies in its simplicity and elegance. With just basic folds, you’ll create something truly spectacular. Get ready for an adventure in Japanese paper artistry!
What Exactly Is an Origami Combined Cube?
The Origami Combined Cube is a fascinating three-dimensional paper sculpture that showcases the beauty of geometric origami. I’ve been folding these cubes for years, and they never fail to impress both beginners and seasoned paper artists.
This particular cube design stands out because it combines multiple folding techniques into one cohesive structure. The “combined” aspect refers to how different folding patterns work together to create the final cube shape. It’s like watching magic happen in your hands.
What makes this project special is its accessibility. You don’t need years of origami experience to succeed. The Simple Origami Combined Cube Step by step process I’ll share breaks everything down into manageable pieces.
Key Terms and Definitions
Origami: : The traditional Japanese art of paper folding without cuts or glue
Mountain Fold: : A fold where the crease points upward, resembling a mountain peak
Valley Fold: : A fold where the crease points downward, like a valley
Base: : The foundational fold pattern that serves as the starting point
Crease: : A sharp fold line made by pressing paper firmly
Materials Needed
Getting started requires minimal supplies, but quality matters. Here’s everything you’ll need for your Origami Combined Cube instructions journey:
| Material | Specification | Purpose | Quality Tips |
|---|---|---|---|
| Paper | 15cm x 9cm rectangle | Main folding material | Use medium-weight paper (60-80 GSM) |
| Work Surface | Flat, clean area | Provides stable folding base | Hard surface works better than soft |
| Ruler | Standard measuring tool | Ensures accurate dimensions | Metal rulers give cleaner edges |
| Bone Folder (Optional) | Paper creasing tool | Creates sharp, precise folds | Plastic or wooden options available |
| Good Lighting | Natural or bright LED | Prevents eye strain | Position light to avoid shadows |
The paper choice makes a huge difference. I’ve tried everything from copy paper to specialty origami sheets. For beginners, standard printer paper works perfectly fine. It’s forgiving and holds creases well.
Step-by-Step Instructions: How to Make Origami Combined Cube
Now comes the exciting part! I’ll walk you through each fold with clear explanations. Take your time with each step – rushing leads to sloppy results.
Step 1: Prepare Your Paper
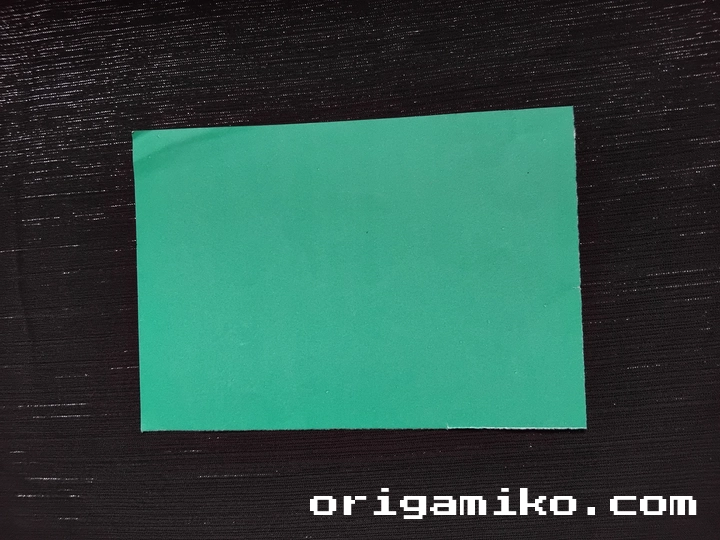
Take your 15cm x 9cm paper and place it horizontally on your work surface. Make sure the surface is clean and flat. Any bumps or debris will show up in your final cube.
Step 2: Create the Initial Thirds Fold
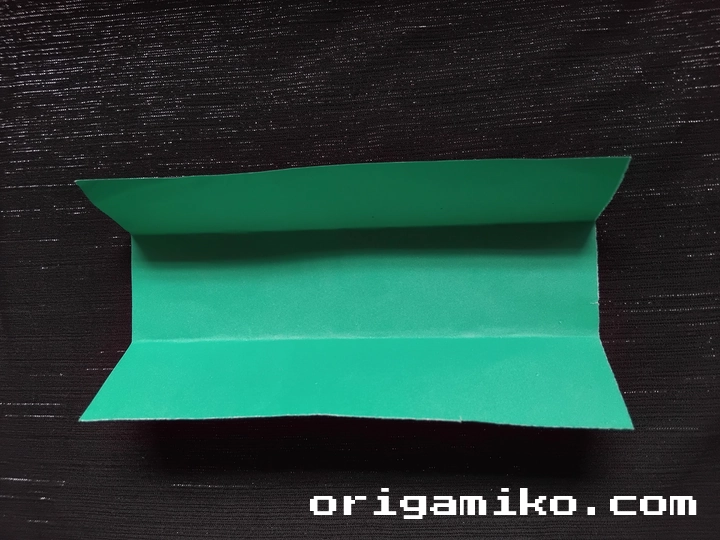
Fold the paper into three equal parts lengthwise. This creates the foundation for everything that follows. Then fold both lower corners slightly inward. These corner folds should be small – about 1cm each.
The key here is precision. Uneven thirds will throw off your entire cube. I measure mine carefully the first few times until I develop muscle memory.
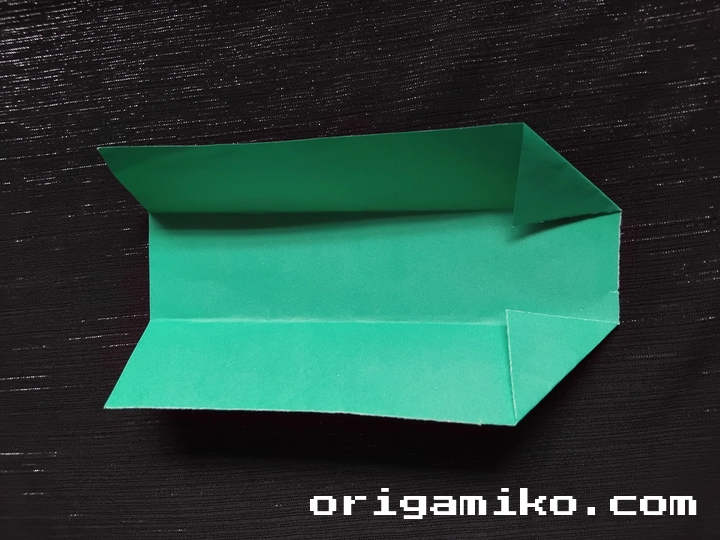
Step 3: Make the Five Essential Folds
Now make five folds following a specific pattern. Each fold builds on the previous one, creating the structural integrity your cube needs. These folds should be sharp and deliberate.
Start from the left side and work your way across. Each fold should align with specific reference points created by your earlier work. Don’t worry if it looks complex – it simplifies as you progress.
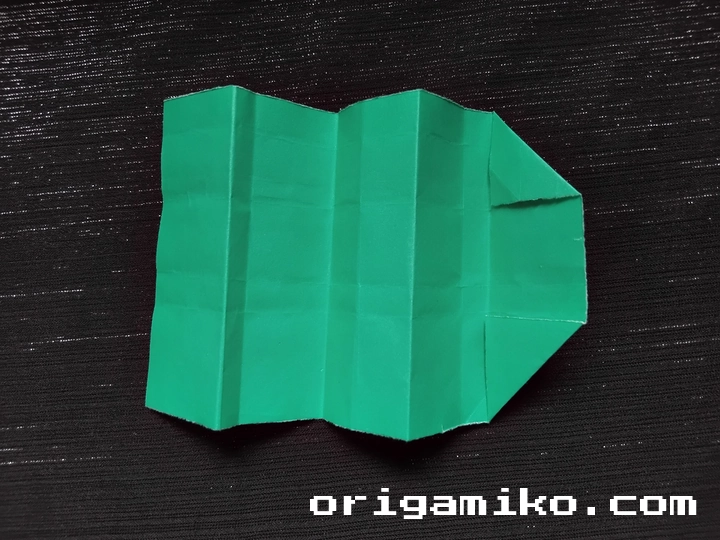
Step 4: Repeat the Pattern Four Times
Make the same fold pattern and repeat it four times total. This repetition creates the geometric beauty of the combined cube. Consistency is crucial here.
I like to think of this step as creating a paper accordion with attitude. Each repetition should mirror the others exactly. Take breaks if your hands get tired – precision beats speed every time.
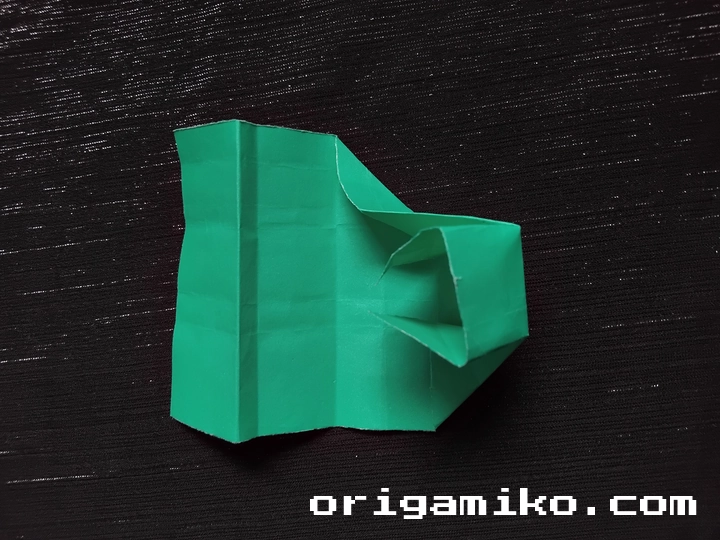
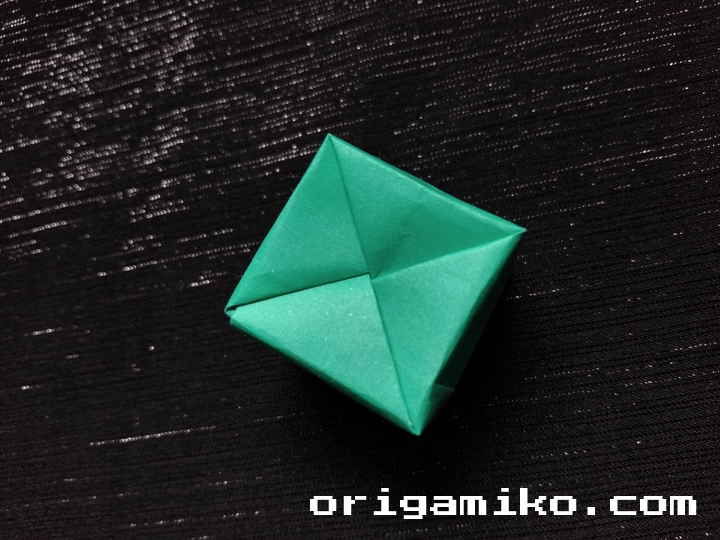
Step 5: Insert the Corners
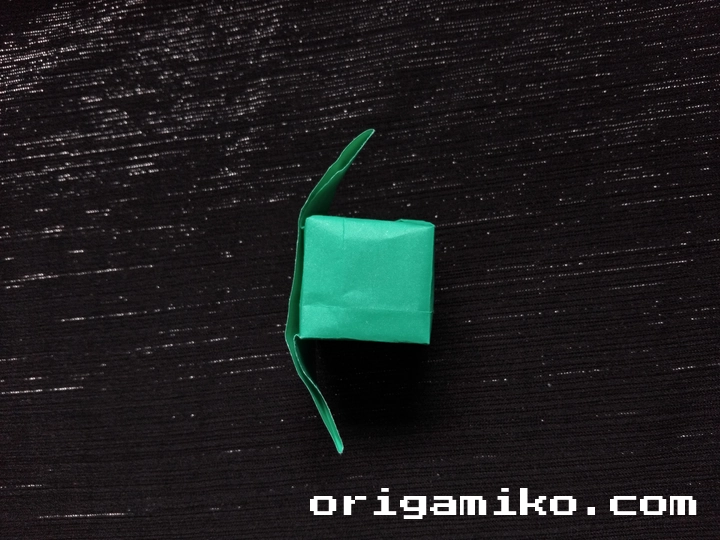
Insert both corners inside the cube structure. This step transforms your flat folded paper into a three-dimensional object. It’s the moment when everything clicks into place.
Be gentle but firm. The paper should slide into position naturally if your previous folds were accurate. If you’re meeting resistance, double-check your earlier work.
Step 6: Final Assembly
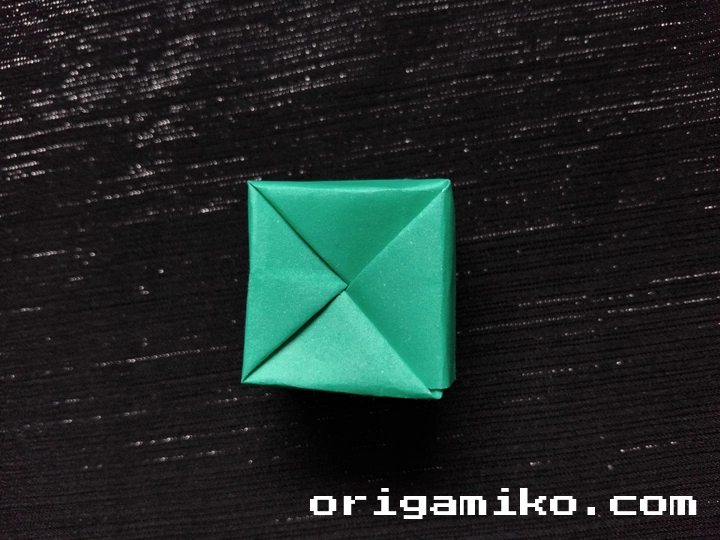
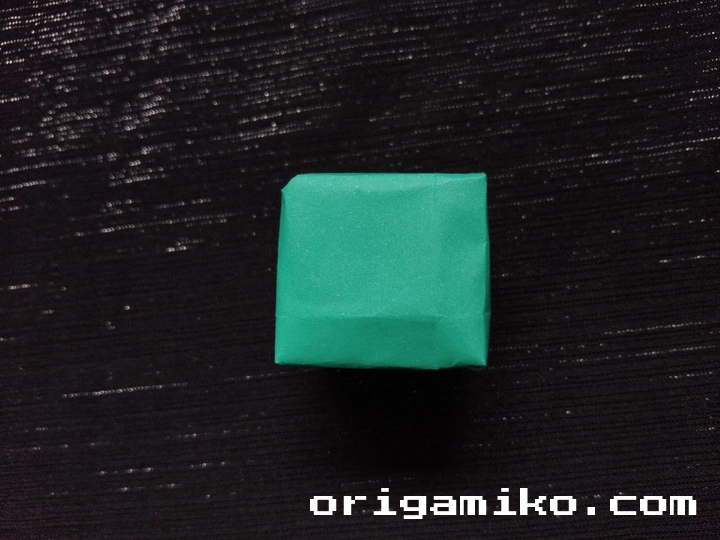
Your Easy Origami Combined Cube is now complete! Give it a gentle shake to make sure everything holds together properly. The cube should feel sturdy and maintain its shape.
Tips for Success
After folding hundreds of these cubes, I’ve learned some valuable tricks that make the difference between frustration and success:
• Start with larger paper if you’re a beginner. The 15x9cm size is standard, but 20x12cm gives you more room for error.
• Keep your fingernails short. Long nails can tear the paper during delicate folds.
• Work in good lighting. Poor lighting leads to misaligned folds and eye strain.
• Practice the valley and mountain folds separately before starting the cube.
• Use a bone folder for super-sharp creases, but be careful not to tear the paper.
• Take breaks if you feel frustrated. Fresh eyes catch mistakes better.
The most important tip? Don’t give up after your first attempt. My first cube looked like it went through a blender. My tenth one was beautiful.
Common Mistakes and How to Avoid Them
I’ve made every mistake possible with this project. Here are the big ones and how to sidestep them:
Uneven initial folds ruin everything downstream. Always measure twice, fold once. Use a ruler for your first few cubes until you develop an eye for it.
Rushing through the repetitive steps leads to inconsistency. Each of the four repetitions must be identical. Treat each one like it’s the first time you’re doing it.
Forcing the final assembly usually means something went wrong earlier. If the corners won’t insert smoothly, unfold and check your previous work.
Using paper that’s too thin makes the cube floppy and unstable. Standard copy paper is the minimum thickness I recommend.
Working on a soft surface makes precise folds nearly impossible. Always use a hard, flat surface.
Similar Variations You Can Try
Once you’ve mastered the basic Simple Origami Combined Cube Step by step process, these variations will expand your skills:
The Decorative Cube uses patterned or colored paper to create visual interest. Try using gift wrap or scrapbook paper for stunning results.
The Mini Cube Series involves making multiple small cubes from 10x6cm paper. Display them together for an impressive geometric collection.
The Textured Cube incorporates different paper types in the same fold. Mix smooth and textured papers for a unique tactile experience.
The Modular Cube System connects multiple cubes into larger structures. This advanced technique creates complex geometric sculptures.
Each variation teaches new skills while building on your basic cube foundation. I recommend mastering the original before moving to variations.
Troubleshooting Common Issues
Even experienced folders encounter problems. Here’s how I handle the most frequent issues:
Paper tears during folding: This usually means you’re being too aggressive or the paper is too thin. Slow down and use slightly thicker paper.
Cube won’t hold its shape: Check that all your creases are sharp and well-defined. Weak creases lead to structural failure.
Uneven cube appearance: This traces back to inconsistent folding in the repetitive steps. Practice makes perfect here.
Difficulty with final assembly: The corners should slide in smoothly. If they don’t, your measurements were probably off in the early steps.
The Science Behind the Fold
Understanding why these folds work helps improve your technique. The Origami Combined Cube instructions follow mathematical principles that have fascinated geometrists for centuries.
Each fold creates specific angles that, when combined, naturally form a three-dimensional cube. The “combined” aspect refers to how multiple geometric principles work together in harmony.
The repetitive folding pattern creates structural redundancy. This means if one section is slightly imperfect, the others compensate. It’s engineering through paper folding.
Taking Your Skills Further
Mastering how to make Origami Combined Cube opens doors to more complex projects. The skills you develop here transfer to advanced origami techniques.
Consider joining local origami groups or online communities. Sharing your work and learning from others accelerates your progress dramatically.
Document your folding journey with photos. Tracking your improvement over time provides motivation and helps identify areas for growth.
Frequently Asked Questions
Q: What’s the best paper size for beginners? A: Start with 20x12cm if you have larger hands or struggle with precision. The standard 15x9cm works fine for most people.
Q: How long does it take to complete one cube? A: Beginners typically need 15-20 minutes. With practice, you can complete one in under 5 minutes.
Q: Can I use colored or patterned paper? A: Absolutely! Decorative papers make beautiful cubes. Just ensure the paper isn’t too thick or too thin.
Q: Why won’t my cube hold together? A: This usually indicates weak creases or incorrect proportions in early steps. Make sure all folds are sharp and precise.
Q: Is this project suitable for children? A: Yes, but I recommend supervision for kids under 8. The folding requires some fine motor control and patience.
Advanced Techniques and Modifications
Once you’re comfortable with the basic process, try these advanced approaches:
Precision Folding involves using specialized tools like bone folders and cutting mats. This creates museum-quality results with razor-sharp edges.
Color Theory Application uses complementary colors or gradient papers to create visual depth. Plan your color scheme before starting.
Size Variations challenge your skills with tiny cubes (5x3cm) or giant ones (30x18cm). Each size presents unique challenges.
Mixed Media Integration incorporates other craft elements like ribbons or metallic accents. Keep additions minimal to preserve the cube’s elegance.
Displaying Your Finished Cubes
A beautiful Easy Origami Combined Cube deserves proper presentation. Here are my favorite display methods:
Create shadow boxes with different colored backgrounds. The geometric shapes cast interesting shadows that change throughout the day.
Build cube collections in glass bowls or clear containers. Multiple cubes together create fascinating geometric patterns.
Use them as unique gift toppers instead of traditional bows. Recipients often keep the cube long after unwrapping the gift.
Photograph your cubes with dramatic lighting. The geometric shapes photograph beautifully and make great social media content.
The Meditative Aspect of Cube Folding
Beyond the technical skills, origami offers mental benefits. The repetitive folding motions create a meditative state that reduces stress and improves focus.
I often fold cubes while listening to music or podcasts. The familiar motions free my mind to absorb other content while my hands work automatically.
Many of my students report improved patience and attention to detail in other areas of life. Origami training translates to enhanced precision in work and hobbies.
The satisfaction of completing each cube provides small victories throughout your day. These minor accomplishments build confidence and positive momentum.
Conclusion
Creating an Easy Origami Combined Cube offers far more than just a paper sculpture. You’ve learned precision, patience, and the joy of transforming simple materials into something extraordinary.
The skills you’ve developed extend beyond paper folding. Every crease teaches attention to detail, every successful cube builds confidence, and every mistake provides valuable learning. Now you’re ready to tackle even more ambitious how to make Origami Combined Cube projects and share this ancient art with others.