
Ever stared at a piece of paper and wondered if you could transform it into something magical?
Today I’ll show you exactly how to create a stunning origami diamond that sparkles with possibility.
This simple origami diamond step by step guide will have you folding like a pro in minutes.
What Makes the Origami Diamond So Special?
I’ve been folding paper for years, and let me tell you – the origami diamond holds a special place in my heart. There’s something absolutely mesmerizing about watching a flat square transform into this three-dimensional gem that catches light from every angle.
The beauty of this particular fold lies in its simplicity. You don’t need years of experience or fancy tools. Just a piece of paper and about 10 minutes of your time. The origami diamond instructions are straightforward enough for complete beginners, yet the end result looks so professional that people will think you’ve been doing this forever.
What really gets me excited about this project is how it bridges the gap between basic folds and more complex origami. It’s like a stepping stone that builds your confidence while teaching you fundamental techniques you’ll use in countless other projects.
Materials Needed
Before we dive into the folding fun, let’s make sure you have everything ready. I always tell people that preparation is half the battle when it comes to successful paper folding.
| Material | Specifications | Purpose | Cost Range |
|---|---|---|---|
| Paper | 6″ x 6″ square | Main folding material | $0.10 – $0.50 |
| Origami Paper (Kami) | 15cm x 15cm, 60-80 GSM | Best for crisp folds | $0.25 – $1.00 |
| Regular Copy Paper | 8.5″ x 11″ (cut to square) | Budget-friendly option | $0.05 – $0.15 |
| Decorative Paper | Various sizes available | Enhanced visual appeal | $0.50 – $2.00 |
| Bone Folder | 6-8 inches long | Creates sharp creases | $5.00 – $15.00 |
| Cutting Mat | A4 or Letter size | Protects work surface | $10.00 – $25.00 |
| Ruler | 12 inches minimum | Ensures accurate measurements | $2.00 – $8.00 |
Paper Weight Guide:
- Lightweight (50-70 GSM): Perfect for beginners, easier to fold
- Medium Weight (80-100 GSM): Holds shape better, ideal for display
- Heavy Weight (100+ GSM): Challenging but creates sturdy results
Step-by-Step Origami Diamond Instructions
Alright, here’s where the magic happens. I’m going to walk you through each step like we’re sitting together at my kitchen table. Take your time with each fold – there’s no rush here.
Step 1: Prepare Your Paper Foundation
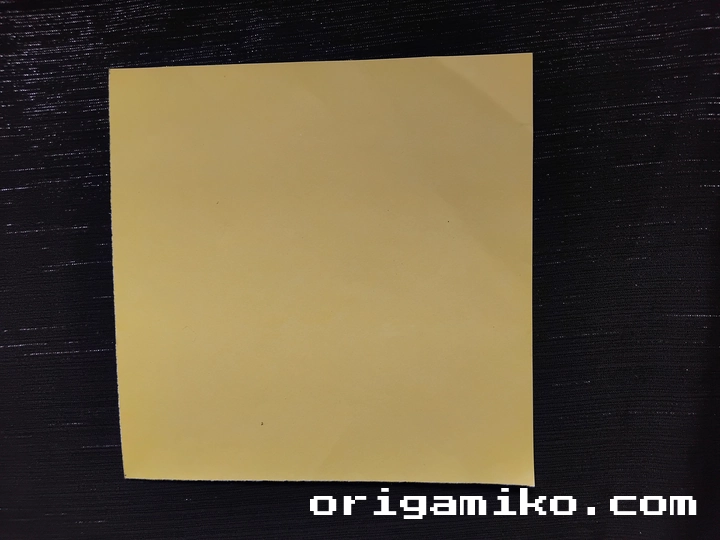
Take a paper and place it in front of you like a diamond shape, with one corner pointing toward you. If you’re using regular printer paper, you’ll need to cut it into a perfect square first. I usually fold one corner to meet the opposite edge, then trim off the excess rectangle.
The key here is starting with a perfect square. Trust me on this – even a slightly rectangular piece will throw off your entire diamond. I learned this the hard way after wondering why my early attempts looked wonky.
Step 2: Create the Essential Crisscross
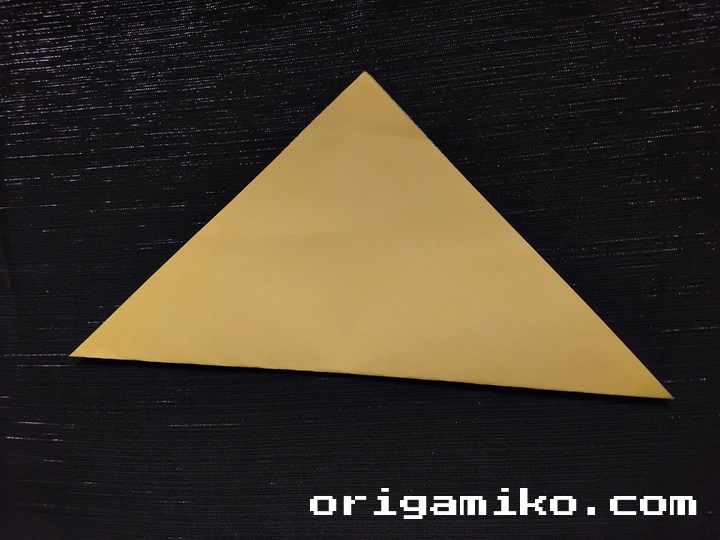
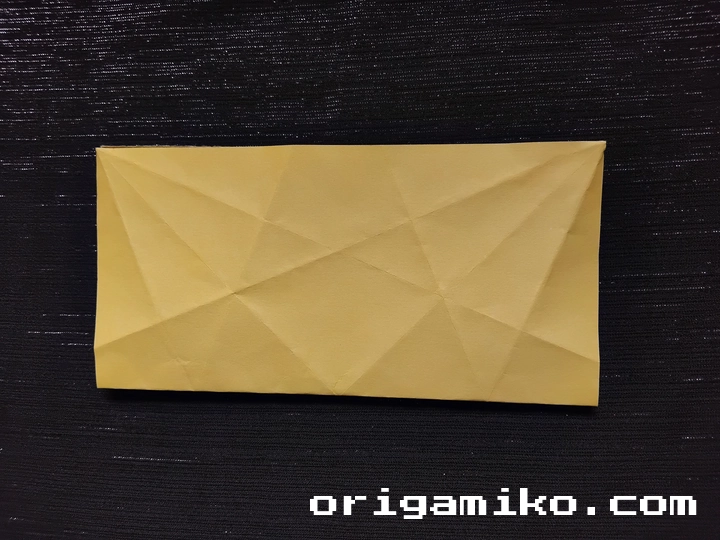
Now comes the foundation of our origami diamond. Make a crisscross by folding the paper diagonally both ways.
First, fold the top corner down to meet the bottom corner. Press firmly and unfold. Then fold the left corner to meet the right corner. Press and unfold again.
You should now see two diagonal crease lines forming an “X” across your paper. These valley folds are crucial – they’re going to guide every fold that follows.
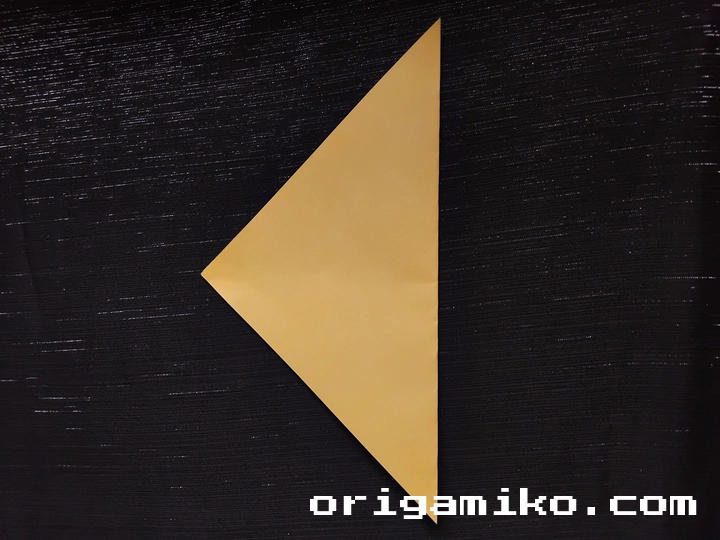
Step 3: The Triple Corner Technique
Here’s where things get interesting. Fold both upper corners and repeat it for three times.
Start by folding the top corner down about one-third of the way to the center. Then fold the left and right corners inward, creating small triangular flaps.
Repeat this process two more times, each time making smaller folds. This creates the layered effect that gives your diamond its dimensional quality. I like to think of it as building up the “facets” of your gem.
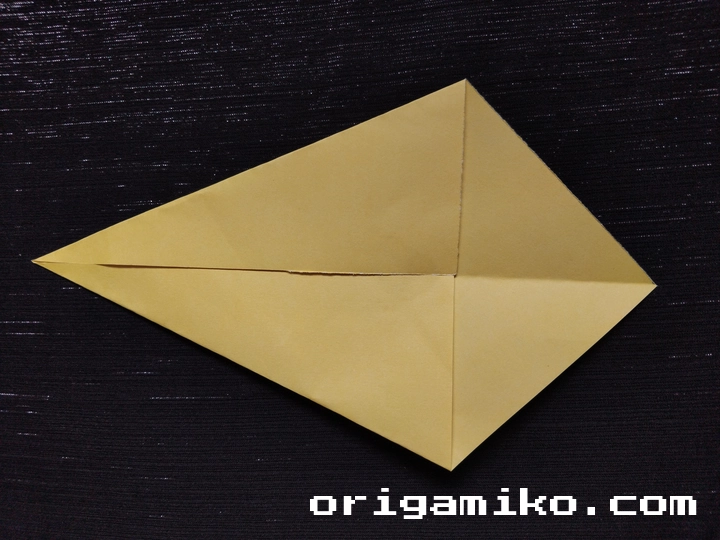
Step 4: Establish the Cross Structure
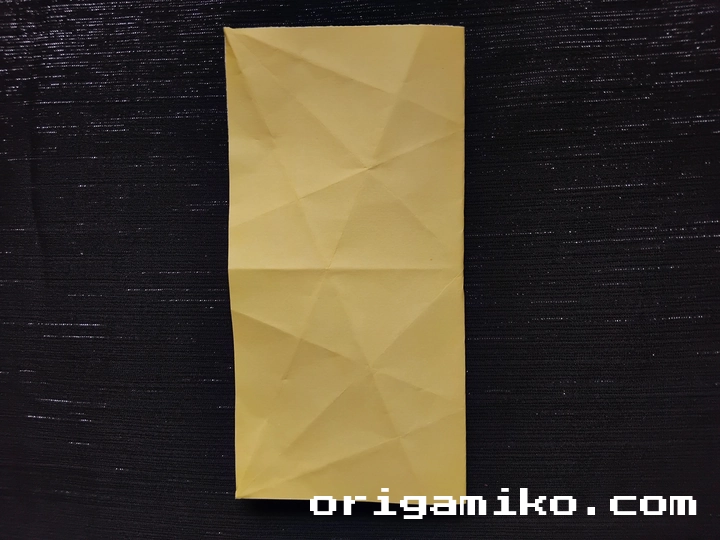
Fold it horizontally and vertically. This step creates the framework that will support your diamond’s final shape.
Fold the paper in half horizontally, bringing the top edge to meet the bottom edge. Crease well and unfold. Then fold vertically, bringing the left edge to meet the right edge. Crease and unfold.
You now have a grid of creases that looks like a tic-tac-toe board overlaid with your diagonal X. Don’t worry if it seems like a lot of lines – they’re all working together.
Step 5: The Critical Inside Fold

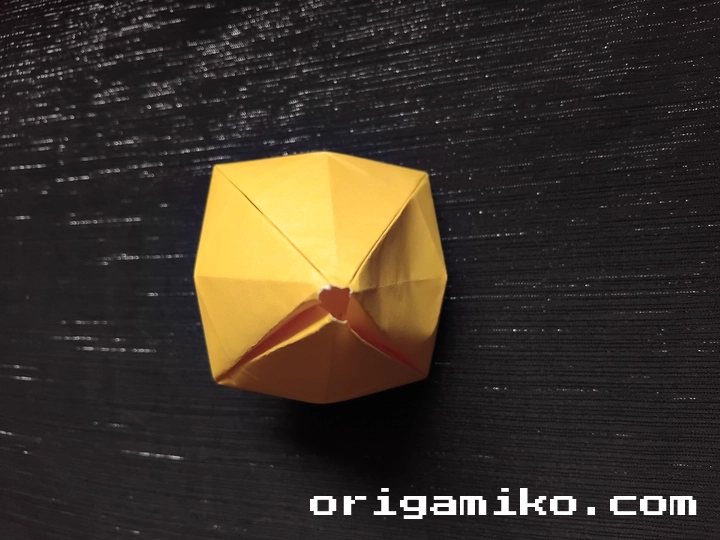
This is the step that transforms everything. Fold the upper middle line inside and make folds like the picture. Then attach four corners with each other.
Fold along the upper horizontal crease, but this time make it a valley fold (folding inward). As you do this, the side corners will naturally want to come together. Guide them gently and let the paper show you where it wants to go.
The “attach four corners” part means bringing all four corner points to meet in the center. This creates the pyramid-like structure that forms the base of your diamond.
Step 6: The Final Transformation
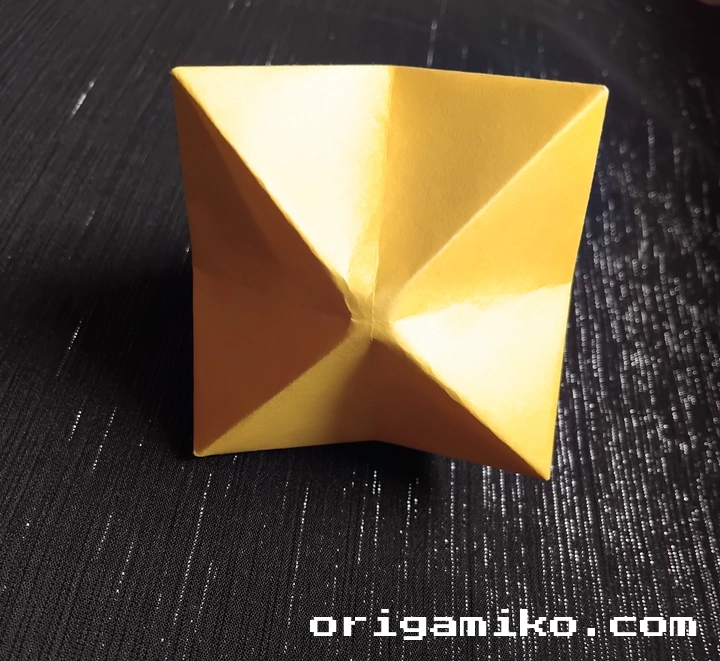
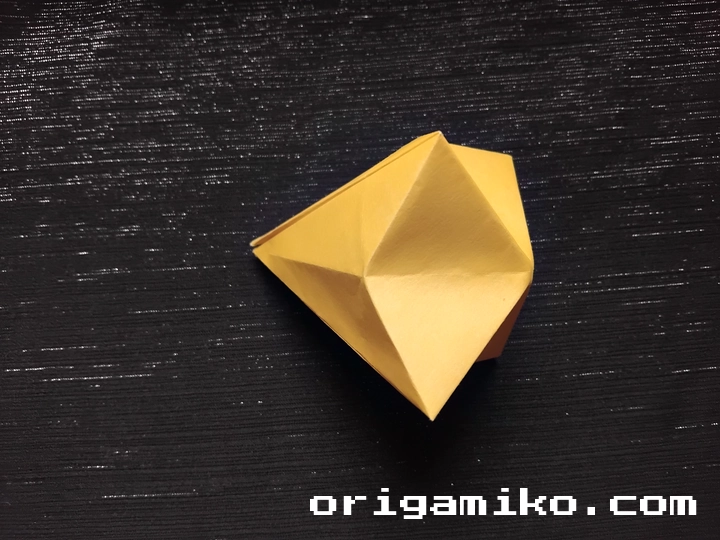
Now the Origami Diamond is ready.
Gently adjust the folds to enhance the three-dimensional shape. You can slightly pull apart the sides to create more pronounced facets, or adjust the angles to make your diamond more pointed or rounded.
The beauty is in the details here. Small adjustments can make a huge difference in how your finished piece looks.
Tips for Success
After folding hundreds of these diamonds, I’ve picked up some tricks that make all the difference:
Start with the right paper. Thin origami paper is forgiving for beginners. Regular copy paper works too, but it’s a bit stiffer.
Make sharp creases. Every fold should be deliberate and firm. I run my fingernail along each crease to make it razor-sharp.
Work on a hard surface. Your kitchen counter or a hardcover book gives you the resistance you need for clean folds.
Take breaks if needed. If you feel frustrated, step away for a few minutes. Fresh eyes often solve folding problems instantly.
Practice the valley and mountain folds. Understanding these basic techniques makes every origami project easier.
Common Mistakes and How to Avoid Them
I’ve made every mistake in the book, so you don’t have to. Here are the big ones:
Uneven squares: This throws off everything that follows. Always double-check that your starting paper is perfectly square.
Weak creases: Soft folds lead to floppy diamonds. Press firmly on every single crease.
Rushing the triple fold: Step 3 is where most people stumble. Take it slow and make sure each repetition is clean before moving on.
Ignoring the grain: Paper has a grain direction. If your folds seem to resist, try rotating your paper 90 degrees.
Not pre-creasing: Those initial diagonal folds aren’t optional. They create the roadmap for everything else.
Similar Variations You Can Try
Once you’ve mastered the basic origami diamond, a whole world opens up:
Multi-colored Diamond: Use paper that’s different colors on each side for a striking two-tone effect.
Miniature Diamonds: Try making tiny versions with 3-inch squares. They make amazing decorations.
Diamond Garland: String multiple diamonds together for party decorations or room accents.
Textured Diamonds: Experiment with handmade paper, newspaper, or even magazine pages for unique looks.
Giant Floor Diamonds: Scale up to poster-size paper for dramatic room decorations.
Troubleshooting Your Folds
Diamond won’t hold its shape: You probably need sharper creases. Go back and reinforce each fold.
Corners don’t align: Start over with a more precise square. Measurement matters more than you think.
Paper tears during folding: Your paper might be too thick or you’re forcing the folds. Try thinner paper or gentler pressure.
Final shape looks lopsided: Check that your initial crisscross was perfectly centered and diagonal.
The Science Behind the Beauty
What makes origami diamonds so visually appealing isn’t just their shape – it’s geometry in action. The way light hits the angled surfaces creates natural shadows and highlights that change as you move around the piece.
The mathematical principles at work here include bilateral symmetry, geometric progression in the fold sequences, and three-dimensional transformation from a two-dimensional starting point.
This isn’t just paper folding. It’s applied mathematics that you can hold in your hands.
Creative Display Ideas
I love finding new ways to show off completed diamonds:
Window displays: Hang them at different heights in a sunny window. The light creates beautiful patterns on nearby walls.
Table centerpieces: Group diamonds of different sizes together for dinner party decorations.
Gift toppers: Skip the bow and top your wrapped presents with handmade origami diamonds.
Mobile art: String several together to create a moving sculpture for a child’s room.
Advanced Techniques for Next Steps
Ready to level up? Try these modifications:
Wet folding: Slightly dampen heavyweight paper before folding for smoother curves and more organic shapes.
Modular diamonds: Connect multiple diamonds together to create complex geometric sculptures.
Inside-out variations: Start with the colored side down for a completely different final appearance.
Frequently Asked Questions
Q: What’s the best paper size for beginners? A: I recommend starting with 6-inch squares. They’re large enough to handle easily but not so big that they become unwieldy.
Q: How long does it take to make one diamond? A: Once you know the steps, about 10-15 minutes. Your first attempt might take 30 minutes, and that’s completely normal.
Q: Can kids do this project? A: Absolutely! Children around 8 years old can usually handle this with some guidance. It’s a great way to develop fine motor skills.
Q: What if I don’t have origami paper? A: Regular copy paper works fine. You can even use magazine pages, gift wrap, or newspaper for interesting effects.
Q: My diamond keeps unfolding. What am I doing wrong? A: This usually means your creases aren’t sharp enough. Go back and press firmly on every fold line.
Q: Can I make this with really large paper? A: Yes! Just keep in mind that larger paper requires proportionally more pressure to create sharp creases.
Why This Simple Origami Diamond Step by Step Method Works
The beauty of this approach lies in its logical progression. Each step builds on the previous one, creating a natural flow that makes sense to your hands and your brain.
I’ve taught this technique to complete beginners and watched their faces light up when that final fold clicks into place. There’s something magical about transforming a flat piece of paper into a three-dimensional object that catches and reflects light.
The how to make origami diamond process I’ve shared here isn’t just about following steps. It’s about understanding the relationship between folds, recognizing patterns, and building the spatial reasoning skills that make all origami possible.
Whether you’re looking for a quick creative break, a mindful activity to reduce stress, or a new skill to share with friends and family, this easy origami diamond delivers. The sense of accomplishment you’ll feel when you complete your first one is worth every minute you invest in learning the technique.
Now grab that piece of paper and start folding. Your first origami diamond is waiting to come to life in your hands.