


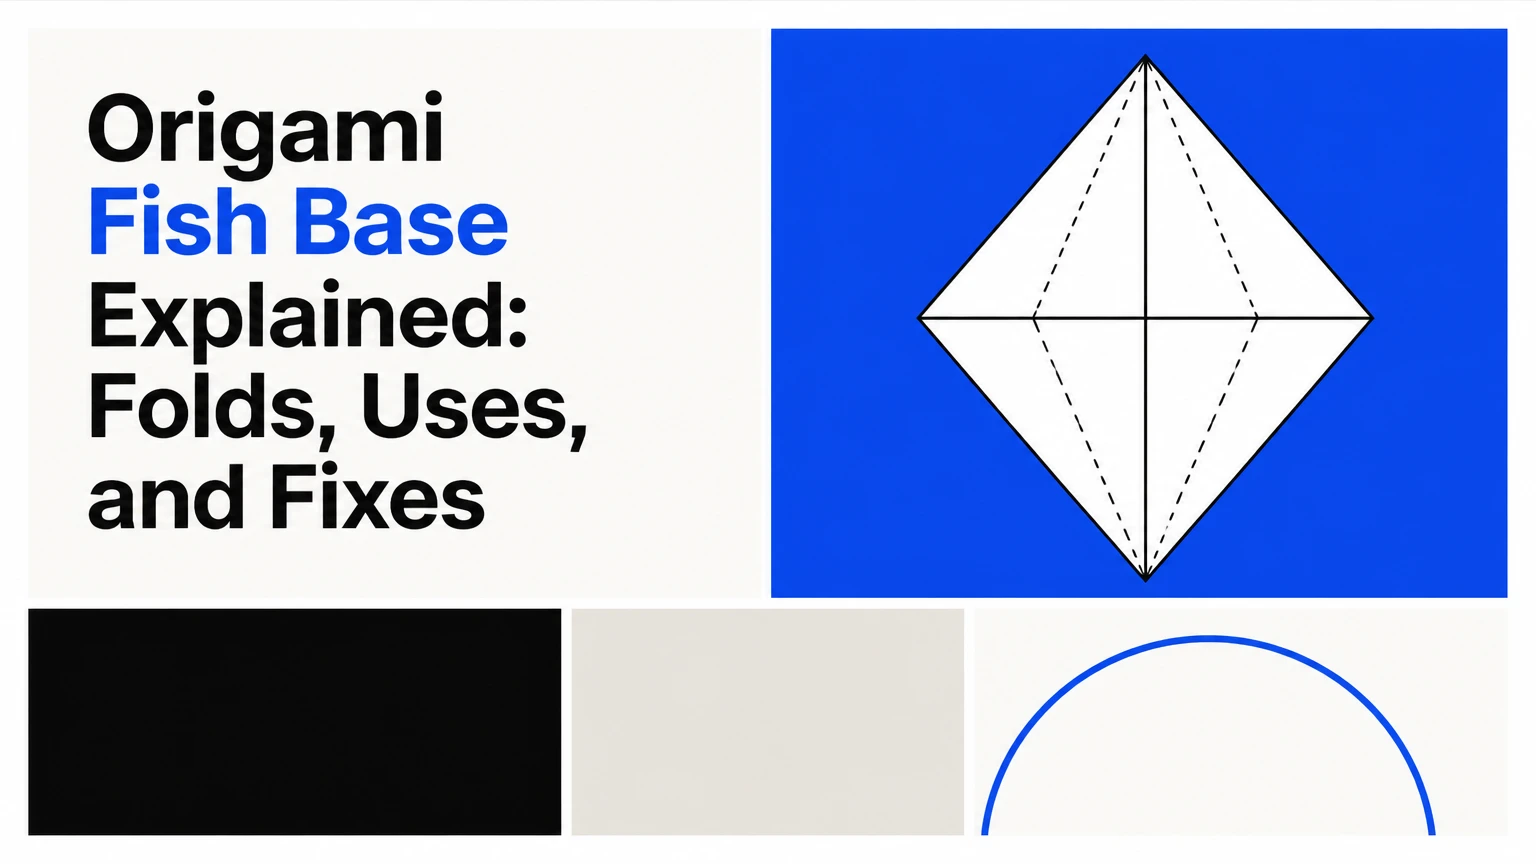
The origami fish base is a traditional folded-paper foundation that creates four functional points, usually two longer points and two shorter points arranged around a central body. Folders use the fish base for fish, whales, seals, birds, and other designs requiring a strong head-to-tail axis rather than four equal limbs.
What Is the Origami Fish Base?
The origami fish base is a preform made from one square sheet, not a completed fish. Its flattened silhouette usually resembles a narrow diamond or fish skeleton, with two long outer flaps and two shorter inner flaps that can become fins, jaws, tails, or other appendages.
The base concentrates paper around a central axis. That arrangement makes the form useful for animals whose anatomy has a dominant lengthwise direction. A traditional fish model may use one point for the head, one for the tail, and the remaining points for fins, while a whale or seal may allocate the flaps differently.
The fish base is commonly taught as a development of kite-base and preliminary-base folding ideas. However, origami terminology is not perfectly uniform. Some diagrams begin with a kite-like set of creases, while others present the same structural result through a different sequence of preliminary folds.
Fish Base Anatomy at a Glance
| Feature | Typical value | What the feature does |
|---|---|---|
| Starting sheet | 1 square | Supplies the entire base without cutting |
| Finished outline | Narrow diamond | Shows the compressed central body |
| Long points | 2 | Often become head, tail, wings, or major fins |
| Short points | 2 | Often become pectoral fins, jaws, or small limbs |
| Main axis | 1 diagonal direction | Controls the model’s front-to-back orientation |
| Collapse style | Layered point collapse | Converts pre-creases into a stable four-flap form |
A fish base should not be confused with an inflatable origami fish. An inflatable fish is a finished model or model family, whereas the fish base is an intermediate structure that may lead to several unrelated designs.
How Does the Fish Base Work?
The fish base works by directing four corner regions toward a common centerline, then collapsing the intervening paper into pointed flaps. The fold pattern combines angle-bisecting creases with hinge-like folds, which is why accurate alignment matters more than force.
The central diagonal provides the primary reference. Side edges fold toward that reference, creating a kite-like region on each side. When corresponding creases meet, the excess paper can lift and flatten as a rabbit-ear-style collapse.
This mechanism explains the base’s unequal points. The original corners retain more paper and become longer flaps, while material gathered nearer the center produces shorter flaps. The exact lengths depend on the crease sequence, proportions, and whether the folder stretches the form.
Why Are the Flaps Different Lengths?
The two long flaps originate largely from corner regions with a longer distance to the central collapse. The two short flaps contain folded layers from areas closer to the center, so they have less unfolded paper available for extension.
The difference is functional. A designer can assign the long points to a fish’s head and tail, then shape the short points into fins. If all four points were equal, the model would behave more like a bird-base derivative or another four-way preform.
A useful practitioner rule is to identify flap roles before adding detail. Put the appendage requiring the greatest length on a long point, because later stretching cannot create paper that the base did not allocate.
How Do You Fold a Standard Fish Base?
To fold a standard fish base, use a square sheet, pre-crease the diagonal and side-to-diagonal relationships, then collapse the gathered layers into two opposing points. A beginner normally needs 2-3 minutes, while an experienced folder can form the base in about 30-60 seconds.
Before You Start
| Requirement | Recommended specification | Reason |
|---|---|---|
| Paper size | 15 x 15 cm | Large enough for clear beginner creases |
| Paper weight | 60-80 gsm kami | Folds cleanly without excessive bulk |
| Working time | 2-3 minutes | Allows alignment checks |
| Tools | 0 tools required | Bone folders are optional, not necessary |
| Difficulty | Beginner to lower intermediate | Collapse accuracy determines success |
| Typical paper cost | $0.01-$0.10 per sheet | Depends on pack size and paper brand |
Use a square with clean corners. Two-sided kami is convenient because the contrasting reverse helps reveal which flaps are moving.
Step 1: Establish the Main Diagonal
Place the paper with the intended outer color facing up. Bring one corner to the opposite corner, align the edges, and crease the diagonal firmly. Open the sheet completely.
Repeat with the other diagonal if your diagram uses both diagonals as preliminary references. Some instructions use only one main diagonal during the visible sequence, so follow the crease map for the specific model.
Checkpoint: The diagonal should run from corner to corner without bowing.
Common mistake: Folding from edge to edge instead of corner to corner creates a misplaced axis.
Step 2: Build the First Kite Relationship
Bring each of the two edges adjacent to the chosen diagonal toward the diagonal crease. Align the full edge rather than matching only one endpoint, then crease from the center outward.
These folds create a kite-like arrangement on one side of the sheet. Open the folds if the diagram requires a pre-crease pattern, because forcing the collapse while the paper remains partly folded makes layer order difficult to read.
Checkpoint: Both creases should meet the diagonal at matching locations.
Common mistake: Crossing the diagonal by even 1-2 mm on one side produces unequal short flaps later.
Step 3: Repeat on the Opposite Side
Turn the sheet or work from the opposite pair of edges, depending on the diagram orientation. Fold the corresponding edges toward the same diagonal reference, then crease and unfold when instructed.
The goal is a balanced network of four directional creases. The sheet should still open flat before the collapse begins.
Checkpoint: The left and right crease groups should mirror one another around the chosen axis.
Common mistake: Using the opposite diagonal as the reference creates a skewed base rather than a balanced one.
Step 4: Lift the Collapse Hinge
Pinch the intersecting crease region on one side and allow the central layer to rise. Do not push the paper directly downward. First let the existing valley and mountain creases determine which layer moves upward.
The raised section resembles the beginning of a rabbit ear. Its tip will become one of the shorter or intermediate points, depending on the diagram.
Checkpoint: The paper rises along a defined hinge instead of forming a random wrinkle.
Common mistake: Pinching too far from the crease intersection moves the point and weakens symmetry.
Step 5: Flatten the First Point
Guide the raised section toward its intended outer corner and flatten it along the established creases. Press from the hinge toward the tip, then sharpen the final layers with a fingernail.
Keep the layers aligned while flattening. A bone folder can sharpen thick paper, but aggressive pressure can emboss or split lightweight tissue.
Checkpoint: The first point lies flat, with no open pocket at its base.
Common mistake: Flattening before the hinge is fully open traps a reversed layer inside the point.
Step 6: Collapse the Opposite Side
Repeat the lift-and-flatten action on the opposite side. Compare the new point with the first before locking the crease permanently.
The two sides should now create the characteristic fish-like distribution: two longer points at one end or along one axis and two shorter points toward the other region.
Checkpoint: The central body is flat and the four points move independently enough for model shaping.
Common mistake: Matching the visual outline while ignoring the layers can leave one flap attached to the wrong pocket.
Step 7: Confirm the Finished Base
Rotate the base so the long axis runs vertically. Identify two long flaps and two short flaps, then check that the center is closed and the edges are not torn.
A completed fish base may look slightly different from a diagram because paper color, camera orientation, and model-specific flap assignments change the presentation.
Checkpoint: The base has four usable points, a compact center, and no accidental open seam.
Which Papers and Sizes Work Best?
Lightweight kami in the 15 cm range is the most forgiving starting material for a fish base. Tant, washi, tissue foil, and other stronger papers become useful when the finished model requires repeated reverse folds or narrow shaped fins.
| Paper type | Typical weight or behavior | Best size | Best use |
|---|---|---|---|
| Kami | 60-80 gsm, crisp and inexpensive | 15 cm | First practice and traditional fish |
| Tant | 70-90 gsm, strong solid color | 15-20 cm | Repeated shaping and color-sensitive models |
| Washi | Fibrous, flexible surface | 18-24 cm | Organic fins and softer curves |
| Tissue foil | Thin laminated structure | 20-30 cm | Long narrow points and complex shaping |
| Origamido | Premium long-fiber paper | 20-35 cm | Large sculptural marine models |
| Construction paper | Often 120 gsm or heavier | 20 cm or larger | Usually poor for tight collapses |
Paper below 7.5 cm can make the center difficult to collapse by hand, especially for beginners. Larger paper is easier to read, but an oversized sheet may require a wider working surface and more careful support around the central layers.
Cost varies by brand and location. Typical kami costs $0.01-$0.10 per sheet in a multipack, while specialty papers commonly range from $0.50-$2.00 per sheet.
What Models Use the Fish Base?
Fish, whales, seals, and selected bird designs use the fish base because the preform supplies a long axis and smaller secondary points. The base is especially efficient when the model needs a broad body with a limited number of appendages.
| Model category | Long-point assignment | Short-point assignment | Typical difficulty |
|---|---|---|---|
| Traditional fish | Head and tail | Two fins | Beginner |
| Whale | Body ends or tail lobes | Pectoral fins | Beginner to intermediate |
| Seal | Body axis | Small flippers | Beginner to intermediate |
| Angelfish | Body and trailing fins | Side fins | Intermediate |
| Stylized bird | Wings or body axis | Head and tail details | Intermediate |
| Abstract creature | Primary extensions | Secondary extensions | Intermediate to advanced |
Model names and base usage vary by designer. A model described in a video as “fish base based” may use only the base’s broad structure before adding sinks, reverse folds, or shaping that substantially changes its outline.
When Is the Fish Base a Good Choice?
Choose the fish base when a design needs two dominant extensions and two smaller ones. The base suits a fish with a long tail, a whale with side fins, or a stylized animal whose body follows one strong axis.
The fish base is less suitable for models requiring four equal limbs, eight major points, or broad radial symmetry. Starting from the wrong preform forces later folds to compensate for missing paper, which usually creates thick, short, or uneven appendages.
Fish Base Versus Other Origami Bases
The fish base is preferable to a bird base when unequal flap lengths matter, while a frog base is better when a model needs eight legs or a wider distribution of points. Base selection should follow the intended appendage map, not the perceived difficulty of the fold.
| Base | Main point pattern | Typical center layers | Common model families | Best structural use |
|---|---|---|---|---|
| Fish base | 2 long, 2 short | Moderate | Fish, whales, seals | Lengthwise anatomy |
| Bird base | 4 long points | Moderate to high | Birds, wings, birds with tails | Four major extensions |
| Frog base | 8 points | High | Frogs, insects, animals | Multiple limbs |
| Kite base | 1 main point pair | Low to moderate | Fish, simple animals | Early directional preform |
Fish Base or Bird Base?
Choose the fish base for two long points and two short points; choose the bird base for four points that need comparable reach. A bird base generally offers more balanced directional options, while the fish base allocates paper more economically along one axis.
A flapping-bird model often needs two wings, a head, and a tail, so the bird base supplies a useful four-point arrangement. A simple fish model does not need four equal extensions, making the fish base more direct.
Fish Base or Frog Base?
Choose the fish base for a low-layer, lengthwise animal and the frog base for a multi-limbed animal. Frog-base collapses distribute paper across eight points, but they also create more layers and demand tighter crease accuracy.
The frog base can produce legs, arms, or antennae that the fish base cannot supply efficiently. The fish base remains faster for a first practice session because fewer points must be opened and managed.
Are Blintzed and Double Fish Bases Standard Terms?
“Blintzed fish base” and “double fish base” are useful descriptive labels, but they are not as universally standardized as traditional base names such as fish, bird, frog, and preliminary. A blintzed version normally begins by folding corners toward the center, adding layers and internal possibilities.
A double fish description may refer to fish-base geometry applied across both sides or to a designer-specific compound preform. Always inspect the crease pattern and finished flap count rather than relying on the label alone.
| Descriptive variation | Added operation | Layer consequence | Suitable situation |
|---|---|---|---|
| Standard fish | Direct pre-crease collapse | Moderate | Traditional models |
| Blintzed fish | 4 corners folded inward first | Higher | Extra fins or layered detail |
| Stretched fish | Altered proportions | Moderate | Long tails or narrow fins |
| Compound or double fish | Two fish-like structures combined | High | Multiple appendage groups |
What Causes an Uneven Fish Base?
Uneven fish-base flaps usually result from mismatched diagonal alignment, inconsistent edge-to-axis folds, or flattening one collapse farther than the other. The problem is usually visible before the final crease becomes permanent, so compare both sides immediately after each collapse.
| Symptom | Likely cause | Immediate fix | Prevention |
|---|---|---|---|
| One short flap is wider | Edge crossed the diagonal | Reopen and realign | Match the full edge |
| Long points differ | Collapse hinges are offset | Flatten both from the same center | Mark the axis lightly |
| Center wrinkles | Thick or stressed paper | Use larger, thinner paper | Pre-crease gently |
| Point will not flatten | Hidden layer reversed | Open the pocket and reset | Track mountain folds |
| Base twists | Opposite diagonal used | Rebuild from one reference | Rotate only after checks |
| Paper tears | Excessive force at hinge | Replace the sheet | Use kami or larger paper |
How Do You Fix Asymmetrical Flaps?
Reopen the last collapse, locate the diagonal reference, and compare the hinge positions rather than comparing only the outer tips. If the hinges differ, correct the pre-creases first; trimming or pulling the points cannot restore equal paper distribution.
For a minor difference under about 2 mm on a 15 cm sheet, reshaping may hide the error in a finished animal. A larger difference usually affects the model’s balance and deserves a reset.
Why Does the Center Bunch Up?
Center bunching occurs when several thick layers are compressed into a small hinge or when a crease intersection is not sharply defined. Construction paper and heavy craft sheets often exaggerate the problem because their fibers resist small-radius folds.
Open the center, reverse the hinge gradually, and flatten from the center outward. Switching to 60-80 gsm kami or increasing the starting sheet to 20 cm usually produces a cleaner result.
Can You Fold a Fish Base Without a Bone Folder?
Yes. A fingernail is sufficient for kami and most 70-90 gsm papers, while a bone folder helps with washi, foil-backed sheets, or large models with thick central layers. The tool improves crease sharpness but does not correct inaccurate alignment.
Expert practice rule: use the lightest pressure that holds the crease. A polished crease made in the wrong place is harder to repair than a soft crease that remains adjustable.
How Long Does the Fish Base Take?
A beginner typically needs 2-3 minutes for a fish base on 15 cm paper, including alignment checks, while a practiced folder can complete the same preform in 30-60 seconds. The base itself requires no adhesive, cutting, or specialized equipment.
| Experience level | Paper size | Typical base time | Expected result |
|---|---|---|---|
| First attempt | 15 cm | 4-8 minutes | Usable form with corrections |
| Beginner | 15 cm | 2-3 minutes | Clean standard base |
| Intermediate | 15-20 cm | 60-120 seconds | Symmetrical preform |
| Experienced | 15-20 cm | 30-60 seconds | Fast model-ready base |
| Small-paper practice | 7.5 cm | 5-10 minutes | Difficult center collapse |
These are practical ranges, not universal specifications. A complex paper, unfamiliar diagram, or model-specific version can add several minutes before the base is recognizable.
Which Base Should a Beginner Practice First?
A beginner should practice the standard fish base with 15 cm kami before trying blintzed or compound variations. The standard form teaches diagonal alignment, layered collapses, and flap management without the heavy center produced by added preliminary folds.
Use three sheets for practice. The first sheet reveals the crease sequence, the second exposes alignment errors, and the third tests whether the hands can reproduce the form without relying on correction.
Intermediate folders can move to Tant or washi when the base is consistently symmetrical. Advanced folders may choose tissue foil or Origamido for long, shaped fins, but premium paper cannot compensate for an incorrect crease map.
Frequently Asked Questions
Is the Fish Base Harder Than the Bird Base?
The fish base is usually easier when the target model needs two long and two short points, because its collapse has fewer balanced extension decisions than many bird-base models. Difficulty still depends on the diagram, paper, and later folds. A highly shaped fish can become harder than a simple bird.
What Color Paper Shows the Creases Best?
A solid, medium-toned sheet with a contrasting reverse shows flap direction most clearly. Two-sided kami with one colored side and one white side is practical for beginners because the white reverse reveals layers during the collapse. Very dark, glossy foil can hide small crease intersections.
Can the Fish Base Make a Four-Legged Animal?
The fish base can contribute to a stylized four-legged animal, but it is usually inefficient when all four legs require similar length and thickness. A frog base, bird base, or another multi-point preform generally distributes paper more evenly for four substantial limbs.
Why Does My Fish Base Look Like a Kite?
A kite-like outline is normal during the early stage, because the fish base uses kite-base relationships before the opposing collapses are completed. If the finished form still has only one dominant point pair, the second side was probably not collapsed or the opposite crease group was omitted.
Should I Pre-Crease Every Fold?
Pre-crease every major reference fold shown in the diagram, but avoid sharpening optional shaping folds before the base is stable. Strong preliminary creases improve accuracy, while unnecessary creases can clutter the surface and make layer direction difficult to read.
What Is the Best First Model After the Base?
A traditional fish or simple whale is the best first model after practicing the base. Both designs use the long axis directly and usually require fewer dense shaping folds than an angelfish, insect, or compound creature.
The Bottom Line
The origami fish base is a four-flap preform built around a strong diagonal axis, typically producing two long points and two short points from one square sheet. Fold it with 15 cm kami, check the hinge alignment before flattening, and choose it for fish, whales, seals, and other designs with unequal front-to-back appendages. Its main limitation is equally clear: the origami fish base is not the efficient choice for radial designs or four substantial, equal limbs.
