


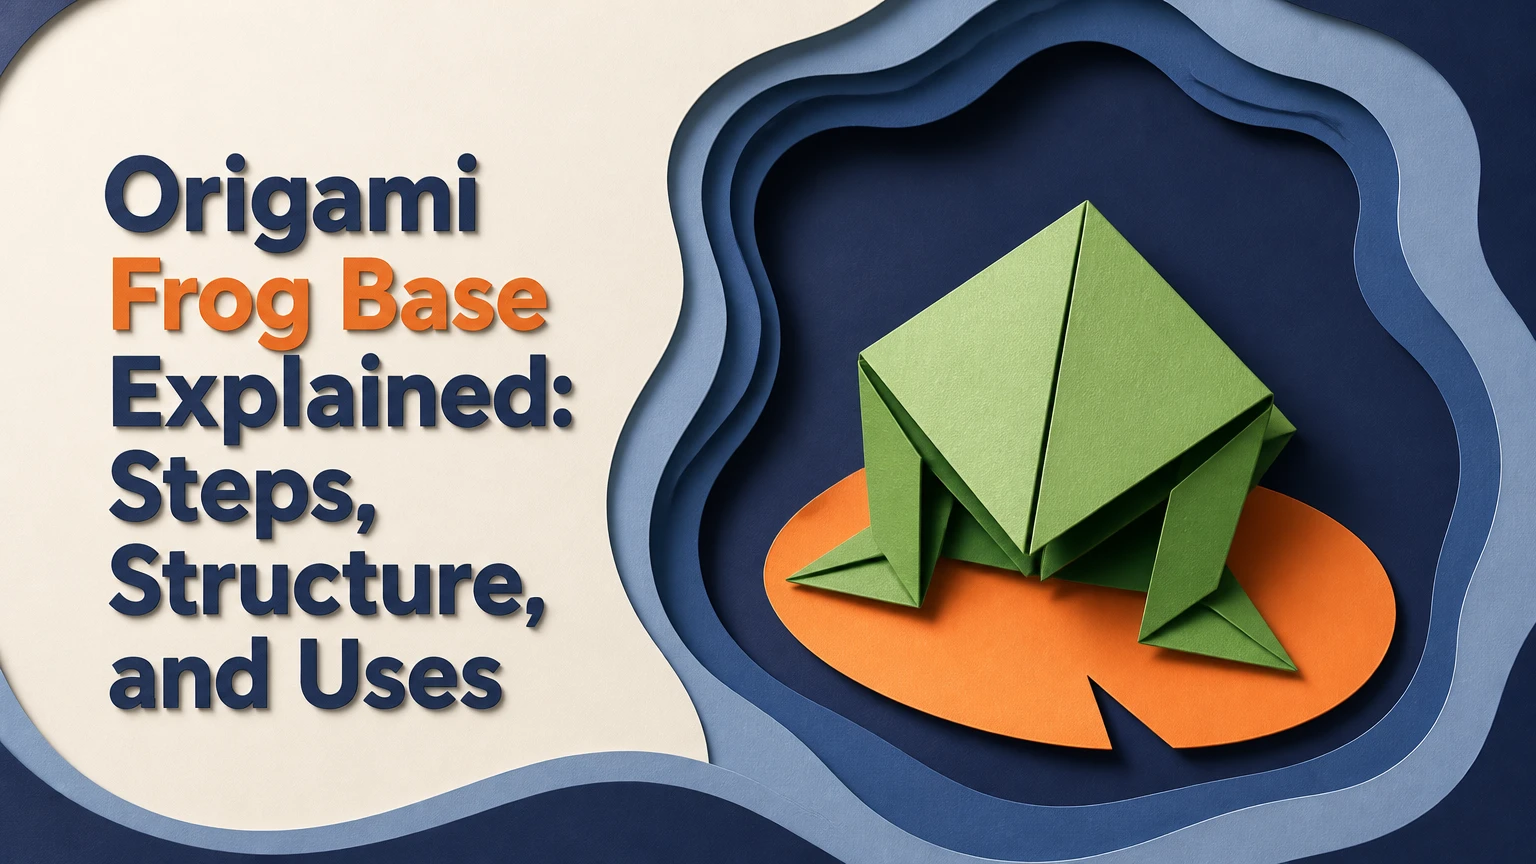
An origami frog base is a folded foundation made from a square sheet that concentrates paper into four long flaps and four shorter corner structures. It develops from the preliminary square base through four squash folds and four petal folds, giving folders enough separated paper areas to design frogs, lilies, irises, insects, and other multi-limbed models.
Key Facts
The frog base begins with one square sheet and a preliminary square base.
Four squash folds open the square base into four kite-shaped surfaces.
Four petal folds create the characteristic long, narrow flaps.
The base is commonly associated with frog and lily models, although the same structure supports insects and flowers.
A 15 cm or 20 cm thin kami sheet is suitable for practice.
The center becomes thick because several layers converge at one junction, but the exact layer count varies by location and folding method.
What Is an Origami Frog Base?
The origami frog base is a symmetrical structural base with four principal flaps arranged around a central axis. Traditional origami diagrams use those flaps for legs, wings, petals, antennae, or other extended features that require several independent paper points.
The name describes the base’s association with the traditional jumping frog and related models. The British Origami Society’s CP Lister List identifies the frog base as a recognized origami base, while Origami Guide commonly labels the closely related structure the frog or lily base. Terminology can vary between designers, so the model diagram remains the final authority.
The frog base is a development of the preliminary, or square, base. A square base alone gives four broad flaps. Squashing and petal-folding those sections redistributes the same sheet into narrower, more useful points.
Frog Base Anatomy
A finished base usually shows four long pointed flaps and four shorter diamond or triangular sections near the center. The four long flaps are the most useful features because they can become legs, petals, wings, or body extensions.
The phrase “eight points” needs care. Some diagrams count eight visible tips, while others count only the four major flaps and describe the remaining structures as supporting layers. The count depends on whether the folder is describing visible geometry, usable design points, or traditional base nomenclature.
How Does the Frog Base Work?
The frog base works by converting broad corner regions into narrow flaps through squash folds, then lengthening those flaps with petal folds. A squash fold opens a folded pocket and presses it flat; a petal fold lifts a lower point while the side layers collapse inward along pre-creased diagonals.
The mechanism is geometric rather than mysterious. The square base supplies four identical units, and each unit receives the same sequence. If one squash fold is shifted, the error propagates around the entire structure because each later flap depends on the central axis.
The structure is efficient for models with repeated limbs. It is less efficient for designs that need one dominant point, a very thin center, or broad unbroken surfaces.
Why the Squash Folds Matter
A squash fold changes a three-dimensional pocket into a flat kite shape. The new center crease establishes the axis used by the later petal fold, so accuracy at this stage determines whether the final points align.
The four squash folds also preserve rotational symmetry. Experienced folders often rotate the model after each fold rather than flipping randomly, because the repeated orientation makes layer identification easier and reduces accidental reversals.
Why the Petal Folds Matter
The petal fold transforms each kite into a long, narrow flap. The fold pulls a lower point upward while two side edges move toward the central crease, creating a slim diamond-shaped section.
Petal folds require more paper movement than squash folds. Sharp pre-creases reduce stress at the junction, especially when the paper is thin or the center already contains several layers.
What Do You Need Before Folding?
Use a square sheet, a flat working surface, and a crease-making tool only when the paper tolerates it. A 15 cm kami sheet gives enough area for hand control, while a 20 cm sheet makes alignment easier for beginners and produces a more visible base.
Paper thickness matters more than paper price. Thin kami handles the central compression better than ordinary office paper, while thick handmade paper may hold beautiful creases but resist the squash and petal folds.
| Material or condition | Typical specification | Best use | Main limitation |
|---|---|---|---|
| Kami paper | 15 x 15 cm, 60-75 gsm | First practice base | Soft color and limited shaping |
| Kami paper | 20 x 20 cm, 60-75 gsm | Beginner demonstration | Larger storage footprint |
| Kraft paper | 20 x 20 cm, 70-90 gsm | Repeated practice | Can resist tight center folds |
| Tant paper | 15 x 15 cm, 70-80 gsm | Clean intermediate models | Higher cost than kami |
| Tissue foil | 25 x 25 cm, thin laminated sheet | Complex insects | Less forgiving of crease errors |
| Elephant Hide | 20 x 20 cm, approximately 100 gsm | Structural prototypes | Center can become difficult to flatten |
Typical retail pricing is approximately $5-$15 for a large pack of kami, $1-$4 per sheet for specialty paper, and more for handmade tissue foil or custom-treated sheets. Prices vary by country, supplier, and sheet size.
How Do You Fold the Origami Frog Base?
The origami frog base takes approximately 10-15 minutes for a beginner using clear diagrams and less than two minutes for a practiced folder. The most important success factor is symmetry: every squash fold must place its center crease on the same underlying axis.
Before You Start
| Requirement | Typical value |
|---|---|
| Paper quantity | 1 square sheet |
| Recommended beginner size | 20 x 20 cm |
| Folding time | 10-15 minutes |
| Difficulty | Intermediate beginner |
| Tools | Flat table, fingernail, optional bone folder |
| Prerequisite | Valley and mountain fold recognition |
Keep the colored side face down or up according to the model diagram. The frog base can be folded from either orientation, but reversing the starting side changes which color appears on the flaps.
Step 1: Crease Both Diagonals
Place the square with one corner toward you. Fold the top corner to the bottom corner, crease the diagonal, and unfold. Fold the left corner to the right corner, crease the second diagonal, and unfold.
You should see an X across the square. The two diagonal creases must cross at the exact center.
Checkpoint: The four corners should move freely while the center intersection remains sharply defined.
Common mistake: Folding corner to edge instead of corner to corner creates an off-center base.
Step 2: Add the Horizontal and Vertical Creases
Turn the paper over if the diagram requires the reverse side. Fold the square in half from top to bottom and unfold. Fold it from left to right and unfold.
The paper now has four radial creases and four edge-to-edge creases. These lines create the preliminary collapse pattern.
Checkpoint: Every crease should pass through the same central point.
Common mistake: Skipping the flip can reverse valley and mountain relationships during the collapse.
Step 3: Collapse the Preliminary Square Base
Bring the four corners together toward one corner while allowing the diagonal and horizontal creases to reverse naturally. Flatten the structure into a smaller square with four layered flaps.
The open raw edges should face one direction, normally downward in a standard diagram. Correct orientation matters because the next squash folds begin from those open layers.
Checkpoint: The square base has a closed folded edge on one side and open layered edges on the other.
Common mistake: Flattening before all four corners meet produces a twisted base.
Step 4: Lift One Upper Flap
Position the square base with the open edges toward you. Lift the upper-right flap so it rises vertically from the table.
Do not pull the tip sharply. Open the pocket from its lower portion, keeping the side layers aligned.
Checkpoint: The flap stands like a small tent, with a central crease visible or easily established.
Common mistake: Lifting two layers together changes the number of flaps available later.
Step 5: Make the First Squash Fold
Open the raised flap and press its sides outward and downward. Flatten the flap into a kite, aligning its center crease with the underlying vertical edge or axis.
The top vertex should remain fixed while the lower section spreads symmetrically. A bone folder can sharpen the outside edges after the paper is flat.
Checkpoint: The kite has equal left and right sides around its center line.
Common mistake: Pressing one side first can shift the vertex and create an uneven flap.
Step 6: Repeat the Squash Fold Three Times
Rotate the model or turn it like a book to expose the next identical flap. Repeat the lift, pocket opening, and squash fold on the remaining three sections.
Use the same orientation for every repetition. Consistent handling is more reliable than trying to identify front and back layers from memory.
Checkpoint: Four kite-shaped surfaces appear around the compact center.
Common mistake: Missing a hidden back flap leaves one side broad and the final base asymmetrical.
Step 7: Pre-Crease the First Petal Fold
On the upper kite, fold the lower-left edge to the center crease and sharpen the line. Repeat with the lower-right edge. Unfold both folds.
Fold the top triangular tip downward to mark the upper limit of the petal fold, then unfold it. These creases create the collapse map for the long point.
Checkpoint: The pre-creases form a narrow symmetrical arrangement around the kite axis.
Common mistake: Folding beyond the center crease makes the finished flap lean sideways.
Step 8: Lift the Lower Point
Lift the lower point of the top layer toward the upper tip. As the point rises, guide the left and right sides inward along the pre-creases.
The paper should begin to flatten into a long diamond. Use gradual pressure rather than forcing the entire flap upward in one motion.
Checkpoint: The new point reaches the upper tip without tearing the side junctions.
Common mistake: Pulling the lower point before opening the side layers causes a locked fold and possible tearing.
Step 9: Flatten the Petal Fold
Complete the collapse and crease the new long, narrow flap. The flap should point upward along the main axis of the kite.
A clean petal fold has two straight side edges and a centered tip. Minor thickening near the root is normal.
Checkpoint: The flap lies flat without a diagonal twist.
Common mistake: Leaving the root rounded makes later model folds difficult to locate.
Step 10: Repeat the Petal Fold on the Other Three Sides
Turn the model as a page or rotate it around the center. Expose each unworked kite surface and repeat the pre-crease, lift, and flatten sequence.
Do not assume the reverse side is identical by appearance. Confirm that the active flap is on top before opening it.
Checkpoint: Four long pointed flaps have formed.
Common mistake: Folding a supporting layer instead of the active kite creates a short, misplaced point.
Step 11: Fold the Long Flaps Down
Fold each long flap downward so the base becomes compact and the major points lie together. This is usually a presentation position rather than a new structural transformation.
The completed frog base may resemble an elongated diamond, a compact octahedral form, or a four-winged shape depending on the diagram’s orientation.
Checkpoint: Four long flaps align around the center without large gaps.
Common mistake: Forcing all points into one exact stack can crush the center.
Step 12: Inspect the Base Before Modeling
Open and close each major flap gently. Check that the four points have similar lengths, the central axis is straight, and no layer has been trapped in a neighboring pocket.
An imperfect base should be corrected now. Later model folds usually amplify small alignment errors.
Checkpoint: The base remains symmetrical when rotated a quarter turn.
Common mistake: Starting the frog or flower immediately because the overall silhouette looks correct.
Which Points Become Legs, Petals, or Wings?
The four long flaps normally become the primary appendages, while shorter folds near the center supply secondary limbs, body shaping, sepals, or supporting layers. Designers may reverse that assignment when a particular model uses a rotated or modified base.
| Finished base feature | Common model role | Example model | Design consequence |
|---|---|---|---|
| Four long flaps | Legs or petals | Traditional frog | Repeated appendages |
| Two long paired flaps | Wings or petals | Iris variation | Bilateral shaping |
| Short central sections | Body, sepals, joints | Lily flower | Adds local volume |
| Narrow folded tips | Antennae or claws | Beetle or insect | Requires thin paper |
| Central layered block | Torso or flower center | Multi-limbed animal | Limits thickness |
The frog base is especially useful when the target model needs rotational repetition. It is less suitable for a fish, leaf, or bird whose design depends on one long axis and two dominant points.
What Models Use the Frog Base?
Traditional jumping frogs and lily-family flowers are the best-known applications, but the base also appears in insects, crabs, beetles, and abstract flowers. The exact model depends on how the designer allocates the four long flaps and reshapes the central layers.
| Model family | Typical flap assignment | Suitable paper | Difficulty range |
|---|---|---|---|
| Jumping frog | Four flaps become legs | 15 cm kami | Beginner to intermediate |
| Iris flower | Long flaps become petals | 20 cm tant or kami | Intermediate |
| Lily flower | Petals use broad layered flaps | 15 cm kami | Beginner to intermediate |
| Beetle | Legs, wings, and body use separate layers | 25 cm tissue foil | Intermediate to advanced |
| Crab | Side flaps become claws or legs | 20 cm kami | Intermediate |
| Stylized insect | Narrow points become limbs | 25 cm tissue foil | Advanced |
A frog base does not guarantee a jumping frog. The base supplies geometry, while later folds create the model’s anatomy, movement, and final proportions.
Is the Frog Base the Same as the Lily Base?
The frog base and lily base are often treated as the same or closely related structure, especially in beginner diagrams. Naming differs because traditional frog models and lily flowers use similar four-flap geometry, while individual designers may reserve “lily base” for a particular orientation or modification.
Check the crease sequence rather than relying on the label. If a diagram begins from a square base and uses four squash folds followed by four petal folds, it is describing the familiar frog-lily base family.
What Are the Main Frog Base Variations?
The traditional frog base starts directly from a square sheet and offers the best balance between thickness and usable flaps. A blintzed version adds corner-to-center folds before the base sequence, increasing paper concentration and potential points but creating a much thicker center.
Rectangular variants exist in modern design, although they are less common in traditional instruction. A rectangle can alter flap lengths and symmetry, so it should be used only when the model designer specifies the aspect ratio.
| Variant | Starting paper | Main geometry | Best application | Primary drawback |
|---|---|---|---|---|
| Traditional frog base | 1:1 square | Four balanced long flaps | Frogs and lilies | Thick central junction |
| Blintzed frog base | 1:1 square with four blintz folds | More concentrated layers | Complex insects | Center becomes difficult to flatten |
| Rectangular frog variant | Often near 2:1 | Unequal flap lengths | Experimental designs | Reduced symmetry |
| Modified frog-lily base | 1:1 square with model-specific pre-creases | Adjusted petal geometry | Flowers | Not universally interchangeable |
A blintzed frog base is not automatically better. Extra points matter only when the target model uses them; otherwise, additional layers reduce precision.
How Does the Frog Base Compare With Other Bases?
The frog base is the strongest choice for repeated limbs and petals, while the bird base offers leaner points for birds and dragons, and the fish base supports two dominant tapered points. The correct base follows the target model’s geometry, not the apparent complexity of the folding sequence.
| Base | Principal points | Typical thickness | Best model families | Weakness |
|---|---|---|---|---|
| Frog base | 4 long, 4 supporting | High at center | Frogs, lilies, insects | Crowded junction |
| Bird base | 2 long, 2 short | Moderate | Cranes, birds, dragons | Fewer repeated flaps |
| Fish base | 2 dominant | Low to moderate | Fish, seals, leaves | Poor for many limbs |
| Preliminary square base | 4 broad | Moderate | Simple animals, derived bases | Points remain wide |
The frog base wins when four or more appendage directions matter. The bird base wins when a clean inversion or slender neck is more important than point count.
When Should You Avoid the Frog Base?
Avoid the frog base when the target model needs a very thin center, a single uninterrupted sheet, or two long points with minimal layering. Starting from a frog base in those cases adds folds that do not contribute to the final design.
A fish base or bird base may reduce wasted layers. Experienced folders choose a base backward from the finished model’s required points, not forward from the base’s reputation.
Why Is My Frog Base Uneven?
An uneven frog base usually comes from one squash fold whose center crease missed the underlying axis. The error may be less than 1 mm at the first flap but becomes visibly larger after four repeated folds.
Unfold the most recent petal fold and inspect the kite underneath. If the kite itself is asymmetrical, correct that squash fold before proceeding.
Squash Fold Problems
| Symptom | Likely cause | Correction |
|---|---|---|
| One long flap is shorter | Off-center squash fold | Unfold and realign the center crease |
| Base twists when rotated | One back flap reversed | Reopen the hidden layer and repeat |
| Tips do not meet | Diagonal creases missed center | Rebuild the square base |
| One kite is wider | Unequal side pressure | Re-crease both sides from the vertex |
Use the top vertex as the anchor. Flatten both sides toward it instead of pushing outward from the bottom.
Tearing at the Petal Junction
Tearing occurs when a folder lifts the lower point before the side pre-creases are sharp. The root contains several layers under tension, so aggressive pulling concentrates force at a small intersection.
Stop when resistance increases. Unfold the petal, reverse-crease the side lines, and reopen the pocket gradually. Dampening paper is generally unsuitable for this base because moisture weakens already stressed layers.
Center Bunching and Paper Creep
Paper creep describes small outward shifts caused by stacked layers occupying physical thickness. The effect is most visible with thick paper, blunt creases, or a blintzed variation.
A practical rule is to stop forcing every outer edge into the exact center once the reference diagram’s geometry is clear. A hairline gap, approximately 0.5 mm on a 20 cm practice sheet, can prevent buckling, but the correct allowance depends on paper thickness.
The often-repeated claim that a frog base is always 16 layers thick is too absolute. Layer density changes between the center, flap roots, and outer tips, and diagram conventions count folded layers differently. Treat 16 as a possible local description, not a universal specification.
How Can You Judge a Finished Base?
A finished frog base is ready for the next model when its four long flaps have comparable lengths, its central axis remains straight, and every major layer opens without tearing. A compact silhouette alone is not enough because hidden asymmetry can remain invisible until the next fold.
Use this inspection sequence:
- Rotate the base 90 degrees and compare the four flap lengths.
- Check that each long point has a centered crease.
- Open each flap one at a time to find trapped layers.
- Examine the center for crushed paper or diagonal buckling.
- Confirm that the color pattern matches the model diagram.
- Test one gentle reverse fold before committing to a narrow tip.
This inspection takes less than one minute and can save an entire sheet during a complex insect or flower model.
How Long and How Much Does Practice Cost?
A beginner typically needs 10-15 minutes per base, while a practiced folder can complete the sequence in roughly 1-2 minutes. The first three attempts are usually more useful than one oversized attempt because repetition teaches layer recognition and squash-fold symmetry.
| Practice situation | Sheet size | Typical time per base | Typical material cost |
|---|---|---|---|
| First attempt | 20 cm kami | 15-25 minutes | $0.10-$0.50 |
| Diagram-guided practice | 15 cm kami | 8-15 minutes | $0.05-$0.30 |
| Timed repetition | 15 cm kami | 2-5 minutes | $0.05-$0.30 |
| Complex model preparation | 25 cm specialty paper | 20-40 minutes | $1-$5 |
| Advanced design prototype | 30 cm tissue foil | 30-60 minutes | $2-$10 |
These are typical retail and practice ranges, not fixed market prices. Local craft stores, specialist origami suppliers, and handmade-paper sellers can differ substantially.
Frequently Asked Questions
Can You Make a Frog Base From Printer Paper?
Printer paper can make a frog base, but standard 75-90 gsm copy paper becomes bulky at the center and often resists tight petal folds. Cut one sheet into a true square, preferably 20-21 cm, and use it for learning crease order rather than for a polished small model.
Should the Colored Side Face Up?
The colored side should face up or down according to the model diagram’s color requirements. The frog base itself works from either orientation, but reversing the sheet changes which surfaces become visible on the long flaps and may reverse the intended two-color pattern.
Why Does My Frog Base Have Only Four Points?
A frog base may appear to have only four points when its shorter supporting sections remain folded into the center. The four long flaps are the primary usable points; the remaining structures may be hidden, folded inward, or counted as secondary points rather than obvious tips.
Can a Frog Base Be Made From a Rectangle?
A rectangular frog-base variation is possible, but the resulting flaps may have unequal lengths and altered symmetry. Use a rectangle only when a specific diagram provides the aspect ratio, because applying the standard square-base sequence to an arbitrary rectangle usually produces distorted geometry.
Is the Frog Base Harder Than the Bird Base?
The frog base is usually harder than the bird base for beginners because it requires four squash folds and four petal folds, with more layers converging at the center. The bird base may be preferable when the target model needs fewer points and cleaner narrow flaps.
What Should You Fold After Learning the Base?
Fold a traditional jumping frog or simple lily immediately after learning the base because both models make the four major flaps easy to identify. Move to an iris, crab, beetle, or multi-limbed insect after you can repeat the base symmetrically from memory.
The Bottom Line
The origami frog base explained in practical terms is a square-derived structure that trades a thick center for four long, versatile flaps and several supporting points. Fold the preliminary square base accurately, align every squash fold to the central axis, sharpen the petal pre-creases, and inspect symmetry before beginning the final model. Choose thin kami for practice, specialty paper for advanced shaping, and a different base when the design needs fewer or more directional points.
