
Ever wondered how paper transforms into magical creatures? Today I’ll show you exactly how to make an origami horse that’ll gallop straight into your heart.
This simple origami horse step by step guide promises an enchanting journey. You’ll discover the joy of creating something beautiful with just paper and patience.
Your hands will craft a magnificent steed through ancient Japanese art.
Creating Your Paper Stallion: The Origami Horse
The origami horse represents one of the most rewarding projects in paper folding. I’ve been making these paper horses for years, and each one feels like bringing a little magic to life. When you follow these origami horse instructions, you’re not just folding paper – you’re connecting with centuries of Japanese artistic tradition.
Paper folding, or origami as we know it, transforms simple squares into incredible sculptures. The horse specifically captures grace and power in its angular lines. I remember my first attempt at making one. The paper seemed to fight me at every fold, but when I finally saw that horse shape emerge, I was absolutely hooked.
What makes this particular design special is its accessibility. You don’t need years of experience or fancy materials. Just a square piece of paper and the willingness to follow along. The beauty lies in the simplicity – how basic geometric folds create something so recognizable and elegant.
Materials Needed
Let me break down exactly what you’ll need for this project. I’ve learned through experience that having the right materials makes all the difference.
| Material | Specifications | Purpose | Notes |
|---|---|---|---|
| Paper | 15cm x 15cm square | Main folding material | Origami paper works best, but any thin paper will do |
| Work Surface | Flat, clean table | Provides stable folding base | Good lighting helps tremendously |
| Scissors | Sharp, precise cutting | For trimming if needed | Optional but handy for adjustments |
| Bone Folder | Plastic or wood | Creates sharp creases | Not essential but improves results |
| Patience | Unlimited supply | Mental preparation | Most important material of all |
Paper Quality Matters : Choose paper that’s not too thick or too thin. Regular printer paper works, but origami paper (kami) gives the best results.
Size Considerations : The 15cm x 15cm size is perfect for beginners. Smaller papers make the folds trickier, while larger ones can become unwieldy.
Color Choice : Traditional colors include brown, black, or white for realistic horses. But hey, who says horses can’t be purple or rainbow-colored?
Step-by-Step Origami Horse Instructions
Now comes the fun part – actually making your origami horse! I’ll walk you through each step like I’m sitting right beside you.
Step 1: Prepare Your Paper

Take your 15cm x 15cm paper and place it in front of you like a diamond. Make sure your work surface is clean and well-lit. I always start by just feeling the paper – sounds weird, but it helps me connect with the material I’m about to transform.
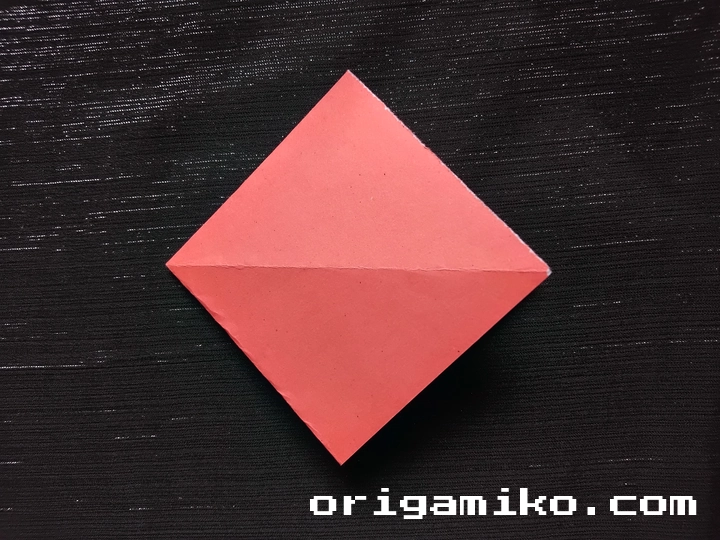
Step 2: Create the Foundation Creases
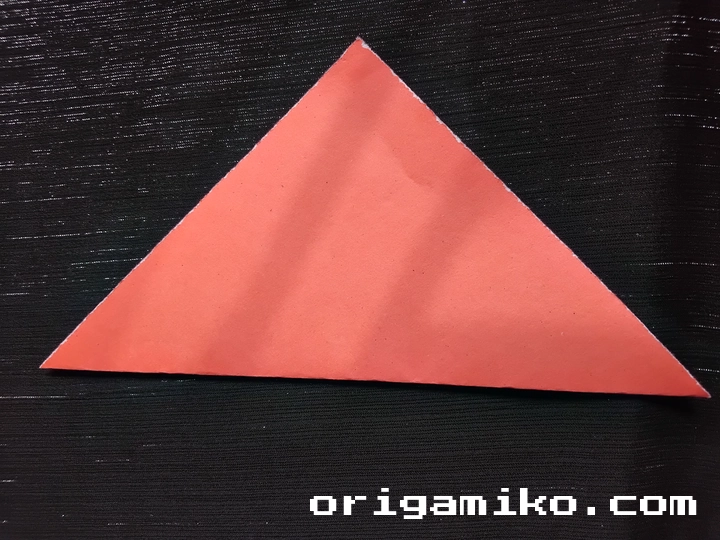
Make a crisscross fold by folding the paper horizontally and vertically. These are your guide lines – think of them as the skeleton of your future horse. Open the paper back up after each fold so you can see the crease lines clearly.
The key here is precision. Sharp, clean creases make everything that follows much easier.
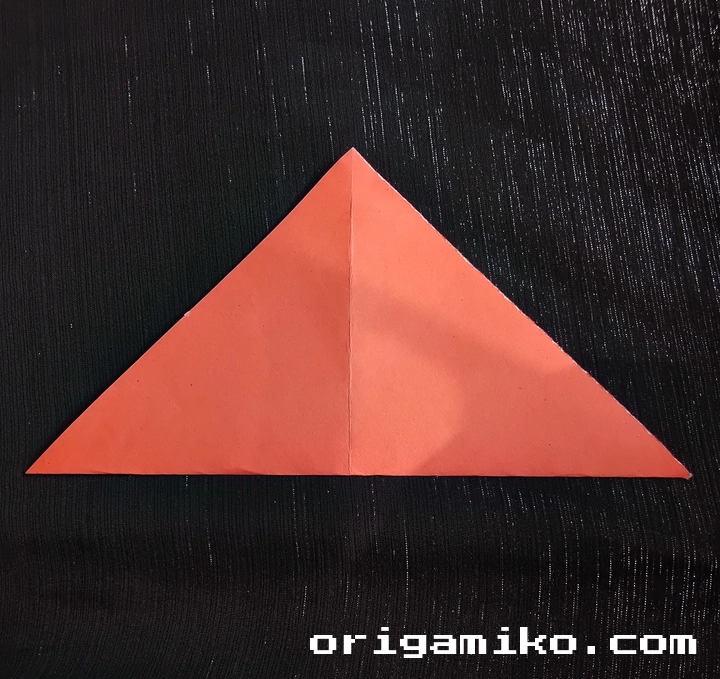
Step 3: Form the Initial Structure
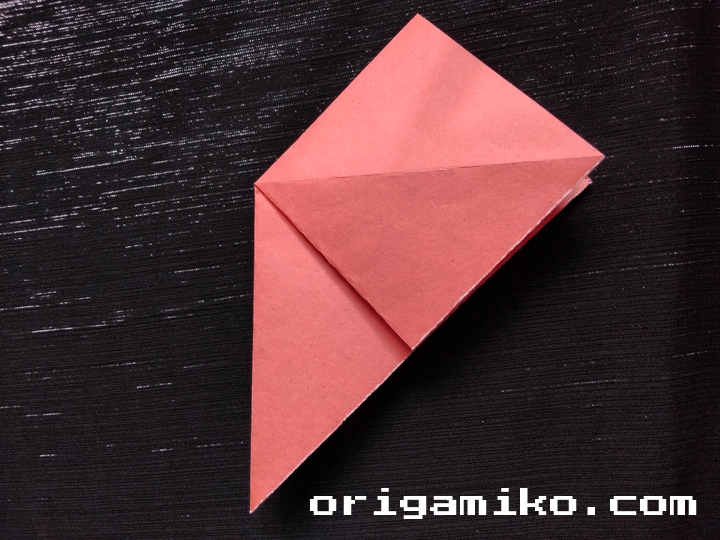
Make a fold like a crease and repeat it to the other side. Then fold the upper corners down toward the center. This creates the basic framework that’ll become your horse’s body and neck.
I like to think of this step as laying the foundation of a house. Everything depends on getting this right.
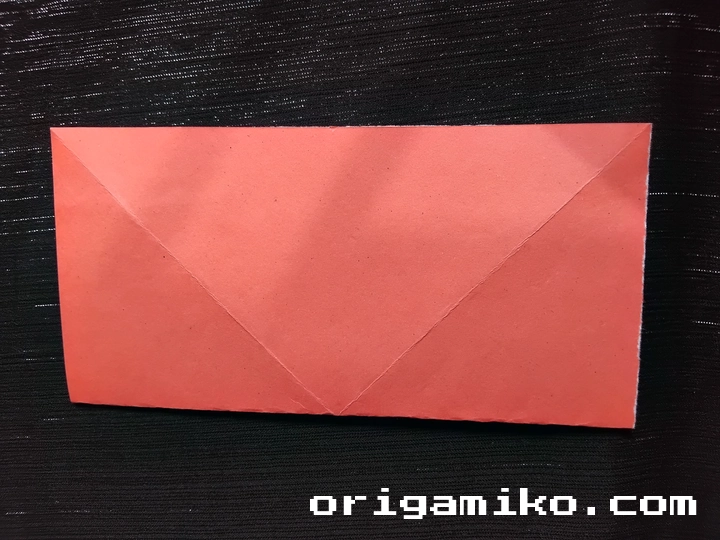
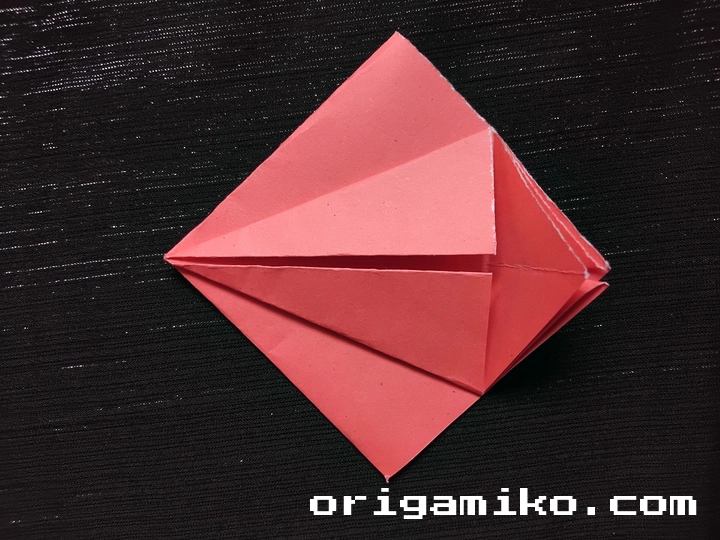
Step 4: Shape the Body
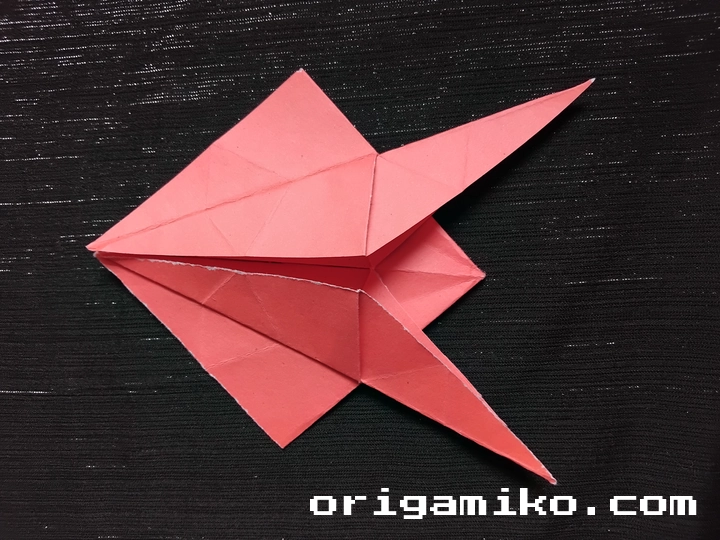
Unfold the paper and cut both sides from the lower section. Now fold both sides from the middle and make a half fold. Repeat this process a second time to reinforce the structure.
This step always reminds me of sculpting – you’re removing excess material and defining the horse’s silhouette.
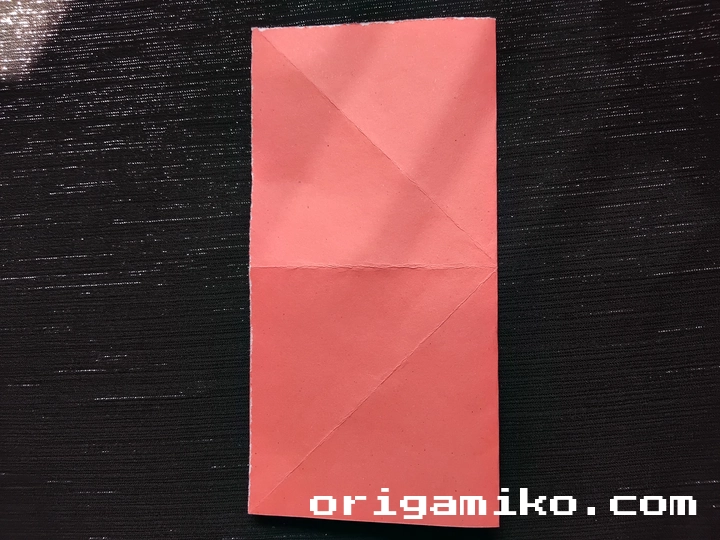
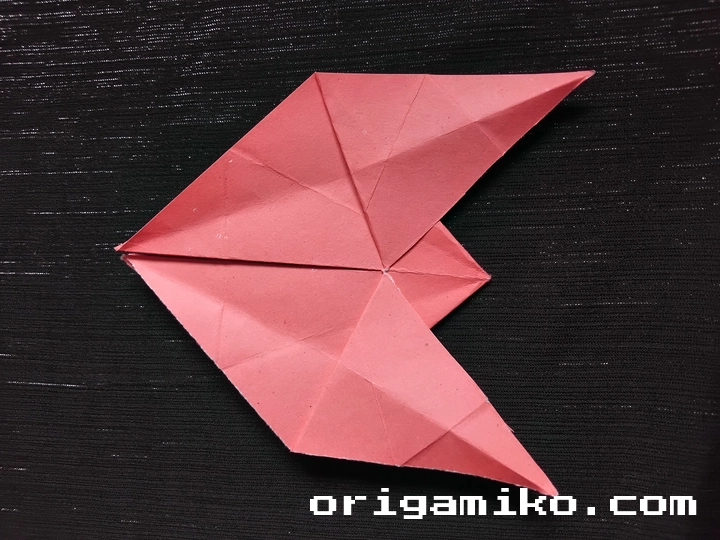
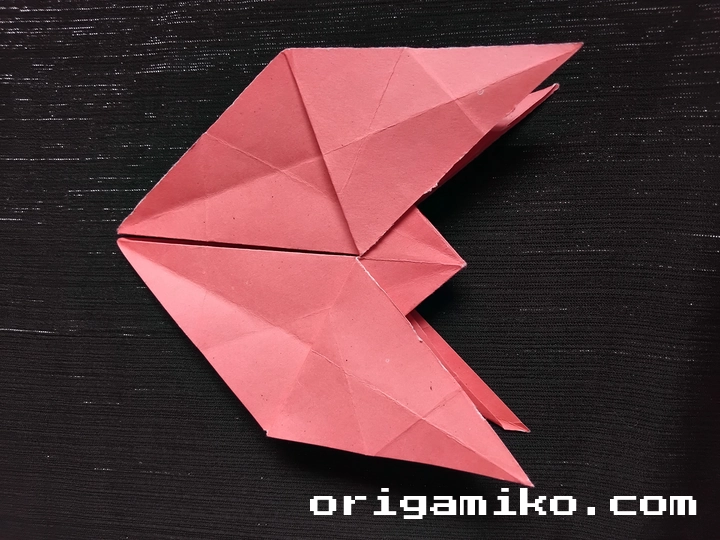
Step 5: Create the Horse Features
Fold the left side like shown in the reference position, then fold the right side to match. These folds create the horse’s head, neck, and legs. Take your time here – rushing leads to lopsided horses (trust me, I’ve made plenty of those).
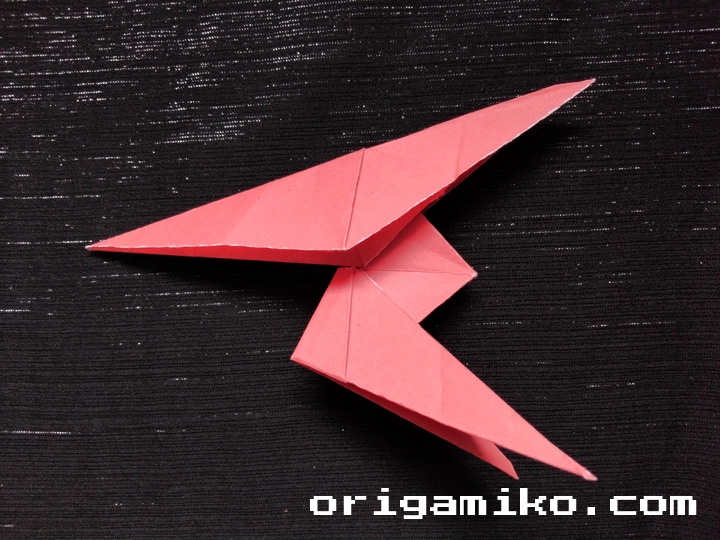
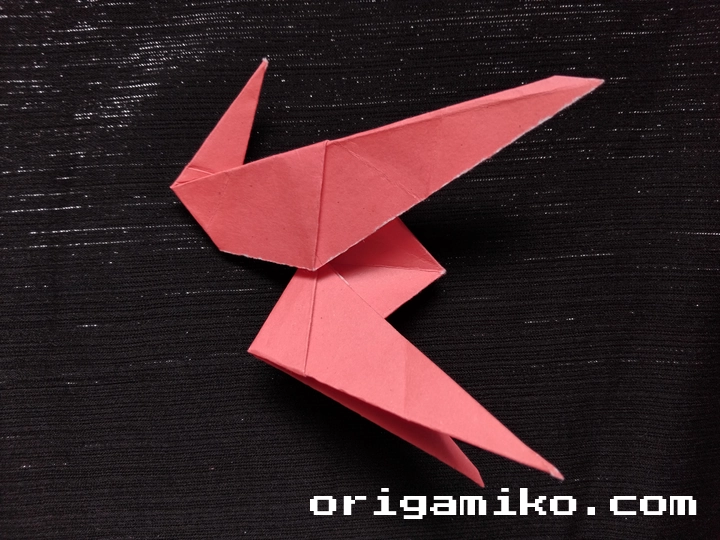
Step 6: Final Assembly

Now your origami horse is ready! Step back and admire what you’ve created. If it doesn’t look perfect, that’s totally normal. My first horse looked more like a confused camel, but each attempt gets better.
Tips for Success
After folding hundreds of these paper horses, I’ve learned some tricks that make the whole process smoother.
Start with Good Lighting Your eyes will thank you. Poor lighting leads to imprecise folds and frustrated crafters.
Keep Your Hands Clean Paper shows everything. Clean hands prevent smudges and keep your horse looking pristine.
Work Slowly at First Speed comes with practice. Focus on accuracy over speed, especially when you’re learning.
Use the Right Pressure Press firmly enough to create clear creases, but not so hard that you tear the paper.
Practice the Basic Folds Master valley folds, mountain folds, and inside reverse folds before attempting complex projects.
Common Mistakes and How to Avoid Them
I’ve made every mistake in the book, so let me save you some frustration.
Mistake #1: Rushing Through the Creases The Problem: Weak or unclear crease lines make later steps nearly impossible. The Solution: Take time with each fold. Use your fingernail or a bone folder to really set those creases.
Mistake #2: Ignoring Paper Grain The Problem: Paper has a grain direction, and fighting it creates messy folds. The Solution: Test how your paper wants to fold naturally and work with it, not against it.
Mistake #3: Skipping the Preparation Steps The Problem: Jumping straight to complex folds without establishing the foundation. The Solution: Those initial creases aren’t suggestions – they’re essential roadmaps.
Mistake #4: Using the Wrong Paper Size The Problem: Too small makes it fiddly, too large makes it unwieldy. The Solution: Stick with the recommended 15cm x 15cm until you’re comfortable with the process.
Mistake #5: Getting Discouraged Too Quickly The Problem: Expecting perfection on the first try. The Solution: Remember that origami is a practice. Each fold teaches you something new.
Similar Variations You Can Make
Once you’ve mastered the basic horse, why not explore some variations? I love experimenting with different approaches.
The Galloping Horse Adjust the leg positions to create a sense of movement. It’s the same basic structure with slightly different final positioning.
The Pegasus Add paper wings! Create separate wing pieces and attach them to your completed horse for a mythical creature.
The Unicorn Roll a small piece of paper into a cone shape and attach it as a horn. Magical and surprisingly easy.
The Racing Horse Make multiple horses in different colors for your own paper derby. I once made an entire herd – it took hours but looked amazing displayed together.
The Miniature Horse Try making tiny versions using 7.5cm x 7.5cm paper. They’re trickier but incredibly cute as decorations.
Understanding the Art Behind the Craft
Origami horses connect us to something deeper than just paper folding. In Japanese culture, horses symbolize strength, nobility, and freedom. When you create one through origami, you’re channeling those qualities into a tangible form.
I find there’s something almost meditative about the process. The repetitive folding, the focus required, the gradual transformation – it all combines to create a peaceful, centered feeling. Many of my students tell me they use origami as a form of stress relief.
The geometric principles at work here are fascinating too. Each fold follows mathematical rules, creating structural integrity through triangulation and compression. You’re essentially engineering a three-dimensional sculpture from a two-dimensional material.
Troubleshooting Your Origami Horse
Sometimes things don’t go according to plan. Here’s how to handle the most common issues.
If Your Horse Won’t Stand Check the base folds – they need to be symmetrical and well-creased. A wobbly horse usually means uneven foundation work.
If the Proportions Look Off Don’t worry too much about perfect proportions on your first attempts. Focus on completing the fold sequence, then refine in future versions.
If You Make a Wrong Fold Paper is forgiving to a point. Gentle unfolding and re-folding usually works, but be careful not to weaken the paper with too much manipulation.
If You Get Stuck Mid-Process Take a break. Sometimes stepping away and coming back with fresh eyes reveals the solution immediately.
The Rewarding Journey of Paper Folding
Creating an origami horse teaches patience, precision, and the beauty of transformation. Each time I complete one, I’m reminded why I fell in love with this art form in the first place.
The simple origami horse step by step process we’ve covered represents just the beginning of your origami journey. Once you’ve mastered this design, you’ll find yourself looking at every piece of paper as potential art. Napkins become flowers, notebook paper becomes cranes, and gift wrap becomes entire menageries of folded creatures.
I encourage you to share your creations. Post photos, teach friends, or display your paper horses proudly. There’s something special about handmade art that connects us to both the creator and the creation process itself.
Frequently Asked Questions
Q: What’s the best paper for beginners? A: Standard origami paper (kami) in 15cm squares works perfectly. It’s thin enough to fold easily but strong enough to hold creases.
Q: How long does it take to make an origami horse? A: For beginners, expect 15-30 minutes. With practice, you can complete one in under 10 minutes.
Q: Can children make this origami horse? A: Absolutely! Children 8 and older typically handle this project well with adult guidance for the trickier steps.
Q: What if I don’t have origami paper? A: Regular paper works fine. Cut printer paper into squares, or use gift wrap, magazine pages, or even newspaper for practice.
Q: How do I make my creases sharper? A: Use a bone folder, your fingernail, or the edge of a ruler to really set each crease. Sharp creases make all the difference.
Q: Can I decorate my finished horse? A: Certainly! Use markers, colored pencils, or small stickers to add personality to your creation.
Summary
Learning how to make an origami horse opens up a world of creative possibilities through this ancient art of paper folding. We’ve covered everything from materials and step-by-step instructions to troubleshooting and variations. The journey from flat paper to three-dimensional sculpture never gets old.
Remember, every expert was once a beginner. Your first origami horse might not be perfect, but it’ll be yours – and that makes it special. Keep practicing, stay patient, and enjoy the meditative process of transforming simple paper into something magical.