

Origami is more than just folding paper—it’s a way to create beautiful, intricate designs with your own hands. Today, I’ll show you how to make an easy Origami Infinity Cube that’s both fun and satisfying. Whether you’re a beginner or an experienced artist, this project is a fantastic way to get creative with paper.
What is an Origami Infinity Cube?
The Origami Infinity Cube is a fantastic creation that’s both simple and mesmerizing. This paper fold puzzle seems to have no end, hence the name “infinity,” and it can be a fun challenge to make! By following a few easy Origami Infinity Cube instructions, you’ll have your very own cube ready to fidget with. And trust me, the journey is as exciting as the result.
In this project, you’ll learn step-by-step how to fold the paper, assemble the boxes, and tape them together to create the infinity effect. It’s not only a great project for honing your origami skills, but it also offers a sense of accomplishment when you finish.
Materials Needed
Before we begin, make sure you have all the necessary materials at hand. Here’s what you’ll need to get started:
| Material | Quantity |
|---|---|
| Paper (any color) | 8 sheets (4″x3″) |
| Tape | Small strips |
| Scissors (optional) | 1 |
Easy Origami Infinity Cube: Step-by-Step Instructions
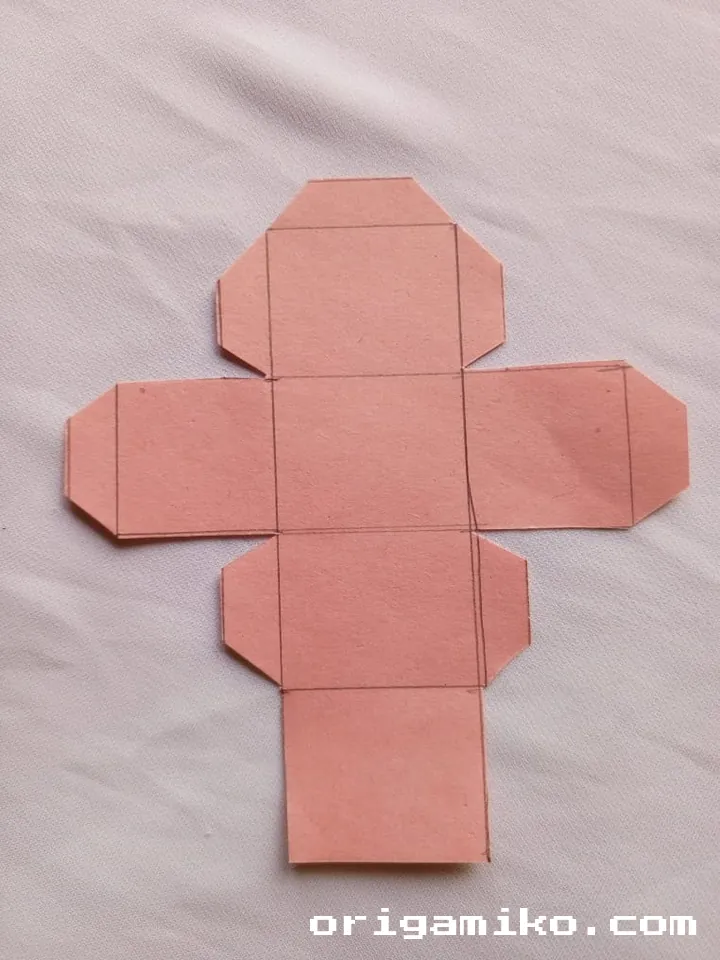
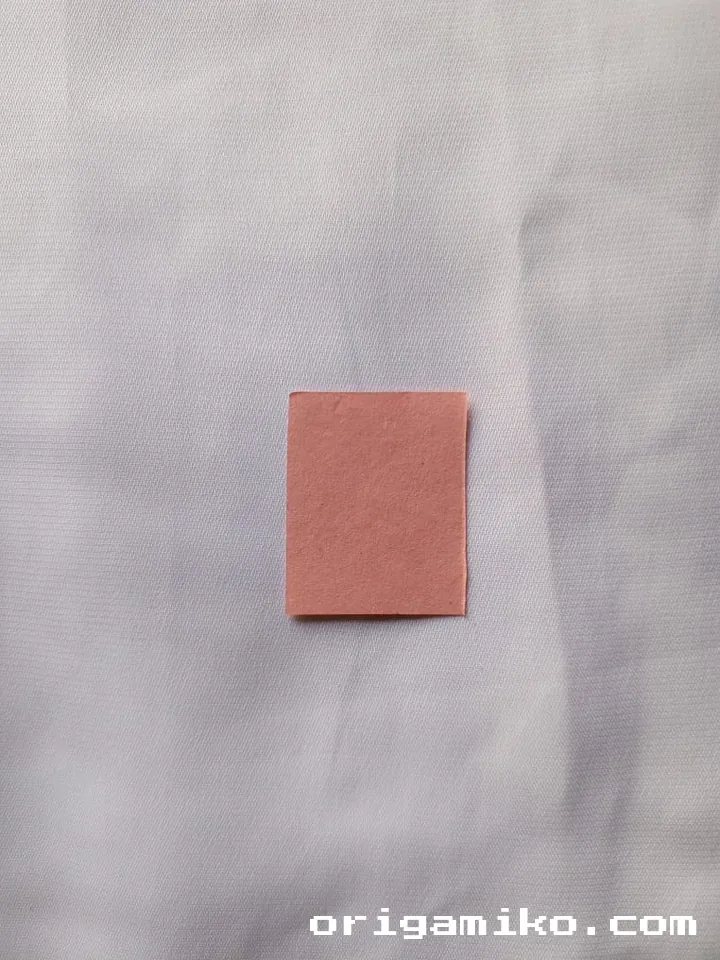
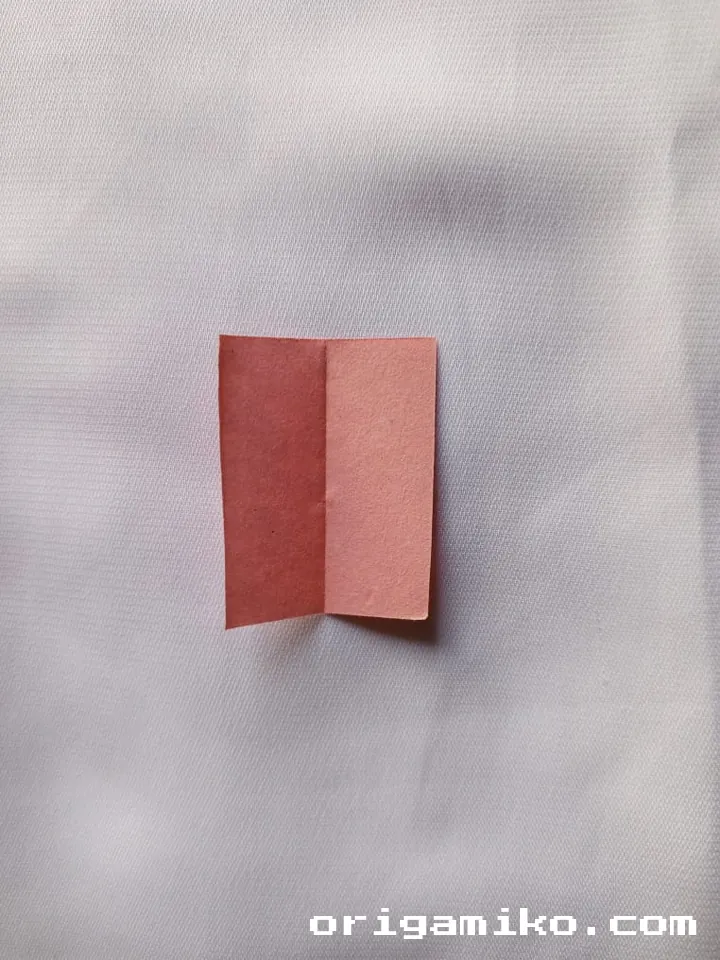
1. Cut a paper 4 inches long and 3 inches in the middle as shown in the picture.
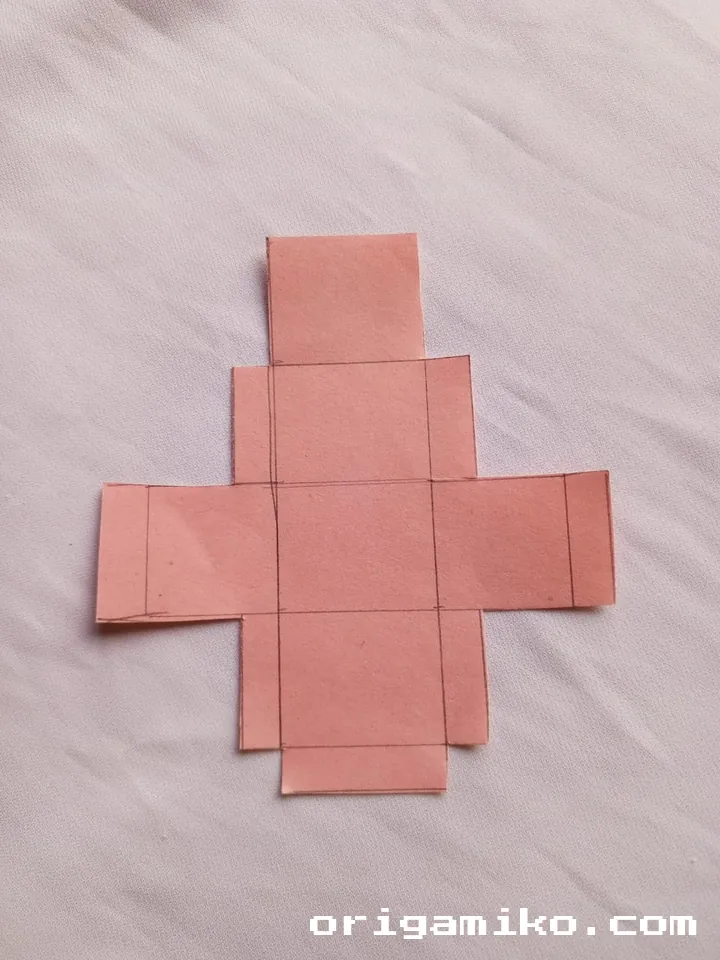
Start by cutting your paper into the required dimensions. It should be 4 inches long and 3 inches wide in the middle. Don’t worry about being super precise; just make sure it’s close enough!
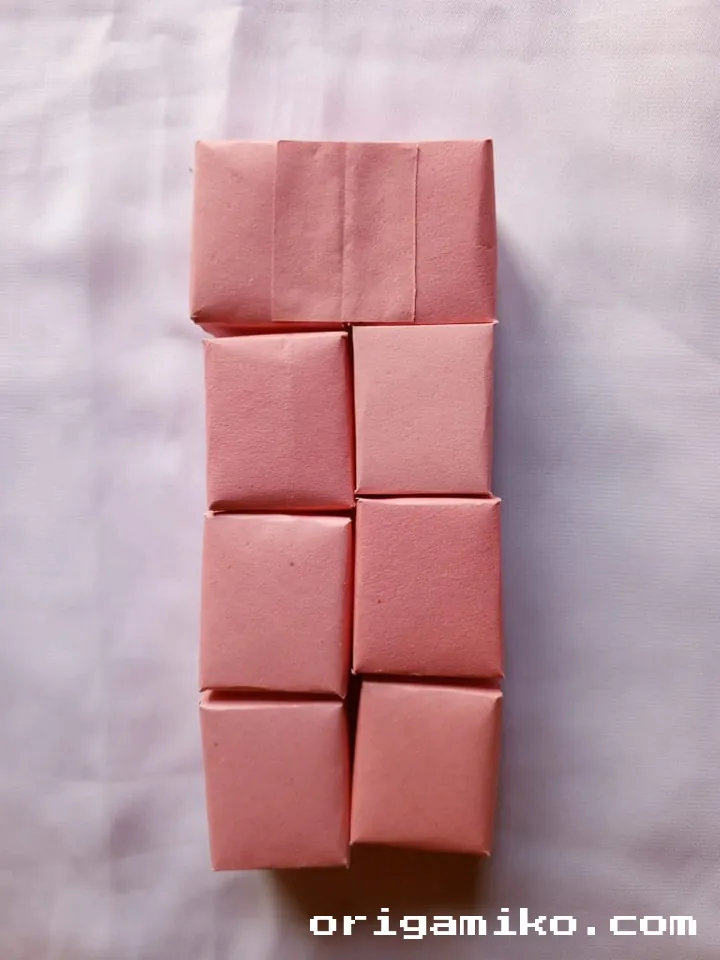
2. Now fold the extra parts and make a box with the help of tape.
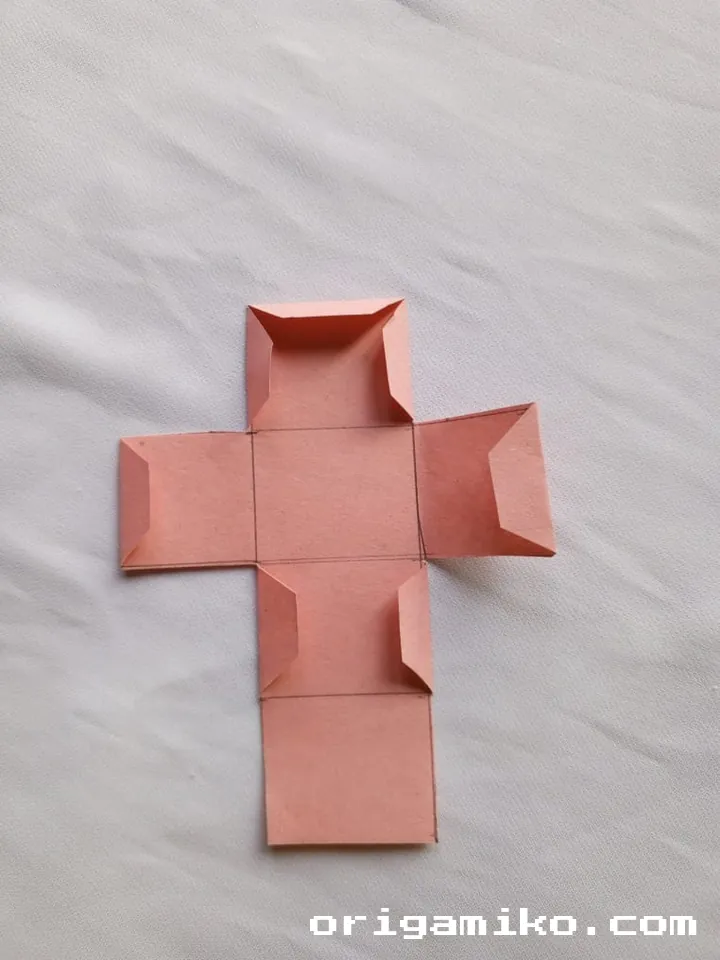
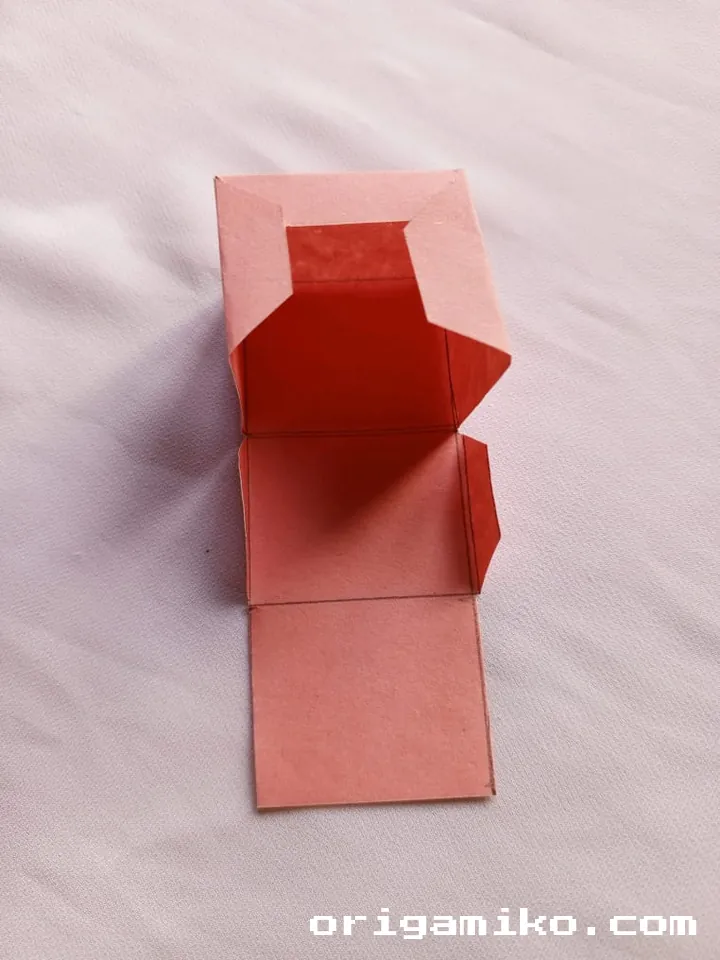
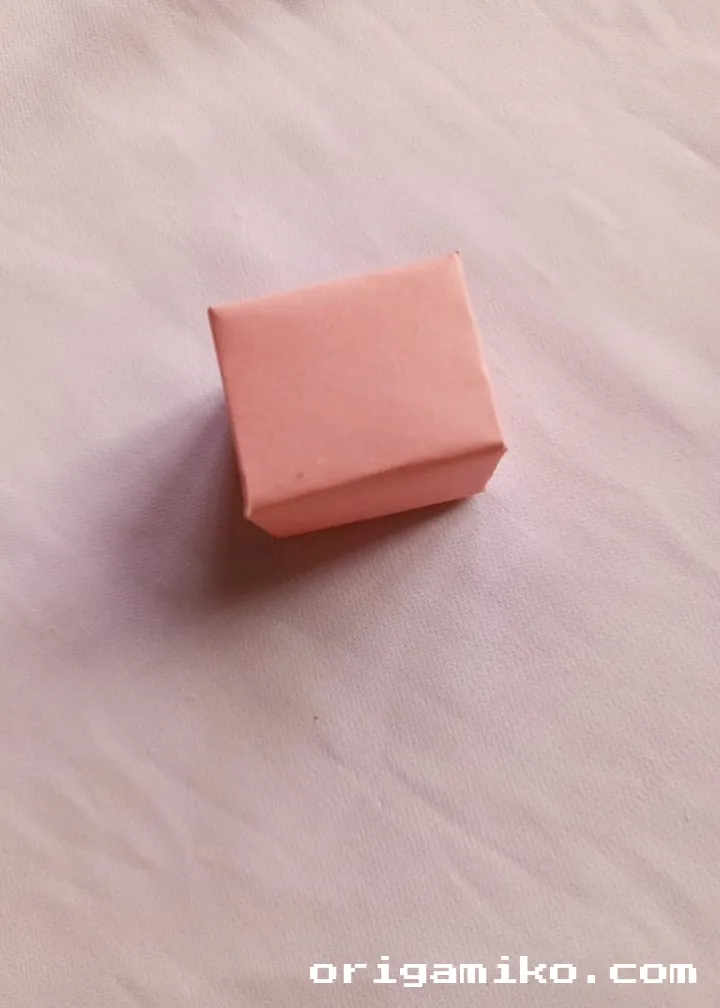
Once you have the cut paper, fold it carefully to form the base of your cube. Use tape to secure the edges into place. This will create a small, open box shape.
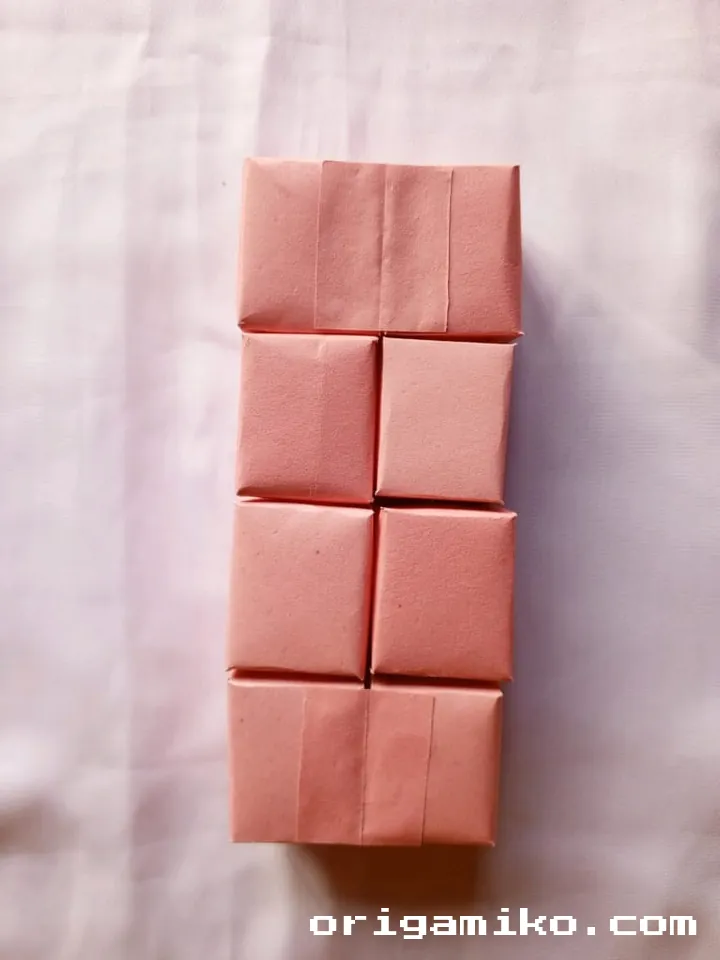
3. Make 7 more boxes in the same way.
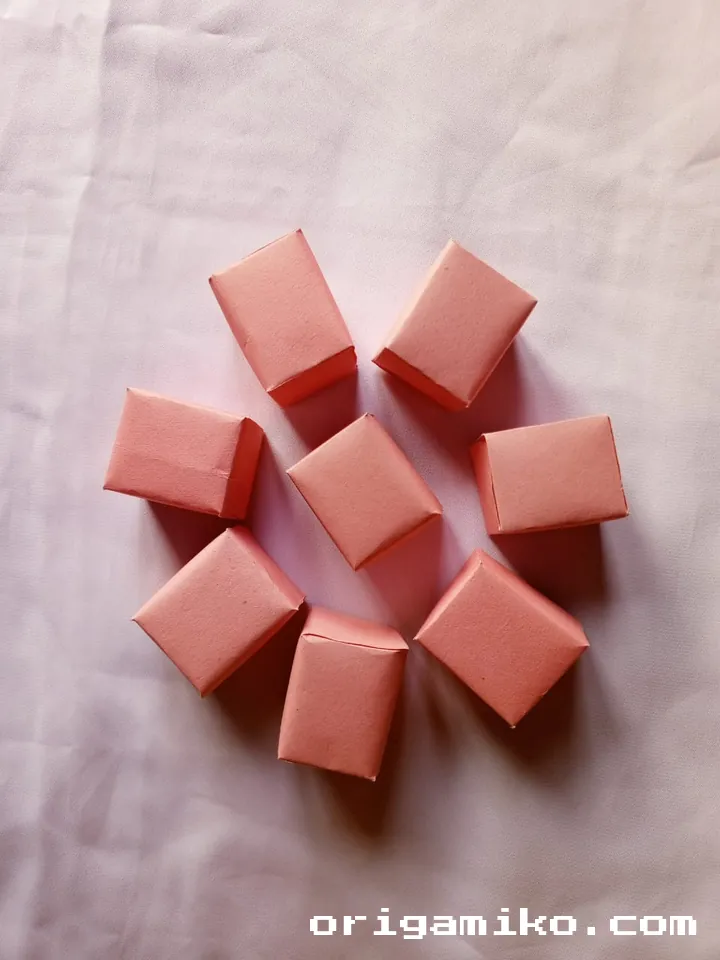
Repeat this step with the remaining pieces of paper. You’ll need a total of eight boxes for your infinity cube.
4. Now arrange the boxes as shown in the picture and add the pieces of paper one after the other with the help of tape.
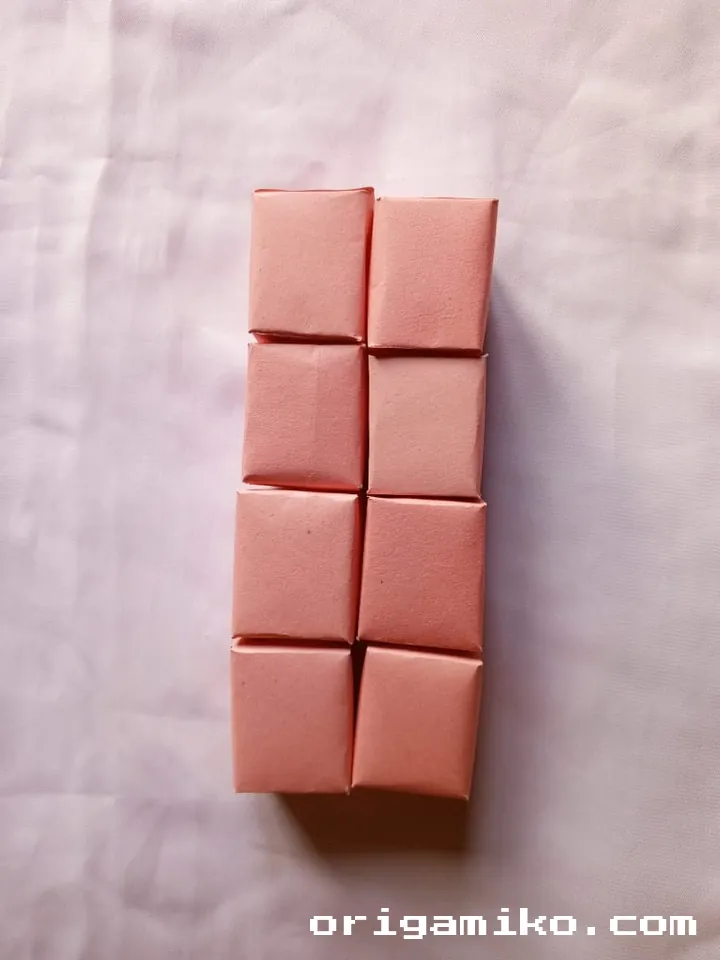
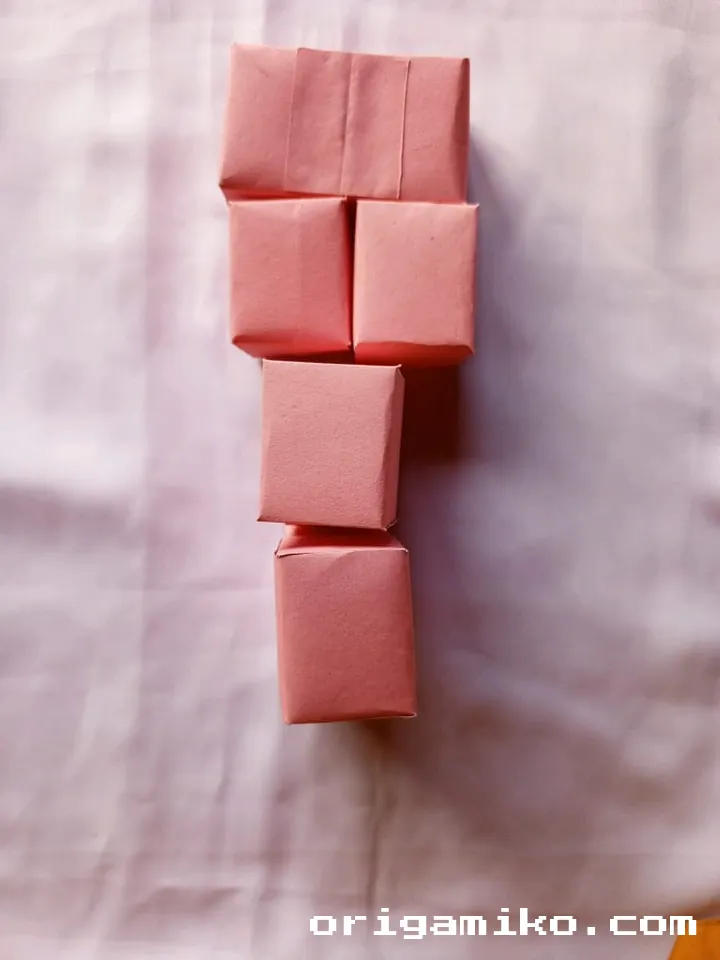
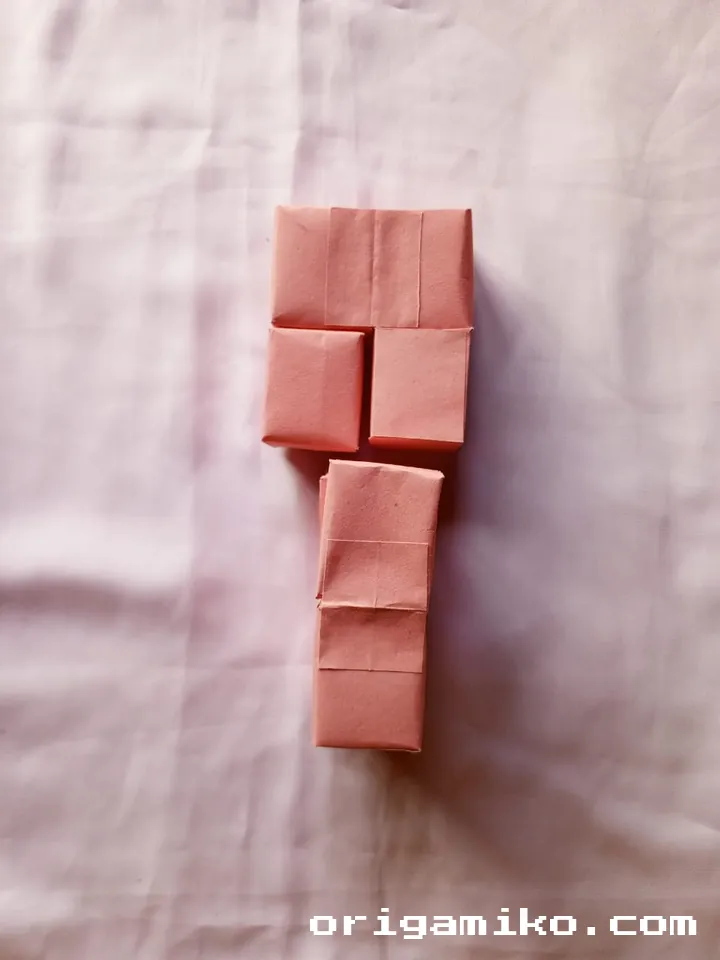
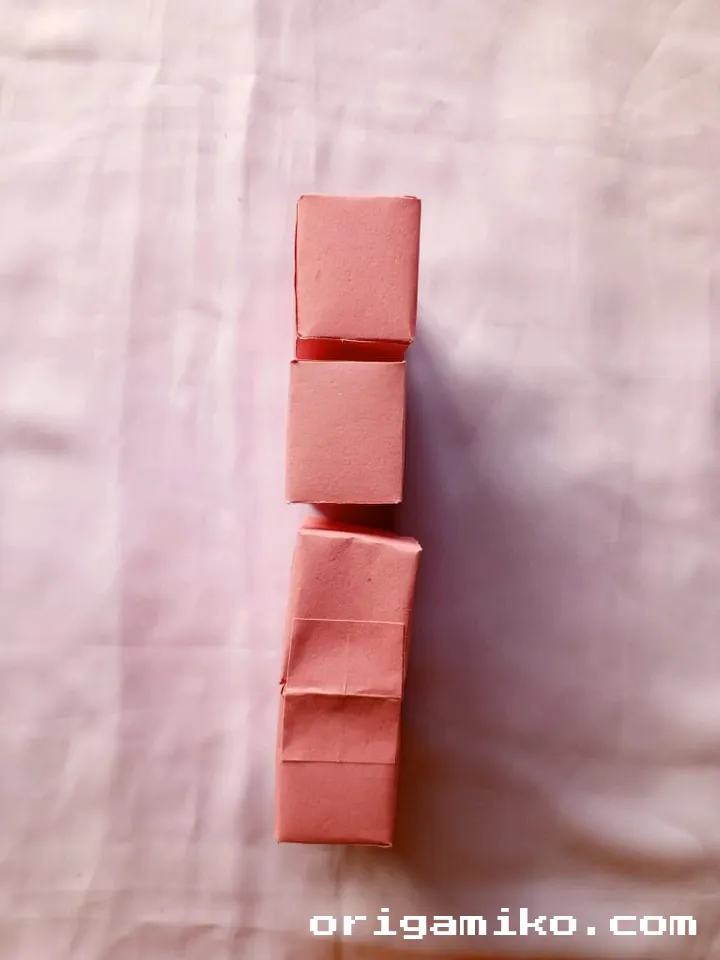
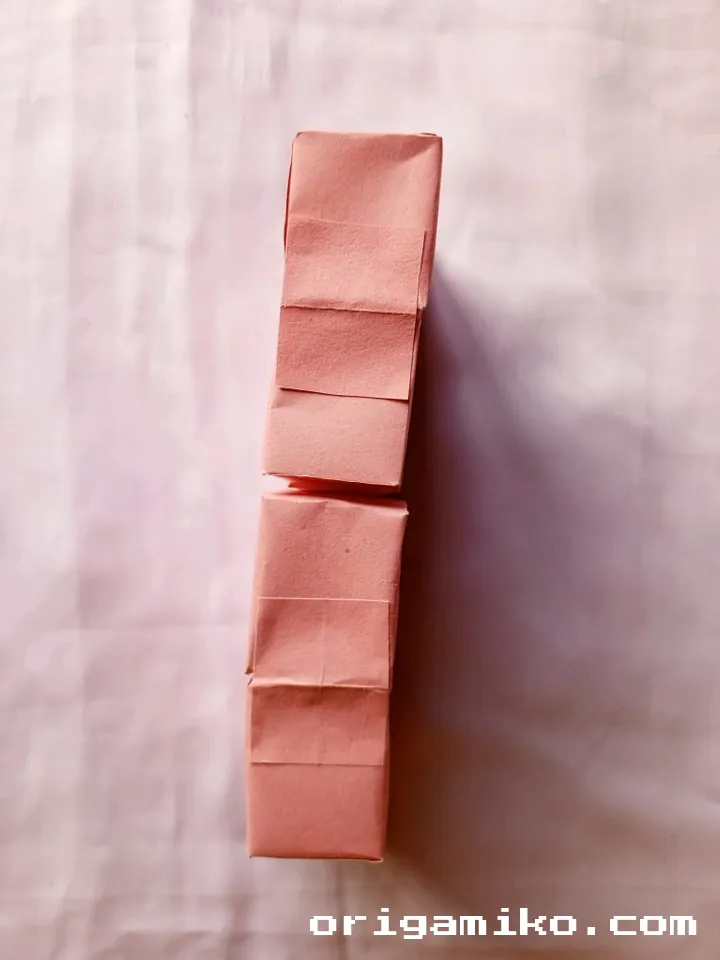

The final step involves connecting the boxes. Line them up and tape them together in a sequence, creating the interlocking infinity effect. And just like that, your Origami Infinity Cube is complete!
Tips for Success
- Precision is key: While the folding and cutting don’t need to be perfect, try to keep the folds sharp and the edges neat.
- Be patient: Take your time with the folding process. The more carefully you fold, the better the result!
- Experiment with colors: You can make your infinity cube more vibrant by using colored papers for each box or keeping it simple with one color.
Common Mistakes and How to Avoid Them
Here are some common mistakes I’ve made while creating this cube and how you can avoid them:
- Mistake #1: Not folding the paper precisely.
Solution: Make sure to fold each side firmly, as this will help the cube hold its shape. - Mistake #2: Using too much tape.
Solution: Only use a small amount of tape to avoid the cube becoming too bulky. Just enough to hold the pieces together will do!
Similar Variations You Can Make
If you’re feeling adventurous, here are some variations of the Origami Infinity Cube that you can try:
- Origami Star Cube: A fun twist on the basic infinity cube, incorporating star-shaped folds for an extra flair.
- Infinity Cube with Different Sized Boxes: Play with different dimensions to see how they affect the overall look and feel of the cube.
FAQs
Q: How difficult is it to make the Origami Infinity Cube?
A: It’s actually quite easy! The project is beginner-friendly, and the instructions I’ve given will help guide you through the process.
Q: Can I use larger paper for the Infinity Cube?
A: Yes, feel free to experiment with larger or smaller pieces of paper. Just make sure to adjust the cutting and folding accordingly.
Conclusion
There you have it! The Origami Infinity Cube is a fun, simple project that anyone can do with just a few materials. It’s a great way to get creative, practice your paper folding, and make something cool you can show off. Happy folding, and I’d love to hear how your infinity cubes turn out!