
Ever wondered how a simple piece of paper can transform into something both beautiful and functional? Today I’ll walk you through creating an Easy Origami Leaf Envelope that’s perfect for beginners.
This charming paper craft combines the ancient art of origami with practical everyday use. You’ll discover that making this envelope is surprisingly simple yet incredibly rewarding.
Join me on this delightful journey as we fold our way to creating something truly special together.
What Is an Origami Leaf Envelope?
An origami leaf envelope is a beautiful fusion of nature-inspired design and practical functionality. I love how this particular fold mimics the organic curves and pointed edges of real leaves while serving as a perfect container for notes, small gifts, or treasured keepsakes.
The beauty of this Simple Origami Leaf Envelope Step by step project lies in its versatility. You can use it for love letters, gift cards, seeds for gardening enthusiasts, or even as decorative elements for scrapbooking projects. The leaf-like appearance adds an organic touch that mass-produced envelopes simply can’t match.
What makes this design special is how it transforms a flat piece of paper into something that looks like it came straight from nature’s handbook. The folding technique creates natural-looking veins and curves that give depth and character to your finished envelope.
Materials Needed
Creating your origami leaf envelope requires minimal supplies, but choosing the right materials can make a significant difference in your final result.
| Material | Specifications | Purpose | Tips |
|---|---|---|---|
| Paper | A4 size (8.5″ x 11″) | Main folding material | Standard copy paper works perfectly |
| Paper Weight | 70-80 GSM recommended | Provides proper fold retention | Too thick = difficult folding, too thin = tears easily |
| Paper Color | Any color of choice | Aesthetic appeal | Green mimics real leaves, but any color works |
| Work Surface | Flat, clean surface | Precise folding | A table or desk provides best results |
| Bone Folder (Optional) | Plastic or bone material | Creates sharp creases | Fingernail or ruler edge works as substitute |
| Ruler (Optional) | Standard 12-inch ruler | Measuring and creasing | Helps achieve professional-looking folds |
The key to success with Origami Leaf Envelope instructions is starting with quality paper that holds creases well without tearing.
Step-by-Step Instructions: How to Make Origami Leaf Envelope
Let me guide you through each fold with clear, easy-to-follow directions. I’ve broken down the process into manageable steps that even complete beginners can master.
Step 1: Prepare Your Paper
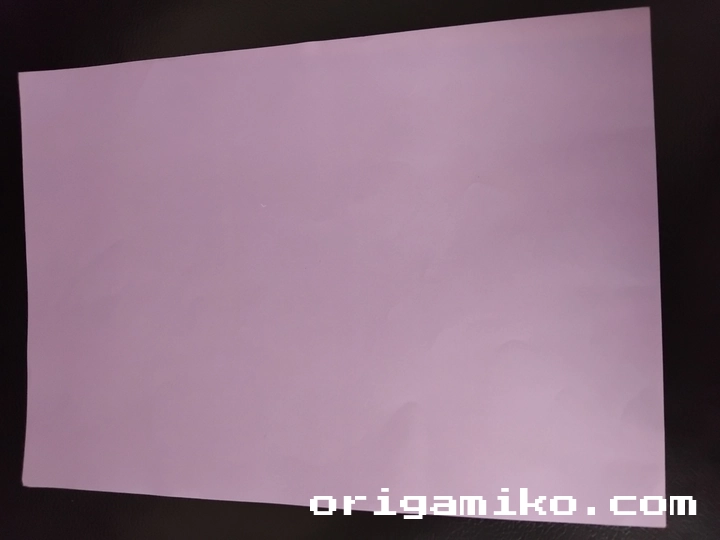
Take your A4 paper and place it on your work surface. Make sure the paper is clean and free from any wrinkles or tears. Position it in portrait orientation (taller than it is wide).
Step 2: Create the Initial Crisscross Fold
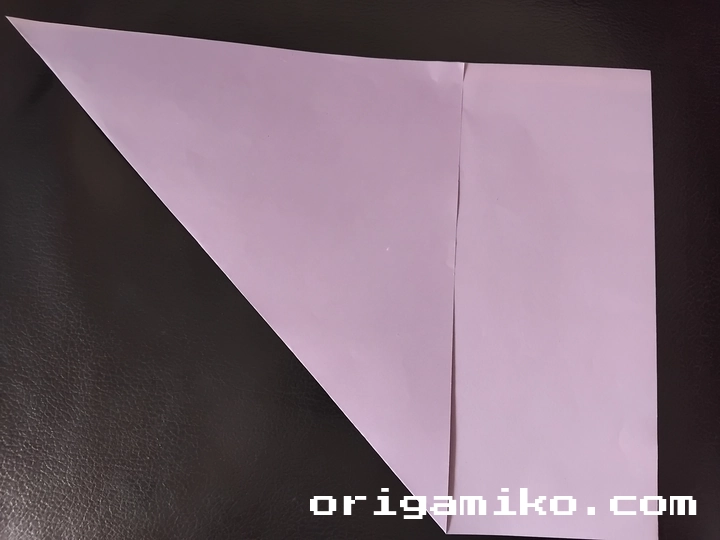
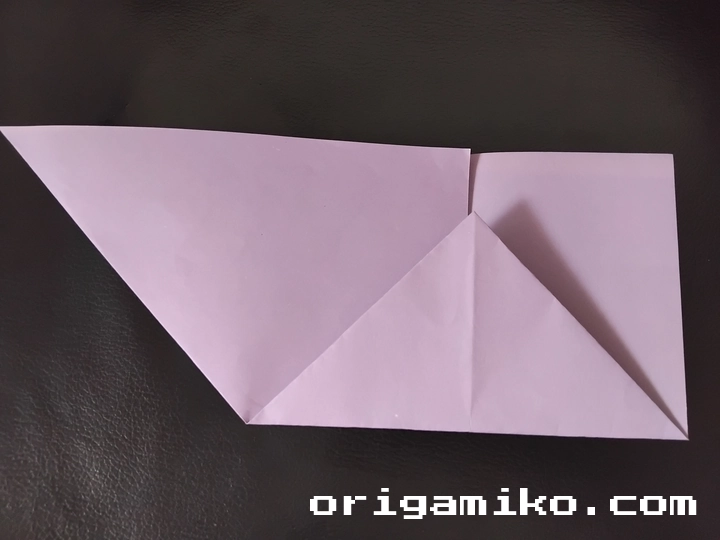
Fold the paper diagonally from one corner to create a crisscross pattern. Then fold the lower side upward. This creates the foundation folds that will guide the rest of your envelope construction. Make your folds crisp and precise – this attention to detail will show in your finished product.
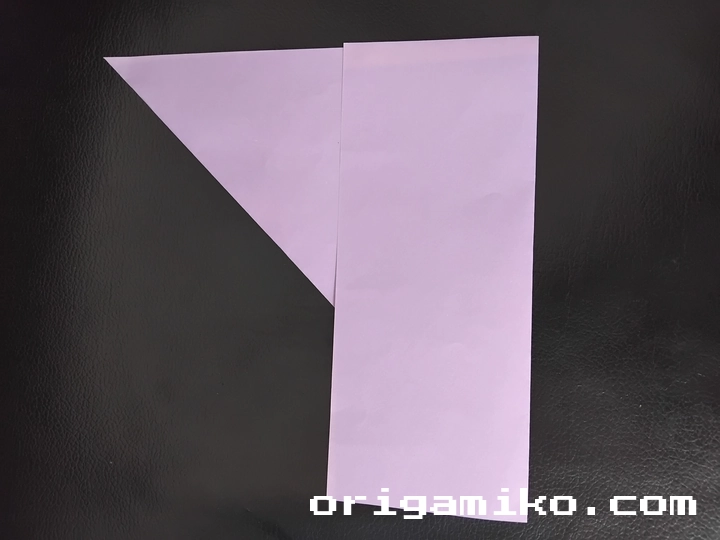
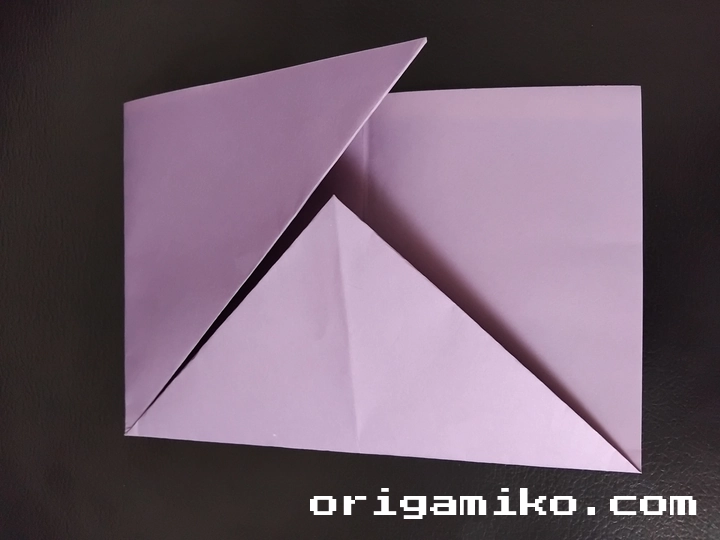
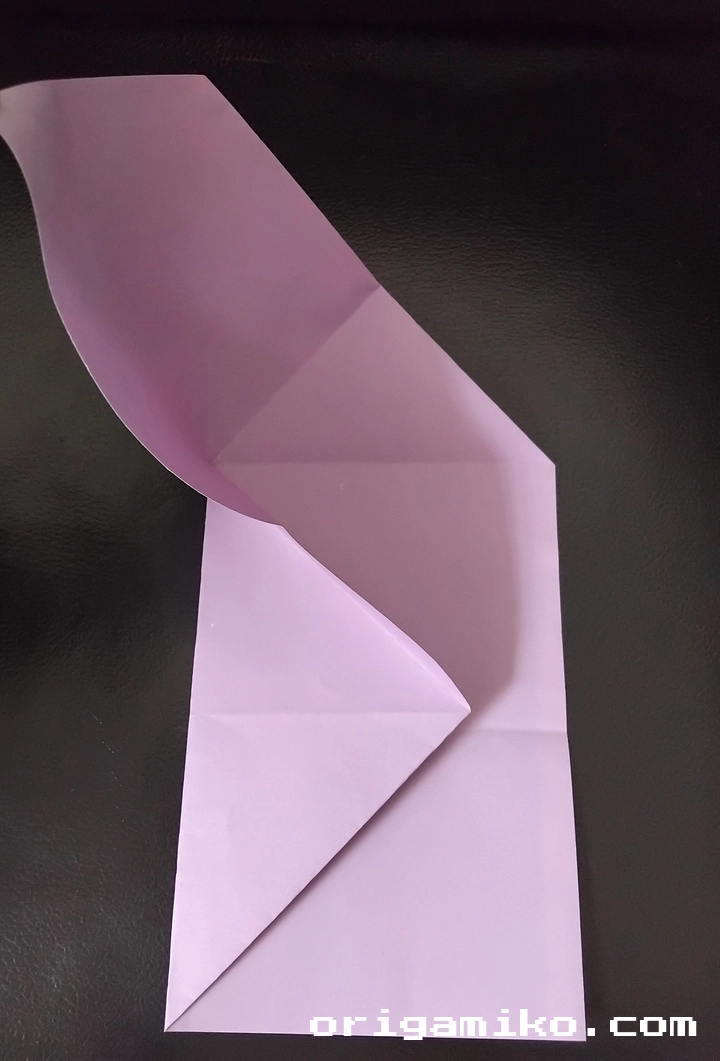
Step 3: Unfold and Create Right Side Folds
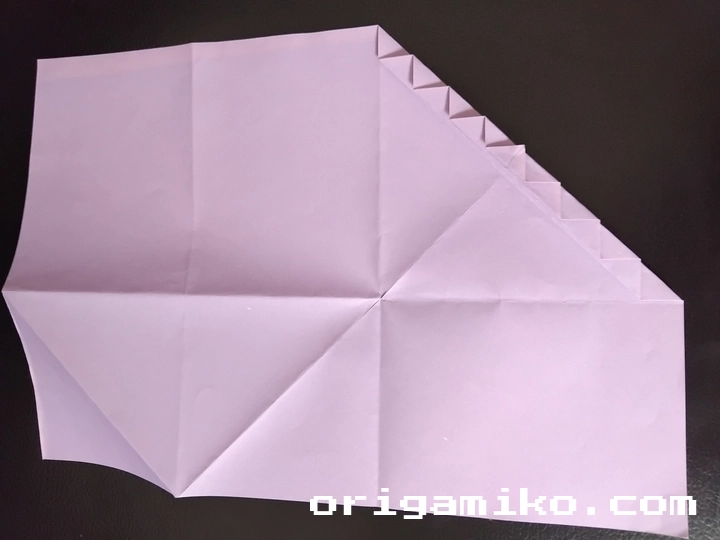
Carefully unfold your paper and examine the crease lines you’ve created. Now, working from the right side, make additional folds following the natural guide lines created by your initial crisscross pattern. These folds should feel intuitive once you see how they align with your existing creases.
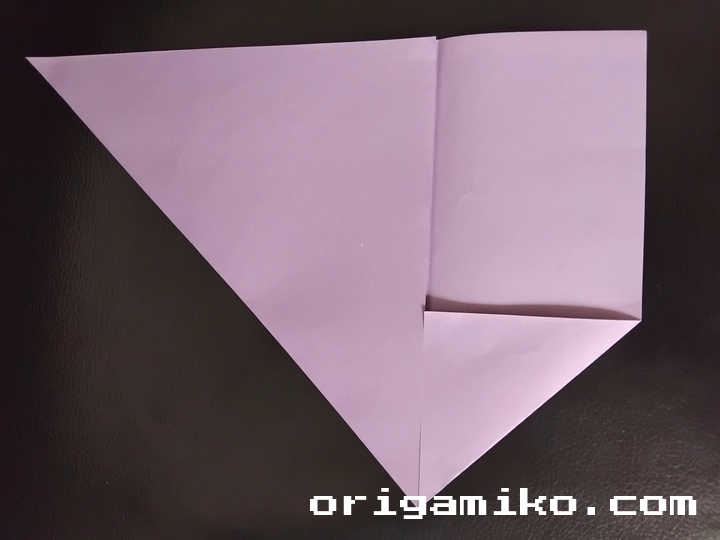
Step 4: Turn and Shape the Envelope
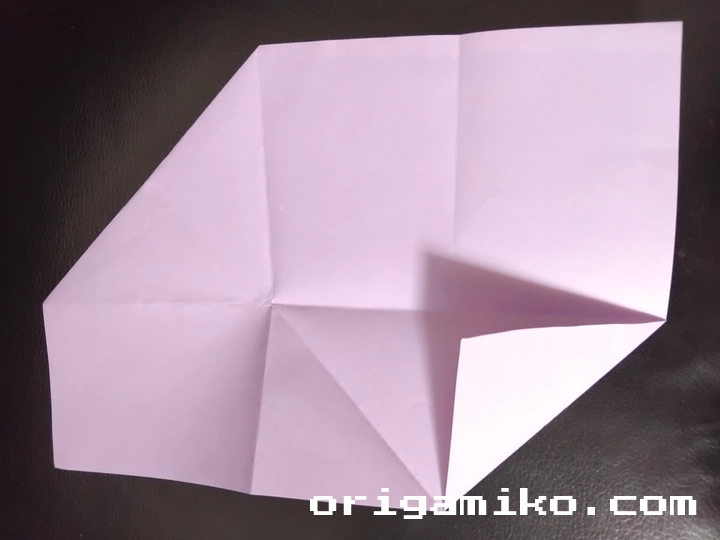

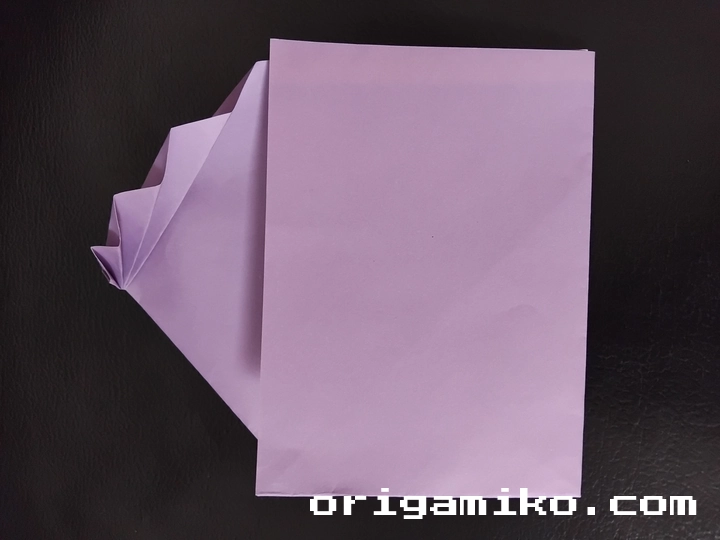
Turn your paper over to the reverse side. Focus on the lower left corner first – fold this corner inward, then fold it again to create a doubled layer. This technique adds strength to your envelope’s corner. Next, fold the lower side up, followed by folding the upper side down. Each fold should build upon the previous one, creating the envelope’s distinctive leaf shape.
Step 5: Final Assembly
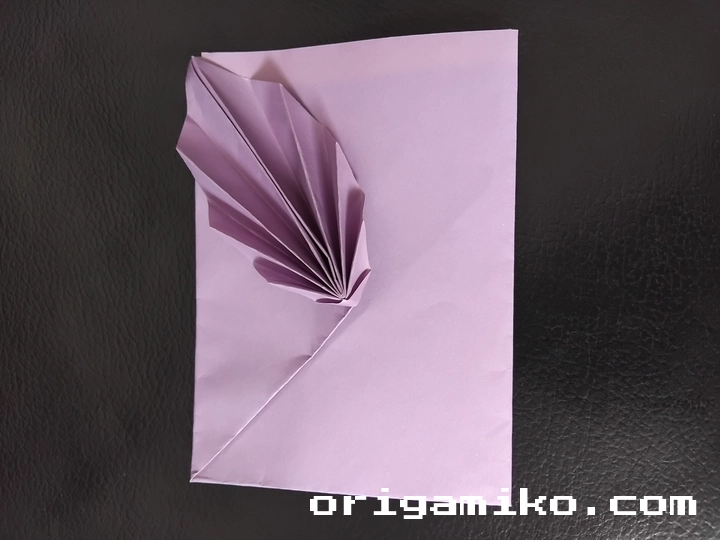
Your Easy Origami Leaf Envelope is now ready! Take a moment to press down all creases firmly and ensure the envelope opens and closes smoothly. The finished product should have a natural leaf-like appearance with a functional pocket for holding contents.
Key Terms and Definitions
Understanding origami terminology helps you follow instructions more easily and communicate with other paper folding enthusiasts.
Valley Fold : A fold where the crease forms a valley, with the paper folding toward you
Mountain Fold : A fold where the crease forms a peak, with the paper folding away from you
Crease : A permanent line formed by folding and pressing paper
Base : The initial folded form that serves as the foundation for more complex shapes
Bone Folder : A tool used to create sharp, clean creases in paper
Tips for Success
Creating perfect origami requires patience and attention to detail. Here are my tried-and-true tips for how to make Origami Leaf Envelope projects that look professional every time.
Work slowly and deliberately. Rushing through folds often leads to misaligned edges and sloppy results. I always remind myself that origami is as much about the meditative process as it is about the final product.
Keep your hands clean and dry. Oil and moisture from your fingers can leave marks on paper or make it difficult to create crisp folds. I keep a small towel nearby when working on detailed projects.
Use consistent pressure when creasing. Some people press too lightly and end up with weak folds, while others press so hard they tear the paper. Find that sweet spot where you create a definite crease without damaging the paper.
Practice the sequence several times. Don’t expect perfection on your first attempt. I usually make three or four practice envelopes before I’m completely satisfied with my technique.
Choose appropriate lighting. Good lighting helps you see fold lines clearly and ensures precision in your work. Natural daylight is ideal, but a bright desk lamp works well too.
Common Mistakes and How to Avoid Them
Even experienced folders make mistakes. Learning to recognize and avoid these common pitfalls will save you time and frustration.
Mistake: Uneven initial folds The solution lies in taking extra time with your first crisscross fold. If this foundation fold is crooked, everything that follows will be off-center. Always double-check alignment before pressing your creases firmly.
Mistake: Paper tears during folding This usually happens when you’re working with paper that’s too thin or when you’re applying too much pressure. Choose paper with appropriate weight and let the folds happen naturally rather than forcing them.
Mistake: Envelope won’t stay closed If your finished envelope pops open, you likely haven’t created strong enough creases in the locking mechanism. Go back and reinforce the folds that hold the envelope closed, applying firm, even pressure.
Mistake: Asymmetrical leaf shape Symmetry problems often stem from inconsistent fold placement. Pay attention to where each fold intersects with previous creases, and take measurements if necessary to ensure even spacing.
Similar Variations You Can Make
Once you’ve mastered the basic leaf envelope, you can explore these exciting variations that use similar folding techniques.
Simple Flower Envelope Modify the final shaping steps to create pointed petals instead of leaf edges. This variation works beautifully for spring-themed projects or romantic occasions.
Butterfly Wing Envelope Extend the side folds to create wing-like projections that mimic a butterfly’s delicate wings. This version requires slightly more advanced folding skills but produces stunning results.
Traditional Japanese Letter Fold Adapt the basic technique to create envelopes that follow classical Japanese paper folding traditions. These designs often incorporate additional decorative elements and symbolic meanings.
Seasonal Leaf Variations Change the proportions and final shaping to mimic different types of leaves – oak, maple, birch, or palm. Each variation captures the unique characteristics of different tree species.
Mini Gift Card Holders Scale down the basic design to create tiny envelopes perfect for gift cards, business cards, or small notes. These miniature versions make charming party favors or desk accessories.
Advanced Techniques and Customization
As you become more comfortable with the basic Simple Origami Leaf Envelope Step by step process, you can begin incorporating advanced techniques that add sophistication to your work.
Wet Folding Techniques Slightly dampening your paper before folding allows for more curved, organic shapes that closely mimic real leaves. This technique requires practice but produces remarkably lifelike results.
Decorative Paper Choices Experiment with patterned papers, handmade papers, or papers with different textures. Metallic papers create elegant envelopes perfect for special occasions, while recycled papers add an eco-friendly touch.
Multi-Layer Construction Create envelopes with multiple layers by combining different colored papers. This technique adds depth and visual interest while maintaining the basic leaf envelope structure.
Embellishment Integration Add small decorative elements like pressed flowers, washi tape details, or hand-drawn vein patterns to enhance the natural leaf appearance.
Troubleshooting Guide
Sometimes things don’t go as planned, and that’s perfectly normal. Here’s how to handle the most common issues you might encounter.
Problem: Paper won’t hold creases Some papers are naturally resistant to folding. Try scoring the fold lines lightly with a bone folder before making the actual folds, or switch to a different paper type that’s more cooperative.
Problem: Envelope is too small or too large Paper size directly affects your finished envelope dimensions. If you need a different size, start with appropriately scaled paper rather than trying to modify the folding sequence.
Problem: Folds don’t align properly Misalignment usually indicates an error in earlier steps. Don’t try to compensate with later folds – unfold back to where the error occurred and correct it before proceeding.
Creative Uses and Applications
Your finished origami leaf envelopes open up a world of creative possibilities beyond simple letter storage.
Wedding and Event Favors Create sets of leaf envelopes in wedding colors to hold small gifts, seeds, or thank-you notes for guests. The handmade touch adds personal meaning that guests will remember.
Educational Projects Teachers can use these envelopes for interactive learning activities, storing vocabulary cards, math problems, or science facts. Students enjoy both making and using these functional art pieces.
Seasonal Decorations Arrange multiple leaf envelopes in autumn colors to create stunning seasonal displays. Fill them with potpourri, small lights, or seasonal messages for family members.
Gift Wrapping Alternatives Use larger versions as unique gift wrapping for small items. The recipient gets both the gift and a beautiful handmade envelope to keep.
Craft Fair Items These envelopes make excellent items for craft fairs and art shows. Their combination of beauty and functionality appeals to a wide range of customers.
Frequently Asked Questions
Q: What’s the best paper size for beginners? A: Standard A4 paper (8.5″ x 11″) works perfectly for learning. It’s large enough to handle easily but not so big that it becomes unwieldy.
Q: Can I use recycled or magazine paper? A: Absolutely! Magazine paper often folds beautifully and adds interesting colors and patterns. Just make sure the paper isn’t too thin or it might tear during folding.
Q: How long does it take to make one envelope? A: Beginners typically need 10-15 minutes per envelope, while experienced folders can complete one in 3-5 minutes. Speed comes naturally with practice.
Q: Can children make these envelopes? A: Yes! Children aged 8 and up can successfully create leaf envelopes with minimal adult guidance. It’s a great way to develop fine motor skills and spatial reasoning.
Q: What if my envelope won’t stay closed? A: This usually means the locking folds need to be reinforced. Go back and press those creases more firmly, or check that you’ve followed the folding sequence correctly.
Q: Can I make waterproof versions? A: While traditional paper isn’t waterproof, you can use water-resistant papers or apply clear sealants after folding. Some crafters use synthetic papers designed for outdoor use.
Summary and Next Steps
Creating an Easy Origami Leaf Envelope combines the meditative aspects of paper folding with the practical satisfaction of making something useful. Through this journey, you’ve learned not just the basic folding sequence, but also troubleshooting techniques, creative variations, and professional tips that will serve you well in future origami projects.
The beauty of this craft lies in its accessibility – with just a piece of paper and a few minutes of focused attention, you can create something both beautiful and functional. I encourage you to experiment with different papers, try the variations I’ve suggested, and most importantly, enjoy the peaceful process of transforming simple materials into something special through the ancient art of how to make Origami Leaf Envelope designs.