

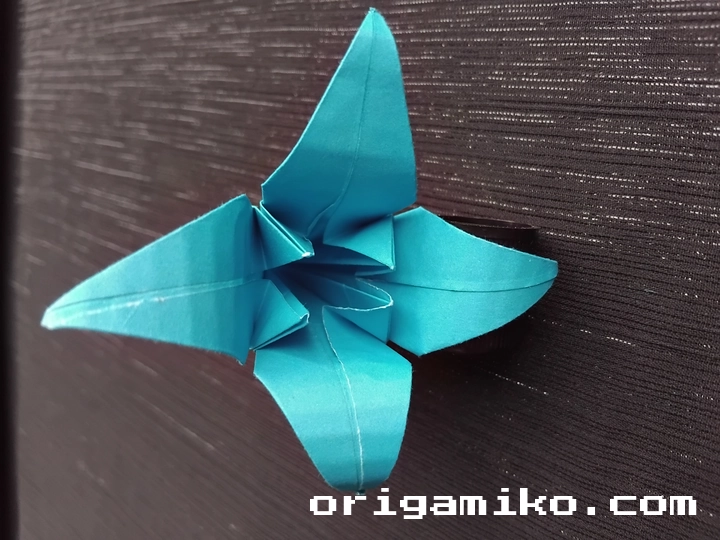
Ever wondered how to transform a simple square of paper into something magical? Today I’ll show you exactly how to make an Origami Lily that’ll leave everyone amazed.
This ancient Japanese art form brings pure joy to your fingertips. You’re about to discover the secrets of paper folding mastery.
Get ready for a journey that turns ordinary paper into extraordinary art.
What Is an Origami Lily?
An Origami Lily is one of the most beloved flowers in the paper folding world. I’ve been folding these beauties for years, and they never fail to capture hearts.
The lily represents purity, rebirth, and transformation in many cultures. When you fold one from paper, you’re not just creating art—you’re connecting with centuries of tradition. This Simple Origami Lily Step by step process transforms a flat square into a three-dimensional masterpiece that looks surprisingly realistic.
What makes the Origami Lily special is its elegant curves and delicate petals. Unlike some complex origami models, this flower strikes the perfect balance between beauty and achievability. Even beginners can create stunning results with patience and practice.
Materials Needed
Before we dive into the folding process, let’s gather everything you need for your Origami Lily instructions adventure.
| Material | Specification | Purpose | Where to Find |
|---|---|---|---|
| Paper | 13cm x 13cm square | Main folding material | Craft stores, online |
| Paper Type | Thin to medium weight | Easy folding and crisp creases | Origami paper preferred |
| Color | Any solid color | Visual appeal | Choose your favorite |
| Work Surface | Flat, clean table | Stable folding area | Any hard surface |
| Lighting | Good overhead light | Clear visibility | Desk lamp if needed |
| Optional Tools | Bone folder | Sharp creases | Craft supply stores |
Paper Quality Matters : The best papers for origami are thin enough to fold multiple layers yet strong enough to hold their shape.
Size Considerations : A 13cm x 13cm square gives you the perfect balance of workability and final size for display.
Color Psychology : White represents classic elegance, while colored papers add personality to your creation.
How to Make Origami Lily: Step-by-Step Instructions
Now comes the exciting part! I’ll walk you through each step of creating your masterpiece. Take your time with each fold—rushing leads to sloppy results.
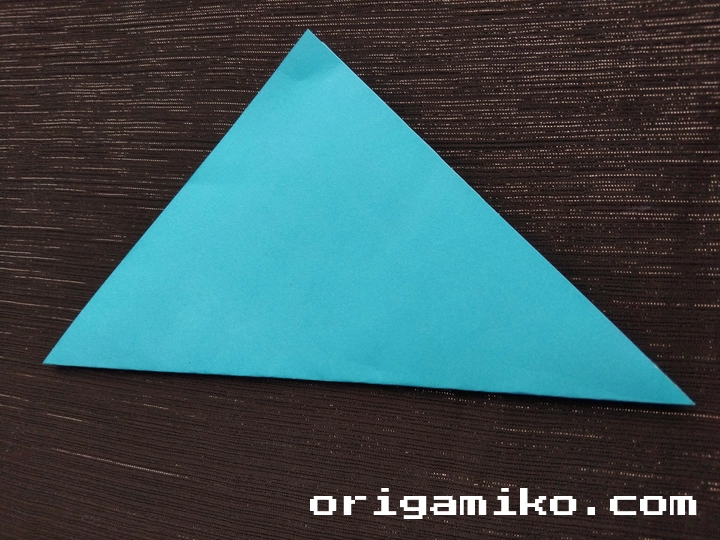
Step 1: Prepare Your Paper
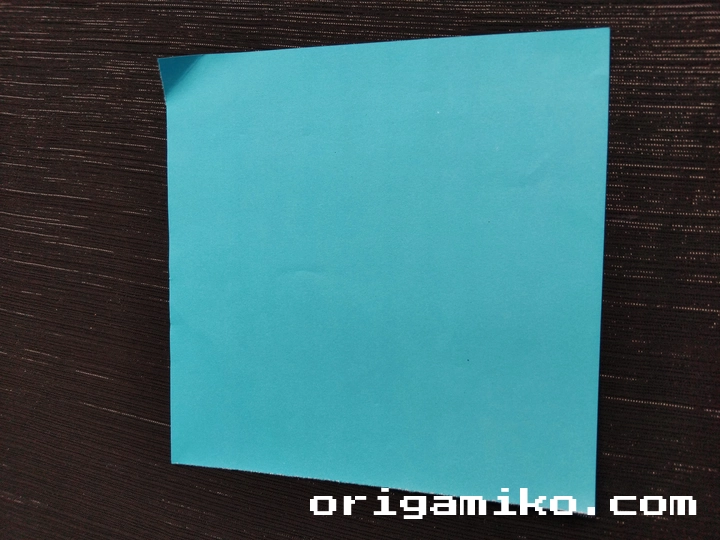
Take your 13cm x 13cm paper square. Make sure it’s perfectly square and free of wrinkles. Place it on your work surface with the colored side facing down if you’re using colored paper.
Step 2: Create the Foundation Folds
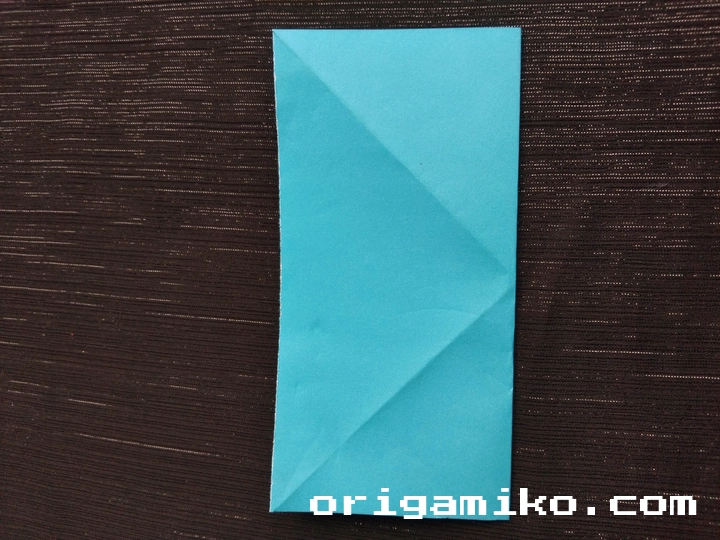
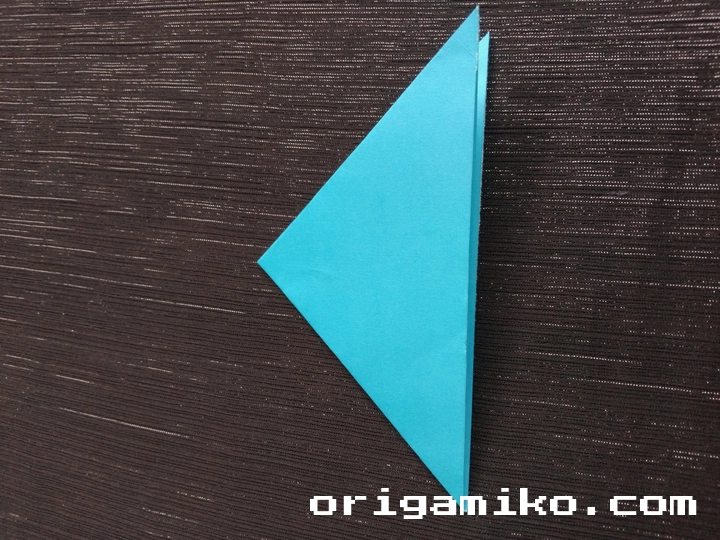
Half fold the paper four times to establish your base creases. Here’s how:
- Fold the paper in half horizontally, then unfold
- Fold in half vertically, then unfold
- Fold diagonally from corner to corner, then unfold
- Fold diagonally the other way, then unfold
These creases will guide your entire folding process.
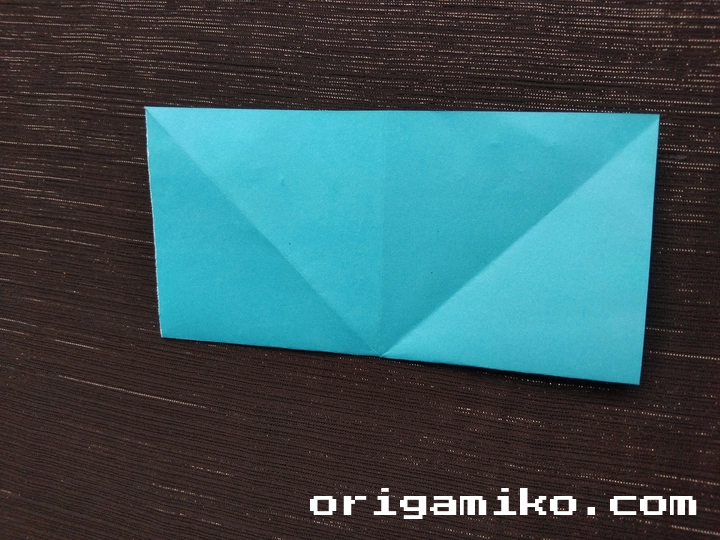
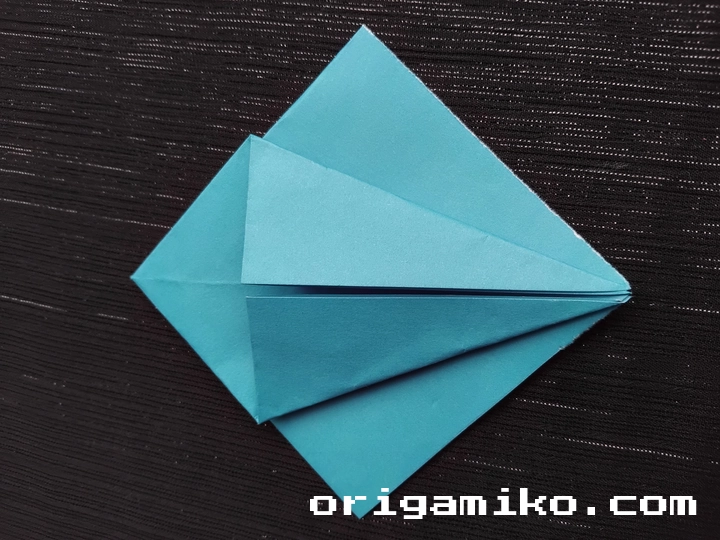
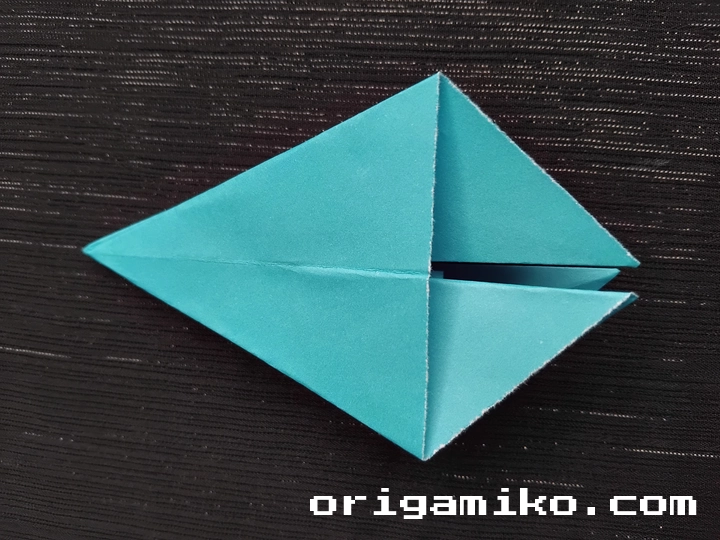
Step 3: Form the Base Structure
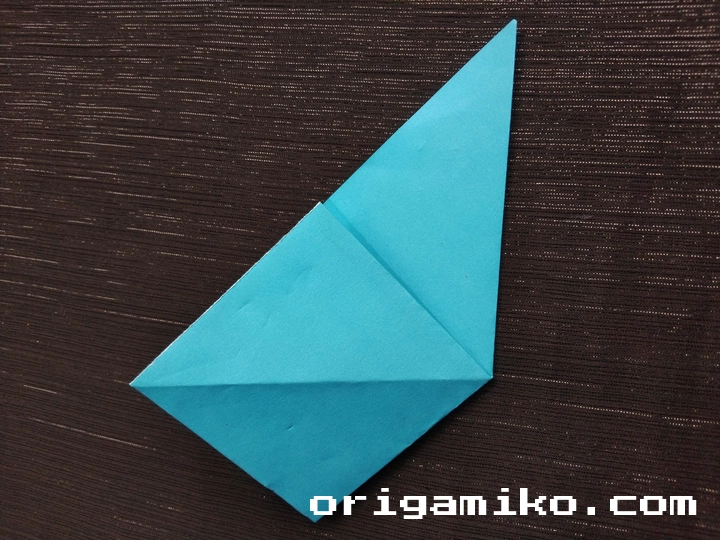
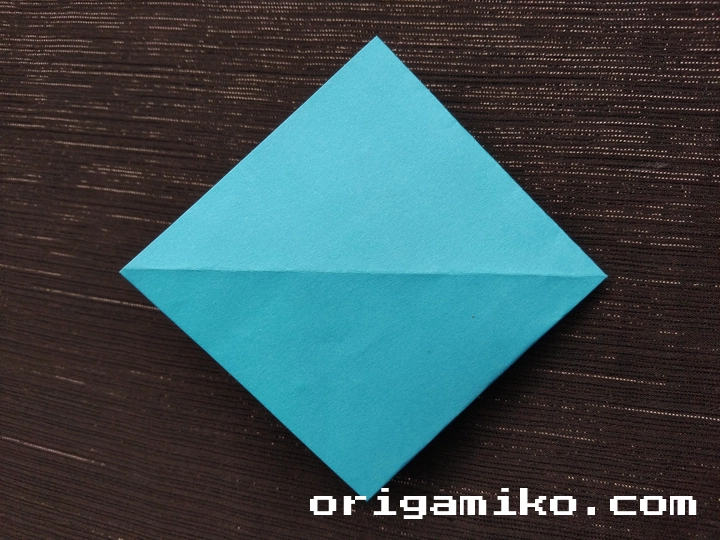
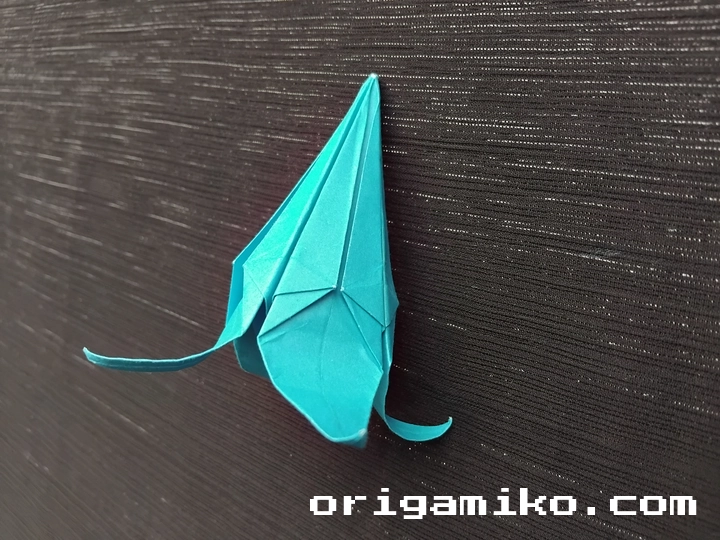
Fold like the picture reference and make a strong crease. This creates what we call the preliminary base in origami terminology. You should now have a smaller square with multiple layers.
Step 4: Shape the Lower Sections
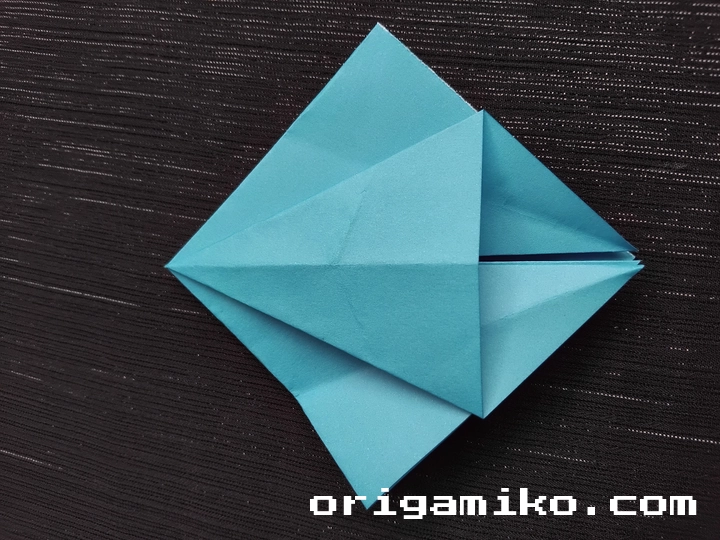
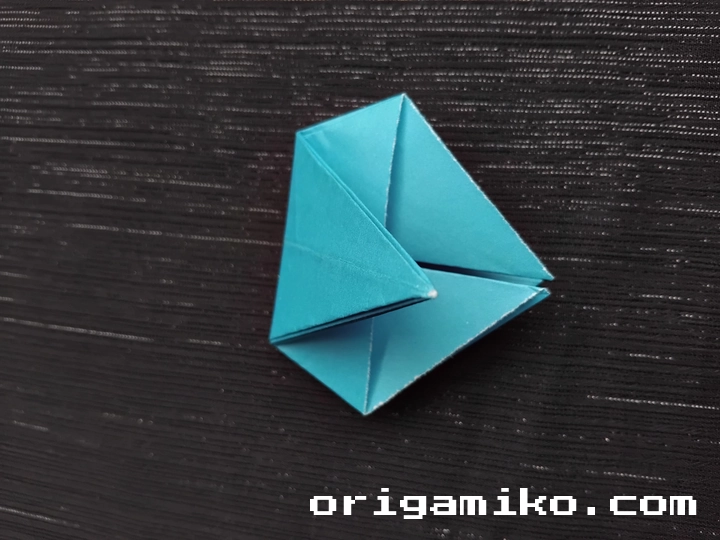
Fold both lower corners up toward the center line. Unfold these folds and create a petal fold like shown in the reference. This is where the magic starts happening!
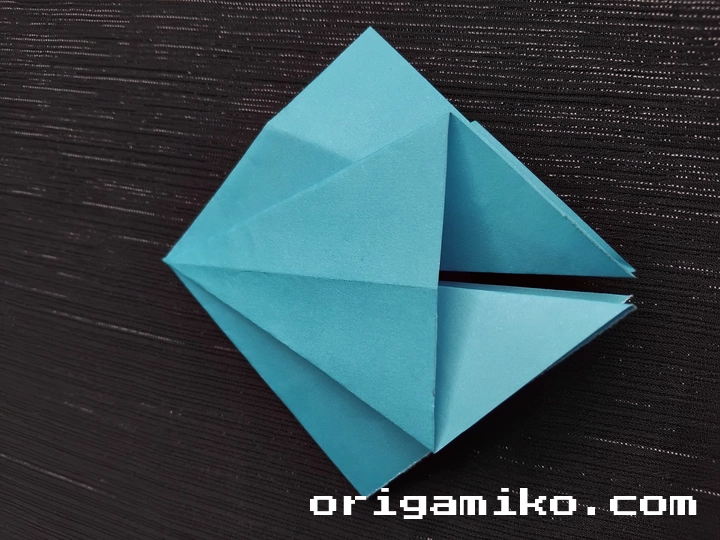
Repeat this process three more times, working your way around the entire piece. Then fold the structure from the middle to create dimension.
Step 5: Refine the Petals

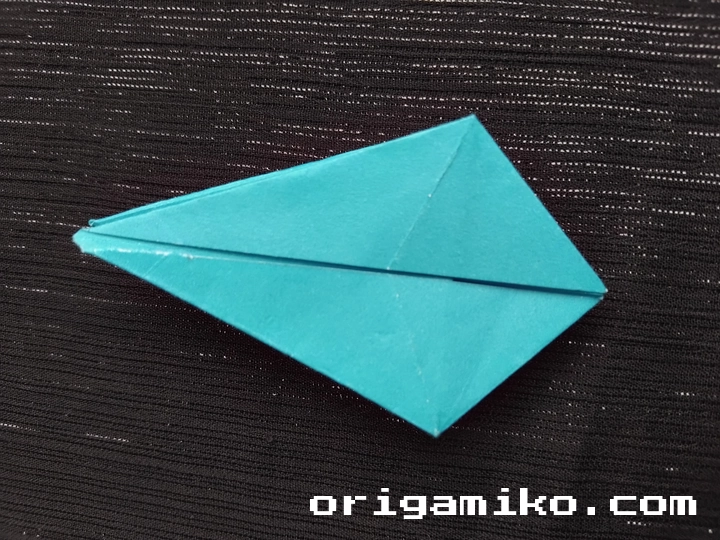
Fold the lower corners four times around the entire lily. This step requires patience—each fold should be precise and clean. These folds will eventually become the beautiful curved petals of your lily.
Step 6: Release and Prepare
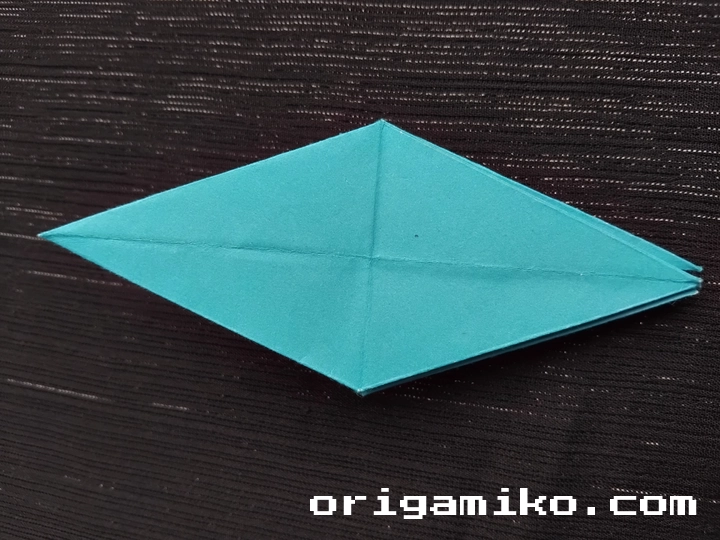
Unfold the paper completely. Don’t worry if it looks messy at this point—all those creases serve a purpose. You’re about to see them come together beautifully.
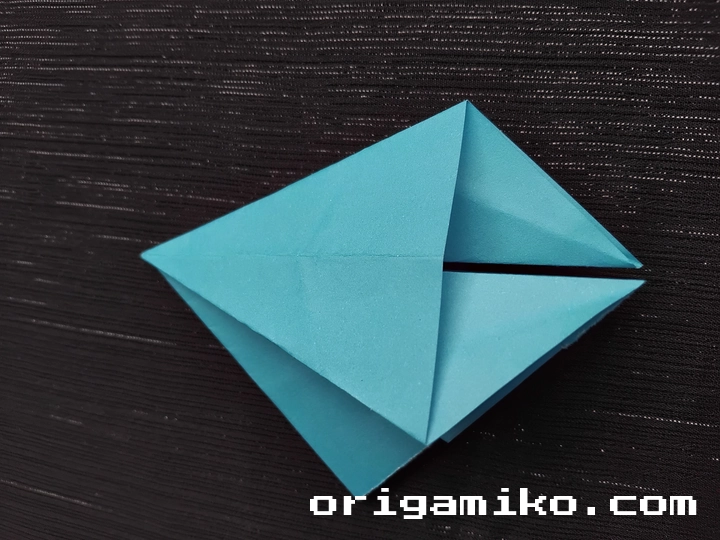
Step 7: Final Assembly

Fold the lower corners four times again, but this time, gently curve the petals as you work. This gives your lily its characteristic three-dimensional shape and natural appearance.
Step 8: Complete Your Lily
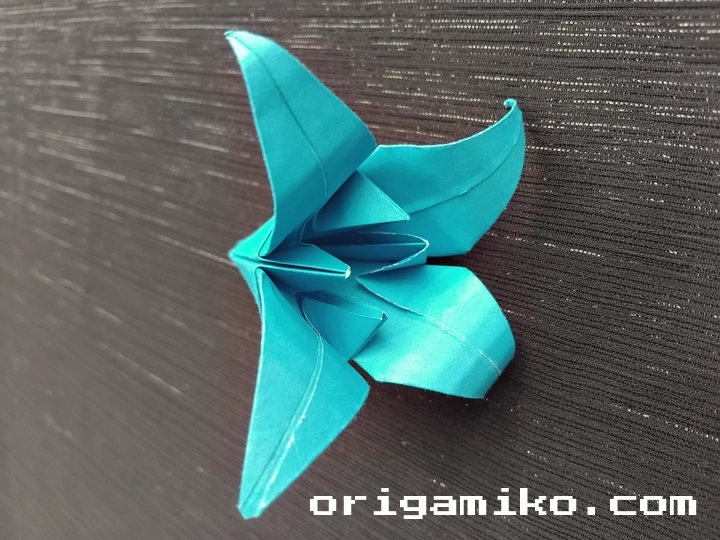
Your Origami Lily is now ready! Gently adjust the petals until you’re happy with the shape. Each lily will have its own unique character.
Tips for Success
Creating a perfect lily takes practice. Here are my favorite tips that’ll help you succeed:
Start with quality paper. Cheap paper tears easily and doesn’t hold creases well. Invest in proper origami paper—it makes a huge difference.
Work slowly and deliberately. I can’t stress this enough. Rushing through folds creates problems later in the process.
Make sharp, clean creases. Use your fingernail or a bone folder to really press down those fold lines. Weak creases lead to floppy flowers.
Practice the preliminary base first. This foundational fold appears in many origami projects. Master it, and you’ll have a head start on dozens of other models.
Don’t be afraid to start over. If something goes wrong early on, it’s often better to grab fresh paper than to fight with damaged folds.
Take breaks when frustrated. Origami should be relaxing. If you’re getting tense, step away for a few minutes.
Common Mistakes and How to Avoid Them
Every origami artist faces challenges. Here are the mistakes I see most often:
Uneven folds happen when you’re not aligning edges properly. Always double-check that your edges line up before making a crease.
Tearing the paper usually results from forcing folds or using too-thick paper. Be gentle and patient with each fold.
Loose petals occur when your creases aren’t sharp enough. Go back and reinforce any weak fold lines.
Lopsided flowers come from inconsistent folding pressure. Try to use the same amount of force for each similar fold.
Rushing through steps creates cumulative errors. Each step builds on the previous one, so take your time.
The key is patience and practice. Your first lily might not be perfect, but your tenth one will be stunning.
Similar Variations You Can Make
Once you’ve mastered the basic lily, try these exciting variations:
Multi-colored lilies using duo-colored paper create stunning two-tone effects. The inside and outside petals show different colors.
Miniature lilies made from smaller paper squares (6cm x 6cm) work beautifully for bouquets or gift decorations.
Kusudama lily balls combine multiple lilies into spherical arrangements. These make impressive centerpieces.
Lily pad combinations pair your lilies with origami lily pads for complete pond scenes.
Modular lily arrangements connect several lilies at their bases to create larger, more complex flowers.
Each variation teaches new techniques while building on your existing skills.
Troubleshooting Your Origami Lily
Sometimes things go wrong. Here’s how to fix common issues:
If your petals won’t stay curved, the paper might be too thick or your creases need reinforcement. Try scoring the fold lines more deeply.
When the lily won’t stand properly, check that your base folds are even and the center is properly collapsed.
If petals tear during the curving process, you’re likely being too aggressive. Gentle, gradual curves work better than sharp bends.
For lilies that look flat instead of dimensional, revisit the preliminary base. This foundational structure creates the lily’s height and depth.
Displaying Your Finished Lily
Your completed lily deserves proper presentation. Here are some display ideas I love:
Place it in a small vase with other origami flowers for a permanent bouquet. These never wilt or need water!
Use it as a table decoration for special dinners. Guests always ask about handmade origami flowers.
Create a shadow box display with multiple lilies in different colors and sizes.
Attach it to greeting cards for unique, personal gifts that recipients treasure.
Advanced Techniques for Experienced Folders
Ready to take your lily to the next level? Try these advanced approaches:
Wet folding involves slightly dampening the paper before folding. This creates softer, more organic curves but requires special paper and careful timing.
Complex color changes use strategic color placement to create realistic lily markings and gradients.
Hybrid models combine lily techniques with other origami flowers for unique creations.
Modular construction breaks the lily into separate parts that assemble into the final flower.
These techniques require solid fundamental skills, so master the basic lily first.
FAQs
Q: How long does it take to make an Origami Lily? A: For beginners, expect 20-30 minutes. With practice, you can complete one in under 10 minutes.
Q: What’s the best paper size for learning? A: Stick with 13cm x 13cm as specified. Larger paper is actually harder to manage for beginners.
Q: Can I use regular printer paper? A: Yes, but origami paper works much better. Printer paper is thicker and doesn’t hold creases as well.
Q: Why do my petals keep unfolding? A: Your creases probably aren’t sharp enough. Really press down hard when making fold lines.
Q: Is this suitable for children? A: Children aged 8 and up can usually manage this project with some adult guidance.
Q: How do I make the lily more stable? A: Ensure all your preliminary folds are crisp and even. A strong foundation creates a stable final model.
The Journey Continues
Learning how to make Origami Lily opens doors to countless other paper folding adventures. Each fold teaches you something new about precision, patience, and creativity.
This Simple Origami Lily Step by step process gives you foundation skills for more complex projects. Keep practicing, keep folding, and most importantly, keep enjoying this wonderful art form that transforms simple paper into lasting beauty.