

Ever wonder how to make an Origami Lotus that looks delicate, elegant, and completely doable at home? You’re not alone. I used to think it was tricky too.
Then I tried it. One fold at a time. And what started as a plain square of paper bloomed—literally—into something enchanting.
In this guide, I’ll walk you through a simple lotus step by step. It’s calming. It’s fun. And by the end, you’ll have your very own paper lotus, no stress included.
What Are We Making? The Charm of the Origami Lotus
Let me paint a picture.
A soft, blooming lotus flower—crafted from nothing but a square piece of paper. No glue. No scissors. Just pure paper folding, inspired by the beauty of nature and the precision of Japanese origami art.
The Origami Lotus isn’t just a paper project. It’s a quiet ritual. A moment of stillness. A way to connect your fingers and mind in creating something truly elegant.
And the best part? This is an easy origami lotus. With a few clear folds, you’ll go from beginner to blooming expert.
Materials Needed
Before we dive into the folds, let’s get you set up right. Here’s everything you need to create your Origami Lotus flower.
| Item | Description | Quantity | Notes |
|---|---|---|---|
| Square Origami Paper | 10 cm x 10 cm | 1 sheet | Any color you love |
| Flat Surface | Table or desk | 1 | Clean and smooth |
| Patience | You’ll need a touch of this | Unlimited | Trust me, it’s worth it |
Tip: Try thinner paper if you’re a beginner. It folds easily and holds shape well.
Key Terms to Know
Origami
The Japanese art of paper folding to create decorative shapes and models.
Valley Fold
Folding the paper toward you, creating a “V” shape.
Mountain Fold
Folding the paper away from you, making a peak.
Squash Fold
Flattening a folded flap to create new points or petals.
How to Make Origami Lotus: Step-by-Step Instructions
Ready to fold? Grab that square sheet and let’s begin!

Step 1: Start with a Square
- Use a 10 cm x 10 cm square paper.
- Place it in front of you, color side down if it’s double-sided.
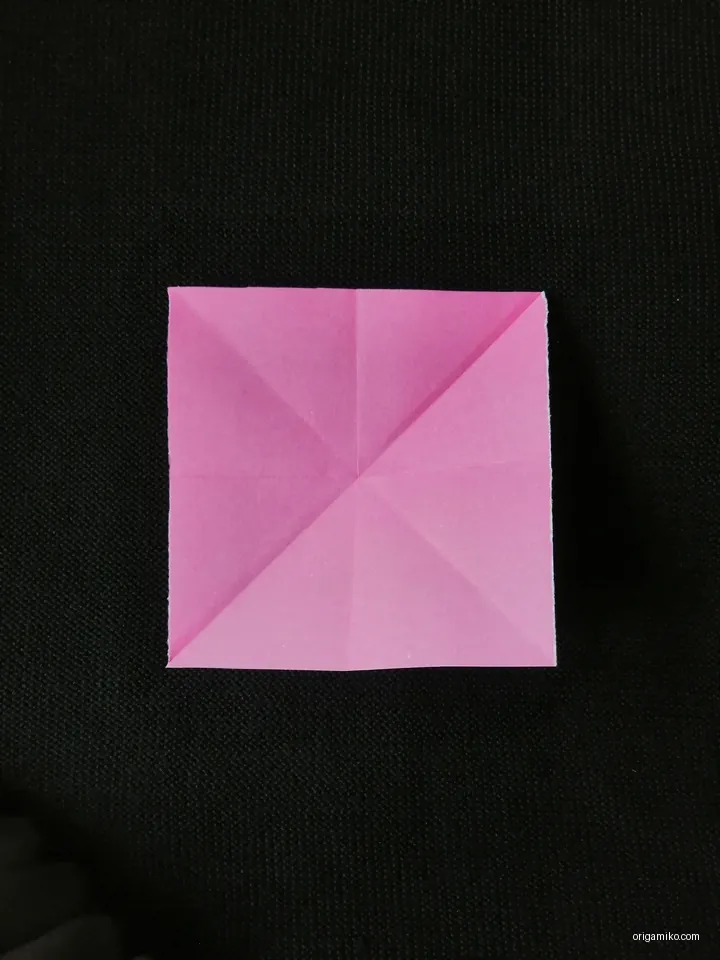
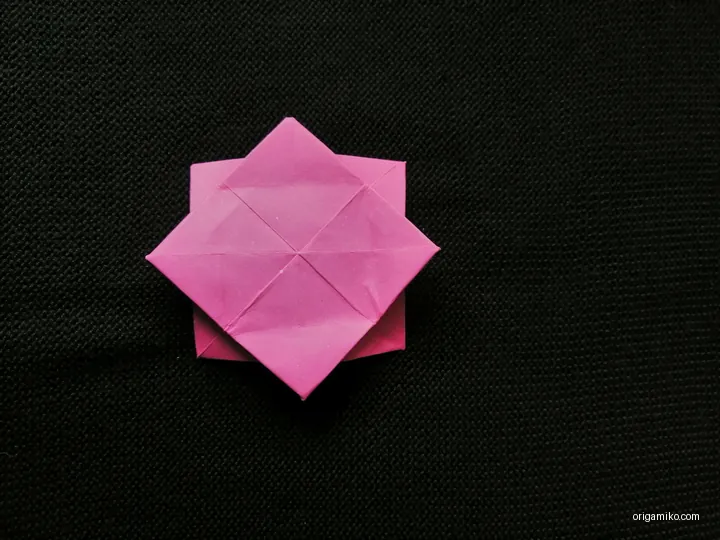
Step 2: Fold All Corners to the Center

- Take each corner and fold it neatly into the middle of the square.
- Press down the folds firmly.
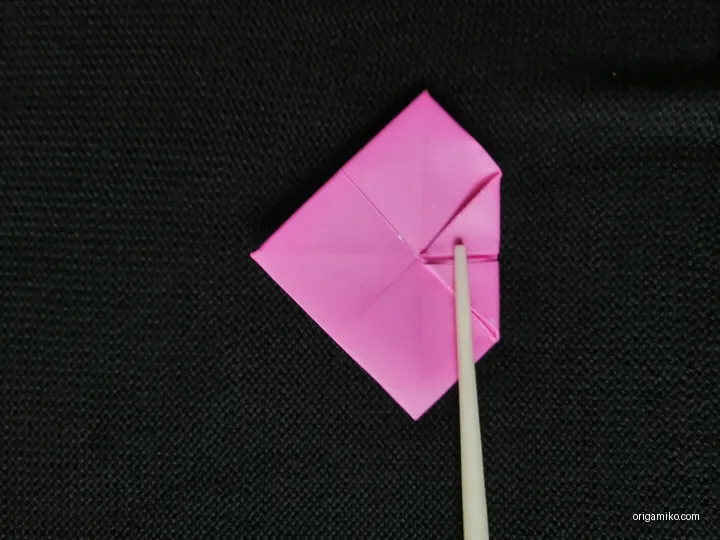
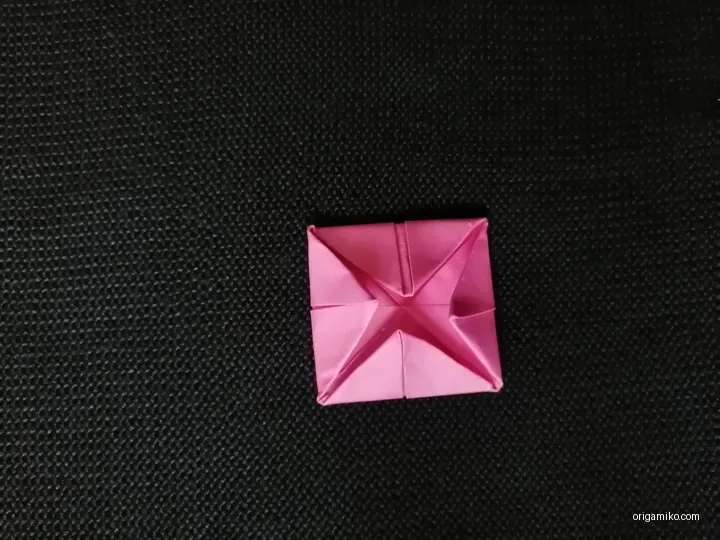
- Now flip the paper over and do the same thing again—fold all corners to the center.
- Flip it over one more time and repeat the process once again. Yep, it’s like folding a box within a box.
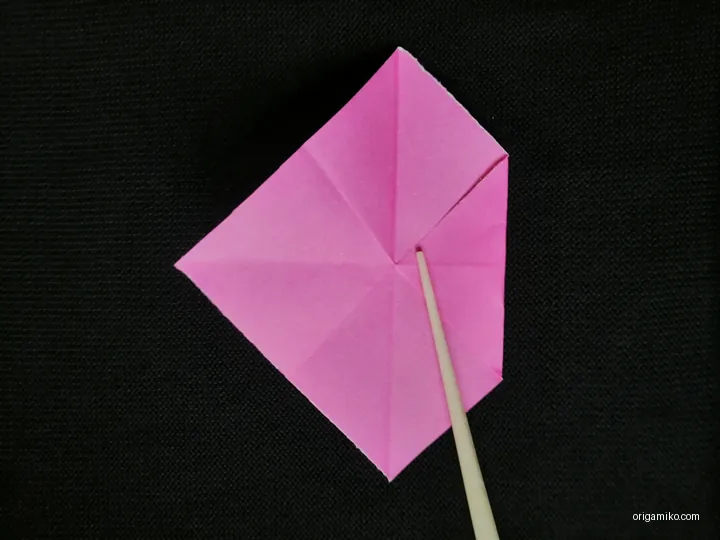
Step 3: Turn Over and Fold Like the Picture
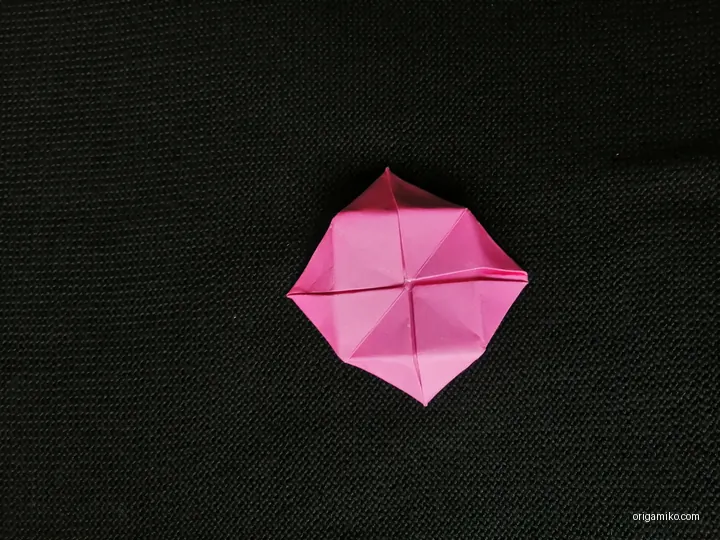

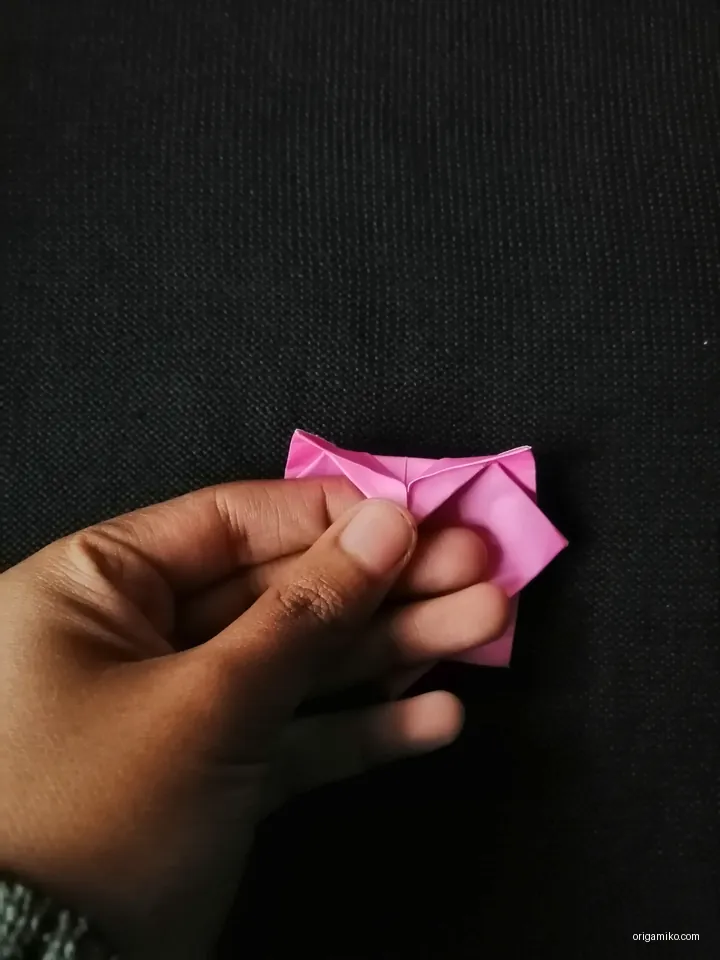

- Once all three layers are done, flip the paper.
- Fold the new edges just like you’d see in a lotus petal—outward and upward.
- You’ll notice flaps forming behind. That’s where the next magic happens.
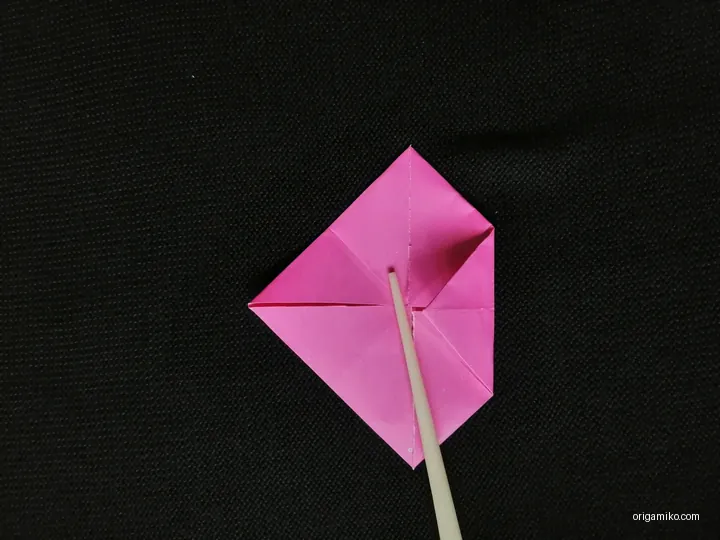
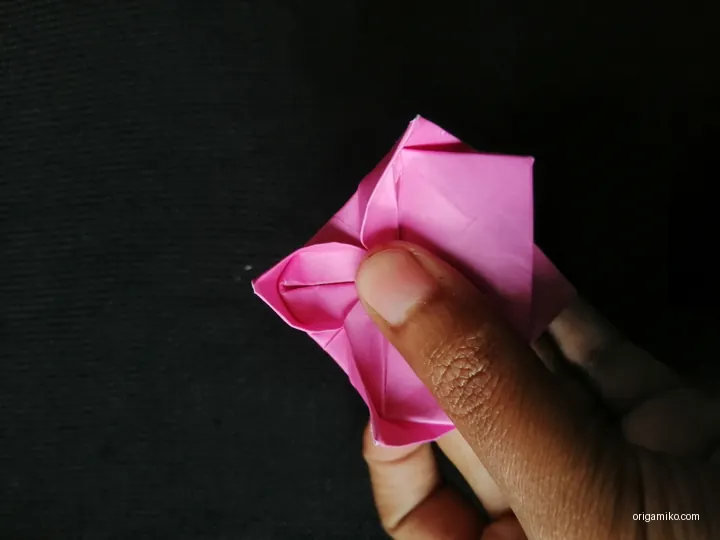
Step 4: Peel the Backside Petals
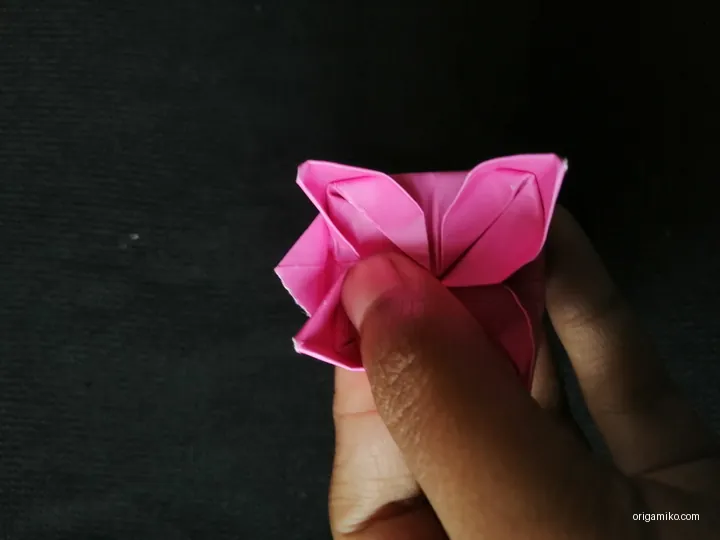
- Gently peel the back flaps (the hidden corners beneath).
- Lift and curl each petal outward to give it that blooming look.
- Adjust slightly for symmetry. It doesn’t need to be perfect—just beautiful.
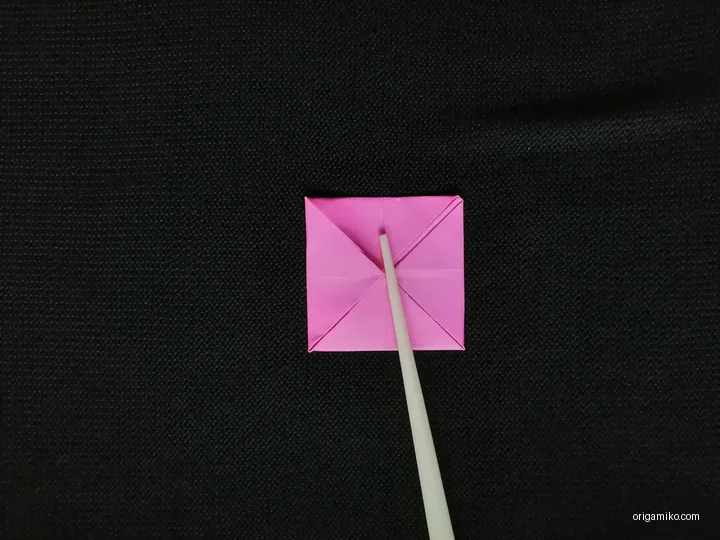
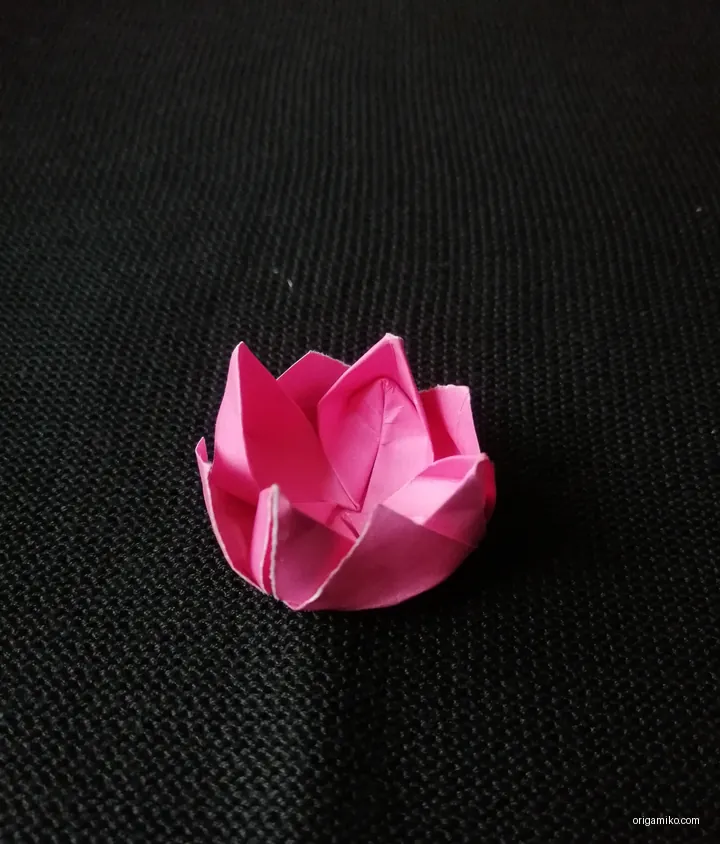
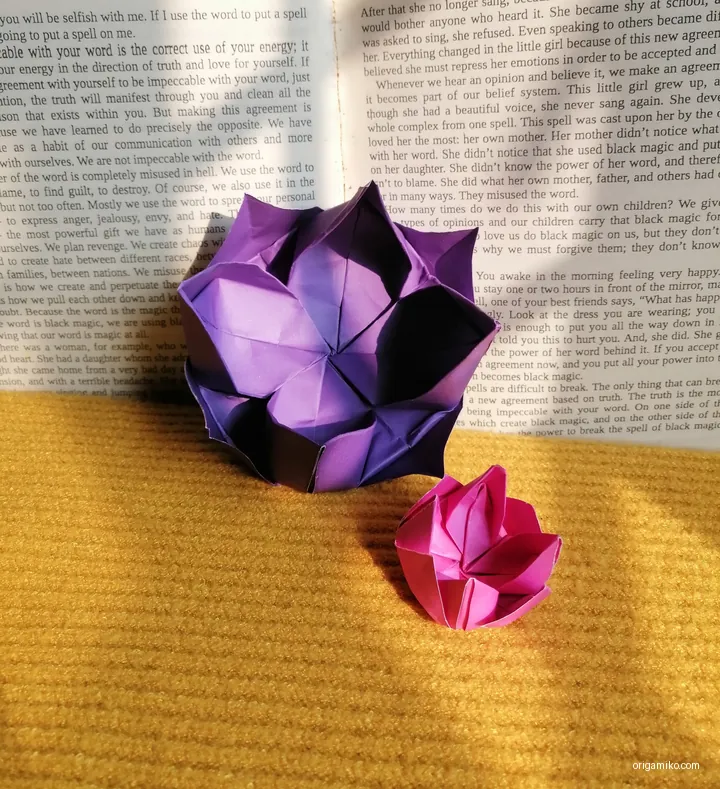
Step 5: Admire Your Lotus
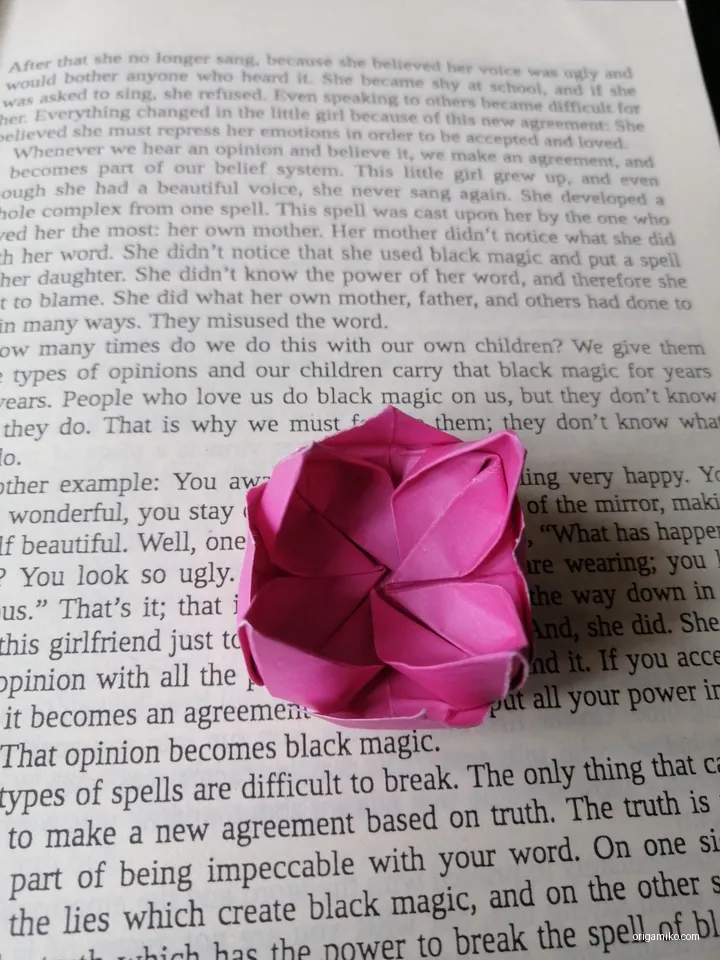
And there it is. Your Origami Lotus is complete!
Doesn’t it feel good to make something that looks this serene?
Tips for Success
Want your lotus to look crisp and clean? Follow these quick tips:
- Crease sharply: Press each fold firmly. A good crease means a tidy result.
- Stay centered: Keep every fold aligned with the middle for a symmetrical lotus.
- Use thin paper: Thick paper makes petals bulky and hard to peel.
- Be gentle: Especially when peeling petals outward. Slow is smooth.
Common Mistakes and How to Avoid Them
We’ve all made these. No shame—just solutions.
- Misaligned folds?
Slow down and double-check your corner placements. - Paper tearing?
You might be using paper that’s too thick or creasing too hard. - Uneven petals?
Try measuring your folds or marking very lightly with a pencil. - Can’t peel the back part?
That usually means folds weren’t deep enough. Firm those creases up earlier.
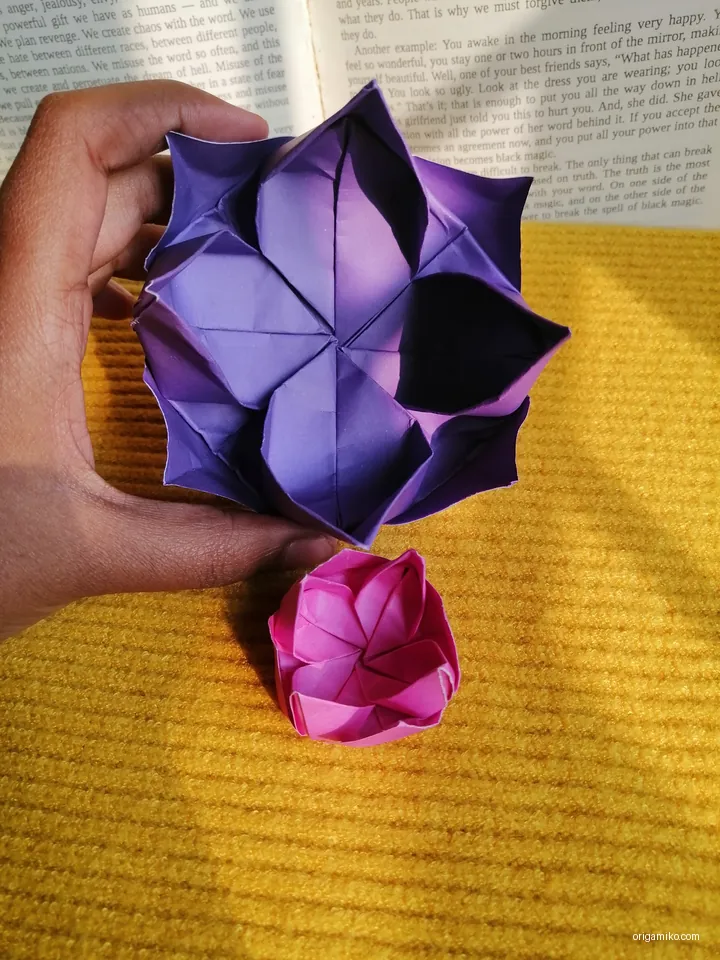
Similar Variations You Can Try
Once you’ve made one, why stop there? Try these fun twists:
- Mini Lotus Garland
Use 5 cm x 5 cm paper and thread them together. - Two-Tone Lotus
Use double-sided paper to give each petal a surprise color inside. - Floating Lotus
Make it with wax paper or tissue and float it in water for events or meditations. - Lotus Gift Toppers
Use these to decorate gifts or add to greeting cards.
FAQs
How long does it take to make an Origami Lotus?
About 5–10 minutes, depending on your speed and experience.
Can kids make this too?
Absolutely! Just help them with the petal peeling step.
Is there a video tutorial?
You can find plenty online—but with this guide, you might not even need one.
Can I use bigger paper?
Yes, just keep it square. Bigger paper gives you bigger, bolder flowers.
Final Thoughts
So there you have it—how to make origami lotus in the simplest way possible. From flat paper to blooming beauty in five easy steps.
Whether you’re decorating your space, calming your mind, or just folding for fun, this easy origami lotus will always be a satisfying craft. Give it a go—and hey, I’d love to hear how your lotus turns out.
What would you like to fold next?