Close Menu
    Facebook X (Twitter) Instagram
    Facebook X (Twitter) Instagram
    Origamik
    Subscribe
    • Easy Origami

      30+ Dollar Bill Origami You Need to Try

      July 30, 2025

      45+ Fall Origami Ideas You Need to Try

      July 30, 2025

      15+ Origami Bookmarks You Need to Try

      July 29, 2025

      15+ Useful Origami You Need to Try

      July 29, 2025

      15+ Sticky Note Origami You Need to Try

      July 29, 2025
    • Functional Origami

      55+ Functional Origami You Need to Try

      July 28, 2025

      Easy Origami Gloves: Your Gateway to Magical Paper Folding

      July 23, 2025

      The Complete Guide to Making an Easy Origami Diamond

      July 23, 2025

      The Complete Guide to Creating an Easy Origami Combined Cube

      July 23, 2025

      How to Make an Easy Origami Samurai Hat (Simple Samurai Hat Step by Step)

      May 14, 2025
    • Gum Wrapper Origami

      8 Easy Gum Wrapper Origami

      July 28, 2025

      Easy Gum Wrapper Hearts Origami

      July 23, 2025

      Easy Gum Wrapper Crane Origami: Turn Trash Into Treasure

      July 23, 2025

      How to Make an Easy Gum Wrapper Star Origami: Your Complete Guide

      July 23, 2025

      The Ultimate Guide to Creating Beautiful Gum Wrapper Origami Butterflies

      July 23, 2025
    • Origami Flower

      18 Origami Leaves You Need to Try

      July 23, 2025

      The Complete Guide to Creating Your First Easy Origami Cherry

      July 23, 2025

      The Complete Guide to Creating a Beautiful Easy Origami Lily

      July 23, 2025

      11 Origami Roses You Need to Try

      July 22, 2025

      25+ Origami Flowers You Need to Try

      July 16, 2025
    • Origami For Beginners
      1. Origami Box
      2. Origami Heart
      3. Origami Star
      4. View All

      29+ Origami Boxes You Need to Try

      July 26, 2025

      How to Make an Easy Origami Divider Box (Simple Divider Box Step by Step)

      April 25, 2025

      Origami Magic Box Instructions: A Fun and Simple Paper Folding Project

      February 8, 2025

      How to Make an Easy Origami Star Box (Step by Step Guide)

      February 8, 2025

      35+ Origami Heart Ideas

      July 27, 2025

      How to Make an Origami Heart Box with Lid: Step-by-Step Guide

      February 8, 2025

      Easy Origami Heart with Blossom: A Step-by-Step Guide

      February 8, 2025

      How to Make an Origami Secret Heart Box

      January 23, 2025

      10 Origami Star Ideas You Need to Try

      July 22, 2025

      How to Make an Easy Origami 5 Pointed Star

      February 8, 2025

      Origami 6 Pointed Star: Step-by-Step Guide for Beginners & Experts

      February 8, 2025

      How to Make an Easy Origami Diamond Star: Step-by-Step Guide

      February 8, 2025

      30+ Dollar Bill Origami You Need to Try

      July 30, 2025

      17+ Origami Vehicles You Need to Try

      July 29, 2025

      15+ Useful Origami You Need to Try

      July 29, 2025

      35+ Cool Origami Ideas You Need to Try

      July 29, 2025
    • Sticky Note Origami

      15+ Sticky Note Origami You Need to Try

      July 29, 2025

      How to Make an Easy Origami Sticky Note Bookmark: A Step-by-Step Guide

      April 25, 2025

      How to Make Easy Origami Sticky Note Claws – Simple, Fierce, and Fun

      April 25, 2025

      How to Make an Easy Origami Sticky Note Fidget Toy

      April 25, 2025

      How to Make an Easy Origami Sticky Note Gown: Step-by-Step for Beginners

      April 25, 2025
    Origamik
    Home » How to Make an Easy Origami Minibag (Simple Step-by-Step Guide)
    Functional Origami

    How to Make an Easy Origami Minibag (Simple Step-by-Step Guide)

    Orig AmiBy Orig AmiApril 25, 2025Updated:October 22, 2025No Comments5 Mins Read
    Facebook Twitter Pinterest LinkedIn Tumblr Email
    Featured image for How to Make an Easy Origami Minibag (Simple Step-by-Step Guide)
    Featured image for How to Make an Easy Origami Minibag (Simple Step-by-Step Guide)
    Share
    Facebook Twitter LinkedIn Pinterest Email

    Ever wondered how to make minibag that’s both cute and useful? This easy Origami minibag is a fun little project that anyone can try—no experience required.

    Folding paper into something as stylish as a bag? Yep. It’s not just possible—it’s pretty satisfying too.

    Stick around, because I’ll walk you through each fold, flap, and crease in this simple minibag step by step. Let’s do this together.


    What’s an Origami Minibag?

    An Origami minibag is a tiny paper bag made entirely by folding a single square of paper. No scissors. No glue. Just you and the folds.

    It’s not only cute—it’s also surprisingly sturdy. I’ve used mine to hold paper clips, tea bags, even tiny treats at a party.

    And the best part? It feels like a little piece of magic. You start with a flat sheet, follow the folds, and suddenly—bam! You’ve got a bag.


    Why You’ll Love This Origami Project

    If you’re looking for something:

    • Relaxing but satisfying
    • Creative but structured
    • Quick but impressive

    Then this Origami minibag is exactly your kind of thing. Whether you’re folding solo on a rainy afternoon or showing a classroom full of eager hands, this project delivers.


    Materials Needed

    Let’s start with the basics. You’ll need just a few things.

    MaterialDetailsAlternatives
    Paper Size9″ × 9″ square paperAny square sheet (6″, 12″, etc.)
    Paper TypeLightweight origami paperPrinter paper, gift wrap, craft paper
    Optional Add-onsDecorative strips for handlesWashi tape, colored strips, ribbons
    WorkspaceClean, flat surfaceDesk, table, tray
    Folding Tool (optional)Bone folder or ruler edgeFingernail, spoon handle

    Let’s Fold: Origami Minibag Instructions (Step-by-Step)

    Alright, now for the fun part. Grab your paper, and follow along.

    Step 1: Start with a Square

    Origami minibag step 1
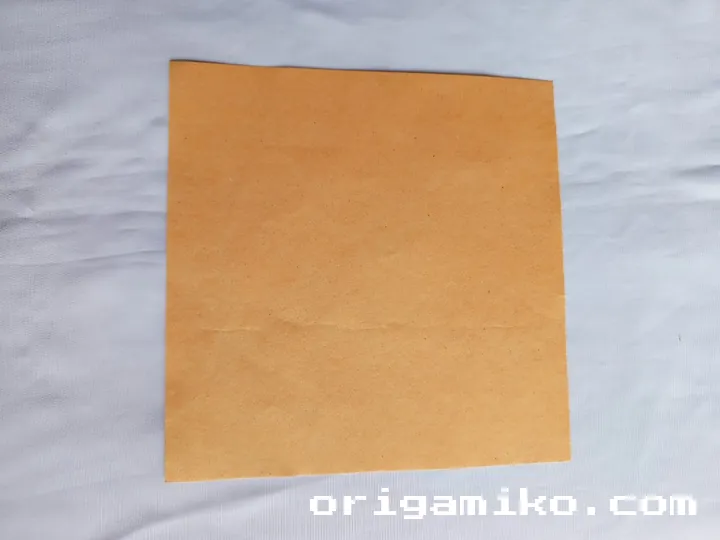
    • Take your 9″ × 9″ square paper.
    • Place it on a flat surface, pattern side down (if it has one).

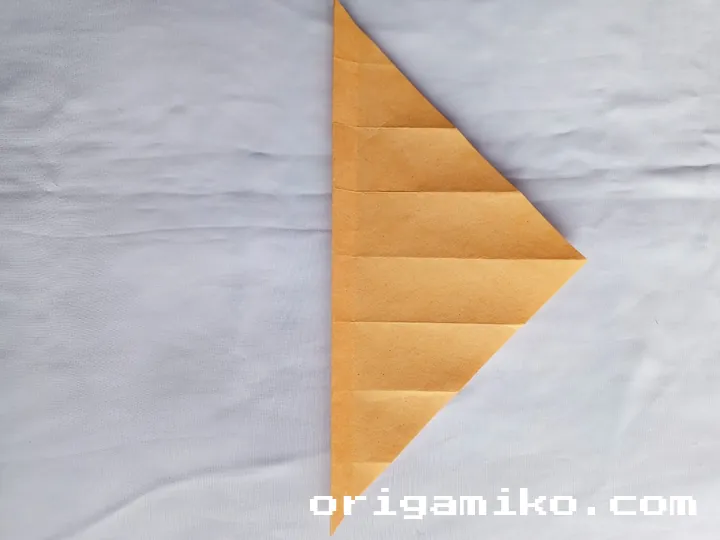
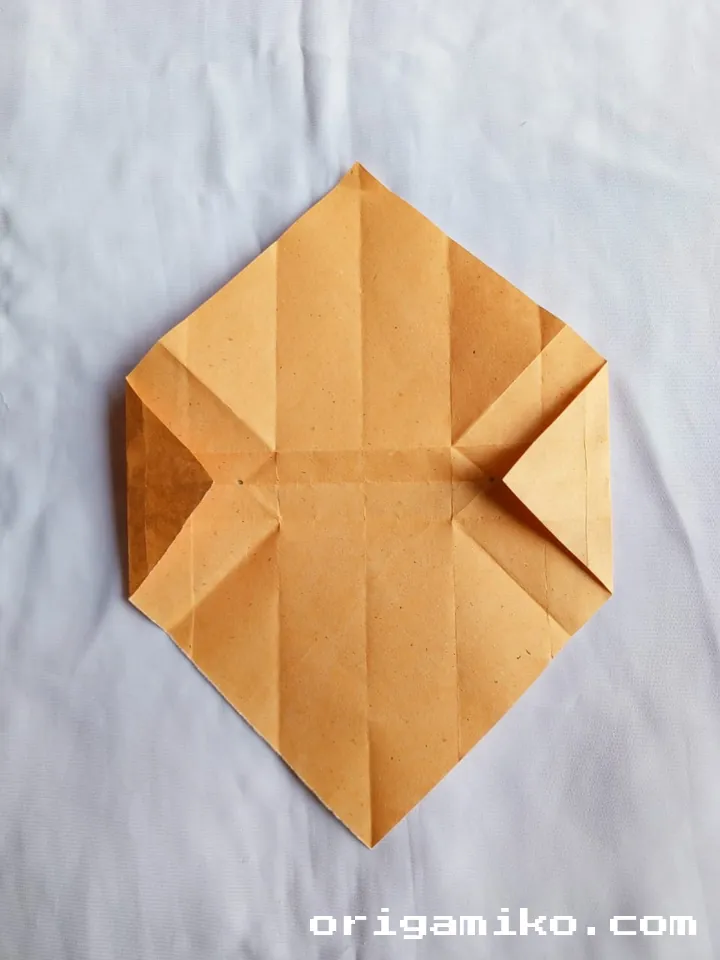
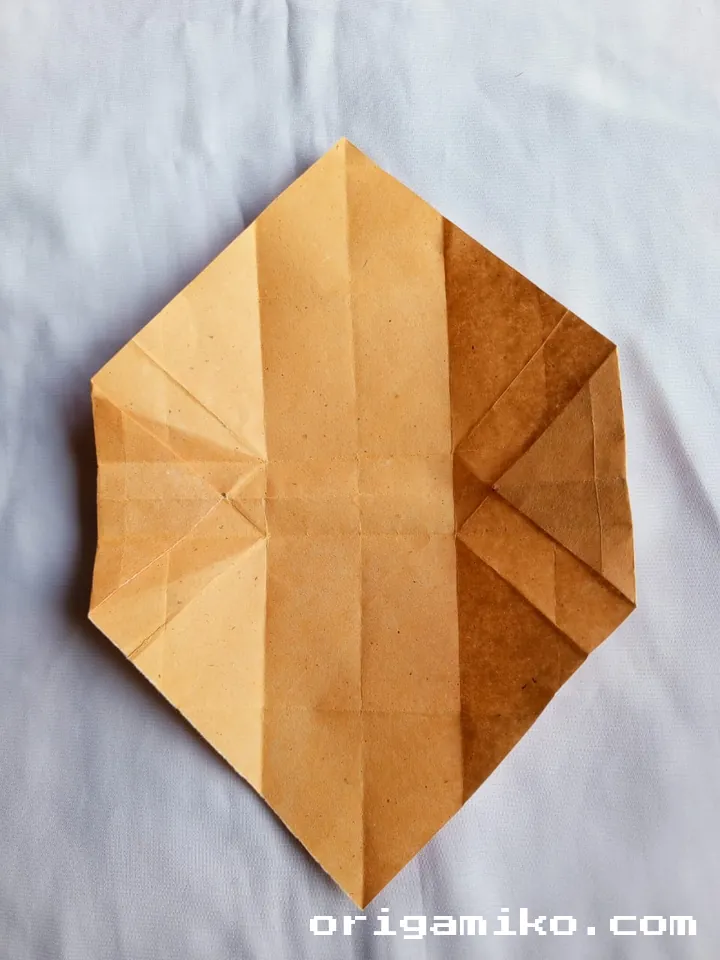
    Step 2: Fold and Unfold All Corners

    Origami minibag step 2 a
    Origami minibag step 2 b
    Origami minibag step 2 c
    Origami minibag step 2 d
    Origami minibag step 2 e
    Origami minibag step 2 f
    Origami minibag step 2 g
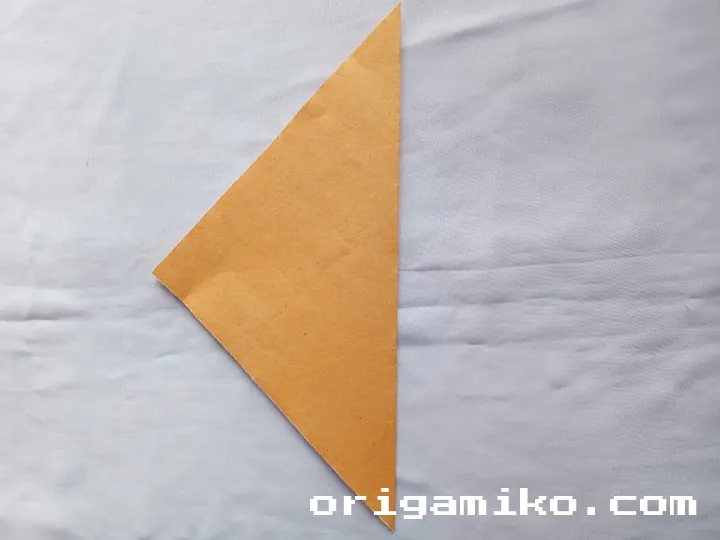
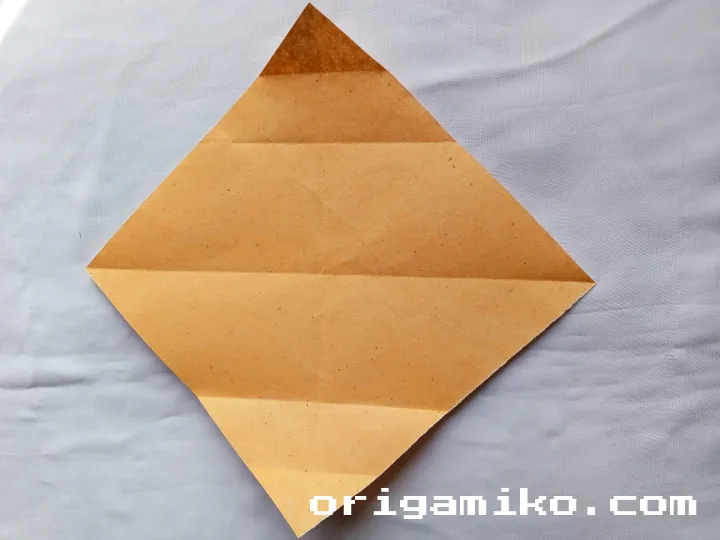
    • Fold the top-left corner to the bottom-right, crease, then unfold.
    • Fold the top-right corner to the bottom-left, crease, then unfold.
    • Repeat for the remaining two corners.
    • When you’re done, your paper should look like a big “X” in crease lines.

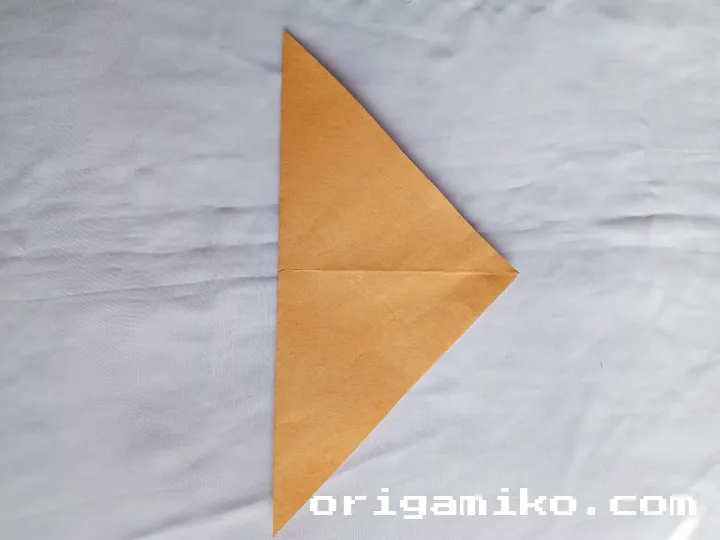
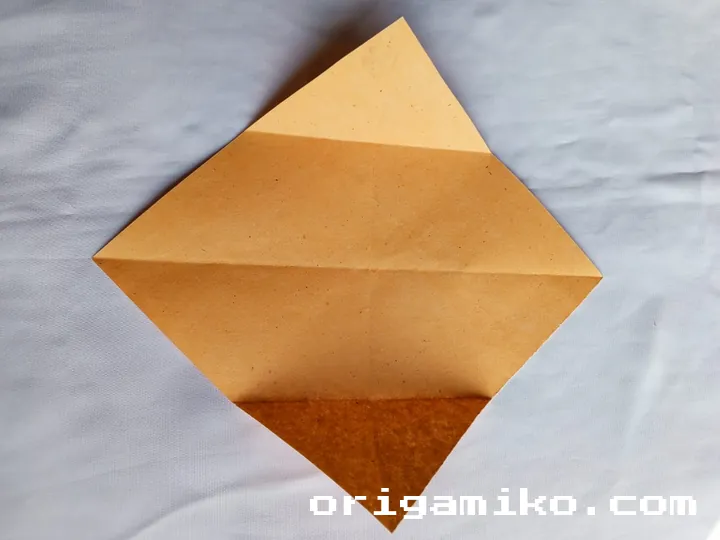
    Step 3: Fold and Unfold As Shown

    Origami minibag step 3 a
    Origami minibag step 3 b
    Origami minibag step 3 c
    Origami minibag step 3 d
    Origami minibag step 3 e
    Origami minibag step 3 f
    Origami minibag step 3 g
    Origami minibag step 3 h
    Origami minibag step 3 i
    Origami minibag step 3 j
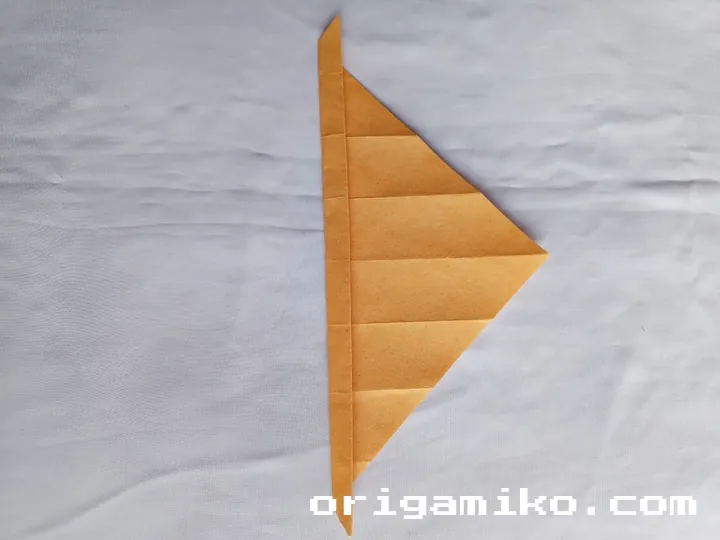
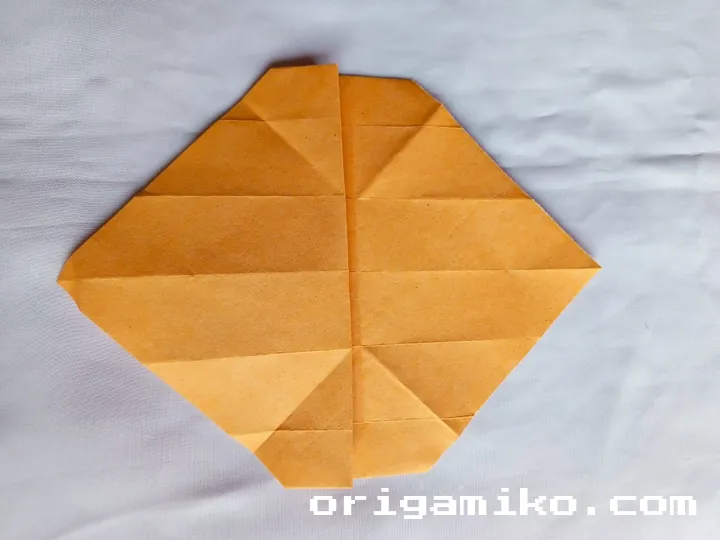
    • This one’s about locking in symmetry.
    • Fold the top edge to meet the bottom edge. Crease. Unfold.
    • Fold the left edge to meet the right edge. Crease. Unfold.

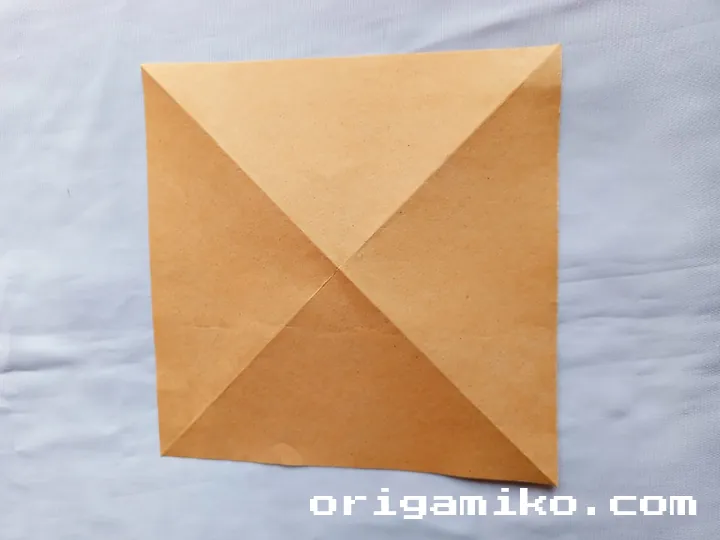
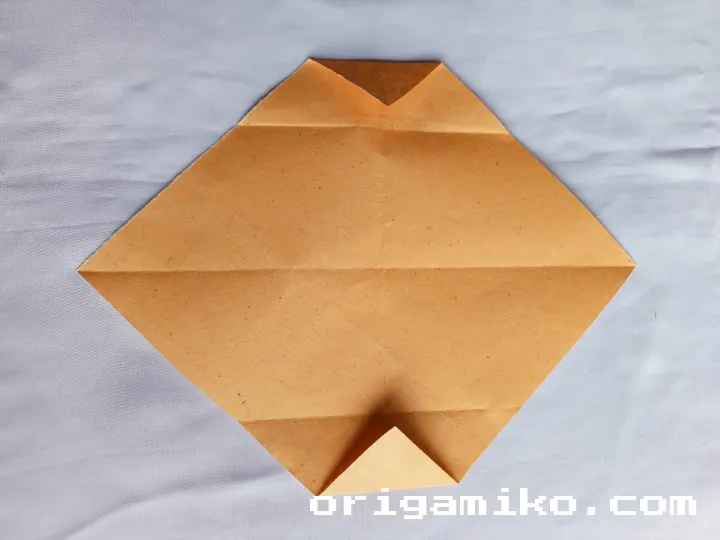
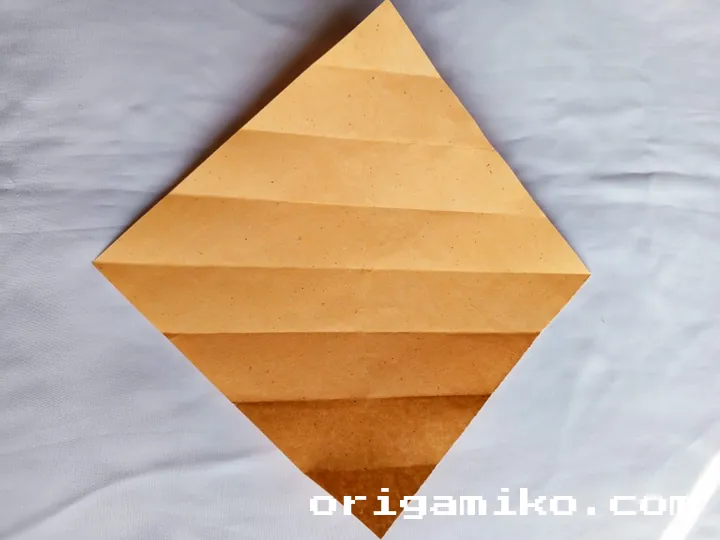
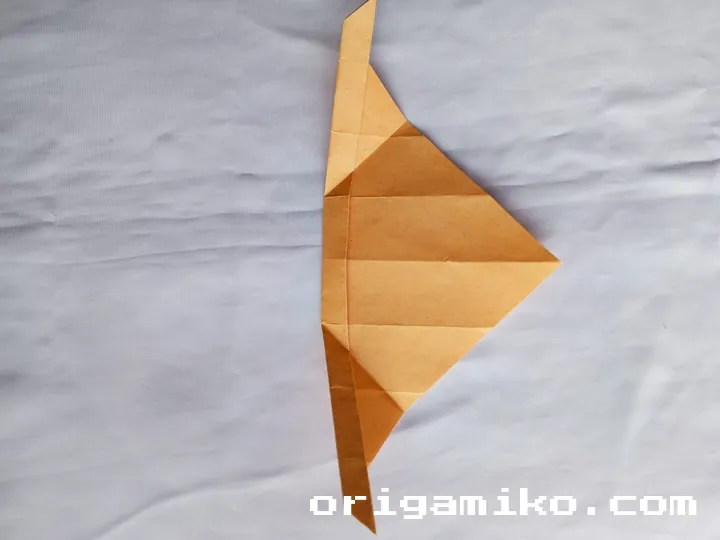
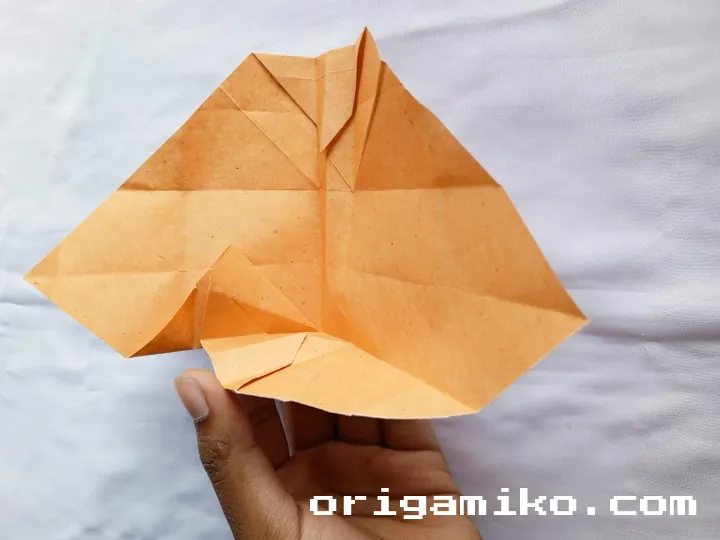
    Step 4: Pre-Crease the Main Bag Sections

    Origami minibag step 4 a
    Origami minibag step 4 b
    Origami minibag step 4 c
    Origami minibag step 4 d
    Origami minibag step 4 e
    • Fold both vertical sides inward toward the center crease. Unfold.
    • Now fold the paper horizontally in half (top to bottom). Unfold.

    This gives you a neat grid with creases guiding you for the next folds.

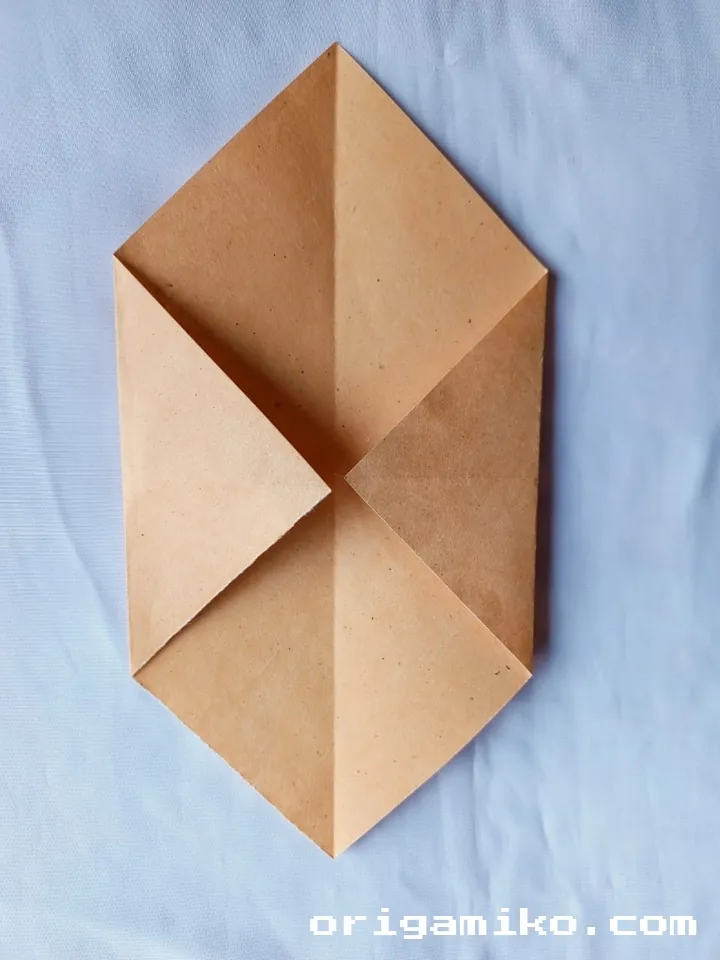
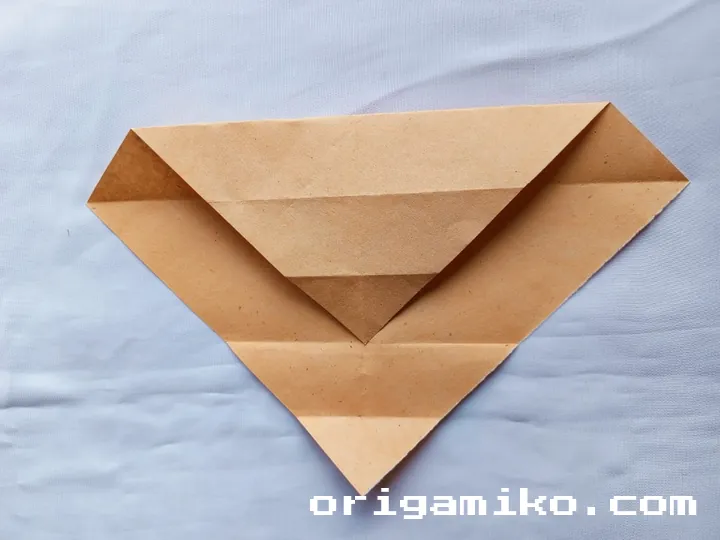
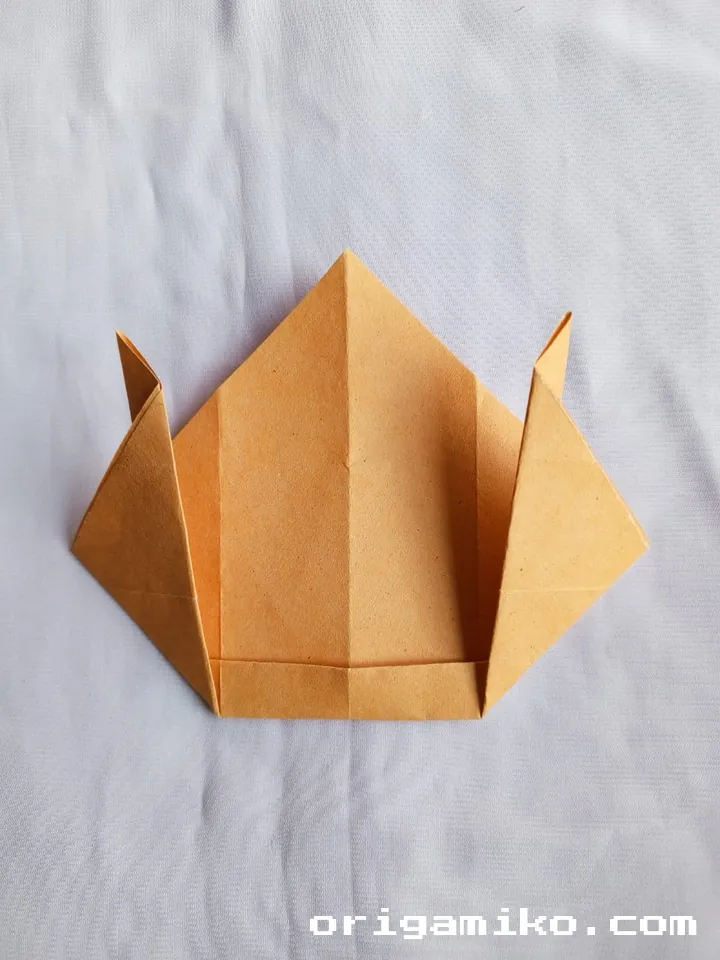
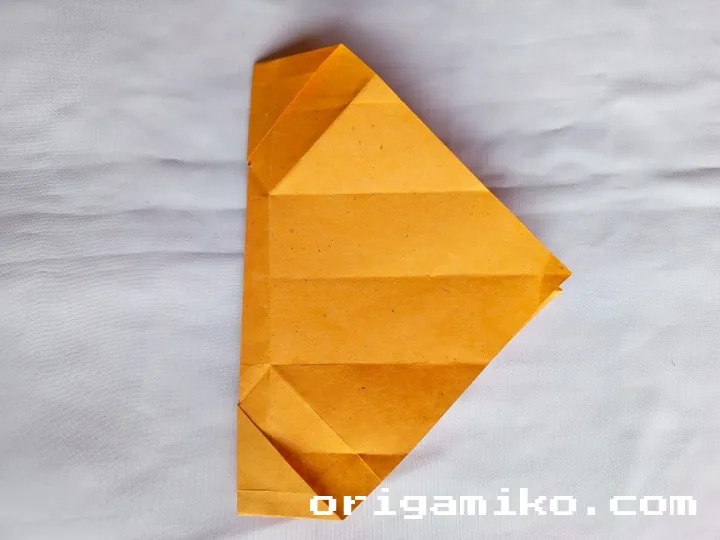
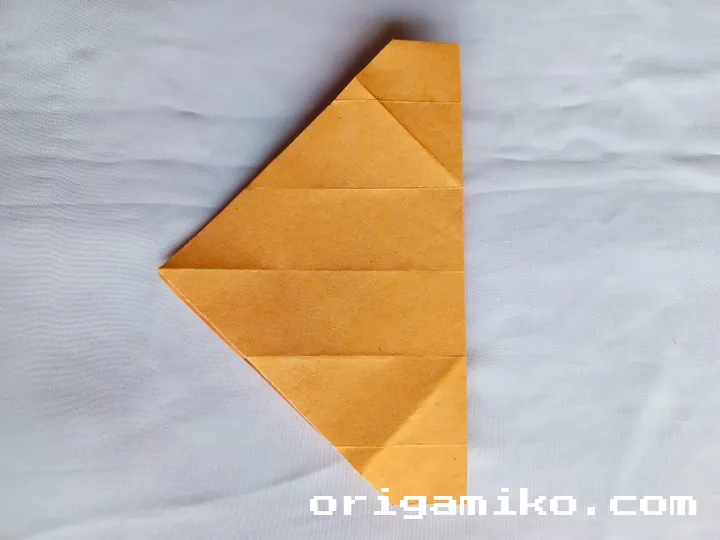
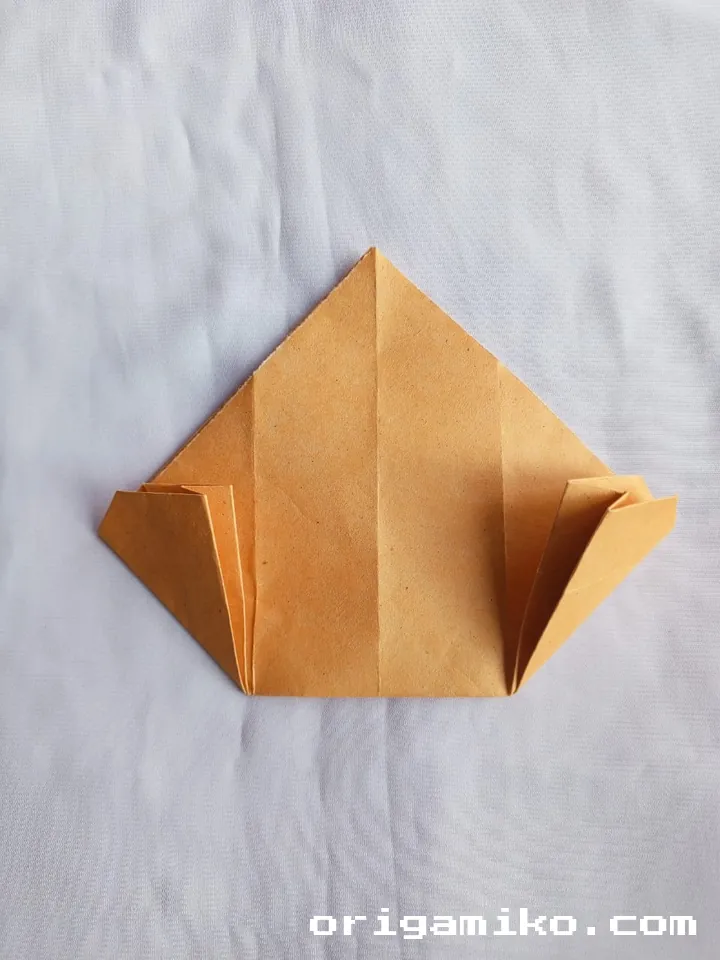
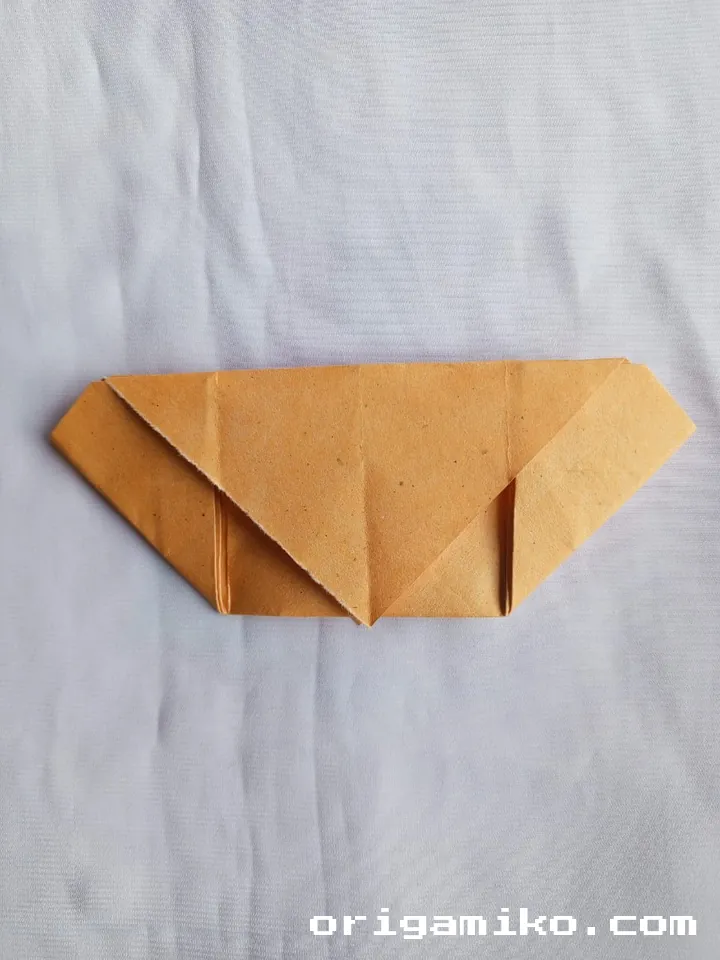
    Step 5: Shape the Sides of the Bag

    Origami minibag step 5 a
    Origami minibag step 5 b
    Origami minibag step 5 c
    Origami minibag step 5 d
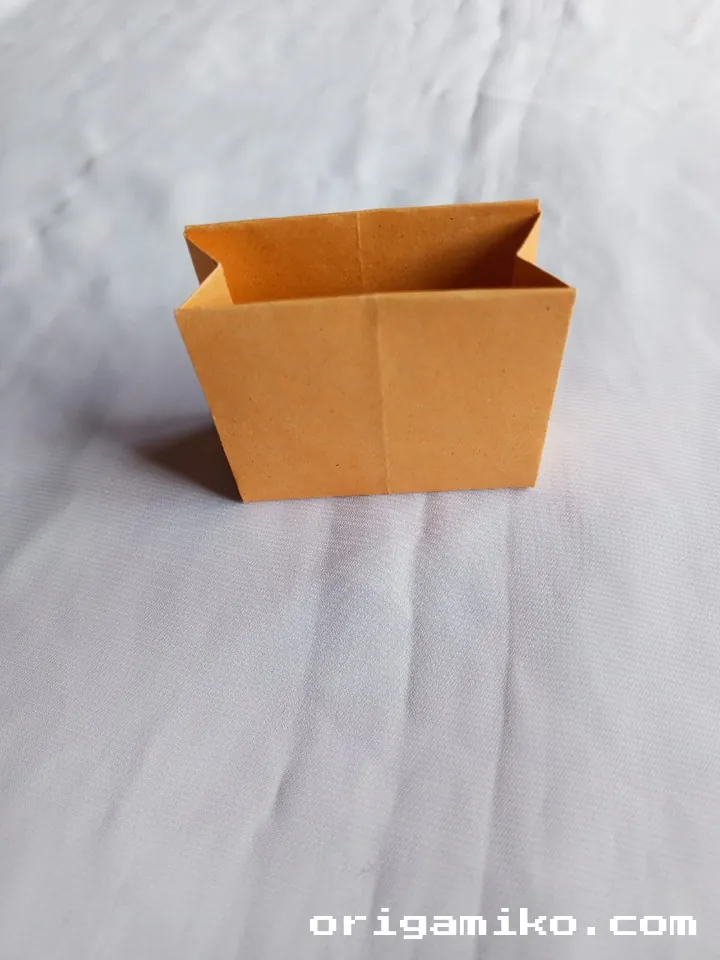
    • Fold the two vertical sides in again (same as before).
    • Then fold the top edge down to the center. Crease.
    • Fold the bottom edge up to meet the center as well. Crease.

    You now have a kind of folded-up envelope with layers. These folds help shape the bag’s body.

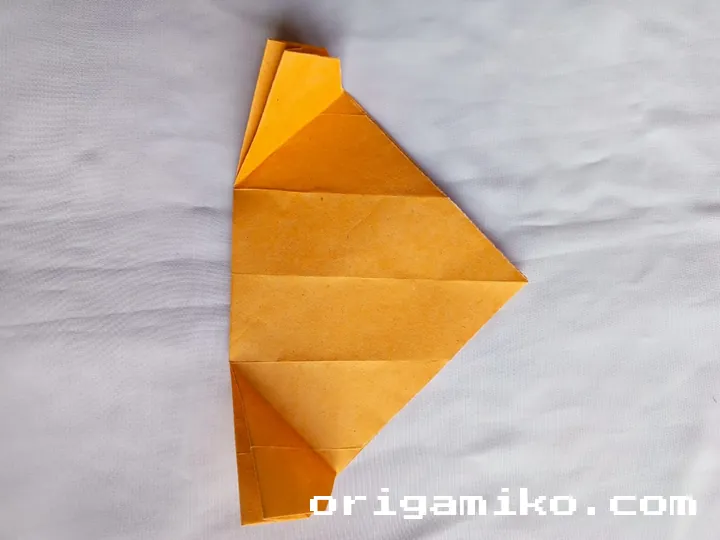
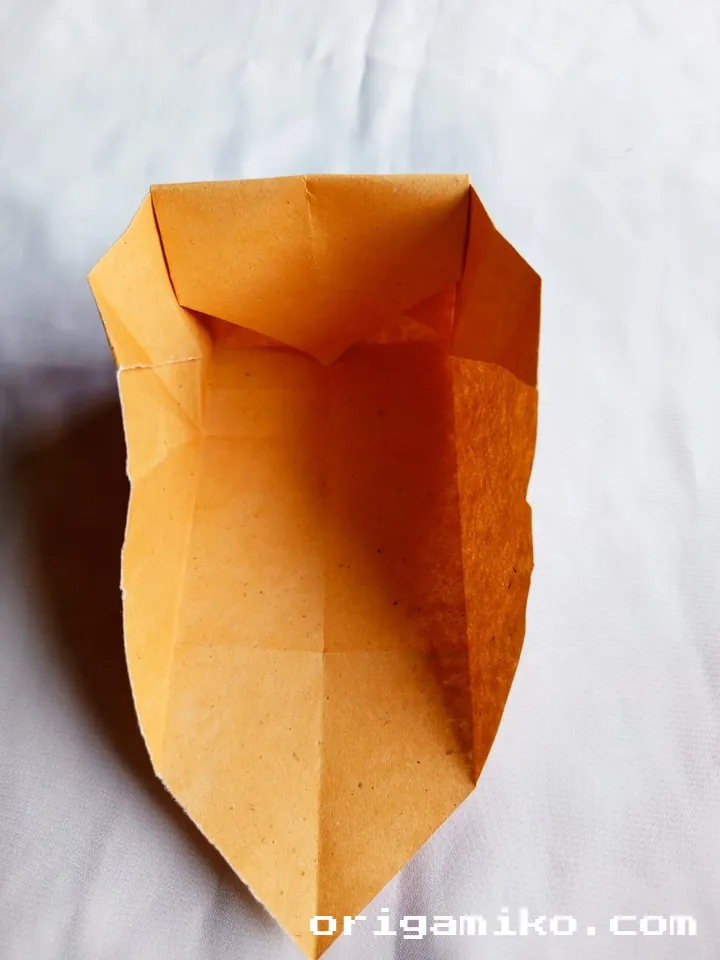
    Step 6: Add Long Paper Strips for Handles

    Origami minibag step 6 a
    Origami minibag step 6 b
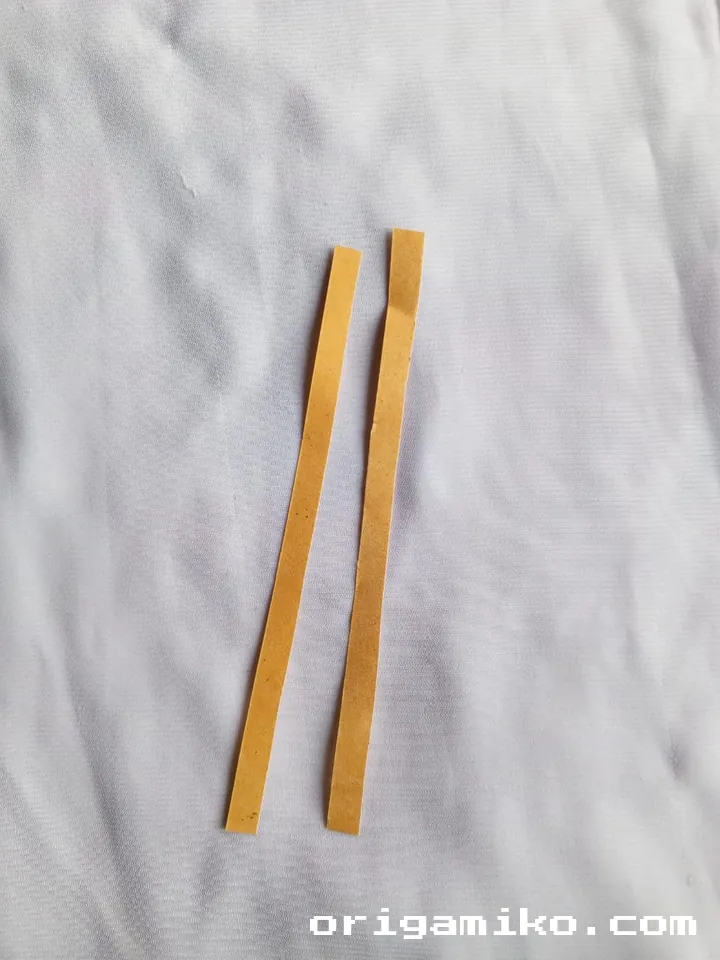
    • To finish, add two long strips of paper to act as handles.
    • Glue or tape them to the inside or outside edges of the minibag—your choice.

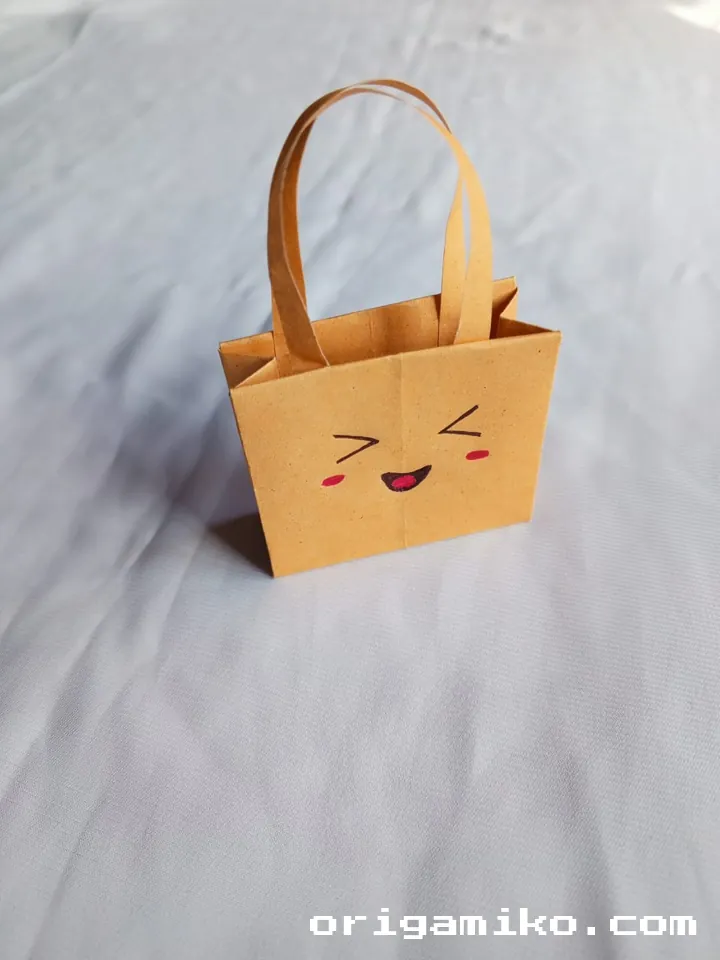
    And that’s it! You’ve just finished making an easy Origami minibag. Looks amazing, doesn’t it?


    Let’s Break It Down: Key Origami Terms

    Here’s a quick glossary if you’re new to folding:

    Crease
    The sharp fold line you press into the paper.

    Valley Fold
    A basic fold where the paper folds toward you, like a valley.

    Mountain Fold
    The opposite of a valley fold—it folds away from you.

    Squash Fold
    Used in more advanced origami, where you flatten a folded section.

    Reverse Fold
    Folding a flap of paper back the opposite direction, usually to tuck in a point or edge.


    Tips for Success

    Want to make your minibag cleaner, neater, and better? Try these:

    • Use thinner paper: Easier to crease, holds shape better.
    • Make sharp folds: Press down hard, or run over it with a ruler.
    • Stay patient: Don’t rush the folds—precision matters more than speed.
    • Keep fingernails clean: Sounds weird, but dirty nails smudge light-colored paper.
    • Practice on scrap paper: Before using your favorite patterned sheets.

    Common Mistakes and How to Avoid Them

    Origami minibag final 2

    Even I’ve made a few of these. Here’s how to dodge them.

    • Mistake: Uneven creases
      Fix: Line up the edges carefully before pressing down.
    • Mistake: Ripping the paper
      Fix: Don’t over-crease. Fold gently at first, then press.
    • Mistake: Handles falling off
      Fix: Use a strong glue or double-sided tape, and press firmly.
    • Mistake: Bag won’t stay upright
      Fix: Reinforce the base with a small square insert cut from cardboard.

    Similar Variations You Can Try

    Once you’ve nailed this basic minibag, try these twists:

    • Mini Origami gift bags: Add flaps or side folds for more volume.
    • Origami tote bag: Use a larger sheet and longer handles.
    • Pocket-fold minibags: Skip the handles, use as envelopes or wallets.
    • Pattern mix: Use double-sided paper for contrast inside and out.

    FAQs

    Q: Can I use printer paper?
    A: Yes! Just cut it into a square. It’s great for practice.

    Q: Is this good for kids?
    A: Totally. Kids love it—and it’s simple enough with guidance.

    Q: Can I decorate it afterward?
    A: Absolutely. Add stickers, stamps, or even write names on it for party favors.

    Q: How strong is it?
    A: Strong enough for lightweight stuff—notes, candies, or trinkets.


    Final Thoughts

    This easy Origami minibag project is the perfect mix of fun and function. You get to flex your creativity, sharpen your folding skills, and end up with something adorable and practical.

    Try it once, and you’ll want to make a dozen. Keep experimenting with sizes, patterns, and purposes. The journey of paper folding is full of surprises—and this is just one of the many magical turns.

    Still wondering how to make minibag? Scroll back up and fold with me again!


    Enjoyed this? Check out my other folding guides like the Origami Triangle Box or Card Holder for more papercraft fun!

    CopyEdit
    Share. Facebook Twitter Pinterest LinkedIn Tumblr Email
    Orig Ami
    • Website

    Related Posts

    55+ Functional Origami You Need to Try

    July 28, 2025

    Easy Origami Gloves: Your Gateway to Magical Paper Folding

    July 23, 2025

    The Complete Guide to Making an Easy Origami Diamond

    July 23, 2025

    Comments are closed.

    Latest Posts

    30+ Dollar Bill Origami You Need to Try

    July 30, 2025

    45+ Fall Origami Ideas You Need to Try

    July 30, 2025

    17+ Origami Vehicles You Need to Try

    July 29, 2025

    15+ Origami Bookmarks You Need to Try

    July 29, 2025

    15+ Useful Origami You Need to Try

    July 29, 2025

    35+ Cool Origami Ideas You Need to Try

    July 29, 2025

    15+ Sticky Note Origami You Need to Try

    July 29, 2025

    20+ Easy Origami Airplanes You Need to Try

    July 29, 2025

    8 Easy Gum Wrapper Origami

    July 28, 2025

    75+ Origami Toys You Need to Try

    July 28, 2025

    About Origamiko

    Orig Ami shares carefully-crafted origami tutorials, models, and ideas to help you explore the art of paper folding. From simple beginner projects to intricate display pieces, we provide clear instructions and inspiration so you can enjoy the process and improve with confidence.

    Questions or feedback? Reach out anytime.

    📧 [email protected]
    📞 +1 714-801-8105

    Subscribe to Updates

    Get tutorials, paper-folding tips, and updates from Orig Ami.

    Footer Menu

    • About Us
    • Contact Us
    • Disclaimer
    • Privacy Policy