

Ever wondered how to create something adorable with just a piece of paper?
Origami penguins are the perfect answer to your crafting desires.
Let me show you how to make these charming little creatures that will delight both young and old alike.
Introduction to the Origami Penguin
I remember the first time I folded an origami penguin. There was something magical about transforming a flat square of paper into a three-dimensional character with personality. That’s what I love about paper folding—it combines precision with creativity to produce something genuinely delightful.
The origami penguin we’ll be creating today is perfect for beginners but satisfying enough for experienced folders too. It’s one of my favorite models to teach because it delivers such a great payoff with relatively simple steps.
If you’ve been searching for “how to make origami penguin” or “origami penguin instructions,” you’re in the right place. This little fellow is about to become your new paper friend!
Materials Needed
Before we dive into folding our penguin, let’s gather all the supplies we’ll need. I’ve created this handy table to help you prepare:
| Material | Recommended Type | Why It’s Important | Optional/Required |
|---|---|---|---|
| Square Paper | 15″ × 15″ | Provides perfect symmetry for our penguin | Required |
| Colored Paper | Black and white preferred | Creates realistic penguin colors | Recommended |
| Flat Surface | Table or desk | Ensures clean folds | Required |
| Bone Folder | Plastic or actual bone | Creates crisp folds | Optional |
| Pencil | Mechanical (fine tip) | For marking fold lines if needed | Optional |
| Googly Eyes | Small size (5-8mm) | Adds character to your penguin | Optional |
| Glue | Non-toxic craft glue | For attaching decorative elements | Optional |
| Patience | Unlimited supply | Helps you through challenging folds | Essential! |
I always recommend starting with standard origami paper for beginners, but once you’ve mastered the simple penguin step by step, you can experiment with textured or patterned papers for more personality.
Step-by-Step Origami Penguin Instructions
Now let’s create our easy origami penguin together! I’ll guide you through each step exactly as required:
Step 1: Prepare Your Square
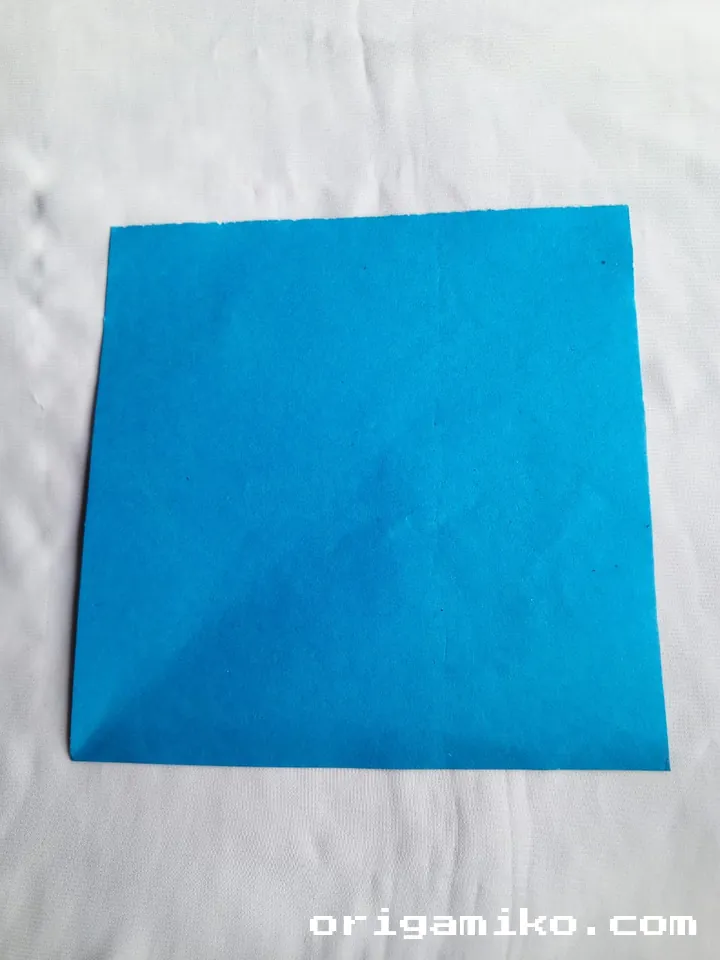
- Take a square shape paper (15″ × 15″ as recommended).
- Make sure you have a clean, flat surface to work on.
Step 2: Create the Guide Creases
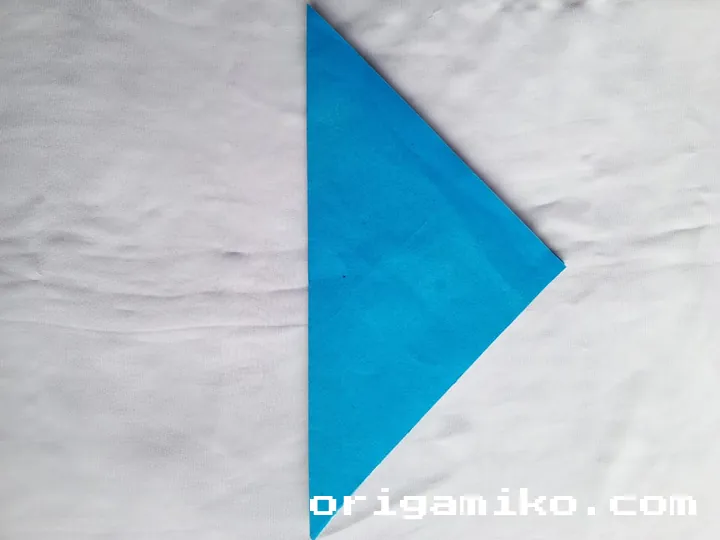
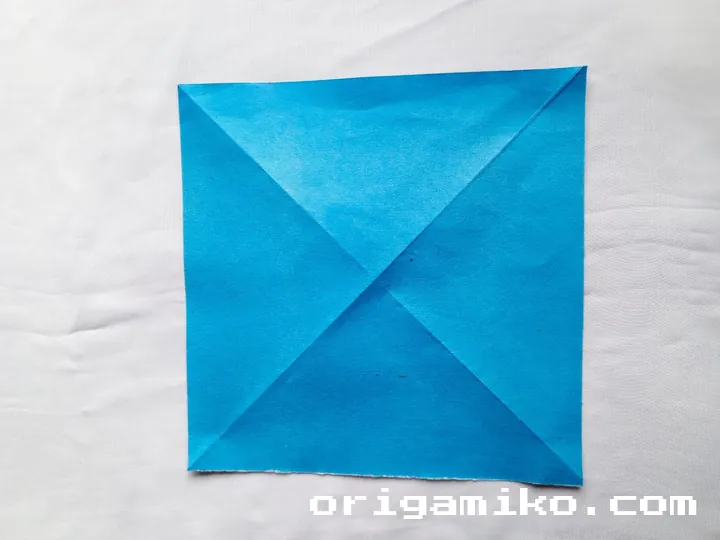
- Fold and unfold the corners.
- This creates diagonal creases that will guide your later folds.
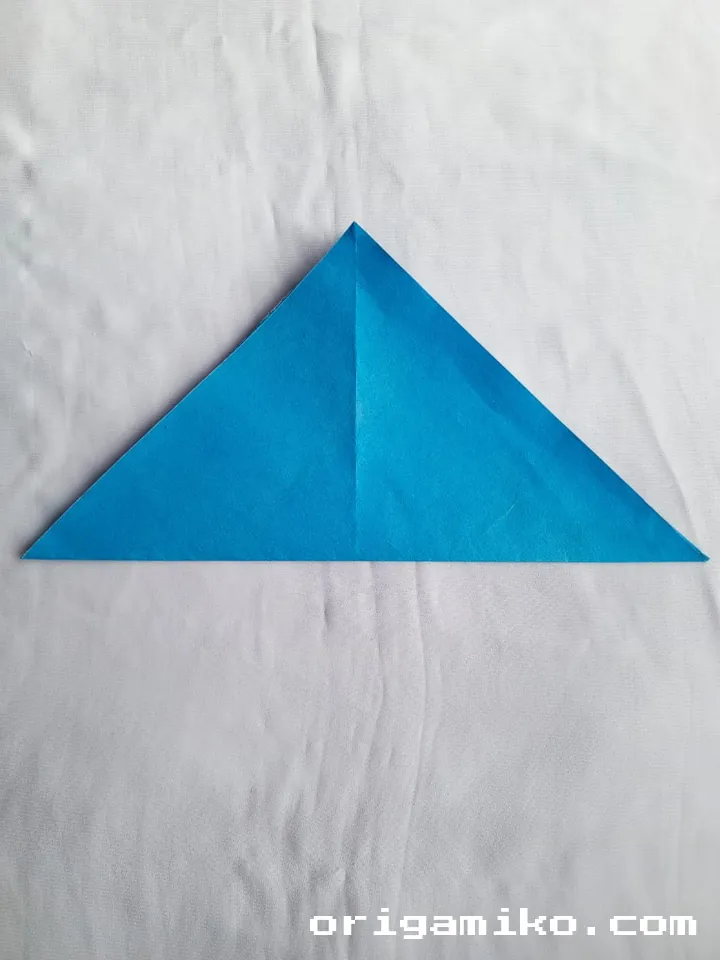
Step 3: Form the Body Structure

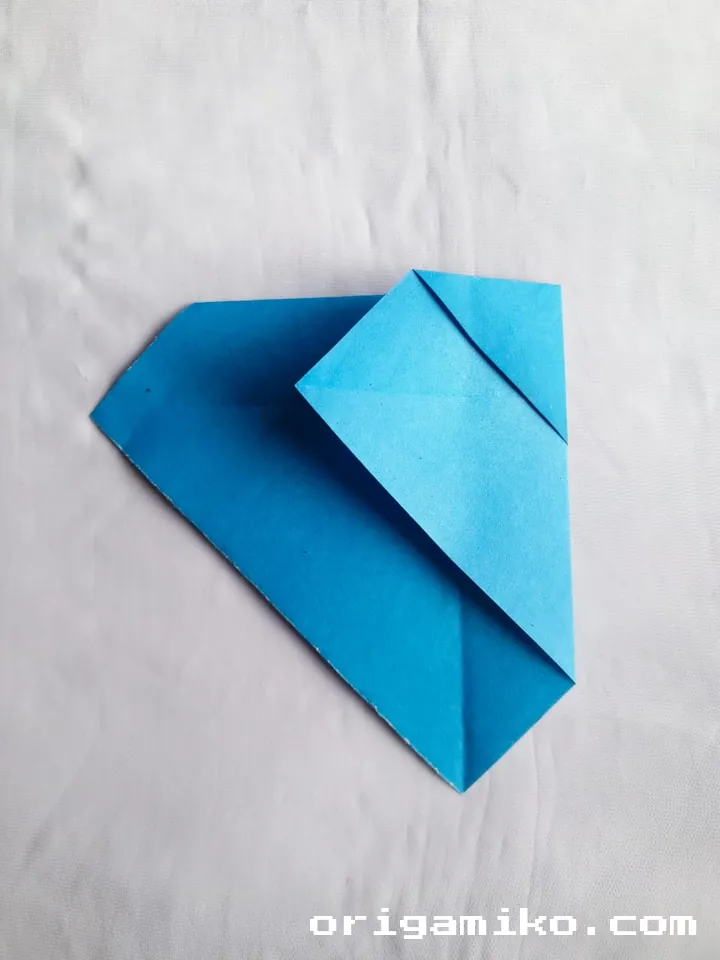
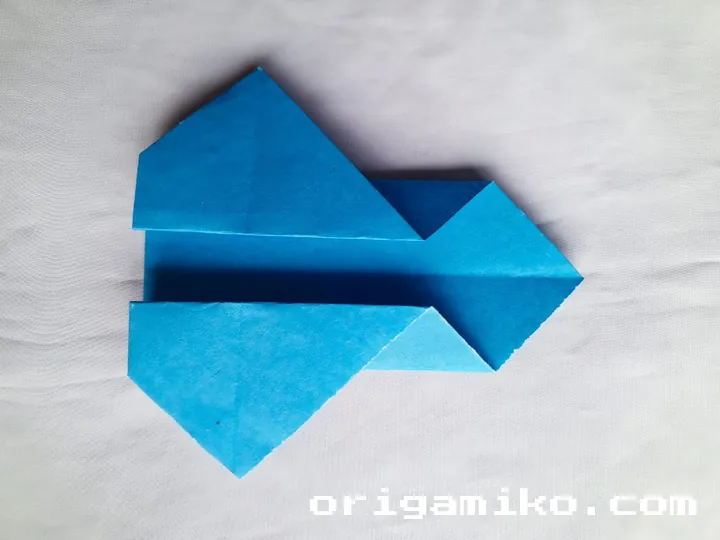
- Make one fold and again leave a little space and make two folds. In this way fold the other side.
- This creates the foundation for the penguin’s shape.
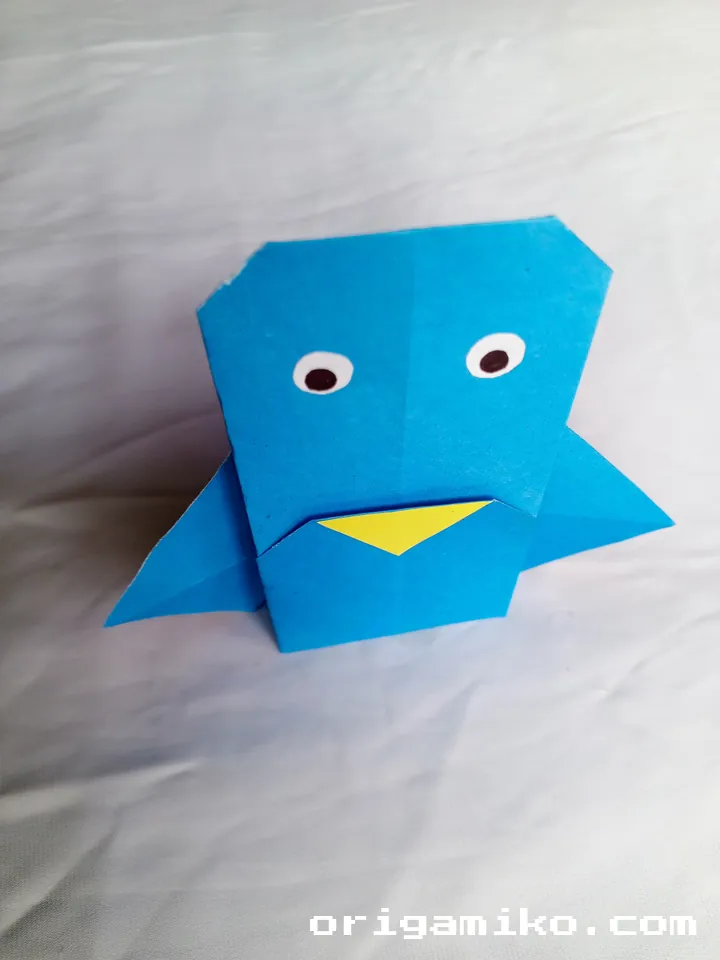
Step 4: Complete Your Penguin
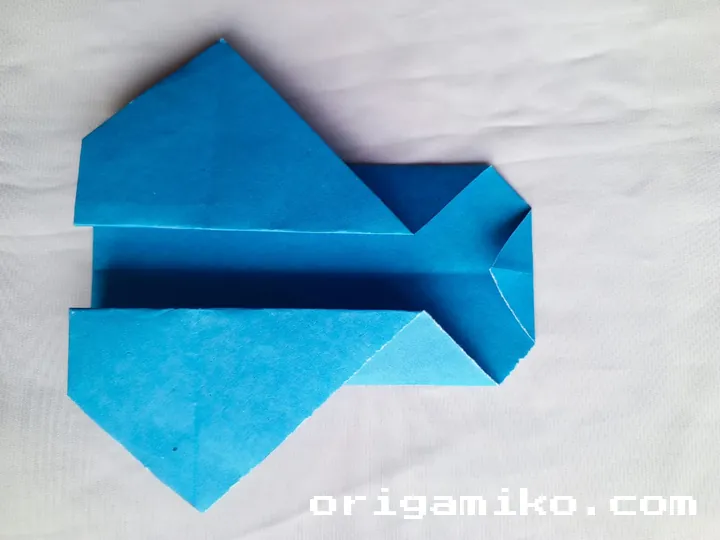
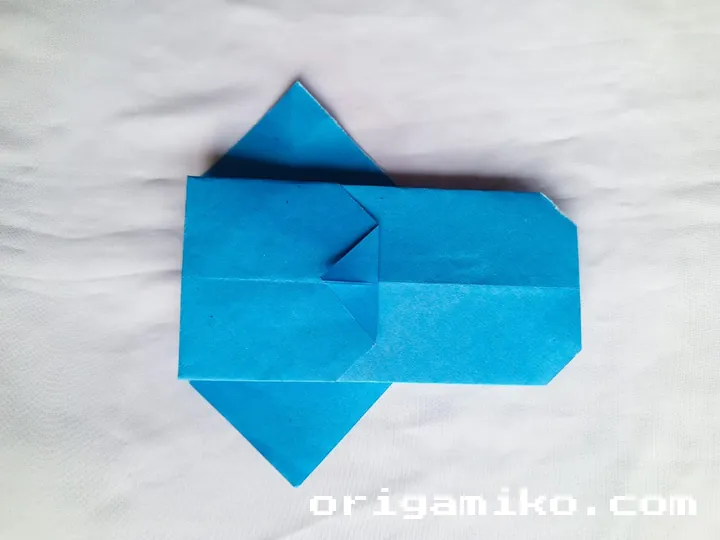
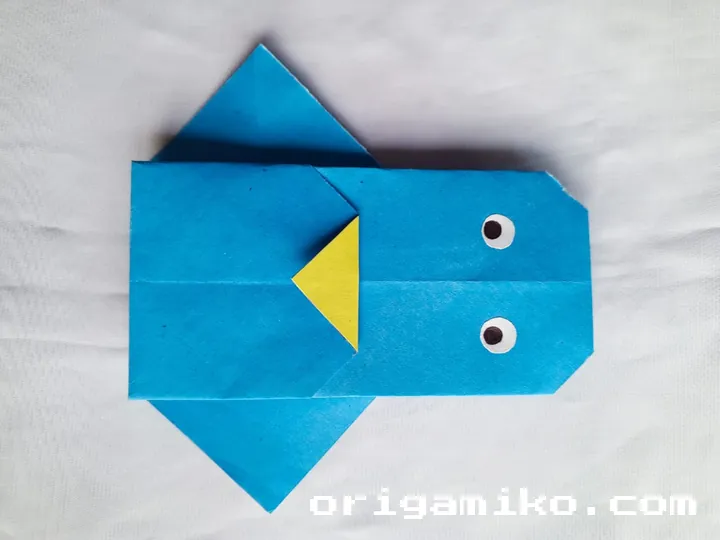
- Fold from above and fold in front.
- Origami Penguin is made by adding eyes and lips.
These simple origami penguin instructions create a charming paper creature that’s perfect for beginners and experienced folders alike.
Tips for Success
I’ve made many origami penguins over the years, and I’ve learned a few tricks that make the process smoother:
- Take Your Time: Rushing leads to messy folds and frustration.
- Crease Well: Each fold should be firmly pressed down for clean lines.
- Use Quality Paper: The right paper makes a significant difference.
- Work in Good Lighting: This helps with precision folding.
- Follow the Sequence: Don’t skip steps—each fold builds on the previous one.
Common Mistakes and How to Avoid Them
When making an origami penguin, here are some pitfalls to watch out for:
- Uneven Initial Square: Always start with a perfect square for symmetrical results.
- Sloppy Creases: Take time to make sharp, precise folds.
- Rushing Through Steps: The simple penguin step by step process needs attention at each stage.
- Ignoring the Paper Grain: When using thicker paper, fold with the grain for cleaner results.
- Forcing Folds: If something doesn’t align, unfold and try again rather than forcing it.
Similar Variations That Can Be Made
Once you’ve mastered the basic origami penguin instructions, you might want to try these variations:
- Emperor Penguin: Add a slightly larger body proportion.
- Baby Penguin: Use smaller paper for adorable miniatures.
- Colorful Fantasy Penguins: Use patterned or bright-colored paper for a whimsical touch.
- 3D Standing Penguin: Modify the base slightly to create a self-standing model.
- Penguin Family: Make multiple sizes to create a charming group display.
Frequently Asked Questions
Is this origami penguin suitable for beginners?
Yes! This easy origami penguin is perfect for beginners while still being satisfying for experienced folders.
How long does it take to make this penguin?
Once you’re familiar with the steps, you can complete it in about 5-10 minutes.
Can I use regular printer paper?
While origami paper is ideal, you can cut a regular 8.5″ × 11″ printer paper into a square for practice.
What if my penguin doesn’t stand up properly?
Make sure your folds are precise and symmetrical. You can also add a small paper clip at the bottom for stability.
Can I make the origami penguin waterproof?
You can spray a light coat of clear acrylic sealer on your finished penguin if you want to preserve it.
Conclusion
I hope you’ve enjoyed learning how to make origami penguin models through this tutorial. There’s something truly satisfying about creating something delightful from a simple square of paper. The best part is that you can make these charming creatures anywhere—all you need is paper and your own two hands!
Whether you’re crafting for fun, teaching children, or decorating for an event, these origami penguin instructions will serve you well. Happy folding, and don’t forget to share your penguin creations with friends and family!