

Origami is a magical art form, turning simple paper into beautiful creations. In this guide, I’ll show you how to make an easy Origami rose bouquet. Whether you’re a beginner or experienced paper folder, this project will enchant you with its simple elegance and rewarding results.
Ready to create something stunning? Let’s dive into these Origami rose bouquet instructions and bring your very own paper roses to life.

What is an Origami Rose Bouquet?
An Origami rose bouquet is a beautiful collection of folded paper roses, arranged in a bouquet-like fashion. It’s a stunning decoration that brings the elegance of flowers without the need for watering or sunlight. The best part? These roses are entirely made from paper! The paper folding process creates delicate flowers, which you can display, give as gifts, or use as décor.
Origami is a Japanese art of paper folding, and with this guide, you will learn how to make your own paper roses step-by-step. Whether you’re a novice or a seasoned Origami artist, the easy-to-follow instructions will help you craft a gorgeous bouquet.
Materials Needed
Before we begin, let’s gather everything you need for this project. Don’t worry, the materials are simple and easy to find.
| Material | Description |
|---|---|
| Square-shaped paper | Standard Origami paper works best, but any paper will do. Choose a vibrant color for the flowers. |
| Scissors | For cutting the round paper to create flower petals. |
| White paper (optional) | To use for wrapping the paper roses together. |
| Glue (optional) | To secure the arrangement or flowers together. |
Easy Origami Rose Bouquet: Step-by-Step Process

Let’s get started! Follow these simple rose bouquet instructions, and I’ll walk you through the process.
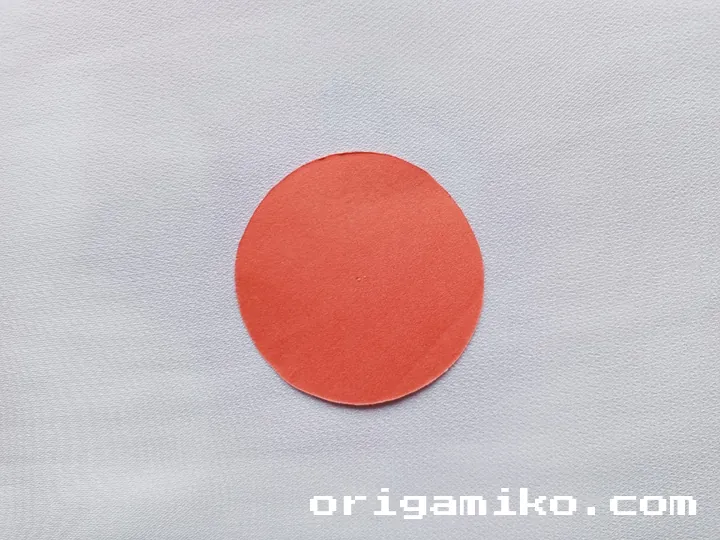
Step 1: Take a Square-Shaped Paper
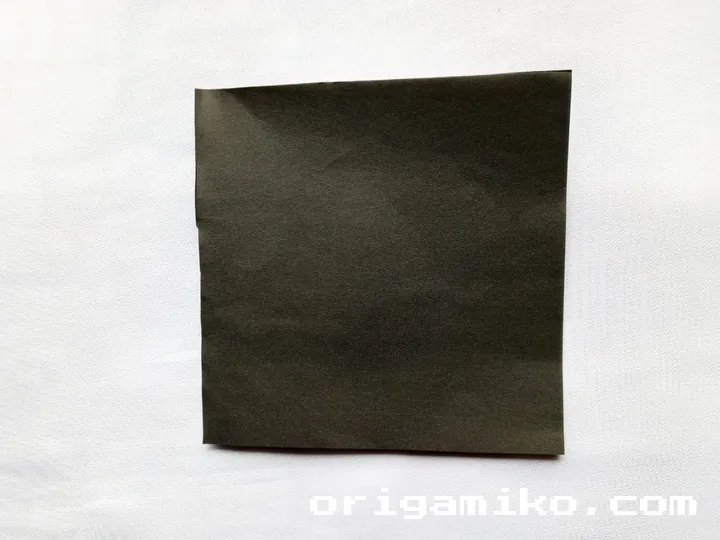
Start with a square-shaped piece of paper. If you’re a beginner, try using standard Origami paper because it’s thinner and easier to fold. The color is entirely up to you, but for a classic rose look, red or pink is a great choice!
Step 2: Wrap the Paper and Fold the White Paper Inside
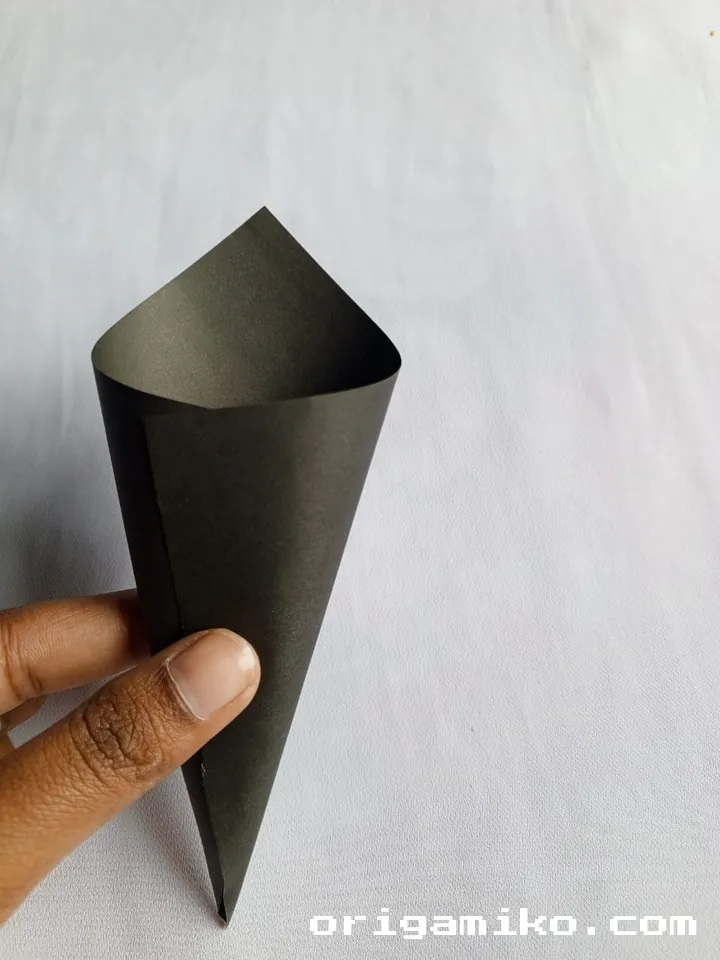
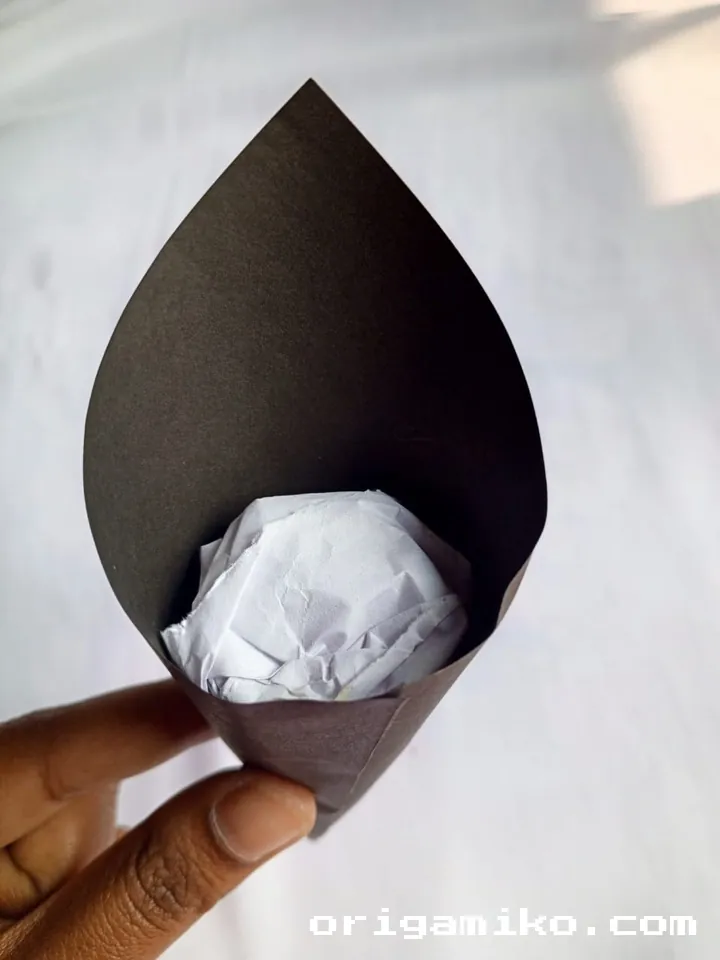
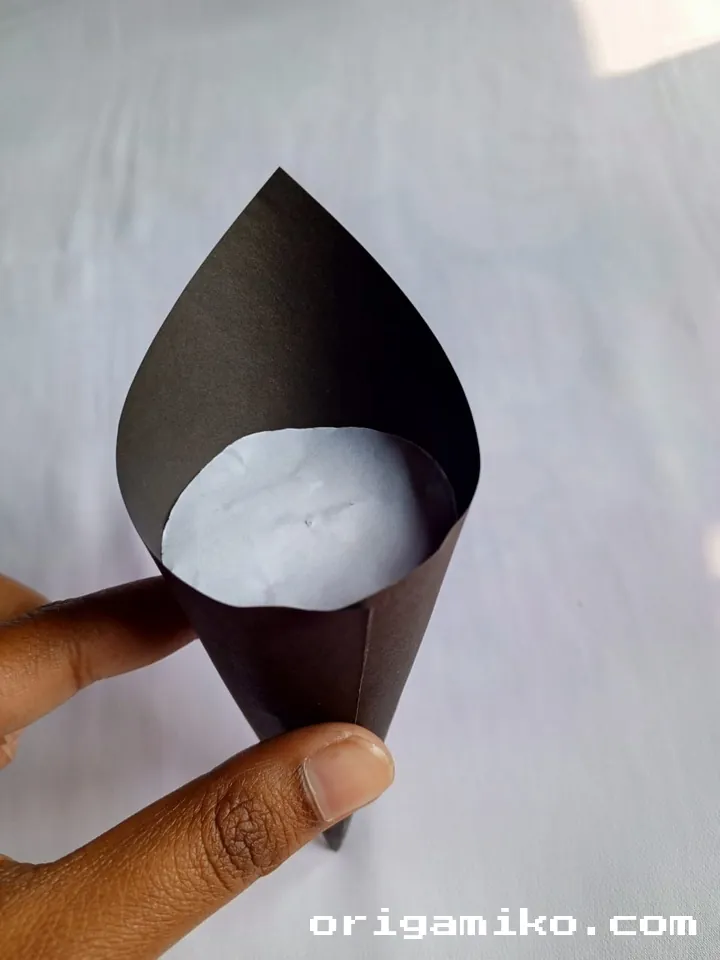
Now, wrap the square paper as shown in the instructions. Once wrapped, fold the white paper inside, tucking it neatly to form the base of your rose. This is where the magic begins, turning the flat paper into something dimensional and lively.
Step 3: Cut and Wrap the Round Paper to Make the Flower
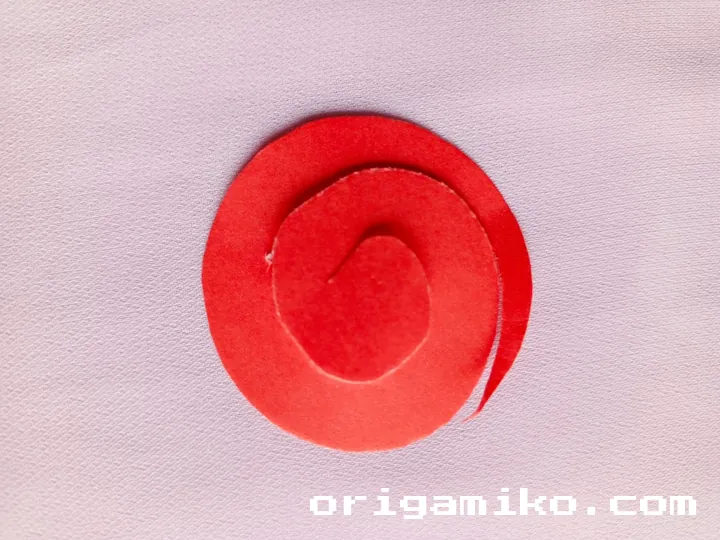
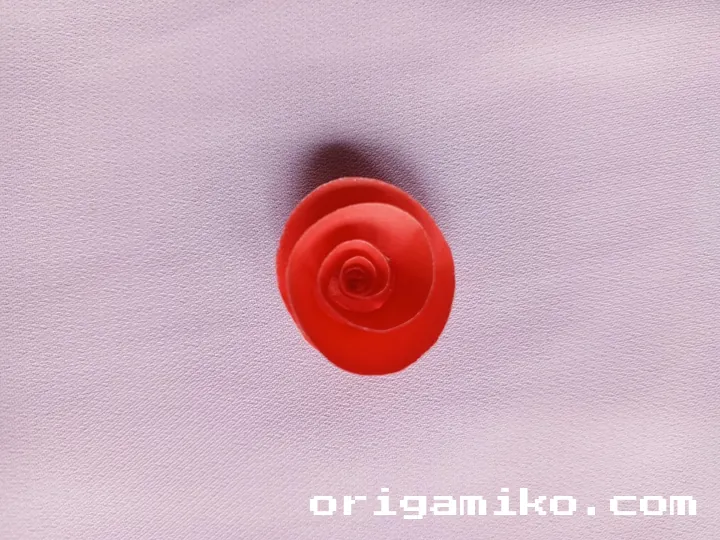
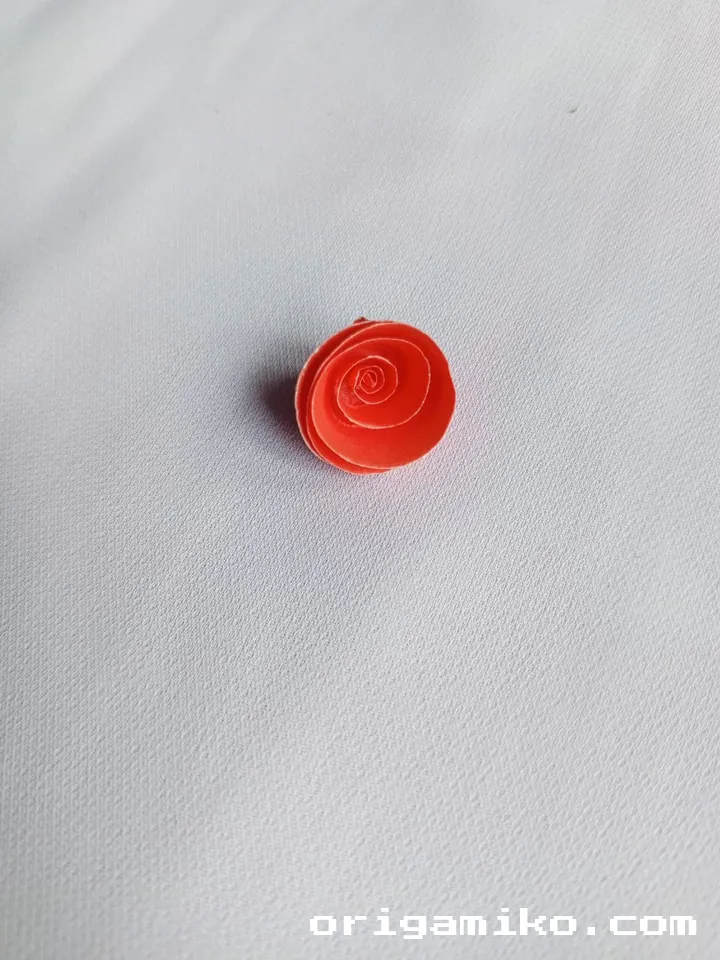
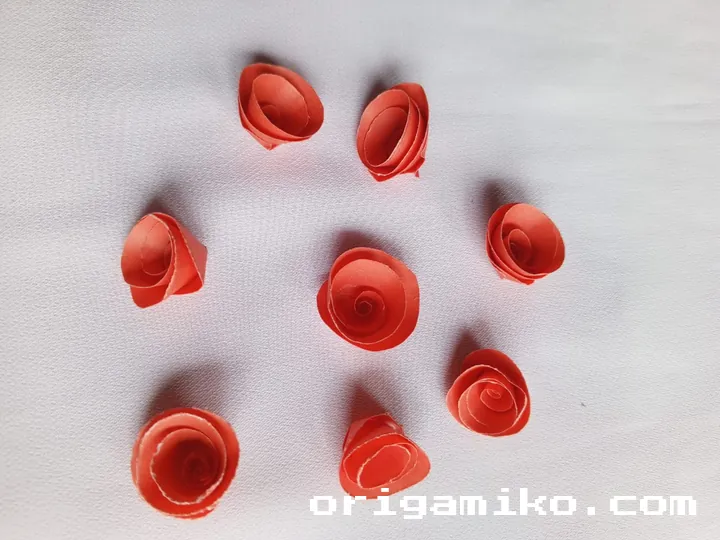
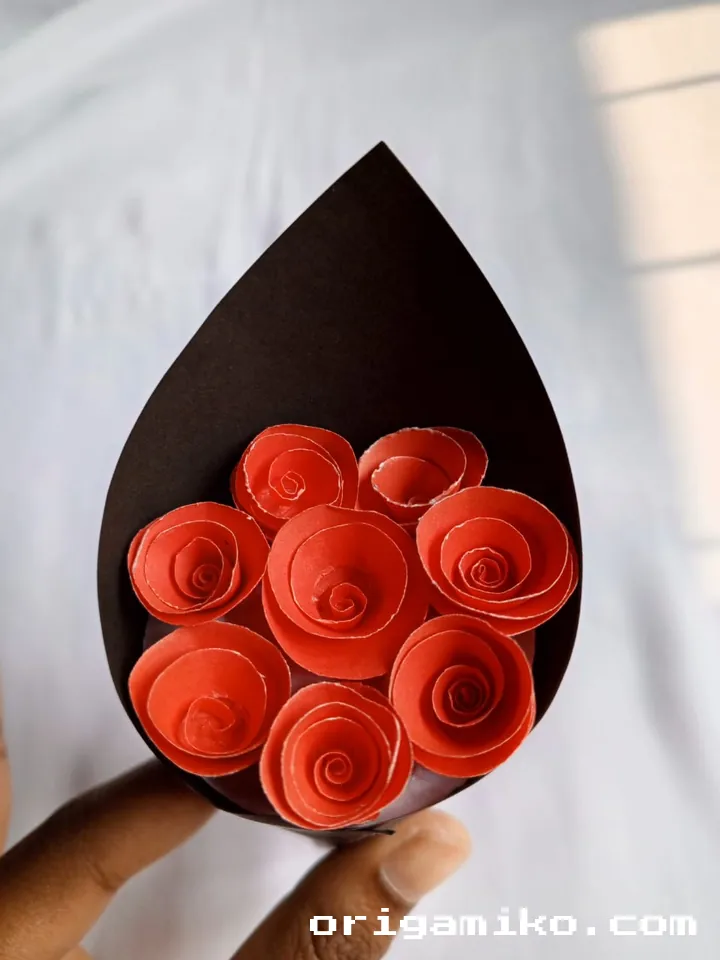
For the petals, take a round piece of paper and cut it into a shape that will form the rose petals. Next, wrap the cut paper around itself carefully, creating a spiral of petals that gradually unfold into the shape of a rose. Continue this process to make as many roses as you’d like to form your bouquet.
Tips for Success
- Start with Square Paper: It’s easier to fold and shape compared to other types of paper.
- Use Different Colors: Mix up colors like pink, red, and white for a vibrant bouquet!
- Use Glue: While Origami doesn’t typically require glue, using a little bit can help hold the flowers in place once arranged.
Common Mistakes and How to Avoid Them

- Uneven Folds: One of the most common mistakes in Origami is uneven folds. Always try to make precise folds for a cleaner result.
- Too Much Paper: Don’t use too much paper at the start. Origami works best when the folds are tight and controlled.
Similar Variations You Can Make
- Multi-colored Bouquet: Use different colors for each rose to make the bouquet more lively.
- Add Leaves: Use green paper to create Origami leaves and add a touch of realism to your bouquet.
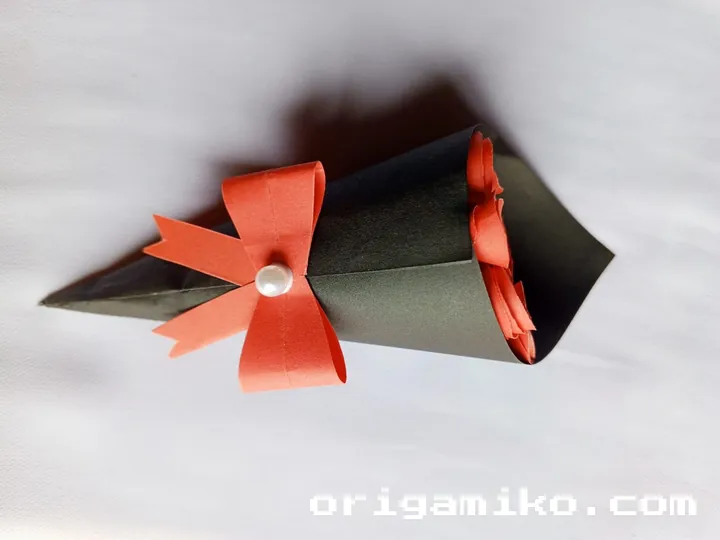
- Create a Ribbon: You can even create an Origami ribbon to wrap around your bouquet for a special touch.
Conclusion
In this easy-to-follow guide, we’ve created a beautiful Origami rose bouquet. I hope you enjoyed this creative process! Whether you’re making it as a gift, for decoration, or just for fun, this simple Origami rose bouquet step-by-step guide proves how rewarding paper folding can be. With just a few folds, you’ve crafted something that will never wilt—perfect for any occasion.
Remember to keep practicing, and soon, you’ll be folding even more intricate designs. Happy folding!
Ready to make your own Origami rose bouquet? Follow these simple steps, and you’ll be amazed at what you can create with just a square of paper.
4o mini